Liquid wallpaper: structure and composition
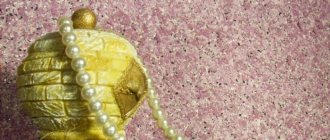
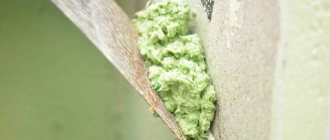
This covering contains dyed fibers consisting of polyester, cellulose and cotton. Colored fibers give the original effect of the fabric covering. The coating contains decorative elements (marble chips, glitter and mother-of-pearl), this will give any room a new style and unusual shades.
liquid wallpaper may include components (mica, wood chips, dry algae, threads)
Acrylic and latex paints help add color to the composition. To achieve interesting and intricate effects, decorative “glitters” are added to the composition. Usually these are mother-of-pearl sparkles of various sizes, mica scraps, colored threads, and other components of natural and artificial materials.
In fact, it is impossible to buy liquid wallpaper ready-made. In the same Leroy Merlin or MaxiDom, liquid wallpaper is sold in a completely dry state. According to the instructions for use, you just need to add water to the dry composition. Semi-liquid wallpaper resembles a thick viscous curd mass, which is what is applied to the walls or ceiling.
Wallpaper consists of cellulose and cotton fiber. It is better to bring the dry mixture to liquid form using water in a special tray. The appearance of liquid wallpaper after drying resembles a cross between traditional wallpaper and decorative plaster. It takes 24 hours to dry completely. The coating is environmentally friendly with good heat and sound insulation.
The decorated surface acquires a single, seamless coating. Plasticity and the ability to use application techniques with different thicknesses help correct minor surface preparation flaws. Defects such as gouges or small cracks completely disappear. In addition, the same plasticity serves as a tool in creating the formation of a bas-relief pattern.
What they look like on the wall
If we talk about appearance, liquid wallpaper is something between plaster and paper wallpaper. From the store you bring the dry composition, to which you add a certain amount of water according to the instructions. The resulting semi-liquid mass is applied to the walls or ceiling. The coating is seamless due to the plasticity of the material; when applied, minor surface defects are corrected - notches, cracks, etc. Due to the same plasticity, it is not too difficult to form a drawing, even a picture.
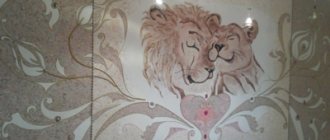
Liquid wallpaper can be used to apply even complex patterns to walls... or paintings
So liquid wallpaper looks different on the wall. Another difference is the different composition. If it is silk-based liquid wallpaper, the surface has a characteristic matte sheen. This composition is also called “liquid silk”. The cellulose and cotton variation is matte; even in the same shade and with the same decorative additives, the wall looks different.
And there are also mixed compositions - cellulose-silk or cotton-silk, in which there is a certain degree of shine, but not so pronounced. In general, it’s hard to say what liquid wallpaper looks like on a wall. If you like decorative plaster, you should also like this finishing option.
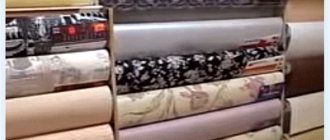
Packaging of liquid wallpaper
The mixtures are sold in transparent sealed bags. Dry wallpaper can look like sawdust. They contain a special viscous wallpaper material, which is pre-impregnated with a special adhesive solution.
The mixture must be diluted with warm water and applied evenly to the wall surface. Special paints are required for tinting the wallpaper. The result is a monolithic surface without seams.
Various types of liquid wallpaper imitate silk, embossed paper or dense foam due to the fine fibers in the mixture.
Types of liquid wallpaper
How the liquid wallpaper appears on the wall will depend on the application technique. The drawing, as a rule, turns out individual, it looks different and is difficult to repeat. Repetition is complicated by various additives of uncertain consistency. For example, liquid wallpaper based on silk acquires a pronounced shine character.
Craftsmen call a variation of this finish “liquid silk.” The use of cellulose and cotton fibers gives the surface a soft, matte velvet structure. Because of this, with the same additions of different decor, the wall looks different.
There are mixed, formed into various models with different methods of application and achieving the best artistic and plastic effect - cellulose-silk and cotton-silk compositions. They also have a component of shine, but not a pronounced one. In a word, it is difficult to describe in words what liquid wallpaper looks like on a wall. There is an opinion that fans of finishing walls with decorative plaster will always like the “liquid wallpaper” option.
As mentioned above, liquid wallpaper differs in the composition of natural fibers. Let's clarify which fibers are more common than others:
1. Silk. This wallpaper contains silk fiber, which is the highest quality coating. These wallpapers have a long service life, they do not fade in the sun, and the price is more expensive. 2. Cellulose coatings are attractive due to their low price, but outwardly they do not look as impressive as silk ones, and the quality is much lower. 3. Silk-cellulose mixtures from different fibers, average in quality, price and beauty.
What is liquid wallpaper made of?
No matter what the skeptics say, liquid wallpaper is much more natural than usual. They are based on silk, cellulose and natural dyes.
In the composition of decorative and expensive species you can see a small content of mineral chips. Today we can separately highlight popular options:
- Cotton - contain a large amount of cotton fibers.
- Silk.
- Cellulose.
- Silk-cellulose.
The second option is the most expensive, since this material has high strength and is practically durable. The most popular is the latter, since it costs the least, but is no different in terms of wear resistance.
Cotton ones can be removed, soaked, mixed with glue and re-covered the wall; this option is more universal.
What is liquid wallpaper
In the photo of liquid wallpaper you can distinguish the textured structure of the material. Depending on the composition, they resemble embossed, paper wallpaper, textured, decorative plaster or expensive, high-quality wallpaper based on it.
Liquid wallpaper is produced from safe, fire-resistant materials. These are mainly cotton, cellulose, adhesive base, and coloring components.
By supplementing the original composition with additional materials, you can obtain wallpaper with different textures and visual effects.
Advantages and disadvantages
Advantages of liquid wallpaper:
- level the walls;
- the structure of the wallpaper makes it possible to make cracks invisible;
- applied without joints;
- a very important plus is the flight of your imagination, you decide what design and decor to create;
- repel dust;
- The service life is unlimited, they are not susceptible to sunlight, and they retain their original structure and color for many years.
Disadvantages of using liquid wallpaper:
- high price;
- dry for more than a day;
- do not tolerate high humidity and water.
Manufacturers
- Leroy Merlin. Produces high-quality decorative plaster based on acrylic dispersion, which does not require a perfectly flat base. It has good sound insulation, is durable, and does not crack when the building shrinks. Diluted with water.
- Bioplast. Russian brand. The Belgorod representative office of the company produces high-quality products. Bioplast mixtures provide good heat and noise insulation, are easy to apply, and have a wide palette of colors.
- Silk Plaster. Safe mixtures that are resistant to sudden changes in temperature, high humidity and stress. You need to dilute with water and wait until the fibers get wet. The downside of the brand is the modest selection of colors.
Which to choose: cotton or silk
Silk, which is used as the main raw material, is artificial. However, it will not lose its properties, the coating will look rich and beautiful.
However, if the owner of the premises is a fan of environmentally friendly solutions, then it is better to choose cotton ones. It is worth considering that the second option is less economical in consumption.
Silk wallpapers also have increased durability and are much cheaper. Otherwise, both materials do not differ from each other in touch, sound insulation and heat retention.
Speaking of application, there are no differences here either, the main thing is to stick to the technique.
Both options do not saturate the room with an unpleasant odor when evaporating, but glue can do this, so it is advisable to wear a protective mask.
Features of the material
The material has a number of advantages:
Thermal insulation, noise absorption. Due to the porosity of the material, the heat capacity of the coating increases, which serves as an additional insulating layer, and the noise level from the outside is reduced.
Liquid wallpaper has moisture-absorbing properties and can slightly dry out the room. At high humidity, deformation and swelling of individual parts of the coating are possible. This fact must be taken into account when choosing them for wet rooms.
Resistant to minor mechanical damage, prevents the adhesion of dust and lint.
Wear resistance. The versatility of the coating allows it to be used without loss of original quality for more than 10 years. If damaged, it can be easily repaired.
Note!
- Wallpaper glue - 155 photos of the best compositions. Review of manufacturers and the best glue brands
Wallpaper from Leroy Merlin: 180 photo examples and video master class on the use of different types of wallpaper
- Wallpaper for the kitchen - types, types, designs and expert advice on choosing a design (165 photos + video)
A wide range of visual effects interspersed with silk and wool threads and mother-of-pearl shine.
Mixture consumption
The packaged mixture contains all the necessary components, so you can immediately pour it into a container and gradually fill it with warm water up to 40 degrees, stirring constantly. 1 package of liquid wallpaper weighing 1 kilogram requires 6 liters of water. However, these indicators may vary among different manufacturers, so before preparing the material you should definitely read the attached instructions. It will also be useful to read the article, liquid wallpaper at home.
IMPORTANT! For more convenient application to the surface, the solution must be left for 8-12 hours and thoroughly mixed again before starting work.
Preparing the mixture
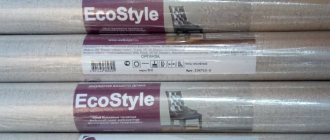
There are three forms of liquid wallpaper on sale.
- Dry mixture, hermetically packed in a transparent bag, weight 1 kg.
- Four plastic bags, each containing a dry ingredient for cooking.
- Wet mixture.
Each of the mixtures can be diluted yourself at home.
The cooking principle is the same for all types, the difference is in the amount of water required (5-8 l) and the ripening time (8-12 hours). The nuances of preparation are indicated by the manufacturer on the packaging.
- One batch is made from one package. You cannot immediately mix the contents of two packages in one container or, conversely, divide them into 2-3 parts. The contents of each package are mixed separately, and after acquiring the desired consistency, all mixtures, if necessary, can be mixed in one container.
- When the wallpaper is packed into bags, you first need to pour glitter into them.
- The already diluted mixture should be stored in a hermetically sealed bag for no more than 2-4 days.
Breeding algorithm:
- The dry mixture is shaken in the package and actively kneaded with hands to restore its fine structure.
- The mixture is poured into a bucket with a volume of about 12 liters, stirred thoroughly to obtain an equally colored mass.
- Heated water (25-35 °C) is poured into the mixture. You need about 5 liters, the exact amount is indicated on the package. If the wallpaper consists of several packages, then first, on the contrary, water is poured into a bucket, and then the decor and other components are poured into it. After each package, the solution is thoroughly mixed.
- The mixture in the bucket is kneaded by hand to the desired consistency.
- The finished mass is transferred into a container convenient for use.
- The next package is mixed and added to the first. Make as many batches as needed for gluing on one wall.
- When the required number of batches is made, the entire mass is mixed until smooth and placed into bags. Excess air is removed from the bags and they are hermetically sealed.
- Danish plaster matures in 8-12 hours.
- The ripened mass is placed in a large container for further use. If the composition turns out to be too thick, you can dilute it with clean water, mix thoroughly and start gluing.
Which walls can liquid wallpaper be applied to?
Liquid wallpaper can be applied to almost any surface. For example, for a similar coating, if the walls were previously treated with the same composition. The only thing you need to do is clean the surface of dirt. Wooden, concrete and plasterboard walls are a little more demanding to prepare.
Liquid wallpaper can be applied to almost any surface.
Can it be applied to the ceiling?
Liquid wallpaper adheres perfectly not only to vertical walls, but also to the ceiling. The technology is similar, but the labor intensity is slightly higher. You have to work in an awkward position with your arms raised.
Liquid wallpaper is applied to a spatula in small portions and distributed over the ceiling using smearing movements. The layer should be minimal - up to 1-3 mm, with good compaction. Before each smoothing, the spatula is moistened with water. This reduces friction between tool and material, making application easier.
Preparing walls for liquid wallpaper with your own hands - work order
Everything needs to be done in stages. It is the observance of consistency and correctness of actions that will help you fully enjoy the interior for many years. It all starts with leveling the surface. However, this initial stage can be skipped if the depth of the pits does not exceed three millimeters. Leveling refers to puttying with gypsum compounds.
For priming, it is important to choose the appropriate composition. For example, there is a special product for wooden surfaces. Primer mixtures are divided into acrylic, quartz and deep penetrating. To ensure that the primer applies evenly, rollers are used instead of brushes.
To ensure that the primer applies evenly, rollers are used instead of brushes.
Concrete surface
Preparing walls for liquid wallpaper with a concrete base begins with careful putty. The thing is that concrete absorbs moisture well, so the result will not be positive. After drying, the walls are thoroughly cleaned and a primer is applied to them in several layers.
Concrete walls must be leveled with putty, which contains gypsum. After all layers of the primer have completely dried, a water-based composition is applied to the surface. It is needed to give a white tint.
When PVA glue is added to water-based paint, the adhesion of the following composition to the surface increases.
Concrete walls must be leveled with putty, which contains gypsum.
Brick surface
If the brick surface has uneven surfaces, it is first plastered, then puttied, several layers of primer are applied, and then similar actions are carried out as with a concrete base. Brick, like concrete, absorbs moisture well. At the same time, it has large roughness.
Brick, like concrete, absorbs moisture well.
Plasterboard surface
Walls and partitions made of plasterboard undergo no less demanding stages of preparation. The moisture capacity of the material is increased. Here you will need complete puttying and priming of the entire surface.
Drywall is secured using self-tapping screws. Their caps need to be slightly “sunk” into the surface and, preferably, painted over with white oil-based paint. The appearance of rust spots after applying liquid wallpaper is due to the use of conventional metal screws for attaching drywall sheets. It is better to use galvanized material for these purposes, which does not oxidize even over time.
Here you will need complete puttying and priming of the entire surface.
Wooden surface
In modern buildings, walls made of wood and chipboard plywood are very rare, but the presence of such surfaces is also no exception. Most often, structural elements are made from these materials.
Wood absorbs moisture well. After covering wood with a liquid coloring composition, the result does not meet expectations. In addition, moisture has a detrimental effect on the foundation itself. The tree becomes deformed, swells and cracks over time. Moreover, the thinner the wooden surface, the faster the deformation occurs.
Before any type of finishing work and more, it is important to ensure the reliability and strength of wooden structures.
Initially, the surface made of chipboard or MDF does not have a completely smooth surface structure, so you will need a special putty designed for processing wood. In addition, it will prevent further penetration of wood resins into the liquid wallpaper.
Oil paint will create a barrier between the topcoat and the base. If you intend to treat a large area of a wooden surface, then it is more advisable to first cover it with several layers of primer, then with a water-based composition with the addition of PVA, and only then apply liquid wallpaper.
Oil paint will create a barrier between the topcoat and the base.
Plywood and elements made of chipboard, MDF
The most common type of decorative structures in modern homes are elements made of plywood and chipboard. Their main disadvantage is increased absorbency, which creates additional difficulties when applying solutions.
To preserve the material and perform finishing work, you should cover the plywood or chipboard with a layer of oil paint. This treatment option will create a kind of barrier that prevents the penetration of moisture.
Oil paint must be sanded. otherwise the liquid wallpaper will simply slide off it
Old walls
How to prepare old walls for liquid wallpaper? The previous coating must be removed from the surface. It is important not to leave a single area unattended. Previously, finishing using bright, rich colors was especially popular.
As in previous cases, exfoliated areas should be removed if possible. Then apply a thick layer of gypsum mixture. An alternative is to treat the surface with water-based facade paint, which is diluted with PVA glue at the rate of three parts paint and one part glue.
If in the case of concrete and brick surfaces you can use a water-based emulsion, then in this case this move will not work and over time, yellowness will “leak through” it. The walls, as a rule, were painted on a plaster layer, so it is important to check problem areas with a peeling plaster layer by tapping. These areas are characterized by a dull sound.
It is important not to leave a single area unattended.
To treat previously painted surfaces, it is better to use a primer based on quartz sand, which will improve the adhesion of the components. It is better to do the work with a brush rather than a roller. If the walls were painted with glossy or oil-based paint, then sandpaper, which needs to be passed over the entire area, will help to give them roughness.
It is extremely necessary to evaluate the color of the previous coating and the color of the applied liquid wallpaper. If the old coating was light, the topcoat will be light and bright. If the initial painting had dark shades, then the color of the liquid wallpaper after drying will become faded and dark.
If the walls were painted with glossy or oil-based paint, then sandpaper will help to roughen them.
What preparation needs to be done for plastered walls?
If the walls in the room are plastered, they must be puttied with a gypsum mixture. This will not only add hydrophobicity to them, but will also give them a uniform white color.
After the putty has dried, the surface does not need to be sanded - for high-quality gluing of liquid wallpaper, the wall must be rough. But applying primer in two layers is a mandatory procedure. Putty itself cannot reduce the absorption of walls, but primer can cope with this. When the surface has dried, you can apply liquid wallpaper.
Real photo examples: liquid wallpaper in the interior
In order to figure out how to decorate the walls with such wallpaper, pay attention to how other people have implemented their ideas. See our photo gallery and get inspired.
How to remove whitewash and paint
Most likely, the whitewash and paint that previously decorated the room will have to be removed. If this is not done, the appearance of the new wallpaper may suffer:
- It is better to clean surfaces containing whitewash. The lime mortar may turn yellow, then the stains will certainly appear on the liquid wallpaper and spoil the appearance of the finish. Wash off the whitewash with warm soapy water using a sponge or rag. Coatings are then applied.
- If the ceiling and walls were painted with water-based paint, it is not necessary to wash it off. Only when the color of the base is too different from the shade of the wallpaper is the surface repainted in a more suitable tone. Otherwise, the substrate will appear unattractively through the liquid wallpaper.
- Acrylic and latex dyes are easy to remove; harmless removers are sold for them. Paint that is not contrasting with the new coating does not need to be removed. Acrylic or latex can strengthen the base; in some cases, they are specially applied to the walls before installing liquid wallpaper.
- Cleaning oil paint is much more difficult, but this should only be done if the coating is weak, with bubbles and cracks. You will also have to remove paint that is too dark - it is very difficult to paint over it even with several layers of white. To remove oil-based paint, several methods are used: scraped off by hand or with a grinder, heated with an iron or a hair dryer, and washed off with chemicals. All methods are dangerous and harmful to health, so you need to act carefully.
How to prepare surfaces
Despite the fact that the wallpaper is easy to install and adheres well to any surface, the base needs to be prepared:
- Nails and old finishing - wallpaper, whitewash - are removed.
- Dust is cleaned with a brush or vacuum cleaner.
- To prevent fungal damage, the walls are treated with antiseptic agents and dried.
- Defects are smoothed out using putty or plaster.
- The surface is coated with a water-repellent, water-repellent primer.
- If the color of the base strongly contrasts with the finish, white water-based paint is applied.
- All metal and wooden parts, including plywood, OSB, chipboard, are coated with alkyd varnish or oil paint.
Allow at least 24 hours for complete drying. Only after this is the clean, dry surface ready for finishing.
Application technique
The first thing you should start with is how to apply liquid wallpaper to paint with your own hands.
If the residual layer is thin, it is better to use a spray bottle. There are several reasons:
- It will significantly speed up and facilitate the process.
- If the walls are uneven or have a defect, it will help to carefully hide them.
The following tools are also used as an alternative:
- trowel;
- spatula - standard from 18 cm;
- grater - plastic.
You can purchase a special grater for liquid wallpaper; it differs in price and the presence of a narrower blade. Their main feature is a transparent body, which helps you monitor how the fibers lie.
Using any of the selected tools, the layer is applied no more than 1.5-2 cm. Wallpaper is applied to the wall according to the principle of heels - that is, to one section made, I add the next one. There is no difference as to where to start work.
If you use a grater, it should be held on the wall at an incline of 15 degrees. To avoid leaving grooves (the material dries quickly and sticks), it is better to wet the tool and remove excess material from it.
One of the easiest ways to apply is to apply circular motions towards yourself. It is advisable not to cover a large area.
Method 1. Spatula
If you are a beginner in this field, you should choose a spatula as your main tool. Instructions for applying the mixture using a spatula are presented below:
- It is necessary to prepare the mixture correctly. Dry material must be diluted with warm water in a ratio of 6 liters of water per 1 kg of dry mixture.
- Leave the mixture for 12 hours, during which time you should prepare the walls for work. Remove the remnants of old wallpaper, cover the cracks with putty.
- Stir the finished mixture so that it can be evenly placed on the surface.
- Use a spatula to take a small amount of the mixture and apply it to the wall. It is necessary to cover the wall in small squares with a side of about 1 meter. After applying the mixture, level it using a transparent grater, the layer thickness should be no more than 2-3 mm.
- The applied mixture should be securely fixed to the wall and dry.
The spatula must be held at an angle, movements must be smooth so that there are no tears
Method 2. Spray bottle
This application method allows you to cover the walls with a uniform thin layer up to 2 mm thick, which helps save money on the purchase of material. A step-by-step application plan is presented below:
- Place the mixture prepared in advance in a spray bottle; the liquid wallpaper should resemble sour cream in consistency.
- After filling the container, point the spray bottle at the wall, moving it smoothly, apply the composition to the surface of the wall.
- Cover the wall evenly, paying special attention to hard-to-reach areas.
- Carefully inspect all sections of the wall; there should be no empty spaces left on it. After applying the composition, level it using a smooth grater or trowel, after wetting the tool with water.
Method 3. Trowel
The principle of using a trowel is practically no different from a spatula. Dilution, preparation and application completely repeat the steps described above.
- Use a trowel to take the prepared mixture and apply it to the wall.
- Using a trowel, cover a small area of approximately 1 square meter. Gradually apply the entire composition to the surface.
- After this, level all areas of the coating using a trowel; the layer thickness should not exceed 2-3 mm.
- The diluted mixture should dry out; to do this, leave it for about 3 days.
To work with liquid wallpaper, choose transparent trowels; when applying, hold them at an angle
Method 4. Hopper
This device is similar in principle to a spray gun, so the basic procedure will be the same as in the algorithm of actions presented above:
- The pre-prepared mixture must be poured into the hopper bucket or into a bag (depending on the design). Close the bag tightly before starting work.
- After this, you should point the tool at the wall and apply the solution evenly, smoothly moving the hopper along the wall.
- Pay attention to difficult areas; the mixture must be evenly distributed over the entire surface of the walls.
- In the final stage, level the solution over the entire surface using a grater or trowel. After this, the mixture should dry, usually this takes about 2-3 days.
Hopper
Method 5. Roller
Using a roller you can adjust the degree of application of the material to the surface.
It is recommended to use a thin-haired roller to prevent the solution from sticking to it. Periodically during work, it is recommended to moisten the roller with a small amount of water.
If desired, you can use decorative rollers to create patterns on the walls. After completing the work, you should level the mixture over the entire surface of the wall using a grater, and then leave it to dry for 2-3 days.
How to properly dilute liquid wallpaper?
It is not enough to just buy liquid wallpaper - the mixture must also be properly prepared for application to the surface.
Before diluting the liquid wallpaper, shake the bag vigorously to mix the mixture well and improve the finely dispersed structure of the liquid wallpaper (so that there are no small lumps and the mixture is easily mixed).
p>
For one package of wallpaper, a mixing container with a volume of 7-8 liters is suitable. Usually choose a container with a depth of 20-30 cm to make it easier to wash and mix the solution in it.
For the solution, use only clean water at a temperature of 20-30 °C. Temperature does not affect the quality of the finished solution, but it is more convenient to mix liquid wallpaper with just such warm water. You can stir either one package or several at once, but in this case it will be much more difficult to achieve sufficient homogeneity of the mass. The second option is relevant only when liquid wallpaper can have different shades and it is necessary to achieve the same color.
How to properly dilute liquid wallpaper to achieve the desired consistency? To do this, pour the entire mixture from the bag into a container and then add about 5 liters of warm water. As water is poured in, you need to constantly stir the solution, achieving homogeneity of the mass. The mixture is always prepared by hand, no mixer or other equipment is used. If it is difficult to mix one package yourself, you can try mixing the solution in small portions.
The consistency of the ready-to-use solution should resemble thick cream. The approximate consumption of material is 5-6 liters per package of the mixture.
Is it possible and how to apply them to the ceiling?
Quite often, according to the designer’s idea, part of the ceiling is covered with liquid wallpaper. Therefore, performers often wonder how to apply liquid wallpaper to the ceiling? There's nothing new here. It is necessary to strictly follow the technology of pasting walls with liquid wallpaper.
How to glue corners correctly
When gluing corners, all movements with tools must be performed not towards them, but away from them. Everything else is standard.
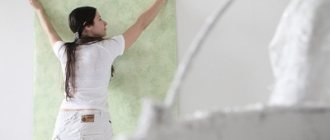
Sticking
And now let's move on to how to apply liquid wallpaper. Take the finished mixture and add slightly heated water to the container with it to soften it. Knead again until the mixture is homogeneous. Then start applying with a trowel or other tool, and ideally this should be done from top to bottom, from the corners to the center. After 1 hour of finishing the work, the wall needs to be illuminated from the side and all flaws removed.
You can fix them later. The prepared solution is stored for up to 10 days. The coating is often applied not just to the ceiling and walls, but also to radiators. True, they need to cool down. The best layer thickness is 0.2 cm, and ideally it should be the same over the entire surface. In the classic application method, they try not to press the spatula too hard, but also hold it at an angle of 4-16 degrees. The thinner the layer is needed, the larger the angle will be.
In this case, each new stroke will slightly overlap the old one. You can also do everything in a circular motion, which will help you get an unusual pattern and there will be fewer uneven spots on the wall. If the mixture is too thick, you should wet the iron. Typically, finishing an apartment costs 1-2 days. When carrying out work, the room can be ventilated, but it is better not to create drafts. We also do not recommend turning on heating devices.
Step-by-step instructions for beginners
Let's take a closer look at each of the methods of applying liquid wallpaper to the wall.
Method 1. Spatula
The mixture is already ready and has stood for about 12 hours . Immediately before work, you need to mix it thoroughly and perform the following steps:
- Step 1. Using a small spatula or simply using your hands, take the finished material from the container and applied to the wall.
- Step 2. Using a spatula you need to level the liquid wallpaper, the layer of which will be 1.5-3 mm.
- Step 3. The composition is applied in small areas, and after filling the surface area of 1-1.5 meters you need to level it with a transparent float or trowel, having previously moistened the instrument with water from a spray bottle;
Hand Right IMPORTANT! It would seem that this is the end of the step-by-step instructions, but you need to know the following rules:
- Liquid wallpaper should be leveled at eye level ; it is not recommended to bend over or stand on tiptoes to avoid defects and unevenness;
- you can take a spatula made of plastic or metal , the main thing is that it has a flat surface;
- movements to distribute the mixture should be short and directed in one direction.
After completing pasting the entire area of the wall, you should wait until it dries completely, which lasts up to three days , depending on the humidity in the room.
Method 2. Spray bottle
This method is used more often by specialists than by ordinary people. The main reason is expensive equipment. However, when using it, consumables are spent 2 times less and, accordingly, time too.
The video will show you how to apply liquid wallpaper with a spray bottle.
- Step 1. Fill the spray bottle with a mixture that should resemble liquid sour cream, so when making the solution you need to add a little more water than indicated in the instructions (for example, instead of 7 liters - 8.5).
- Step 2. Point the tool at the surface and smoothly, without stopping in place, move to the side, paying attention to the absence of empty areas.
- Step 3. After applying the wallpaper, you need to smooth it with a grater or trowel..
Star Half (Inverted) IMPORTANT! To prevent the appearance of empty or transparent areas, after the first layer has dried, you can apply a second one.
Method 3. Drawings
The advantages of liquid wallpaper are that with their help it is possible to implement any design idea , pattern or pattern on the surface. This method will require more time and patience.
- Step 1 . A drawing is drawn on the wall with a pencil.
- Step 2. The space inside the picture is filled with a mixture 2 mm wide , extending 1-2 mm beyond the boundaries, which is then moved with a spatula to create boundaries.
- Step 3 . After complete drying, liquid wallpaper is applied to the remaining surface, not reaching the edges a few millimeters.
- Step 4 . Using a small spatula, you need to move the layer towards the drawing to form a clear outline. Level the surface with a trowel.
Tips for installation in hard-to-reach places
When decorating walls with their own hands, people often encounter problems applying material in hard-to-reach places. Most often, difficulties arise when applying wallpaper under the ceiling, near radiators, in corner parts or on walls located under a slope. Before applying material in these areas, we recommend using the installation tips below.
Behind the battery
When applying the composition, the batteries will interfere greatly, so for convenience you should remove them, if possible. If the batteries cannot be removed, you can apply the material behind them with a small spatula or brush, however, modern wallpaper models allow you to apply the material on top of the battery, which greatly simplifies the process.
On the pipes
If you want to apply the material to the pipes, you should turn them off and wait until they cool down. Instructions for coating pipes are presented below:
- To coat the pipes, you can use a spatula; a small amount of the mixture should be carefully applied to the pipe evenly over the entire diameter.
- The thickness of the layer should not exceed 2 mm; after applying the material, it should be smoothed along the entire length of the pipe using a trowel.
- The finished coating must be left to dry for 2-3 days.
On the arch
To finish the arch you will need a special rounded spatula or roller. It will not be possible to apply the mixture with a trowel due to the rectangular shape of the tool. It is recommended to first coat the arched vault, moving gradually downwards. Finally, finish the corners.
On the slopes
- When applying the material to slopes, the walls should be prepared using putty, and the material should be applied strictly at eye level to track the slope.
- In this case, it is also necessary to prepare plastic film in advance to close the door. This will prevent the composition from getting on the door.
- Using a roller, carefully apply the material along the slope.
- Then the material should dry; to speed up the process, you can open the windows and doors in the house.
In corners: outer and inner parts
For this purpose, several spatulas are used simultaneously, which allows you to create an angle of the required size. If you need to create even corners in the room, you should purchase a corner spatula in advance; you can use it to apply the mixture in the corners of the room. The operating principle is no different from using classic spatulas.
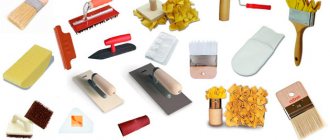
Tools and materials
- Spatulas. Used for removing old wallpaper, filling, applying wallpaper and leveling it. Tools can be metal, plastic, acrylic. For beginners, it is better to use a spatula with a transparent platform to control the uniformity of the applied layer.
- Trowel. It levels the applied layer. It can be metal or plexiglass. The second option is more suitable for beginners.
- Angle spatulas. For applying the composition in corners.
- Transparent grater. It looks like a trowel with a different shaped handle. Using a tool, the layer is leveled 1-2 hours after gluing, when obvious flaws become noticeable. Before use, the grater is pre-wetted with water.
- Roller. A liquid sheet can be applied and leveled. Any short-nap roller will do. You need to pre-wet it in water or spray the walls with a spray bottle in advance. Walls that are too smooth are pre-treated with a relief roller. A homogeneous liquid mixture is applied with a thin-pile roller.
- Hopper pistol. Used for processing large surfaces. The liquid composition is placed in the tool bucket and applied under pressure of 2 atm in an even layer. In a day, an area of up to 200 square meters is covered with a gun.
Materials you will need:
- putty;
- deep-penetrating soil;
- water-based emulsion or water-dispersed white dye.
Auxiliary tool:
- stepladder, sawhorses or sturdy table;
- mixing container;
- ditch for soil;
- brushes, rollers for priming.
How to reuse?
Leftovers are stored for a long time, up to several years. Manufacturers allow reuse of the material provided it is properly stored.
How to preserve and reuse liquid wallpaper:
- Wait until the mixture in the container dries completely.
- Pack dried liquid wallpaper into a bag.
- When the time comes to apply the material, dilute it with water.
- Leave the mixture for several hours.
- Stir the liquid wallpaper, adding more water if necessary.
- Apply to the wall.
How to store divorced ones?
If after covering the walls you have a small amount of diluted material left, do not rush to throw it away. The mixture can be reused, for example, to decorate individual sections of the wall with a different coating or some pieces of furniture.
Saving unused mixture is quite easy. There is a “dry” method for this. How to use:
- Take a large piece of clean plastic wrap and spread it on the floor.
- Apply the remaining mixture to the spread polyethylene in a thin layer using a plastic spatula.
- Let it dry completely. For this, 24-40 hours at room temperature with optimal air humidity will be enough.
- Now roll up the plastic. Crumple it so that the material returns to its original form, becoming a powder.
- Place the reconstituted mixture in a bag, release the air, and tie tightly. You can simply use a vacuum bag.
In this form it can be stored for a long time. The main thing is that the package is sufficiently sealed.
How to properly remove liquid wallpaper from a wall?
If you are tired of the material or need to repair any defect, you need to know how to remove liquid wallpaper from the wall without damaging adjacent areas.
To remove the required area of liquid wallpaper, it is generously moistened with water using a spray bottle. To do this, use only clean water so that no stains from various solvents and detergents remain in adjacent areas. After the surface becomes soft, the liquid wallpaper is carefully scraped off with a sharp spatula into a previously prepared container. Typically, such work is carried out if it is necessary to replace electrical wiring.
After removing the liquid wallpaper, the clean and dried surface is treated with a colorless primer or enamel. When the primer dries well, the edges of the repaired area are also generously moistened with clean water using a spray bottle.
Liquid wallpaper that has been removed with a spatula is not thrown away, but reused. To do this, warm water is added to them, stirred to the desired consistency (heavy cream) and applied to the primed base in the same way as it was originally done.
You should try to rub all existing edges with the new coating so that this area does not stand out in any way after drying. It is in this case that the surface of the walls or ceiling will be uniform and uniform.
Now you know how to apply and remove liquid wallpaper - it's time to put your knowledge into practice.
Under what conditions can liquid wallpaper be used?
Cellulose and other fibers react quite sensitively to operating conditions. With high air humidity, they can swell and become affected by mold. Therefore, liquid wallpaper without any protective coating is recommended to be used only in dry, heated rooms.
The moisture resistance of silk plasters can be increased by using alkyd or latex-based varnishes, polyurethane or silicone paints. Surfaces treated with them can be washed, but without fanaticism. Direct contact with water is very undesirable, so it is better to choose more remote areas for finishing bathrooms or kitchens with silk plaster.
In dry rooms, water-based paints are used for painting. They do not tolerate direct contact with water, but are breathable. Since liquid wallpaper can be repainted many times, you can regularly refresh the interior without high costs.
Advantages of liquid wallpaper.
There are many reasons to choose liquid wallpaper. This treatment of the surface of interior walls is especially useful when the surface is uneven and the walls need to be smoothed before applying classic wallpaper. They can cover minor defects on the wall surface, ignoring even small cracks.
They can also be easily applied to geometrically irregular and problematic surfaces, such as:
- various niches,
- bay windows,
- arches,
- corners, etc.
They are perfectly applied not only to brick or stone walls; they are also used to process plasterboard, chipboard and other board materials. Compared to classic wallpaper, the layer created by liquid wallpaper is uniform and does not contain seams, which increases the overall aesthetic impression. They impress with a wide range of color options that can be combined as desired. As a result, your efforts can result not only in a beautiful monochrome wall, but also in various mosaics or even wall paintings.
What is the advantage of such wallpaper?
Advantages of liquid wallpaper. Such wallpaper is very easy to stick to the wall, filling all the spaces and cracks. Ideal for hard-to-reach places, such as around outlets or in corners. The seams are not visible after them! Even fabrics such as silk or gold thread are added to their composition, thanks to which they give an amazing effect when you use them to glue a living room, for example, or a hall.
In addition, liquid wallpaper has a wide range of colors, this will also help you achieve the desired effect. For those who love originality in everything, it is worth giving preference to liquid wallpaper. Of course, they are also unusually expensive, but after finishing the apartment with liquid wallpaper, you will get an amazing effect!
Liquid wallpaper with a pattern
There are other advantages of liquid wallpaper: such wallpaper can be applied to uneven, unleveled walls - glued in a new house without waiting for it to shrink (liquid wallpaper is not afraid of shrinkage) - can be applied to metal, for example, to pipes - has sound and heat insulation - fireproof (the fire will not burn on the wallpaper) - easily get rid of stains, dirt (you need to remove the dirty spot and stick on a clean new layer) - there is no dust on their surface, it cannot accumulate there, because the fabric included in the liquid wallpaper does not has an electric charge. Fantasies in the use of liquid wallpaper are limitless and allow you to apply the composition to the ceiling.
Liquid wallpaper on the ceiling
Surface preparation
In order for the work to be of high quality and last a long time, you need to properly prepare the surface . First of all, old wallpaper and layers of paint are removed. If there are any unevenness or other defects, putty. After this, apply a primer to the wall. If you do not follow these recommendations, then when the liquid wallpaper dries, all the imperfections will be visible. It is better to take care of this in advance and do the job efficiently.
Priming walls before applying wallpaper
If there are any unevenness, the walls are puttied
Rules for applying wallpaper
Before applying the coating to the wall, be sure to prepare the surface:
- Remove the old layer of wallpaper from the wall.
- Fill defects and prime the walls. In this case, the primer is applied in layers with interlayer drying.
For work you will need the following tools:
- hard spatula;
- transparent grater;
- spray.
According to the instructions, the material should be applied “up-down-sideways”, starting from the corner. Circular application is prohibited. Apply one portion of the solution to the wall and move it with a spatula in one direction. To apply one portion, make about 10 movements with a spatula; if you do more, the fibers of the material may be damaged and pellets will appear.
The main thing is to correctly hold the spatula almost parallel to the wall. Don't put pressure on him. The material is distributed with soft, smooth movements.
Liquid wallpaper is applied to the wall using:
- Spatula. Apply the material in small sections, then level it with a trowel.
- Spray bottle. Using this method it is easy to reduce material consumption by half.
- With drawings. Time-consuming method.
For liquid wallpaper, the instructions for use are not complicated and can be handled by a beginner by following the sequence of steps.
Application of material
It is believed that liquid wallpaper is better suited for surfaces that have complex geometry. That is, they will look more advantageous on such walls. At the same time, we must not forget that the material can be used even on metal structures.
That is why they are successfully used in all rooms of a house or apartment. But it is not recommended to apply them to the walls of a bathroom or shower room, which is small in size and has poor ventilation, even forced ventilation. This is because the material can (over time) accumulate moisture.
What is very convenient is that they really help hide some defects in the walls. Both professional and novice designers will find room for creativity.
Using silk plaster you can create a truly unique and unusual interior design
On a note! If you don’t like such a decorative surface, then its layer will have to be removed completely. Therefore, you should immediately decide whether liquid wallpaper is suitable for a particular room or not.
Original drawing options
The real highlight of the interior will be the thematic design, which you will transfer to the surface in any convenient way. You can even decorate the ceiling with liquid wallpaper using sketches of ornaments around the perimeter, and beautiful silk panels will emphasize the luxurious Baroque style in the living room or bedroom.
Flowers
Perhaps one of the best wall decorations are images of a plant nature. An exquisite three-dimensional flower or a whole bouquet is an excellent option for decorating the wall of a bedroom or living room. When creating, you can experiment with shades, placing layers on top of each other, mixture additives and relief.
Trees
Even a person with school drawing skills can draw a tree using a stencil. An elegant sakura branch is considered a classic of the genre. By adding low wicker furniture and floor vases to the interior, you will get a Japanese-style living room design.
Natural landscapes
In order to apply a drawing on a wall with a complex theme, you need to have artistic abilities. Making landscapes is a painstaking and time-consuming job, but the result of your efforts will cause white envy among your guests and will be an excellent addition to the interior in the Provence style.
Geometry
Circle, rhombus, square, rectangle - all this can be transferred to the wall using a stencil and done with a minimum number of colors. For originality, use a combination of shapes, highlight them with shades, relief, in general, fantasize with geometry as you like: it is impossible to spoil it.
Paintings
An interesting solution for a living room in a classic style would be to create a picture using silk liquid wallpaper. This option can be used as a separate decorative element on any surface, if you separate it from the main background with a wooden frame.
Patterns and curls
It is more convenient to draw patterns and curls using a stencil: basically, it is a repeating fragment. Floral designs look great in a bedroom or kitchen.
Animals and insects
Drawing a horse or a butterfly is not difficult: use the template and sketch technique. You can easily color the resulting outline together with your child and decorate the children’s room with the picture.
Composition and properties of liquid wallpaper.
Wallpaper material consists mainly of cellulose, cotton and silk. These natural ingredients give the wallpaper excellent thermal insulation properties, retain heat in the room and thereby reduce heating costs.
Walls treated with liquid wallpaper also provide good acoustic insulation, making them suitable for households where musical instruments are played or loud music is listened to.
Thanks to the material used, liquid wallpaper can withstand high air humidity, and the wall surface can hold a significant amount of steam, which enters the room in the form of dry air. They can also be used in bathrooms and kitchens. Liquid wallpaper is only afraid of direct exposure to water (unless treated with a special varnish).
According to manufacturers, liquid wallpaper in the interior will last up to 20 years. The surface of walls treated with liquid wallpaper is flexible and usually does not crack. Minor damage and stains to the wallpaper are easy to repair. Clean and spray the affected area, when the surface is soft, smooth it lightly with a spatula or add new material.