Rubber bitumen mastics
Rubber-bitumen mastic is used as waterproofing. Due to the chemical composition of the substance, mastic can be used to treat various surfaces. Of course, mastic can only be used as sound insulation in a car, and as for an apartment, it is not necessary, but if it is necessary to carry out work to protect the surface from aggressive environments, it is one of the best.
@zhidkaya_shumoizolyatsia
Using rubber bitumen mastic, external sound insulation can be carried out. Quite often, rubber bitumen mastic is used for various types of roofs. Due to its characteristics, the material provides hydro and sound insulation, but this applies mainly to upper floors and apartments.
Individual approach to soundproofing of residential premises
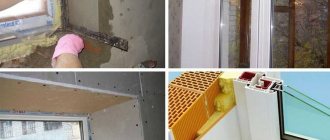
It's easy to make soundproofing with your own hands. The work will not require prohibitively expensive materials and tools. The main thing is to prepare the premises and follow the stages of work. High-quality plastering of wall surfaces is a guarantee of peace and tranquility in your home.
The instructions for the preparatory process are as follows:
- first the base is checked for strength;
- cleaning the wall from all kinds of contaminants (for example, lime mortars, dust and others);
- base primer – promotes better adhesion;
- applying a thin “grout layer” (covering more than 80% of the surface) of this admixture;
- Applying a control layer after 24 hours.
Carrying out work to improve your living space yourself doesn’t cost anything. To begin with, a thorough apartment inspection is carried out to examine the presence of cracks and holes in the wall, the putty of which adds the first step to noise reduction.
Sockets are the second step in eliminating extraneous sounds from your home. At this stage, we note the sequence of some manual actions to eliminate noise:
Silence in the house
- complete shutdown of electricity in the residential areas of the house (apartment). This can be done thanks to the shield located in the entrance, by unscrewing the plugs or lowering the machine;
- use a tester to confirm that there is no current in the sockets in the apartment;
- unscrew and remove all contents of the socket;
- Fill the free space of the socket with foam rubber, polystyrene foam or fiberglass;
- seal everything with a construction mixture that dries instantly.
The third stage is sealing heating pipes. An elastic sealant is used to seal seams at the junction of pipes and the wall.
With your own hands you can not only put the walls in order, but also make plaster (we’ll talk about warm plaster). Instructions:
- raw materials for preparing plaster: water, perlite granules (perlite - pearls) or vermiculite, filler (4 parts), one share of cement and 50-60 grams of PVA glue, an emulsion of polyvinyl acetate in water or a plasticizer is added to a bucket, the contents of which are cement;
- mix the plasticizer with water thoroughly;
- cement and granules (filler) are mixed;
- Place points 2 and 3 in one container and make a homogeneous thick mass (mixing);
- The mixture is infused for 15 minutes, after which it is applied to the walls.
Another way to improve sound insulation is to increase the thickness of the walls of residential premises. For this procedure, you can use various products, such as polystyrene foam, glass wool, mineral wool and others. The choice of product is a personal matter for the tenant of the apartment (house).
Types of liquid soundproofing materials
Today, manufacturers of liquid sound insulation offer customers various types of material, which can be selected according to manufacturer, characteristics and cost. Polyurethane foam materials are produced in different countries, which determines their type, efficiency and price. Among the most common are the following:
- Polyurethane foam Synthesia this material is produced in Spain. The main advantage of sound insulation is its reasonable cost in relation to quality. The material is made from environmentally friendly ingredients, so it can be used for processing in residential areas. Also among the positive qualities of foam is the fact that it can be used at different temperatures.
- Ecotermix polyurethane foam sound insulation is a product of joint production between Russia and China. The material can be used in various rooms and has a high level of fire resistance. This sound insulation also protects wall surfaces from biological formations of fungus and mold. Speaking about the cost of foam, it can compete with products from other manufacturers.
- Demilec polyurethane foam material is manufactured in the USA. This product can be classified as a top-class product, as evidenced by its high quality, reliability and cost. The effectiveness of sound insulation is quite good, but not everyone can afford it.
- Bayer polyurethane foam is produced in Germany and is already a fairly well-known brand throughout the world. As always, the consistent German quality and relatively low cost of the material make it popular among buyers. If you need to perform high-quality sound insulation at a relatively low cost, then the Bayer brand provides its product.
Depending on your budget, you can choose the most suitable soundproofing option, which will help protect your apartment from noise and at the same time save money.
What they say
As already mentioned, there are different opinions about the effectiveness of acoustic plaster.
If we summarize the negative ones, then their causes can be divided into two types:
- high expectations were not realized;
- the work technology was violated (the plaster was rubbed down like regular plaster, it was mixed incorrectly or dissolved in the wrong proportions).
As for positive comments, everyone, without exception, notes the good damping of high sounds.
From materials for soundproofing plaster, good reviews about Knauf products. Users note the best price/quality ratio. Other companies speak well of IVSIL and Vetonit mixtures.
The compositions of any manufacturers, as a rule, correspond to the passport data, unless we are talking about fakes. When choosing a mixture, focus on the stated characteristics and price.
One of the simplest and most effective ways to reduce noise levels in a room is to use soundproofing plaster. This material is actively used not only in office, administrative and public buildings, but also in residential premises. We will consider the types, features, advantages and disadvantages of soundproofing plaster in this article.
Systems for sound insulation under plaster
For the purpose of soundproofing walls and ceilings, the following can be used: frame-type systems, which are installed on a metal profile Ticho P (praktisch), etc., and frameless systems, which are necessary to create a higher level of sound absorption (ZIPS slabs).
This article soundproofing under plaster also contains information about materials for installation on floor coverings. These could be systems such as Ticho K (kommerziell). To further enhance their properties, it is recommended to lay them in several layers. If you need to improve vibration isolation properties, then for this you can use Ticho F (effektiv) systems, TichoMastix bk vibration isolation mastic. You can also use decorative materials that contribute to high-quality sound insulation of the room.
Option for frameless sound insulation with rolled materials
The second option for reducing noise in an apartment using a frameless method is to hang roll sound insulation on the wall and cover it with gypsum plasterboard sheets. If panels with sand reduce noise due to their large weight and friction of grains of sand inside, then rolled materials work due to a large number of thin fibers that absorb sound waves. Some rolls come immediately with a viscoelastic membrane, which gives an additional effect. The most suitable products for soundproofing walls without frames:
Soundproofing plaster for walls
I myself was interested in why such plaster achieved excellent results and why on many forums I read both a lot of positive and a huge number of negative reviews. In fact, sound insulation performance is often deteriorated precisely because of improper use and the use of inappropriate decorative finishes. But everything has its time.
So, the plaster received sound-absorbing properties due to its porosity. It contains granular, lightweight fillers, particles of which are no more than 5 mm. More precisely, it can be expanded clay, vermiculite or crushed pumice. That is why the material has a low density. Sound reflection occurs from obstacles, and now imagine how it will be reflected from a porous and loose mass? This is exactly how sound is muffled thanks to plaster.
Most of the negative reviews are unfounded, since it is thick and dense paint, like enamel, that clogs the pores in soundproofing plaster, thereby reducing its acoustic properties. Errors in coating soundproofing plaster with enamel or wallpaper worsen the quality of the plaster and make many people doubt the properties of this material. If you want to avoid such serious mistakes, then you need to use water-dispersion paint for painting, which is well absorbed and does not clog the structure of the soundproofing material.
Types of plaster compositions
The differences between all soundproofing mixtures lie in the initial composition, which includes:
- a base represented by cement mortar, lime or gypsum;
- polymers;
- filling components.
The quality of the plaster layer and sound insulation capabilities depend on the composition of the solution. Sometimes aluminum powder is used in the manufacture of such material. This element improves the porosity of the coating, which increases the ability to absorb noise.
Where is soundproofing plaster in demand?
It makes sense to use this type of noise protection in places where the size of the room does not allow the use of more effective, but also more massive solutions. Where a significant increase in the thickness of the structure is not possible due to the layout. Finally, when dictated by economic constraints.
Soundproof plaster can be applied both to walls and ceilings behind which noise sources are located, and to all surfaces enclosing the room. In this case, it provides damping of reflected sound waves, which improves acoustic comfort. As for specific places of application, it is hardly worth listing them. Noise interferes everywhere, so protection from it will not be superfluous either in a hospital, or in an office or apartment.
Objects of using soundproofing plaster.
The most common uses for sound-absorbing plaster are public places. As a rule, they are characterized by a high noise level, which depends on the number of people arriving in a public space. In this regard, there is a need to use soundproofing plaster. Public space facilities include:
A noisy establishment needs soundproofing
- courts and counseling centers, as well as business centers and meeting rooms for important meetings;
- various industries, next to which there are residential sectors;
- catering: cafe; dining room; restaurant;
- residential buildings;
- libraries, clubs, reading rooms and so on.
Such huge rooms require not only silence, but also comfort, which can be provided by another type of sound-absorbing plaster that provides warmth. Heat-soundproofing plaster applied to the walls allows you to maintain a comfortable temperature in the room, and also protects the inhabitants of this space from external irritants - noise.
Noise suppression methods
Probably every second person is faced with the problem of noisy neighbors who for some reason prefer to make noise at the most inopportune time for you. I’m generally silent about living near busy highways. That is why all kinds of wall materials that help cope with background noise have long begun to appear on the construction market.
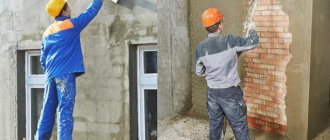
Plastering the wall with soundproofing plaster
Each material has its own advantages and disadvantages, so I decided to make a table about each of them:
| Material | pros | Minuses |
Polystyrene foam Low cost, availability, the ability to do the work yourself, light weight does not complicate installation and does not put extra stress on the walls Low noise suppression rates compared to other soundproofing elements, subsequent decorative finishing is required Soundproofing boards Good acoustic characteristics, environmentally friendly for people, Durable material and easy installation High cost, due to which the material is more often used for studios and expensive buildings, installation is carried out strictly according to Acoustic insulation (mat) technology Low cost, good sound insulation properties, sold in rolls, can be cut into pieces Used during finishing walls with plasterboard, since it is laid inside the frame, when purchasing a heat-insulating element, it is necessary to check whether the solution has acoustic characteristics Soundproofing plaster The most popular method, reasonable price and the ability to do the work yourself, is not harmful to human health, does not require additional finishing, but can be coated and glued above wallpaper Some people think that plaster is not a good solution for noise suppression, but it does a 35% better job than other methods. It is necessary to adhere to technology, a long process
Using the table as an example, it becomes clear that you can use any method convenient for you for walls. However, if the goal is to suppress noise as much as possible, then it is necessary to use soundproofing plaster. Here are a few more reasons why I gave my preference to this particular plaster:
- Doing the work is possible with your own hands and quite quickly, especially if you have certain skills
- Walls do not require preliminary leveling or careful preparation
- Small pests such as rodents or insects do not like plaster
- Two methods of applying to walls: manual and machine
- It is this soundproofing material that is used in restaurants, courts, business centers and various industries - this suggests that plaster has long established itself as a high-quality soundproofing element
Finishing with soundproofing plaster
And although I was delighted with it, I cannot hide some shortcomings:
- Soundproofing plaster is not a cheap material, so it is worth calculating the costs in advance, especially if the repair will be carried out with the help of a specialist and not with your own hands
- Further finishing, if any, will involve additional costs in time and money.
Advantages and disadvantages
Compared to other acoustic materials, sound-absorbing plaster has the following advantages:
- ease and speed of application;
- seamlessness;
- undemanding to the evenness of the base;
- versatility (any, even complex shapes can be created);
- environmental friendliness.
How the coating has its advantages:
- vapor permeability, allowing the walls to breathe;
- low dead weight (does not place a heavy burden on foundations);
- maintainability;
- additionally has insulating properties ;
- fire resistance;
Minuses:
- is not a finishing coating;
- high cost (compared to conventional mineral compounds, but significantly lower than other soundproofing materials);
- the coating is not elastic and (like mineral) is afraid of vibrations.
Properties and selection of material
Soundproofing plaster for finishing
In principle, I did not find any particular differences in the application of such plaster and some other solution. However, some nuances do exist, and they are worth talking about. Soundproofing plasters must have a certain number of properties, and here are some of them:
- The structure of the plaster must be dense and free of voids and microcracks, because they are the conductors of sound
- After finishing application on the walls, the surface should be uniform, this is the key to high sound insulation performance
- In noisier rooms it is necessary to apply a thicker layer of plaster
- Finishing in this way will be durable, and this is an additional joy for the owner and all residents
Wall finishing with plaster
When the composition selection process is underway, it is necessary to pay attention to the following nuances:
The higher the declared noise absorption values, the better the quality of the plaster. Pay attention to the application method stated by the manufacturer. If a machine method is indicated, it is better not to apply the solution by hand.
- If the room has a high level of humidity, then it is better to use a cement-based mixture, and in a dry room a gypsum solution is sufficient
Today, the leader in soundproofing plaster for walls can be called a solution produced by KNAUF
. This is a well-known company that has conquered the construction market thanks to its high-quality soundproofing materials. Knauf plaster has all ONORM standards, and the price/quality ratio speaks for itself. I chose this particular mixture to decorate the walls in my house and I must say that I was pleased with the ease of application and the soundproofing qualities of this material. By the way, manufacturers have thought through all the options and have produced plasters that can be applied both by machine and by hand.
Popular manufacturers
Soundproofing plasters are not an invention of our time. For almost a century, this material has been developing, and now many companies produce such products based on cement and gypsum binders.
Pl groups
The Paladium brand belongs to the Moscow company, which produces dry building mixtures. Paladium soundproofing mixture is made with foam glass filler. It is universal, suitable for work on facades and indoors. A coating made from this mixture lasts more than 10 years. Insulating fire-resistant material, easy to apply, resistant to biodestruction.
Ivsil
The company produces a unique (unparalleled) heat and sound insulating mixture IVSIL TERMOSIL. A mixture based on foam glass and cement is applied mechanically and manually. The coating is durable. In one pass, a layer thickness of up to 30 mm is applied. Dry mixture consumption (average) per 1 m2 = 3 – 4 kg.
Favorite
De Luxe is a Russian brand. The heat and sound insulating mixture Teplolux is characterized by its low cost without sacrificing quality. It is resistant to moisture, so it can be used in bathrooms and other damp areas. Universal. Can serve as long-term protection for facades and premises. Withstands temperatures in the range -50 ... +50°C.
Knauf
The famous German company Knauf is loved for the high quality of its products. Knauf AkustikPutz has a gypsum base with mineral components. Versatile in use. Easy to install and reliably serves for many years. But finding this type of plaster in the store is almost impossible!
Selection of materials
Compositions for the installation of soundproof plaster come to the market in the form of powder mixtures
Packing: regular paper bags. Like any plaster mixtures, their shelf life is limited, so when purchasing material, pay attention to the date of manufacture. Mixtures include granules of expanded clay, pumice, other porous stone materials, fiber from synthetic and natural fibers. Some manufacturers use gas-forming additives, usually based on aluminum powder. When the plaster composition is dissolved with water, aluminum oxidizes, releasing carbon dioxide, saturating the thickness of the plaster with tiny pores. Such mixtures are much more expensive, but their sound protection is on average 7-10% higher. Even before choosing a mixture, you need to determine on the basis of what binder it should be made from.
Gypsum-based compositions are not used for exterior decoration or for rooms with high humidity.
Acoustic plasters
Acoustic plasters (stone, concrete, wood), pre-coated with Portland cement-based primer. Common composition for soil: I: 3.5 or 1:4 with the addition of 10% lime. A layer of acoustic plaster is applied to unpainted soil using the usual techniques.
The acoustic properties of plasters increase if the plaster layer is applied not to a dense wall, but to a surface made of coarse-grained materials, and also if an air gap is placed between the wall and the plaster, filled with slag wool or asbestos fiber.
Painting or whitewashing reduces the acoustic properties of plasters, especially at high frequencies of sound vibrations. The acoustics laboratory of the Moscow Architectural Institute has developed a number of recipes for acoustic plasters.
Acoustic (sound-absorbing) plaster can be applied to any surface
Plaster ADC
Crushed building pumice is sifted through a sieve with holes of 3-5 mm. The residue on a sieve with 3 mm holes is used as filler. The binder is cement. A mixture of pumice and cement is mixed dry and diluted with water. Dosage of the plaster composition per 1 m2 of surface with a plaster thickness of 20 mm: Pumice………………………………………………………………………………. 28.8 l Cement………………………………………. …………………7.2 l Water……………………………………………………………… 7.2 l Volumetric weight of pumice………………… ………………… 400 kg/m3. ………………plasters…………………………………… 620
Method of application. A layer of ADC plaster 25 mm thick is applied over a still damp layer of pre-applied cement plaster (about 10 mm thick). Under normal conditions, the plaster takes about 25 days to dry. It can be applied to concrete, stone and wooden (on the Rabitz grid) surfaces.
AGP plaster
Crushed pumice is sifted through a sieve with 2-3 mm holes. The residue on a sieve with 2 mm holes is used as filler. The binder is sifted gypsum. Pumice is poured into the gypsum milk and mixed thoroughly. Dosage of the plaster composition per 1 m2 of surface with a plaster thickness of 25 mm: Pumice………………………………………….. 19.2 l Gypsum…………………………………………………… ….. 4.8 Water……………………………………………. 6.0 Volumetric weight of pumice……………………… 400 kg/m3………………..plaster. 700 - 800 kg/m3
Method of application. The prepared plaster is applied in its raw form as an overlay (without grouting) onto the surface to be plastered (concrete, stone or wood).
ACSH
Crushed boiler slag is sifted through a sieve with holes of 3-5 mm; the residue on a sieve with 3 mm holes is used as filler. The binder is cement. The mixture of slag and sifted cement is mixed dry and water is added.
Slag……………………………………… 19.2 l Cement……………………………………………………… 4.8. Water…………………………………………………………… 3.2 " Volumetric weight of slag……………….. 840 kg/m3
plaster .. 1100-1200 kg/m3
The application method is similar to that for the ADC.
Acoustic plaster of subway tubes
The composition of the plaster is cement: asbestos fiber: sand in a ratio of 1:2:1 to 1:6:1. This mixture is applied by gunning in a layer of 5-10 mm and a preparation layer of cement and sand (1:2) 5-5 mm thick. 6 mm.
Acoustolit ASP
Crushed pumice is sifted through a sieve with holes of 2 and 1 mm. The residue on a 1 mm sieve is used as filler. The pumice is then dry mixed with caustic magnesite sifted through a 0.25 mm sieve. After this, hydrochloric acid is poured in and the whole mass is thoroughly mixed until evenly moistened. Dosage of the plaster composition per 1 m2 of surface with a plaster thickness of 25 mm: Pumice……………………………………………………19.2 l Magnesite…………………………………4, 8 Hydrochloric acid……………………… 6.4 Volumetric weight of pumice………………….. 400 kg/m3 .. . magnesite……………………………..1000….acoustolite. . . ………….. 900 Hydrochloric acid……………………… 12° Be The application method is similar to that for AGP.
Composition application technology
The technological process using a soundproofing mixture is based on two main stages - preparing the base and applying plaster.
The optimal coating thickness is 30 mm.
Application methods
As with conventional plaster, there are two main techniques:
- manual;
- machine
Plastering units are expensive. Even a large area can be processed manually, although it will take a lot of time and take a lot of effort.
There are two ways to apply the solution - manual and machine
Tools and consumables
For plastering work, you should prepare the necessary list of tools and equipment. As a rule, this is a classic set of tools:
- grater, grater;
- spatulas (preferably of different widths);
- rule;
- trowel (trowel);
- maklovitsa;
- rags.
You will also need a container with a construction mixer for mixing the solution. If you need to work at height, it is advisable to prepare a stepladder, scaffolding or other suitable device.
To level the plaster, you need to prepare spatulas of different sizes, a trowel, a grater, etc.
Preparing the base
Most soundproofing plasters from different manufacturers do not require special surface preparation. However, some mixtures require a fairly even base, since they are applied in a thin layer (for example, plaster of the Akustat, Acoutex brands). To do this, the walls are prepared accordingly - leveled with classic plaster or sheathed with sheets of plasterboard.
The preparation itself is carried out according to the general algorithm:
| 1. All old finishing (paint, plaster) is removed. | |
| 2. Pronounced defects are corrected with cement mortar. | |
| 3. Stains of various natures are removed (traces of fuel oil, drying oil, oil, etc.). | |
| 4. The metal parts present are treated with anti-corrosion materials (mandatory condition). | |
| 5. If the wall is brick, jointing of the masonry joints is carried out. | |
| 6. Foci of biological damage must be neutralized. | |
| 7. Surfaces are dust free. | |
| 8. Finally, the walls are primed. |
The surfaces are covered with deep penetration soil in 2 layers with mandatory drying of each. In order to increase the sound-absorbing properties, a metal mesh (mesh size - 10 mm) is attached using cement-sand plaster.
Preparation of the solution
Stirring the composition, as well as the process of applying it, must be carried out in suitable conditions - temperature from +10 ° C to +30 ° C, with a humidity level of no more than 60%. The step-by-step process is as follows:
| 1. Dry powder is poured into a prepared container (30-40 l) (it is advisable to empty the entire package). | |
| 2. Water is poured in according to the instructions. | |
| 3. The mixture is stirred for about 10 minutes. | |
| 4. Be sure to let the plaster set (from 5 to 8 minutes). | |
| 5. Immediately before use, the solution is mixed again. |
The result should be a homogeneous consistency without lumps. The lifespan of cement plaster can be up to 4 hours. It is worth considering that it is impossible to reuse the composition after hardening (dilution with water). Therefore, you need to carefully monitor the time.
Cement-based mixtures have a lifespan of up to 4 hours
Applying the solution to the surface
The plaster is applied in two layers. It is advisable to adhere to the optimal total coating thickness of 20 mm. If necessary, it is permissible to increase the value to 25 mm. Layers (10 mm each) are applied one after another, but a new coating is laid only after the previous one has dried. Leveling is done using an aluminum rule, and the excess is removed with a trowel.
Water-based paint or decorative plaster is used as a finishing coating. If the walls were covered with gypsum plasterboard, then among the soundproofing plasters for such a surface it is better to choose a gypsum mixture.
The technology for applying soundproofing mortar is practically no different from working with other plaster compounds
DIY soundproofing plaster
The application of acoustic compounds is not much different from plastering with traditional cement or gypsum mixtures. However, there are also features, failure to comply with which may negate the protective properties of the coating.
- We begin work by preparing the surface. If other types of plaster are not available, first apply a primer layer of ordinary cement mortar in a ratio of 1:3. The layer also serves for leveling, so its thickness depends on the quality of the base, but in any case it is desirable that the soil layer be at least 10-12 mm.
- After the soil has set, we begin laying the acoustic layer. Apply the composition to the wall in portions and level it with the rule. We apply gypsum compositions with a spatula; for cement ones, you can use a plaster ladle.
- We lay a layer at a time, no more than 15 mm thick. Since manufacturers usually recommend at least 40 mm, we apply the plaster in two or three steps, allowing each layer to set.
There are two points to pay attention to when applying:
- acoustic plaster does not rub off;
- if laying is carried out along beacons, then after the layer has set, they are removed, and the resulting voids are filled with an acoustic composition.
Combined method of sound insulation
When the thickness of the plaster coating is doubled, noise reduction does not improve. Layered sound-absorbing coatings work most effectively, so it is better to place other soundproofing sheet coverings - mineral wool (preferably basalt) or polystyrene foam - under the acoustic mixture. This coating will provide additional heat savings.
First, a sheet of soundproofing material is mounted (glued) onto the wall - polystyrene foam, corrugated cardboard panels with filler, etc. After the glue has dried, plastering begins. The main disadvantage of the combined method is the reduction in the free space of the room (the coating is thick).
Properly applied soundproofing plaster will help make life in your home more comfortable. Even a non-specialist can cope with this. The main thing is to follow the recommendations and do everything efficiently.
Myths and reality of acoustic plaster
The range of opinions about soundproof plaster ranges from attributing truly wonderful properties to the material, to accusations of quackery, to complete denial of any effect. As often happens, the truth is in the middle.
Plaster cannot provide 100% protection from loud noise. But she is capable of weakening it, turning it from an irritating factor into an unobtrusive background.
A properly prepared and laid composition can subjectively increase the acoustic comfort of a room by 25-30%. At the same time, reduce the noise level by 6-8 dB, which corresponds to an additional layer of brickwork, approximately the thickness of a brick (250 mm).
Areas of application
Insulating materials can be used to protect buildings of various types - not only residential, but also for technical purposes. Insulation can protect the room from excessive humidity, electric current and noise exposure.
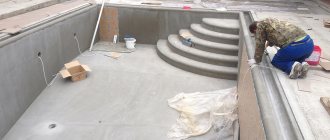
Moisture protection
The issue of waterproofing is one of those problems that can be solved with the help of paint and varnish material. It should be noted that most paints, one way or another, have waterproofing properties. However, if you need truly serious protection, you cannot do without a special coating. After coating with this composition, the surface will withstand even direct exposure to water for a long time.
Waterproofing coatings must have certain qualities:
- The paint should be intended for both interior work and facade finishing, since double-sided painting provides more reliable protection.
- It is desirable that, in addition to moisture resistance, the paintwork material is resistant to ultraviolet rays and temperature changes.
- The composition should include anti-salt additives and antifungal drugs. Antiseptic qualities are very important for good waterproofing, because moistened material is an ideal place for the development of mold and mildew.
Note! The quality of the paint and varnish material is influenced not only by its shelf life, but also by storage conditions. The paint should not be in too cold rooms (at sub-zero temperatures) or too hot
Information on storage times and conditions can be found on the product packaging.
Noise insulation
An increased level of sound insulation can be achieved by painting the surface with special paint. Soundproofing coatings have a number of characteristic features:
The basis of this type of paint is bitumen or an acrylic composite element. Both substances have a number of features: acrylic is better suited for interior work, since it is practically odorless (water-based), and bitumen is much more effective outdoors, but is not suitable for indoors, as it smells unpleasant
At the same time, bitumen coatings are much cheaper than acrylic ones, which is important when painting large areas. The maximum level of sound insulation can be obtained if the composition is applied in a thick layer. It is recommended to use a brush or roller as a working tool
The paint dissolves in a synthetic composition. For insulating moving elements (for example, machine or car parts), bitumen-based paints and varnishes are best suited. This group of paints is capable of absorbing not only sounds, but also vibrations.
Advantages and disadvantages of liquid sound insulation
Like any other material, liquid sound insulation has its advantages and disadvantages. Speaking about the advantages of the material, the following should be noted:
- In addition to soundproofing properties, the treated surface also improves the thermal insulation of the apartment, which will help save on heating costs in winter.
- Due to the structure of the material, after application it penetrates into cracks and pores, effectively insulating the room. Often this material is used to process window and door openings where cracks may form.
- The foam has high adhesion to various surfaces, which makes it possible to apply sound insulation even without preliminary surface preparation. Upon completion of the work, a minimum of debris and waste remains.
- Using polyurethane foam, you can completely seal the apartment, which will improve the soundproofing qualities of the room. When applying the material to the walls and ceiling surface, a monolithic layer is formed that will plug all the cracks on the surface.
- Using foam, you can save space in your apartment. If the sound insulation has a layer of three centimeters and add to this the parameters of the drywall sheet, it turns out that complete sound insulation will have a thickness of four centimeters. Liquid insulation is the optimal solution for small-sized housing.
- The weight of the material is very light, so the structure is not subject to additional load.
- The structure of the material allows for effective noise insulation at different wavelengths.
Speaking about the disadvantages of polyurethane foam, the material has few of them, and the main one is the difficulty of dismantling. Despite the duration of operation, which is more than fifty years, the sound insulation will still have to be changed, and it will be difficult to wipe it off the wall. These are, perhaps, all the negative aspects of liquid sound insulation.
Styrofoam
This material is often used for sound insulation. Its advantages:
- easy;
- accessible;
- environmentally friendly;
- comfortable in using;
- can be formed, cut and processed.
The walls are lined with polystyrene foam. The material releases volatile substances in very low concentrations, so it does not harm health. In exceptional cases, individual intolerance to polystyrene foam is observed.
Thanks to its porous structure, the material effectively absorbs vibrations. If you install soundproofing boards correctly, you will be able to reduce the noise level. Polystyrene foam has good functional characteristics. It is light in weight, which means it is easy to transport.
The slabs can be stored for a long time in an unheated room, they will not deteriorate or lose their properties. Foam plastic has a low melting point, regular foam melts at a temperature of + 145 degrees, and epoxy at a temperature of + 170 degrees. Lights for 4 seconds, after which it goes out if there is no source of fire nearby.
Process and processing features
To apply liquid sound insulation indoors, you need special technical equipment. Under pressure, the chemical composition is applied to the surface, forming a polyurethane layer. Such insulation will protect the house from noise, cold penetration and various pests.
The work process is simple. If working with other materials requires certain preparation, then in the case of polyurethane foam, all this is not needed. If there are large peeling elements on the surface of the wall, then they can be dismantled, but otherwise nothing is needed.
Application technology
The technological process of applying sound insulation has some similarities with painting. Liquid noise insulation must be applied evenly, like regular paint in several layers. Do not hold the sprayer at one point for a long time to prevent large foam formation. The thickness of the layer should be three centimeters, this is enough for the material to provide the necessary level of protection.
Stage 1. Preparatory
There is no preparatory stage as such when treating with liquid sound insulation, but you can clean the wall surface from peeling elements. It also doesn’t hurt to cover the floor with plastic film or paper. Foam that gets on the floor will dry out and be difficult to clean.
If there are wires and sockets on the wall, then they should be covered first so that in the end you do not have to completely change the wiring. A special corrugated casing should be used for cables. Upon completion of the preparatory work, equipment is brought in and application can begin.
Stage 2. Primer
The surface of the wall should be treated with a primer. As with any finish, the primer provides maximum adhesion to the coating. You can apply the primer either with a hand tool: a roller or brush, but also with a spray gun. Liquid impregnation of walls is a prerequisite when working with surfaces.
Thanks to the primer, fungi or mold do not form on the surface of the wall under the sound insulation. The primer must be applied evenly over the entire surface. It is better to start applying from the top of the room, this way you will not get smudges.
Stage 3. Applying sound insulation
Polyurethane foam must be applied in two stages. The first layer is thin for the binder, and the second is denser. It is during the application of the second layer that a reliable soundproofing coating is formed. The polymer expands, and the resulting bubbles will be an excellent insulating layer. When working with polymer, a special pressure-operated tool is used. When the insulation layer has reached three centimeters over the entire surface, you can finish processing and put away the equipment.
Stage 4. Drying
After completing the application of the polymer material, it must be allowed to dry. Depending on the manufacturer and composition of the foam, drying time may vary. When sound insulation hardens, it forms a dense porous structure. The outer surface of the coating is uneven, so to bring the wall to perfection it is necessary to use facing slabs or panels. As an option, you can use decorative panels, which, despite their small thickness, also have a certain level of sound insulation. When all finishing and installation work is completed, the object can be handed over to the owner.
Today, the variety of soundproofing materials is so great that you can choose according to your requirements and wishes. When it comes to a large apartment, using frame sound insulation in it will be beneficial for you, since its cost is cheaper than using liquid sound insulation. Liquid sound insulation of the floor in the apartment, as well as the walls and ceiling will make the room comfortable and convenient. The optimal treatment option is considered to be a small living space. Thanks to the insignificant thickness of the soundproofing layer, those important centimeters will be preserved in the apartment.
As stated earlier, only an integrated approach to sound insulation guarantees effective and reliable protection from various noises and sounds. By installing external and internal sound insulation in your apartment, you don’t have to worry about your sleep and peace of mind.
Three solutions for soundproofing the ceiling
Soundproofing the ceiling will make the apartment quieter and relations with neighbors more pleasant.
Let's figure out how to do this project independently, quickly and on a budget. Airborne and impact noise enters the apartment through the ceiling. Airborne noise is music, conversations, barking dogs and children's songs. Stomping, jumping, and hitting balls are impact noises. Soundproofing the ceiling reduces airborne noise levels. But only soundproofing the floor in the apartment above will protect you from impact. It is impossible to control the repairs of your neighbors, so in this article we will give tips on how to reduce the level of airborne noise using ceiling soundproofing.
What kind of ceiling sound insulation is there?
Soundproofing projects vary in effectiveness, thickness, installation complexity and price. A solution for soundproofing the ceiling is chosen at the beginning of the renovation, because this is the first stage of finishing work. The choice depends on your plans for soundproofing walls and floors, your budget and the expected level of noise reduction.
Ceiling soundproofing solutions
Project "ZIPS III Ultra"
Efficiency 3* Thickness 2* Installation 2*
Materials for the project
"ZIPS III Ultra" is the most effective solution in terms of thickness/result ratio. It reduces noise by up to 80% thanks to a combination of dense gypsum fiber and loose fiberglass. Flexible supports-vibration insulators, with which the panel comes into contact with the ceiling, increase sound insulation.
The panel is attached directly to ceilings made of concrete, blocks and bricks. This solution does not require a metal frame, so it is easier to install.
Each slab includes the necessary fastening materials: screws, dowels, anchors and washers. Additionally, for installation you will need Vibrostek-M100 damper tape, Vibrosil sealant, drywall and fasteners for it. To cut the slabs you need an electric jigsaw and a sharp knife, for fastening - a hammer and a drill.
Before installation, the ceiling surface is leveled with plaster. It will not be possible to install soundproofing boards on a ceiling with differences in height.
Damper tape is glued to all adjacent walls. It prevents sound transmission from the walls to the soundproofing structure. The tape is attached to the wall using Vibrosil sealant. It remains flexible, so it does not transmit vibrations from the wall to adjacent structures. If pipes come out of the ceiling, they are also wrapped with tape to reduce noise transmission. If you do without tape and sealant, the effect of sound insulation will be reduced by 50%.
Zips III Ultra slabs are mounted to the ceiling through eight protruding supports. This is convenient and reduces the risk of error because the attachment points are already marked. Excess through holes in the slab violate its tightness, that is, reduce sound insulation.
The top of the slabs is covered with a finishing layer of plasterboard a little more than one centimeter thick. Drywall is attached using self-tapping screws. The seams between the sheets of drywall are filled with Vibrosil sealant, and the ceiling is ready for finishing.
Advantages of the ZIPS III Ultra solution
The most effective sound insulation is a reduction of up to 80% of noise. No metal card needed. Easy to install yourself. Fasteners included
Project “Mineral wool + gypsum plasterboard frame”
Efficiency 2* Thickness 1* Mounting 1*
Materials for the project
Fasteners: self-tapping screws, dowels, anchors
“Mineral wool + gypsum plasterboard frame” is an effective and cost-effective frame solution. It reduces noise by 60% thanks to soundproofing wool, sealant, damper tape and vibration suspensions.
Mineral wool does not burn and does not become moldy from moisture. The fibers of this material are thin, long and arranged in a chaotic manner, so they insulate impact and airborne noise.
As in the ZIPS III Ultra project, sealant and tape separate the soundproofing structure from the walls. A vibration suspension is needed to attach the frame to the ceiling. Thanks to the combination of elastic materials Sylodyn and Sylomer, it reduces noise by 25% compared to standard straight hangers. The vibroacoustic properties of this suspension last up to 30 years.
Materials for this project, including hardware, are sold separately.
The “Mineral wool + gypsum plasterboard frame” project is cheaper than “ZIPS III Ultra”, but installation requires skills in installing frame structures or a construction team.
The first stage of work is insulating the walls with damper tape. Then vibration suspensions are attached to the ceiling, on which the profile is installed. The empty space between the ceiling and the profile is filled with mineral slabs. When working with this material, be sure to use protective overalls, gloves and goggles.
The frame and slab structure is covered with two layers of 12.5 mm thick plasterboard. The final step is to treat the seams between the sheets of drywall with Vibrosil sealant.
The thickness of the installed soundproofing structure is 7.5 cm. It “eats up” the most space compared to other solutions, so it may not be suitable if the ceilings are low.
Advantages of the “Mineral wool + gypsum plasterboard frame” solution
Reduces noise up to 70%. It costs almost several times cheaper than ZIPS III Ultra.
Efficiency 1* Thickness 3* Installation 2*
Materials for the project
Euroblock is a budget solution for rooms where little noise insulation is needed. Sheets of two layers of polyethylene foam of different densities reduce noise by 10%. "Euroblock" is used under suspended slatted or cassette ceilings.
Sheets measuring 60x100 cm can be mounted on any surface primed with two layers. For installation you need a water-based adhesive-sealant or alcohol-based liquid nails. They do not corrode the sheet material. The thickness of the finished structure is 20 mm. The glue dries in 12-24 hours, and then the installation of the suspended ceiling begins.
Advantages of the Euroblock solution
Suitable for suspended ceilings. Doesn't "eat up" a lot of space. Easy and quick to install
What else is important to consider?
The effectiveness of sound insulation will increase if you also soundproof the walls in the room, as this reduces the spread of impact noise from the wall to the soundproof ceiling structure.
If you plan to soundproof the floor in your apartment, then take into account its final thickness in order to estimate how much the height of the apartment will decrease after all the finishing work.
What are 5 questions to ask before choosing sound insulation for a ceiling?
- How much will this soundproofing structure reduce noise in the apartment?
- How much area will the structure “eat”?
- How much do soundproofing materials, fasteners and delivery cost?
- How to prepare the surface before installation?
- What skills and experience are needed for installation?
General concepts
Sound refers to mechanical vibrations from 20 to 20,000 Hz. The human ear cannot hear frequencies higher or lower. An unwanted sound that interferes with concentration or relaxation is what we call noise.
The selection of its structural composition is based on the use of physical laws of propagation of wave oscillations in an inhomogeneous medium. To describe this in detail, you need to outline entire sections of acoustics.
In practice, it is usually sufficient to know that soundproofing plaster is saturated with tiny pores, and 2/3 of it itself consists of granules of substances that do not transmit mechanical vibrations well. Fiber materials are also added to some compositions to increase sound-damping properties. The result is a porous substance in which sound vibrations are intensively attenuated or reflected.
Warm plaster for exterior use
For warm plasters, solutions are used that have a volumetric weight in the air-dry state of 600 to 1200 kg/m3. Binders: Portland cement, hydraulic lime, air lime, lime + Portland cement. Fillers: chalk, boiler slag, tuff and pumice fines or organic matter (sawdust, charcoal chips, sifted sphagnum fines). Fillers in warm mortars are dosed in the same way as building sand in cold mortars; the ratio between binder and filler is from 1:2 to 1:3 (by volume).
The grain size of inorganic aggregates is from 0.25 to 2 mm; fillers should not contain dust or mealy particles. For internal tentations, grain size is up to 3 mm.
When applying warm plasters, you must follow the following rules: warm plasters are applied in a layer of 3 to 7 cm according to calculation; the wall surface should not be wet; a surface that is too dry should be moistened by spraying; Before applying the mortar, the walls are sprayed with a liquid mortar of the same composition, but with a finer aggregate.
Under plasters containing sawdust or sphagnum, spraying is done with a solution in which the aggregate is replaced with sand.
Sequence of installation of roll sound insulation for walls
- Rolls of sound insulation (SoundPRO material was used at the site) are hung on a leveled wall. We secure the material using plastic mushrooms or rondoles into which a 6 x 40 mm dowel-nail is inserted. Usually, we make an overlap of 5-7 cm between adjacent SoundPRO sheets, but in the case of frameless schemes, the insulation rolls should be hung joint to joint, without overlap. In this case, the thickness of the sound insulation is the same everywhere and the sheathing sheets will lie flat.
- Next, sheets of gypsum fiber (GVL) 10 mm thick are hemmed. The sheets are fixed directly to the wall through a layer of sound insulation. We also attach the gypsum plasterboard either to the dowels in the case of reinforced concrete walls, or to the dowels if the walls are made of brick (including hollow brick). After installing the sheets, the seams between the sheets are sealed with silicone sealant. The effectiveness of sound insulation largely depends on the tightness of the gypsum fiber layer.
- Next, the gypsum plasterboard is either plastered or covered with a second layer of plasterboard 12.5 mm thick for finishing.
How to apply
The process of applying soundproofing plaster is no less important than the quality of the material itself. Due to non-compliance with the finishing technology, the resulting coating will not meet the declared characteristics and will not provide the proper level of noise insulation. The plaster mixture is suitable for application to concrete, wood and brick walls. The soundproofing solution can be applied manually or by machine.
Preparing the base
Soundproofing plaster does not require perfectly smooth walls for application. However, some preparatory work still needs to be done. The surface is cleaned of old coating, dirt and grease. It is recommended to eliminate severe irregularities. If there are cracks in the base, they must be repaired with cement mortar.
Preparation of the solution
Further preparatory and finishing work must be carried out at air temperatures ranging from +17 to +25 degrees and humidity not exceeding 65%. Instructions for thinning the plaster will be indicated on the packaging of the material. For most varieties the process looks roughly the same:
- Pour the dry mixture into a clean container with a volume of thirty liters or more.
- For one bag of dry plaster you need to take approximately twelve liters of water. The exact proportions are indicated on the product packaging.
- When introducing water, the solution is constantly stirred. This procedure will take about seven minutes in total. The mixture should become viscous and homogeneous.
- The solution is left to sit for ten minutes, after which it is stirred again.
- The resulting mixture must be used within four hours.
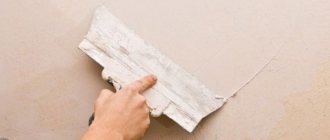
Finishing work
The solution is applied in at least two layers. The total thickness of the coating should be approximately twenty millimeters. You can increase this figure to two and a half centimeters. The layers are applied sequentially after the previous coating has completely dried, with a thickness of no more than ten millimeters. A layer that is too thick may crack when drying.
The plaster coating is leveled using an aluminum rule. Excess mixture can be removed using a plaster polisher. After applying the solution, the walls can be covered with water-based paints or decorative plaster mixtures.
In the next video you will find a presentation of the heat and sound insulating plaster De Luxe TEPLOLUX.