How to achieve a velvet effect?
The process of applying velvet effect plaster is somewhat more complicated than the conventional method. This work is performed mainly by specialists. After all, the coating is a mixture of paint and plaster in a certain consistency .
The tool with which the mixture is applied to the wall contains two components at once - the plaster itself and the paint. They are applied simultaneously. But with a little skill, you can master the technique of applying plaster: the main thing is that the material and tools are selected correctly.
Velvet effect of decorative plaster
The decorative mixture can be used on any surface. The rich velvet effect looks good on the wall, ceiling, and will allow you to highlight an arch or niche in the room. The mixture is convenient for decorating small interior elements - window slopes, corners, shelves. The composition is easy to apply and does not require a lot of experience and skills from the artist. Moreover, using various methods, you can imitate special textures on the working surface. In addition to city apartments, plaster is widely used in country apartments, business centers, retail premises, restaurants and hotels.
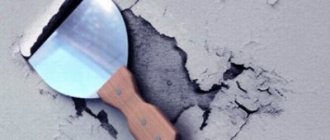
How to properly prepare the surface for work The surface is thoroughly cleaned of dust, grease stains, dirt, and mold. If the surface was previously painted with coloring agents, the remaining paint should be removed. The walls are treated with sanding paper to completely remove unwanted shine. If the work surface has deep cracks, gouges or severe unevenness, it is recommended to use a high-quality finishing putty. After leveling the surface, carefully treat it with a deep penetration primer.
When working with concrete and plastered surfaces that were previously coated with alkyd paints, it is better to use a strengthening primer in 1 layer. When treating microporous, highly absorbent surfaces, it is better to choose an impregnating soil mixture.
We are talking about the following surfaces: • drywall; • building gypsum; • previously plastered surfaces using dry putties. If the surface absorbency is high, the primer is applied in 2 – 3 layers. Preference is given to the “wet” method - until visible traces of “absorption” disappear.
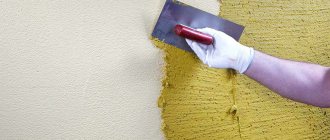
How to create a velvet effect Key steps: 1. Mix the paint with the color. The consistency should be uniform. At this stage you can add 10-15% water. 2. Decorative plaster is applied to the surface using a narrow brush. First, the initial line is formed (this is done so as not to stain the wall when working with a roller). 3. Using a velor roller, apply the first layer – the background – to the working surface. The process is not complicated, but it requires accuracy and endurance. 4. The paint composition is poured into the painting tray. The roller is impregnated with paint, squeezing it a little at the end. The surface is painted with vertical stripes. It is important to get an even, uniform layer. 5. The background is left to dry for up to 2 days. 6. The finishing decorative mixture is stirred and applied to the walls using a spatula. Movements should be chaotic and arbitrary. 7. A finishing layer that is thicker and more textured will help enhance the “velvet illusion.” Using a spatula, apply the composition to the trowel and immediately spread it over the surface. Smooth out the “fresh” finish using a slight pressure on the spatula. This will enhance the “ruffled” velvety effect.
The Remonstr online store has everything you need to update your interior inexpensively and efficiently. We offer construction and finishing materials from the best brands at competitive prices. When creating a fashionable velvet effect, use the best offers from the store: • Decorative plaster 'Velvet' VGT • Alpina accent effekt paint • Alpina impression effekt paint • Washable paints from VGT manufacturers, Tikkurila, Alpina.
The estimated cost of 1 m2 is about 300 rubles. For more detailed calculations, please contact our specialists.
Photo
Below are photos of the walls after finishing.
Color selection
Attention
Special paint with a velvet effect for plaster is sold at all construction markets and in large stores. There are domestic and foreign brands. Their quality and consistency are usually the same, but domestic paint is cheaper than its imported counterpart. The paint is mostly water-based and usually white in color.
You can change the shade by adding a colored pigment to the base. In total there are more than 300 shades, the customer will be able to implement any of his solutions for decorating the walls. However, there are some recommendations. For example:
- for offices it is proposed to use calm tones;
- for apartments - cozy, warm;
- and for children's rooms, on the contrary, bright and rich colors.
What materials are needed?
There may be several types of coverage:
- Texture (velvet relief).
- Structural.
- Venetian plaster, characterized by increased smoothness. A master with experience will be able to work with it.
The remaining types differ in the composition of the binding element.
To prepare surfaces, special primer solutions are needed to treat walls before plastering. Sometimes you may need a concrete mixture to seal large cracks in the walls and level the wall itself.
Materials and tools
In addition to whether you chose dry putty or a ready-made mixture, you will need additional materials:
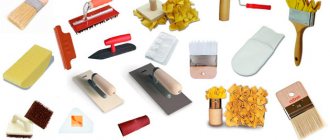
List of main tools:
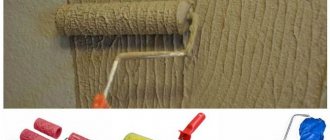
You can apply the texture with various objects, your imagination will help here: sponges, polyethylene, brushes, spatulas, special rollers with a pattern, etc. You can create a relief with your own fingers, most importantly, wear gloves to comply with safety regulations. To create a panel, you will need a special set of tools for decorative artists.
Step-by-step application instructions
A velvet surface can be obtained by following the instructions:
- First the paint is prepared. If it has been standing in a store or warehouse for a long time, the composition settles and a sediment forms in the jar. Shake or stir the jar of paint well.
- Color dye and 10–20% water are added to the container, everything is thoroughly mixed.
- At the third stage, putty and paint are applied to the walls, starting with hard-to-reach places. For example, around windows, doors, in corners, etc. You need to paint with a brush with a working part width of no more than 3 cm.
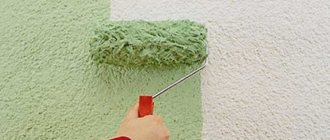
- After painting the corners and slopes, the remaining walls are painted. It is applied with a velor roller. This must be done carefully, but with skill, so that there are no smudges or empty unpainted areas.
- In order for the paint layer to lay down evenly, the roller must be rolled out on a special tray with paint. Otherwise, areas with too thin or thick layers may appear on the wall.
- Paint applied according to all rules dries completely in 24–36 hours. The exact time, taking into account the ambient temperature, is indicated on the can.
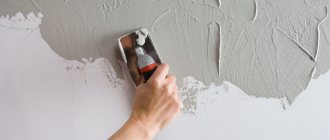
- After the background paint layer has dried, putty is applied to the walls using a trowel. The mixture is applied in a small portion to its working part and smoothed evenly over the wall.
Advice
To enhance the effect of a velvet wall, you need to repeat the process of applying putty with another layer.
Decorative paint Maitre Deco “Veloute” velvet effect 1.2 kg
Available for this paint
In order to select and get a color code, use the Palette .
Order tinted paint by specifying the color code you like in the delivery comments. Please note that ordering tinted paint is only available with 100% prepayment.
Please also note that the color rendering on the screen of your device may differ from the actual color. For a more accurate color selection, please visit our stores.
VELOUTÉ – decorative coating with a velvet effect. Suitable for application to almost any pre-prepared mineral base (concrete, concrete blocks, brickwork, cement, cement plaster, gypsum, gypsum plasterboards), as well as chipboard, fiberboard and other wooden surfaces.
Properties:
- Made from environmentally friendly components.
- Deep velvet effect.
- Saturated color.
- Suitable for self-application.
- High covering material.
- Non-flammable, fire safety class KM1.
- Certified for children's and medical institutions.
- 30 expressive colors.
Recommendations for use:
Apply the material to a uniform, pre-leveled, dry and clean surface. If necessary, remove existing weak parts and loose layers of old paint with a spatula. Before application, protect unpainted areas with mounting tape and film. Treat the surface with AMORСE primer in one layer (consumption 0.1-0.2 l/m² on a smooth surface, drying time 2-3 hours) with a roller or brush to improve adhesion with subsequent layers of finishing materials, strengthening and removing dust from the surface.
After complete drying, to color level the prepared surface, apply SOUS-COUCHE primer paint (consumption 0.15-0.30 kg/m², drying time 6-12 hours) with a lint roller so that the surface is perfectly smooth without a “fur coat” , for which SOUS-COUCHE is rolled out in different directions over the surface. If necessary, after the first layer has completely dried, apply a second layer. Use a brush in hard-to-reach places. It is recommended to tint the SOUS-COUCHE primer paint half a tone lighter than the topcoat.
Stir gently by hand before applying VELOUTÉ. The material is ready for use. Application should begin from the upper left corner, moving to the lower right. To avoid noticeable seams on the surface, always work on a wet edge, leaving a minimum amount of material around the edges. Apply the second layer in small sections in opposite directions, creating a pearlescent shimmer. To do this, the surface of the trowel, leaving a small gap between the surface to be treated and the tool, distribute the material in uniform strokes. It is important that the pattern of strokes of the second layer does not repeat, but “intersects” with the pattern of the first, since the first layer will shine through, creating the depth of the pattern.
Drying: at an ambient temperature of +22°C and a relative air humidity of no more than 65%, permissible complete drying is 24 hours, wet cleaning no earlier than after 28 days. Drying time may vary depending on ambient temperature and humidity.
Advice from the experts
To successfully apply decorative putty, craftsmen advise not to skimp on materials, especially on paint and varnish coating . It must be of high quality. There are also a number of recommendations from professionals that make sense to listen to:
- You should never be afraid of working with a special tool: your hands get used to it very quickly. Even a beginner can easily paint walls with a roller or brush in half an hour or an hour.
- The second useful tip is to always read the instructions on the package or jar. Everything is written there - how to dilute the composition, how long it takes to dry, how to apply it, sometimes it is even written what tool is used to carry out the work.
- If the type of decorative plaster involves layer-by-layer installation, then apply the mixture one by one only after the previous layer has completely dried. Yes, it may take several days, but the result will exceed expectations.
- You can give the desired texture to the plaster not only with a trowel with teeth around the perimeter. This work can be done with a regular sponge, brush, broom, or even a patterned roller. These tools are used to create drawings, patterns, transitions, and structures.
- The structure of the plaster composition can be changed within several hours after its application, until it has completely hardened. Once it dries, this cannot be done.
- To save material, and it can be very expensive, all unevenness in the base can be leveled with cheap material. And then apply a decorative composition with various additives to it.
- When choosing a color, take into account that after the paint dries, its tone becomes a little lighter.
- When calculating the amount of paint, plaster and even color additives, you need to calculate their amount for all walls for finishing with a small margin. After all, if the paint, plaster or color scheme runs out during the work process, then it will not be possible to make exactly the same mixture. It will be difficult to find exactly this color on the market. The surface will look uneven. Patches of a different shade will appear on it.
Decorative paint with velvet effect for walls: how to apply
The velvet coating fits perfectly on a base made of absolutely any material, including brick and concrete.
Of course, the composition is applied to an already primed wall, treated with putty and completely leveled. In addition, before applying, make sure that the surface is also absolutely clean, that is, there should be no traces of dust and dirt.
Sequence of actions:
- Add to the jar with the color composition and mix thoroughly, you can add a little water, but this is not necessary.
- Impregnate the walls with a primer, preferably acrylic.
- We work the seams along the windows, doors and ceiling with a velvet mixture.
- Using a velor roller, apply the mixture to the remaining smooth walls.
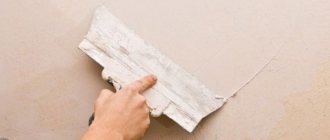
- Work the surface with a trowel.
- If necessary, open with varnish.
The applied paint will subsequently become the background for the decorative pattern, so it is important to distribute it evenly, without creating any unevenness in the design.
What to apply
After the paint has dried, apply the first decorative layer using a trowel with chaotic movements.
There will be two of them, the first one is thinner. Both layers must be even. So, for work we needed:
- thin brush (for working out seams);
- velor roller;
- putty knife;
- ironer;
- paint tray.
Interior options
The interior can be anything you want. The decorative plaster coating even has specific names used among designers - these are “Lamb”, “Fur Fur”, “Bark Beetle” and others. They differ in layer thickness and texture.
The choice of color is left to the customer’s choice, but it must take into account the purpose of the room.
- For bedrooms, choose calm, cream, beige or dark red tones.
- For living rooms - brighter colors, for example, blue or green.
- Light beige or ivory are suitable for office decoration.
Ways to make decorative plaster yourself
The technique for covering the surface with plaster depends on the type of composition used. The mixture is sold in three forms:
- in dry form,
- in liquid form, on a resinous basis (this coating is completely finished),
- Decorative plaster for decorating indoor surfaces (“Venetian”, “bark beetle”, etc.)
There is no particular difference in the liquid and dry mixture; the final result is almost identical. The only difference is that with ready-made plaster you save time on the process of mixing it.
If you don’t know, master class, how to make decorative plaster from dry composition and you are new to this business, it is better to buy a ready-made mixture.
Before you start, check that you have the tools. You should have on hand: spatulas of different sizes, a drill mixer, a scraper, a grater, a trowel and a mixing container (if you prefer dry plaster).
Decorative plaster for interior wall decoration photo
Before applying any type of plaster, preparatory work must be carried out. They include grouting the surface from the remnants of the previous coating. Noticeable depressions and cracks must also be repaired. It is necessary to prime the surface, as it provides strong adhesion to the decorative mixture. And this is one of the main factors that ensures the durability of plaster.
Types of material
Decorative plaster is not limited to the velvet effect.
- The already mentioned Venetian style, whose structure resembles a smooth marble coating, changes its shade when the angle of light changes. This is due to the translucency of the coating layer. The color can be anything, because marble comes in different shades. But this coating is more suitable for formal rooms, living rooms, and offices. In bedrooms and children's rooms, pretentious marble walls are undesirable.
- There is also a material with a mother-of-pearl effect - “Ottocento la seta”. The composition includes acrylic paints diluted with water. Colors are chosen from a variety of shades.
- “Imperiale or Damasco” is a covering with a fabric effect, when the walls seem to be covered with silk. But applying such a layer is very difficult, so only experienced craftsmen can do it. It is unlikely that you will be able to make such a cladding yourself.
- Another fabric covering layer is called Antico Velluto. It differs from the previous one in more expensive material.
Work prices
For those owners who fully pay for the work of the craftsmen and do not try to do something on their own, you need to know the prices. The material is sold in stores and on the market at stable prices. The higher the quality of the material, the higher the price.
Important
The price of the work can be calculated taking into account the area of the base. It is 400-800 rubles. per square meter, depends on the skill of the worker and the cost of the material.
Velvet decorative plaster has a high cost, but it is still popular because it creates an indescribable feeling of coziness and comfort in the room.
Applying plaster
Base layer
This is the first mandatory layer of decorative plaster. Thanks to it, the relief layer will lie softer, and the base layer will hide defects in the base of the walls.
The layer is applied with a spatula in a layer of 2-3 mm evenly over the entire surface. Leave it to dry until completely hardened.
Each layer of plaster must dry completely before applying the next one.
Relief layer
Here, each wall drawing and panel creation has its own work process. But there are several rules that must be followed:
After the texture is formed, it must dry completely. Then, depending on the selected wall relief, you can lightly sand the texture with sandpaper, removing too protruding parts of the plaster.
Before painting, the wall should be primed again. Thus, the paint will not be absorbed into the plaster and the wall relief will not be washed away.
