- Mixtures with gypsum cannot be sanded once they have gained a certain strength. Therefore, it is important to start sanding on time: wait until the putty dries, but is not yet hard. For a person without experience, this stage can become a problem; it is possible that you will have to resort to the help of a specialist.
- It needs to be applied quickly. Putty can be found in the form of a powder, which is diluted with water. After mixing the composition, it must be applied within 20-40 minutes. The finished mixture cannot be diluted with water a second time.
Purpose of gypsum putty
The surfaces of walls and ceilings, finished with gypsum putty, become perfectly flat and smooth.
Walls can be painted, wallpapered and covered with other finishing materials. Putty can be used as the main material to create stucco panels and other decorative interior decorations.
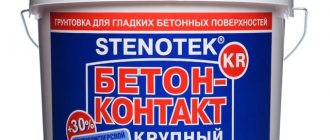
Apply gypsum putty to coated plaster, plasterboard-lined and cleaned concrete walls.
Gypsum putty is not used in rooms with high levels of humidity (bathrooms, kitchens, saunas, swimming pools). The finish quickly absorbs moisture and may lose its strength.
Types of putty
Gypsum putty is usually divided into three main types:
- Starting. This putty mixture is used for walls and ceilings that have many cracks and uneven areas. In addition, it can even out a discrepancy of 1-2 centimeters. The gypsum base mixture has a grayish tint and a granular consistency. Apply a thin layer. But if the differences in the surface are larger, then it is not advisable to use putty; a thick layer can move away from the wall and collapse. For such work, plaster is used. Even the Vetonit starting putty has a finer suspension.
- Finish. The composition is used to give whiteness and smoothness to walls and ceilings. The finishing putty must be applied before painting or decorating the walls. Its consistency is characterized by the absence of grains, and after hardening it becomes white. This makes it easier to apply the paint.
- “Start-Finish”, universal gypsum-based putty. Its composition is suitable for both leveling and preparing walls for finishing. Choosing this putty will help you save money and not make a mistake with quality. The gypsum putty composition Volma, Typhoon, Vetonit or Saten will not only help hide the seam, but also give the wall a white tint.
Putty composition
The basis of the finishing mixture is gypsum. The binder layered mineral belongs to the class of sedimentary rocks. It is mined in quarries. At industrial enterprises, the mineral is subjected to purification and heat treatment. The hard rock is ground into powder and a substance called gypsum is obtained.
Dry gypsum putty
In the production of gypsum construction dry mixtures, various modified additives of water-soluble polymers are used. Pure gypsum powder, dissolved with water, hardens within a few minutes in the same way as alabaster. To slow down this process and give the worker time to mix the solution, special substances are added to the plaster.
Additives increase the plasticity of the product and slow down the hardening process.
Popular brands
Popular Russian manufacturers include the “Starateli” brand. It allows you to putty various surfaces and is one of the leaders in the domestic market. If it is necessary to treat a surface on which plaster has already been applied, it is recommended to choose “Hercules”. Suitable not only for flat surfaces, but also for processing joints. For the final stage of preparation before the main cladding, Bolars is also suitable. Also, “Unis”, which is characterized by high ductility, is often used for the finishing coating.
Putty “Starateli” allows you to putty various surfaces and is one of the leaders in the domestic market.
Why and when should you choose gypsum putty?
Modern construction stores are replete with an abundance of offers for putties - the choice is simply huge, there are a lot of options for putty mixtures. Gypsum putty has been a known material for quite some time, and of course, today there are a lot of other, more modern analogues for it. What makes experts still prefer the good old gypsum putty? Here's why:
- Gypsum is an environmentally friendly natural material, it is completely safe for human health and does not pollute the environment. In general, the entire composition of gypsum putties is safe.
- The gypsum mixture is well suited for filling cracks, recesses and irregularities - it can, provided that the additive fraction is large, tightly fill the gaps and not crack.
- Gypsum allows surfaces to “breathe” as it conducts air and moisture well. Such putties have excellent vapor permeability, which allows you to create the right microclimate indoors.
- Gypsum putties have a plastic structure, which makes them easy to apply. These materials will be ideal even for a beginner who is picking up a spatula for the first time, and will make it easier for real specialists to carry out work and significantly speed up the puttying process.
- Their subsequent processing is also convenient - after applying the finish, it can be easily sanded to a mirror shine. Once dry, gypsum is very easy to work with and sanding does not require much effort.
- Gypsum putty is quite unpretentious and can be successfully used on various surfaces: drywall, cement, brick. It has a high level of adhesion, and in principle, it does not matter what material will be the base.
- Since gypsum putty always contains plasticizers and modifiers, after it has completely dried, shrinkage will not occur, which means cracks will not form.
- The consumption of gypsum putty is much less than that of some other types, say, cement putty, which means it is more profitable to use them.
- The cost of gypsum putties is very affordable; these finishing materials are available to everyone. Since their main component, gypsum itself, is not expensive, putties also have a budget price.
As you can see, gypsum putties have many advantages and all of them are significant, so despite the constant emergence of newer materials, gypsum putties continue to occupy a leading position in overall sales volumes for finishing materials. Among their shortcomings, there is only one that really deserves attention:
- Gypsum putties are not moisture resistant, which means they cannot be used in rooms with high humidity, such as a bathroom or kitchen. Typically, gypsum putties are used for the initial and final finishing of residential premises.
Advantages and disadvantages
Like any other construction and finishing materials, working with gypsum has its pros and cons. The following advantages can be highlighted:
- Environmentally friendly material. The composition of gypsum putty is made up of natural ingredients, while polymer putty is made up of artificial substances.
- Vapor permeability. This property helps create the right microclimate.
- Easy to use. Even a person without experience working with such mixtures can cope with applying gypsum putty.
- Quality of crack filling and ductility. A sufficient level of plasticity helps to avoid cracks after drying.
- Durability. The mixture is quite strong, hardens well and helps to preserve the result for a long time.
- Excellent compatibility with various materials. Helps to use gypsum putty on almost any surface. The adhesion strength of gypsum putty Volma suture, Saten is not less than 0.3 MPa.
- Economical. Prices for dry mixes are quite inexpensive, and shelf life is long, which can save a good amount of money.
In addition to the positive characteristics, some disadvantages cannot be avoided:
- Destruction in the presence of moisture. Do not use the mixture on surfaces exposed to moisture. It does not have sufficient water-repellent properties, so it is not recommended for use in the kitchen or bathroom.
- Temperature changes. Putty is quite demanding in terms of temperature conditions, so it is difficult to tolerate temperature changes.
- Inability to use outdoors. The absorption of moisture by the mixture makes it difficult to use gypsum for exterior use. The mixture will swell and flake off.
- Sanding time. Gypsum mixtures cannot be sanded once they reach maximum strength. Therefore, it is important not to miss the moment when the putty dries but does not harden. For an inexperienced person this is quite problematic.
- Quick application. The putty is sold only in the form of a dry powder and therefore requires dilution with water. After preparing the mixture, it must be used within the first 20-40 minutes. The already prepared mixture cannot be further diluted.
Which one should I buy?
Gypsum putty is usually presented in construction stores in two forms:
Dry. This product is sold in bags of various packaging: 5, 10, 25 and 50 kilograms. Depending on the size of the area to be treated, it is necessary to give preference to one or another volume of putty. Dry putty is convenient if you need to putty a large area - it is convenient to dilute it in portions, completely using up what has already been mixed.
Diluting the dry mixture is quite simple; to do this, you must strictly follow the proportions of water and dry powder indicated on the package. For better mixing and making the finished mixture plastic, it would be correct to use a construction mixer - a special attachment for a hammer drill.
Ready to use. This gypsum putty is sold in buckets and is completely ready for use. The only point is that it also needs thorough mixing.
Important point:
gypsum putties have a rather short shelf life. Usually the packages indicate from 6 to 12 months. Therefore, before you take your purchase out of the store, be sure to check how long the putty is still usable.
Manufacturers
Currently, one can note a relatively large selection of gypsum putty, but not all of it is popular and of high quality. Unfortunately, all materials produced in Russia and the CIS are of very questionable quality at an unreasonably high price.
Often, domestic putties are purchased for extremely low-cost work, where quality comes last. The best manufacturers of gypsum putty are companies from Poland and Germany, although their price is much higher - it corresponds to the quality.
Some of the best putties are considered to be products from the Knauf company, produced in various modifications. Often, when you search for “gypsum putty,” a photo of this company’s product appears. But there is no classic starter in their assortment, but there are finished products (after opening the bucket you can start putting putty) for each of the products in the range.
Ceresit putties, produced as starter and facade putties, have proven themselves to be quite good. Pairs perfectly with Knauf products. Also, some types of putty are produced by the well-known company Tikkurila, but it is known for its paints. But the putty of this company is also of high quality.
The Polish company Alpol, specializing in bulk materials, presents starting (S20) and finishing (S22) putty. Almost all builders who can buy this company give preference to it. But since Alpol does not produce a universal one, another Polish manufacturer Acryl Putz gained its popularity precisely in the segment of universal gypsum putty and rightfully occupies its niche.
Gypsum putty: comparison with similar materials
If in the process of finishing work you rely only on your own strengths and skills, you must approach the choice of putty composition with due care. In this regard, we will consider the answer to the question: “Which putty is better?”, and also consider why it is still better to choose gypsum putty. To do this, let’s compare its characteristics with the characteristics of an equally common polymer putty.
- Both compositions are intended for finishing work indoors;
- Using polymer or gypsum putty compositions, you can effectively fill voids and cracks, as well as level even complex surfaces;
- Despite the fact that polymer putty, unlike gypsum putty, is characterized by resistance to high humidity, this is difficult to attribute to a number of its advantages, since this contributes to the disruption of microclimatic parameters and moisture retention in the room, while gypsum putty manages to maintain them at the proper level ;
- Gypsum putty is characterized by high vapor permeability, while this is not typical for polymer compositions;
- The next advantage of gypsum putty compared to its polymer analogue is especially important if you carry out repairs yourself. Due to the characteristics of its composition, it is characterized by plasticity, which facilitates the process of working with it;
- Gypsum putty is an environmentally friendly material, while polymer putties contain synthetic components;
- The price of gypsum putty is another advantage of it compared to rather expensive polymer compounds.
Nuances and use of gypsum putty
This product looks like dry gypsum putty or a ready-to-use paste. Its base is gypsum.
To obtain expensive substances, white gypsum is used; if gypsum putty is cheaper, then yellow material is used. In addition, the composition contains modifiers from various polymers that are soluble in water, mineral additives (for example, quartz sand, mineral flour), etc. Polymers provide protection from rapid drying, from the appearance of cracks and scree.
The particle volume of the components affects the characteristics of the putty and its uses.
The smaller the particles, the thinner the applied coating will be. Most often, light compositions are obtained using finely ground marble flour.
If the composition is of high quality, then it can rub the base with shine, it turns out smooth, and besides, a minimum of material is needed.
Area of use
Many substances can only be used inside buildings. Only mixed products (based on acrylic, latex) can withstand the negative influence of the external environment, which is why they are used for facade work.
Often this gypsum mixture is used to prepare surfaces for the next treatment - for painting, for wallpaper.
Due to its good adhesion, this product is used for:
- Closing joints on the ceiling and walls.
- Closing defects and nuances.
- Removing depressions and crevices.
- Closing seams between GPC sheets.
- Closing chips.
With the use of gypsum putty, different bases are obtained smooth and even. Also, stucco molding, decorations, and so on are made from gypsum material.
It is important to know that it cannot be used with chipboard, brick and stone.
With OSB, such a gypsum putty mixture can be used, but only after it has been prepared and a primer layer has been applied to it.
Also, such a gypsum mixture is not used for bathrooms and saunas - because the material is very sensitive to moisture and becomes fragile.
Advantages and disadvantages
What is better for obtaining a flat surface and what differences other similar products have compared to gypsum substances will be described below.
Putting gypsum putty and acrylic-based polymer putty together, you can see that they are similar. So, they:
- They are used to treat cracks and joints and can make even a difficult base smooth.
- Easy to work with and aligns well.
- Very elastic, white in color.
But, of course, there is a difference too.
Gypsum, compared to polymer, allows steam to pass through. It does not affect the climate in the room and prevents mold and mildew from developing.
Acrylic and latex mixtures do not allow air to pass through as well, but they are not so afraid of water, so they are often used for exterior decoration. Polymer putties are based on synthetic materials, but gypsum mixtures have almost all natural components.
There are also other positive aspects of the mixture on plaster:
- Good price, low consumption.
- Ecological composition, non-toxic.
- It can work with different bases and goes well with various other putties (even cement ones).
- Good grip.
- It does not flake, does not crack, there is no scree, and does not shrink after drying for a long time.
- Easy to apply and then sand.
- Beautiful appearance.
This mixture also has disadvantages. It is important to stir it correctly, otherwise lumps may form and you will have to do everything again.
The finished mixture must be used immediately, otherwise it will harden, and it cannot be re-diluted. The shelf life of dry matter is up to 1 year, but polymer compositions can be stored for more than one year.
Also, an important disadvantage is considered to be high hygroscopicity. The solution cannot be used where there is a high level of humidity and different temperatures.
It is best suited for the bedroom, hallway, living room and other rooms where there is low or medium humidity.
How to prepare for applying gypsum putty
Before you start finishing the walls, you need to determine the consumption of gypsum putty per 1m2. To do this, the sum of the areas of all walls and ceilings to be finished is determined, and the thickness of the finishing layer is selected. Multiplying the initial data, which will be the amount of material consumption per coverage area.
With an approximate thickness of the applied layer of one millimeter, with a ceiling area measuring 3 × 4 m = 12 m², the mixture will require: 12 m2 × 1.2 kg x 1 mm = 14.4 kg.
If the coating layer is on average 3 millimeters, the result obtained is multiplied by 3 and the mixture consumption is 43.2 kg. Typically, the approximate consumption of material is indicated on the packaging of the mixture.
Advice: It should be taken into account that the mass of gypsum putty, the same volume as cement putty, is significantly less.
If there is a large difference in the levels of the top and bottom of the wall, gypsum putty can be applied in just one layer up to 60 millimeters thick, and the risk of peeling, cracking, or shell effect is practically absent. When performing work, the temperature inside the room and the base of the wall should range from (+5°C) to (+30°C).
To prepare the surface for putty you need to:
- Clean the wall from dirt.
- Remove dust.
- Remove layers.
- Remove old coating and other dirt on the wall.
- Remove metal hooks and staples.
- Pull out the nails.
- Cover the remaining metal parts with anti-corrosion protection and then re-prime, which will increase the adhesion of the solution.
- Substrates that strongly absorb moisture must be re-primed with special care. This:
- foam and aerated concrete surfaces;
- brickwork;
- cement-lime plaster.
The procedure for preparing the solution is as follows:
- The contents of the bag are carefully poured into a container of water. To do this, take approximately 0.6 liters of water per kilogram of dry composition. So for a bag of 30 kilograms you will need 18 liters of water.
- Everything is mixed well to a homogeneous consistency by hand, with a construction mixer or an electric drill with an attachment.
Preparation of gypsum putty
- The solution settles for up to 5 minutes.
- Stirring is repeated.
- The solution obtained in this way must be consumed within 30 minutes after dilution with water.
Tip: You cannot add foreign components to the resulting mixture.
Types, composition and indicators
According to general standards, all putty mixtures are divided into basic, finishing and universal. They have different indicators, properties, different particle volumes and additives. But each mixture contains gypsum and polymer additives, so the solution dries quickly and the base becomes even and smooth.
Often such materials are called gypsum polymers; they make the coating:
- Gypsum with a high level of plasticity.
- Gypsum with a high level of elasticity.
- Strength to bending.
- Prevents cracks from forming.
Such mixtures are sold in packaging from 5 to 50 kg, sometimes you can find the product in a jar or bucket with a ready-made composition (already with water) for 5, 10 or 20 liters.
Many putty materials are white, some have a gray tint; white products have the highest price.
The parameters of the substance differ and depend on their type and manufacturer. Here are the average technical parameters of such a mixture:
- Temperature at which you can work – +5° – +30°.
- Layer thickness (without the use of reinforcing material) – 10 mm.
- The dilution principle is 1 part of the dry mixture and 0.5 parts of water.
- Sets within an hour.
- Complete drying - at least 5 hours.
- Full strength in a week.
- Consumption – up to 1.4 kg per square meter.
The drying time of the product, consumption and other indicators can be found on the pack.
Basic putty
This substance is often considered plaster. The main purpose is to make the surface smooth, remove large nuances (strong differences), and strengthen the material for the socket boxes.
Often the base composition is used to make the plaster smoother, and in new buildings such a solution is used as the first layer or placed after the primer coating. To save money, buy a base with a gray tint; it has a lower cost.
It is covered with a thin coating, and if there are large irregularities, then you need to buy reinforcing material. If you don't use it, the base will peel off.
It is better to remove the largest defects using cement-based plaster.
Finish putty mixture
This product creates a smooth base for subsequent finishing.
Often the finishing material is coated once, resulting in a smooth white finish. You can glue wallpaper on it, apply paint, even light colors.
In appearance, the cleanser is smoother (since there are no large grains) and white compared to the base mixture.
Universal material
They also sell universal substances that have unusual properties. They are applied in a thick layer with a small volume of grains.
The area of use is very large - removing seams on GPC, removing cracks, various defects, leveling the surface.
In addition, the material has a very white tone, and the finishing agent does not need to be used.
How to apply gypsum putty
The instructions for applying the material suggest:
- The solution, prepared in advance, can be applied to the walls in one layer up to 50 millimeters thick, or locally up to 80 millimeters thick.
- Gypsum putty is applied to walls from bottom to top, and when applied to the ceiling, it is applied to itself.
- When covering the ceiling with a layer of putty of more than 20 millimeters, it is better to use galvanized mesh for reinforcement.
- The applied mixture is leveled by zigzag movements of the h-shaped rule. About an hour after applying the composition and starting to set, the excess material is cut off using a trapezoidal rule, as in the photo, and all remaining irregularities are filled with the mixture.
Excess gypsum putty is removed as follows:
- To remove traces of the trapezoidal rule, after trimming the excess mortar, the surface is smoothed with a wide spatula.
- After 20 minutes, you can begin finishing the surface.
Next, the surface is prepared for finishing:
- The wall is abundantly wetted with water.
- There is a pause until the surface of the wall becomes matte.
- The surface is rubbed in a circular motion using a plastic grater.
- The surface is smoothed with a wide spatula.
- To obtain a perfectly smooth surface, it is necessary, no earlier than 6 hours after the mixture has completely hardened, to generously fill the plastered surface with water, and then smooth it again with a spatula.
- In this way, the surface is prepared for wallpaper or painting. In this case, further puttying of the surface is not required.
Surface after applying finishing gypsum putty
- Optimal conditions are provided so that there is normal hydration of the solution, it sets better, and its stable adhesion to the base is ensured.
Advice: Until the surface is completely dry, no drafts are allowed in the room; the putty should not be dried intensively or exposed to sunlight.
- At the end of drying, the room is ventilated, which will remove excess moisture from the drying putty.
What is gypsum putty, the technical characteristics of the material, and the method of application are shown in detail in the video in this article.
Despite the fact that applying such a coating is quite simple, plasterers are required to have skills, abilities, and special care when performing individual stages of work. After correct application of gypsum putty, the surface is smooth, closed, uniform, without smudges, scratches, bubbles and stains.
Preparation and application
Before using gypsum material, it is important to familiarize yourself with the sequence of actions and strictly follow the rules for preparing the base and mortar.
Preliminary work
All surfaces to which putty will be applied must be clean. Dirt, dust, stains are removed. To clean cracks and recesses, you need to use a vacuum cleaner; it will quickly remove even small particles. Afterwards you need to use a deep penetration primer - it will improve the adhesion of the putty to the base.
Preparation of the solution
The instructions always describe in detail the process of preparing the building mixture if it is sold in dry form. Tools and mixing container must be clean. The algorithm of actions is as follows:
- pour the required amount of water into the bowl;
- add the powder in small portions (it is best to sprinkle it by hand, so the distribution throughout the water will be uniform);
- as the powder exceeds the water level, wait 2 minutes to soak the mixture;
- stir the mass manually, but better - using a construction mixer or drill with an attachment (at low speed);
- If the consistency of the mass is liquid, there is no need to rush to add a new portion of powder - in a couple of minutes the mass will thicken.
You should not immediately prepare a large amount of solution. Its shelf life is limited, the mass will harden and deteriorate.
Applying putty
To work, you will need several spatulas of different sizes. Using a small one, take the mass and place it on a large spatula. Then, with even, smooth movements, strokes are made on the ceiling or wall. In this case, the tool must be held at an angle of 50-60 degrees to the surface, pressing evenly on the base.
The thickness of one layer should not be higher than 5-8 mm for the starting layer. The directions of movement on the walls are from bottom to top, on the ceiling - towards you. If necessary, use reinforcing mesh. If the layer is more than 1.5 cm, it is better to use galvanized tape, which is screwed with dowels. The applied strokes are leveled by subsequent movements of the spatula.
After the first layer has hardened, apply the second, and so on until a smooth surface is obtained. The last layer is the finishing layer. After final hardening, the putty is sanded using sandpaper attached to a block. Afterwards, the wall or ceiling can be primed and the final finishing can begin.
Features of ceiling putty
Plastering the ceiling Unlike vertical planes, finishing the ceiling is associated with certain difficulties. You have to work standing on a stepladder or sawhorse. To do this, you need to stand with your arms stretched up. All this causes a lot of inconvenience to the employee. The support platform should be selected so that its height provides the most comfortable working conditions. 2 people must participate in finishing the ceiling. One worker directly works with a spatula. An assistant scoops the solution onto a spatula and gives it to the plasterer. This will significantly speed up the process of puttingtying the ceiling.
Types of mixtures
Plaster
Gypsum putty is a paste or powder mixture based on gypsum. Gypsum is usually white, but materials with a yellowish tint are also found. Additionally added to the composition:
- modified polymer water-soluble additives;
- modifiers;
- plasticizers.
These components of the solution protect it from premature drying, shedding, and protect it from cracking.
Sometimes there are mineral fillers inside. When the components are correctly combined, a high-quality, reliable mixture is obtained. It dries quickly and forms a smooth, durable film on the surface, which reduces the consumption of facing material.
All components included in the composition give the cladding the following qualities:
- Resistant to cracking. This helps to achieve a normal level of plasticity.
- Vapor permeability. Due to this property, an ideal microclimate is created in the room.
- Easy to cover. The surface is smooth, without breaks. Grinding on such a machined surface is carried out quickly.
- Strength, hardness, durability of the coating. It is not afraid of temperature changes, humidity fluctuations, and other characteristics that can negatively affect the condition of the coating.
Attention:
Gypsum putty is needed to level the plane of ceilings, walls or floors. It is also suitable for both indoor and outdoor work. It masks cracks and seam joints on drywall. The gypsum base has good adhesion with any material.
Starting
The starting solution is used to level out unevenness in the wall. It is applied not in one layer, but in several at once. It is available in three available versions:
- cement-based;
- on plaster;
- polymer.
- Cement putties are indispensable when finishing rooms with high humidity. It has large grains in its composition and a grayish color. It is very difficult to hide with the finishing layer.
- Gypsum mixtures contain gypsum and lime. Such components do not tolerate a humid environment and cannot withstand sudden temperature changes. They are used only in dry climates, indoors, heated in winter.
- Polymer solutions are a universal material that can be used to level walls and ceilings. The putty is impervious to moisture and temperature changes.
Starting mixtures are used for:
- leveling uneven walls;
- finishing of window openings, door jambs;
- to eliminate joints between floor slabs.
Before working with these compounds, surfaces must be carefully prepared. They are cleaned of small construction debris and dust. Then they pass over the entire treatment area with a damp cloth. The surface is primed, sometimes several times in a row, to improve the adhesion of materials. While the primer dries, prepare the composition. The dry mixture is diluted with cold water, the temperature of which should not be higher than 30 degrees.
Advice
The homogeneous mass should not be too liquid in consistency and resemble thick sour cream. After good mixing, wait a few minutes again so that all components are thoroughly combined, and mix the final time.
The putty hardens very quickly, so the solution needs to be stirred from time to time and worked quickly.
Finish
Finishing mixtures are intended for final decorative finishing work. Their purpose:
- level the plane after applying the starting mixture;
- serve as the final layer for other decorative coatings (wallpaper, paint, other decorative cladding);
- eliminate defects on the ceiling and walls;
- enhance the protective properties of the treated surface: impart water resistance, frost resistance, heat resistance, make the base strong, immune to external mechanical influences and vibrations;
- impart the necessary performance qualities to the base layer (ductility, absence of cracking);
- improved coating quality after previous rough processing;
- Uniform color, beautiful appearance.
Attention
When mixed, a good finishing mixture should be homogeneous, without lumps, with good adhesion, i.e. at the molecular level there should be a strong connection with the surface material.
It must be made of high-quality components that would ensure the formation of a flat plane.
Finishing putties are easily applied to any type of substrate. The solution does not slide down the wall, and cracks do not appear after hardening. Can be easily sanded and painted a uniform white color. The finishing mixture differs from the starting mixture in a number of characteristics:
- Contains fine powder with a diameter of no more than 0.7 mm. The starting composition contains a coarse-grained component.
- Suitable only for leveling the last layer of putty, regardless of the number of layers. If the starting composition serves to level and correct the curvature of the base, then the finishing composition refers to the final stage of finishing.
- The hardening layer is always smooth, while the rest have a rough structure.
The difference between finishing putty is its plasticity, ease of sanding after drying, elasticity, and uniform color. “Finish” is ideal for applying to any other. It can become a final coating that does not require additional processing.
Sealing cracks
Characteristics and rules for preparing a mixture for sealing cracks:
- Purity. When preparing, do not use dirty construction tools or last year’s compounds. Only fresh, uncontaminated solutions should be used.
- Use only clean water for mixing. It should not contain additives or impurities, so as not to create flaws on the surface during application.
- You cannot mix facing mixtures at high speeds using the mechanical mixing method. Manually stir in one direction.
- The viscosity of the mixture should resemble thick sour cream.
Cement-sand compositions and sealants are suitable for sealing cracks . Polymer putties are elastic and retain their working condition for a long time. They can be used for application all day long and do not need to be mixed, but are immediately applied to the surface. Among polymer solutions, latex and acrylic are distinguished. The latter are used for both external and internal work. Latex ones are only suitable for indoor use.
For the job, a screwdriver is used, with which the crack first expands and finally takes the form of a wide triangle. Deeper cracks are converted to a trapezoidal appearance. Using a stiff brush, remove small debris from the inside and the material remaining after jointing. Existing damage must be covered with a primer. The composition can then be applied with a sponge or a brush with coarse bristles.
Important
You can use a gypsum mixture, but it can only be used to treat the work surface for 2 hours. After this time, the putty loses its original qualities, hardens quickly, and then it must be thrown away.
Safety precautions
Both during any construction work and when finishing internal fences, it is imperative to adhere to safety regulations:
- The plasterer's hands must be protected with rubber gloves.
- When finishing ceiling surfaces, it is imperative to protect your eyesight with glasses from getting putty particles into your eyes.
- When working at heights, you need to wear shoes with rubber soles to prevent a person from falling from a height. It is necessary to have one more person present who could promptly protect the employee from an accidental fall from a height.
- When preparing the putty solution, you must wear a respirator or gauze bandage. This will protect against involuntary inhalation of gypsum powder and its entry into a person’s lungs.
- The electric mixer must be in good condition and not present a risk of electrical short circuit during operation.
These are not very complex safety requirements, but do not forget about them.
In addition to gypsum putty, there are varieties of finishing materials of polymer origin. However, in terms of its qualities, gypsum-based putty is significantly superior to other similar materials.
General information
Features and purpose of gypsum putty
In the role of the latter, quartz white sand or mineral flour and other components are used. Polymers will provide protection against premature drying, cracking and shedding. The size of the fraction of different additives determines the characteristics of the product and the type of its use. The smaller the fraction, the thinner the finished layer will be when applied to the substrate being treated. Usually the most weightless and light putties are made on the basis of finely ground marble flour (particle size is 1/10 of a millimeter). Good products make it possible to rub the surface to a shine, making it extremely smooth, while using very little material.
Area of use
Large quantities of products can only be used to treat indoor walls and ceilings. Only mixed materials (with latex or acrylic) can withstand the effects of negative environmental factors, and therefore they are used even outside the house. Typically, such compositions are used to level walls for further finishing - for painting and gluing wallpaper.
Due to its excellent adhesion, the putty can be used for:
Sealing ceiling and wall joints.- Grouting various flaws and errors.
- Filling cracks and holes.
- Sealing joints between plasterboard sheets.
- Removing chips.
When using a gypsum product, any surface will become even and smooth in appearance and touch. From this mixture you can make stucco molding, panels, and interior decorations. But here it is important to remember that it is incompatible with chipboard, stones and bricks. OSB boards can be treated with this product, but only after preliminary preparation and thorough priming. You cannot yet use this mixture for a bathroom, sauna, or swimming pool, because the finish will begin to absorb moisture and quickly lose its strength.
Advantages and disadvantages
What material should be used for leveling and how the gypsum mixture will compare favorably among similar products - we will consider further. Comparing polymer acrylic putty with gypsum putty, you can find a lot in common.
They both:
- Designed for sealing seams and cracks, effectively leveling complex surfaces.
- Easy to apply and perfectly leveled.
- They have a white color and elastic texture.
But still there is a difference. Gypsum material, unlike polymer ones, is vapor permeable. It does not disturb the microclimate of the room, does not provoke the formation of fungal colonies, and latex and acrylic allow less air to pass through, are more resistant to humidity, and therefore they are often recommended for use outside the room, that is, facade work. Certain polymer products contain artificial ingredients, but gypsum products are almost 100% natural.
Let's consider the advantages of gypsum-based putty:
- Favorable cost and economical consumption per square meter.
- It is environmentally friendly and does not emit toxicity.
- Possibility of application on various surfaces, excellent compatibility with other putties as a second layer (even cement-based).
- High adhesion properties.
- No cracking, delamination, shedding, or shrinkage after drying for a long time.
- Easy to putty and further sanding.
- Strength of the finished layer.
- Beautiful appearance.
Please note that the material has few shortcomings, but they still exist. The product should be diluted correctly, otherwise there is a risk of lumps and damage to the entire mixture. The finished solution should not be applied for a long time so that it does not harden; you will not need to dilute the product again. The drying time of the dry mixture is usually no more than 1 year, while polymer putties are stored for several years.
Another huge disadvantage will be the high degree of hygroscopicity. Use the material in damp areas with regular temperature changes. It is better to use putty on plaster in the bedroom, living room, office and other rooms with low and normal humidity levels.
How to carry out the work?
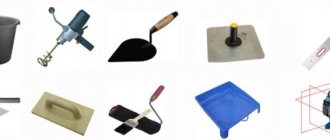
Necessary tool
To work you will need:
- Drill with mixer attachment for mechanical mixing of dry mixture with water. The goal is to obtain a homogeneous composition without lumps.
- Spatulas of different lengths and widths. It is better to prepare several large spatulas, the maximum size is 40–50 cm. The smallest one should be prepared in case of working in hard-to-reach places.
- Brushes, rollers. Necessary for priming before work. Increases strength and degree of adhesion to the treated surface.
- Rule. It is used for uneven walls when puttying is done in a thick layer. A long metal rule works well for leveling thick layers.
- Spirit or laser level. Before starting the initial puttying, install test beacons using a level to check.
- Sandpaper for rubbing the surface, giving it a smooth appearance. Sandpaper 240 allows you to achieve the perfect result.
- Manual skinner. Its handle has clamps that help you hold the sandpaper well and process surfaces with it.
- Container for mixing the mixture. This could be a bucket, a small construction tank, or an ordinary bowl of any size that you wouldn’t mind throwing away.
Materials
- It is necessary to select a putty mixture. You should focus on consistency and accessibility when using (for the finished composition). You need to pay attention to the shelf life of the dry mixture too. It is not recommended to buy either a ready-made composition or a mixture for self-preparation with an expired expiration date. The putty is selected according to the size of the fraction. The smaller it is, the smoother the plane will be.
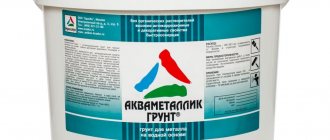
- To work, you will need a primer: you need to take good compounds with a long shelf life.
- It is necessary to protect the surface of objects from contamination. To do this, plastic film is placed on the furniture if it cannot be taken to another room.
- Wear thick clothing, gloves, a gauze bandage, and protect your eyes with goggles.
Applying the solution with a spatula
Starting compositions are applied to the surface with a wide spatula, with which the solution is distributed evenly in all directions, and horizontal, vertical and diagonal movements are performed. To improve the quality of the putty, it must be prepared in small portions to avoid premature drying. To finish corners, use special corner spatulas.
Advice
The starting layer should dry well after application. Only after it has completely dried can you work with the topcoat.
The thickness of the last ball should not exceed two millimeters. Such a base can give completeness to the wall covering and ensure a uniform fit.
Work with a spatula is performed in the following sequence:
- The tool is turned to the wall at an angle of 30 degrees.
- To obtain the ideal angle, apply a small amount of solution with a spatula and distribute it evenly over the entire surface.
- If putty is applied to level under wallpaper, you need to determine the exact thickness and type of wallpaper. These indicators affect the thickness of the leveling putty solution that is applied to the base.
- The starting layer should not be distributed as diligently as the finishing layer. The first basic one lies on the surface without additional manipulations. The finish always requires leveling, sanding and grouting.
- After application, the last layer is carefully rubbed down and allowed to dry completely.
From the video you will learn how to putty walls with a spatula:
Priming and sanding walls
After the putty has completely dried, the base is primed. The number of primer layers depends on the degree of absorption of the composition, which depends on the type of walls. Concrete surfaces require application of primer several times. The absorbency of wood is low, one layer is enough.
After the soil has completely dried, putty is applied. The finish is subjected to grinding, which is pre-leveled and dried. Sanding is done with sandpaper. The larger its fraction, the less neat, but more rough the wall will ultimately turn out to be. This option is good for a decorative effect, which is achieved by processing with coarse sandpaper.
Advice
Small fractions of particles in sandpaper create a smooth effect. It is used to treat the base for wallpaper, painting or to create a visual decorative effect.
Why sand walls between layers and whether each layer needs to be primed is explained in the video:
Final wall putty. Technology
After the primer has dried, the surface is ready to apply the finishing putty. To prepare the composition, take a plastic bucket and pour a small amount of water into it, less than half. To begin with, it’s better to make a little composition to fill your hand.
Then pour a little putty there, while stirring with a mixer. The consistency should be slightly less liquid than thick sour cream. We achieve uniformity of the composition, the complete absence of lumps, otherwise balls of dry powder will form on the wall.
The mixture should not roll off the spatula. If this happens, it means it is too watery. It is very difficult to work with such a composition.
We proceed directly to puttying. We have two spatulas in our hands: large and small. Please note: the spatula is not absolutely even.
It is curved more in one direction than in the other. It is necessary to define the “rounded” side. If you putty another one, stripes will remain on the surface.
Speaking about spatulas, it is worth noting that you need to choose stainless materials. Otherwise, during subsequent puttying, rusty stains will remain on the wall. We take a little mixture onto a small spatula and transfer it to a large one, distributing it evenly over the entire surface.
Starting from the window, we begin to putty the wall, creating a non-transparent layer of 1-2 mm. If you make the layer too thick, it will be more difficult to smooth out and cracks may form as it dries. When working with plasterboard, the direction of movement of the spatula does not matter, since the surface is smooth.
On a plastered wall, dried large particles have their own direction. Therefore, we simply repeat it when puttingty. This will become clear as you work.
Important: the uniformity and smoothness of the putty is very dependent on the lighting. Flaws that are not visible in daylight may become noticeable when illuminated with electric light.
Puttying walls for painting implies a uniform layer of composition without gaps. If the layer is thinner in some place, the paint will have a different shade. The difference between wallpaper putty is that the wallpaper will hide small errors.
As you work, various stripes and stains will appear on the wall. Let's level out the situation as best we can. But don’t forget that there is still life-saving polishing.