Reasons for wall deformation
The optimal humidity for logs, beams or rounded logs is 12 percent. Since it is impossible to achieve exactly the same moisture content for the entire batch of building materials, deviations in linear dimensions are inevitable after completion of construction. This happens because the outer side of the wall is either heated by the sun or wetted by rain, while the inner side is mainly exposed to heat from heating systems and water vapor, which are inevitable in any home. And since these impacts are uneven and occur at different times of the day and even at different times of the year, the result is that the walls “lead.” And until the entire prefabricated structure reaches dynamic equilibrium, deformations of one degree or another are inevitable. And they are stronger, the more the humidity of the building material differs from the recommended one. It is not for nothing that all owners of newly built wooden houses, after at least a year of living in them, are given recommendations on leveling the walls and further caring for them.
Causes of curvature of walls
If we talk about log cabins, then the cylinder can also be subject to bending, like a wild whip with bark, although to a lesser extent. This is due to violations of technology, the degree of dryness of raw materials and its processing from the penetration of moisture and the effects of sunlight. More details:
- The fastening of each crown is a precisely verified construction technology. The length of the fixing dowels should be such that it is enough with the remainder to connect two crowns. Through holes in adjacent logs must be drilled so that the fasteners protrude 10-15 cm from each side.
The spacing of the dowels is from 50 to 60 cm. If you do more, the log will twist and defects cannot be avoided. A frequent arrangement of holes can split the log and longitudinal cracks on the whip will appear too quickly.
- Logs with natural humidity should be selected for construction - up to 12%. If you purchase absolutely dry raw materials, then cracks during fixation will become commonplace - the whip will lose its viscosity.
A raw log can take a thousand years to shrink and at the same time change its shape right in the log house. And this is also not conducive to straight walls.
- Treatment. The worse it is, the better the logs absorb moisture, and in the heat they lose it. Frequent changes can constantly change the shape of the logs and thereby bend the walls.
This effect can be prevented if you pay attention to the wood in terms of insulating it from moisture. To do this, after construction, the walls are treated with protective compounds that prevent natural precipitation from the outside and steam from the inside from penetrating into the depths of the logs.
Alignment methods
There are only two of them - mechanical and decorative. Both should be used for best results. So, how to straighten the walls of a log house using available methods:
Basic materials for leveling walls
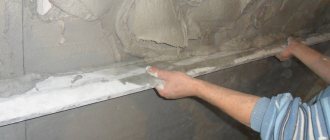
For leveling, specially shaped metal plates, steel angles with a side of at least 6 cm, threaded studs, large washers and nuts screwed onto the studs are used. The structures are mounted not only in the place where the curvature occurred, but along the entire length right up to the end of the wall so that the entire plane is subjected to corrective loads. The diameter of the studs must be at least 10 mm, taking into account the dynamic resistance of the wood. The length of the stud is selected taking into account the thickness of the walls. The most convex part is pulled with a pin to the transverse (vertical) beam. Which, in turn, is tightly attached to the lower crowns.
In addition to studs of sufficient length, you will also need self-tapping screws with a length of 90 mm and a diameter of at least 8 mm at the base of the head, a grinder, an electric drill with reverse and speed control.
Pros and cons of methods
Each technology has its own advantages and disadvantages. It is up to the owners to decide which method to choose.
Plaster
“Wet” plaster is one of the most common methods of leveling any surface. Many years of practice have revealed all the strengths and weaknesses of the method.
Pros:
- strength. But this only applies to cement mortars. You cannot screw a self-tapping screw into clay, lime, or plaster;
- durability - all types of plaster have a minimum service life of 30 years;
- fire resistance - prevents the fire from spreading to the walls if there is a fire inside;
- the heat and sound insulation of the house is improved;
- hardness - the surface is difficult to damage even in clay with light impacts, not to mention the CPR;
- environmental friendliness - can be used in the bedroom or nursery;
- the ability to restore damaged areas.
Minuses:
- high cost of work;
- high labor intensity of filling shingles;
- the technological process is extended in time due to the drying of each layer - up to 30-45 days;
- the need to install communications only on top of the finishing - grooves for wires and cables cannot be cut;
- complex technology - difficult for a beginner to understand.
Panels
The panels have their own advantages :
- no finishing is needed - they give room for imagination when decorating the interior;
- simple installation;
- work is completed in a short time;
- affordable for people with below-average income;
- have a long service life;
- make it possible to carry out additional thermal insulation with basalt wool or expanded polystyrene;
- easy to clean;
- You can hide wires and cables.
Alignment methods
Before starting work, they study the basic design of the building with its layout of load-bearing walls and partitions. To level the wall, select the element that is most out of plane, using for this purpose threaded rods (studs), metal plates or corners with holes drilled in them for these studs and nuts with flat washers.
If the lower beam or log has been pushed out, you can correct the situation with the help of wedges. To do this, a wedge is made of sufficient size, a stationary wooden element is attached at the bottom of the crown, and between it and the crown they begin to drive a wedge into the ground with a sledgehammer. This is done gradually, over a number of days or even weeks, until the protruding part falls into place. In these cases, plasterboard or OSB is used, which is attached to the inside of the wall, having previously created a sheathing on the surface from vertical (and possibly horizontal) log bars with a cross-section of approximately 4 x 5 cm. It’s even better to make the sheathing metal, since it is not subject to expansion cycles like wood.
Wood is a breathable material. Therefore, before covering the interior walls of the house with clapboard, plasterboard, fiberboard, OSB and other materials:
1. Soak the base, logs or timber, with an antiseptic solution so that the walls are not affected by fungus, bacteria or pests;
2. Provide ventilation between the sheathing and the wall;
In addition, after straightening the wall material, all wood must be impregnated with a composition that protects against dampness.
Leveling with metal corners (Mechanical method)
The hole for the pin is drilled with a diameter slightly smaller than the diameter of the pin itself, in order to avoid play in the wood, which can cause cracks along the entire length during tightening. The pin is driven into this hole with a hammer, corners with pre-drilled holes in them are put on both sides, washers are placed and the nuts are screwed until they stop. Over time, the beam/log will straighten under the pressure of the metal plates of the angle, and then the nuts will weaken and will need to be tightened. The leveling process usually takes about a month; in wet weather it goes faster.
These actions are taken mainly for single protruding logs or beams. If there is a large section of the wall, you cannot do without jacks that lift the crowns - and from the straightened base of the house, actions are taken to eliminate the resulting curvature.
Decorative alignment method
It is used after the mechanical method, when subsidence and other major defects are corrected using jacks. Only after this does it make sense to decorate the interior surface of the house with facing materials such as plasterboard or fiberboard. And which, without correcting large distortions, will simply be torn from their places as a result of the next inevitable deformations of the wooden walls.
So, you have completed the repair work using metal angles and jacks. But this made the house less presentable. What to do?
- Remove all dirt from the walls, which inevitably serves as a source of wood contamination by fungi and pathogens. Impregnate the walls with a composition that protects against rotting.
- The logs/beams are covered with a vapor barrier film with the shiny side facing the room.
- Lathing is installed on the wall that has been corrected from the outside using previous power methods. Preferably metal. But in rooms where high humidity can be expected, it is better to use a wooden one, since condensation will accumulate on the metal, which will inevitably transfer to the wood of the walls.
- If the walls of the house are made of solid logs with a diameter of 25 cm or more, they do not need to be insulated. And between the lags of the sheathing under the cladding you can place communications. Although they do not interfere with insulation, it will not hurt to lay cables, pipes, etc. in the spaces between the logs with mineral wool.
- When doing a full-fledged cladding of the walls inside, you need to start this operation from the ceiling due to the inevitable further shrinkage of the walls. In this case, the drywall is not joined, leaving approximately 3-4 mm technological gaps. So that they do not catch the eye, they are filled with elastic putty.
Leveling walls with plywood
This is done in almost the same way as leveling walls with plasterboard.
When choosing the thickness of the sheathing material, you need to focus on plywood with a thickness of 5 to 10 mm. Otherwise, even trying to lean against the wall will cause it to deform.
Wooden walls are not sheathed directly with plywood - otherwise, in the event of even the most minimal (and inevitable) shrinkage of a wooden building, the sheets will become deformed. It is necessary to sheathe not the walls directly, but the sheathing that has been mounted and leveled, checking the verticality of each of its elements.
A decorative way to correct wall unevenness
It is used primarily indoors using drywall. Why is it recommended to do it mechanically first?
This is obvious - under the decorative cladding, the process of subsidence of the walls will continue, and the day when the whips will begin to break the drywall is not far off. So, if all manipulations with jacks and corners are completed, but the house has lost its attractiveness, proceed as follows:
- They impregnate the wall with protective compounds, having previously cleaned it of dust, debris and dirt - this is an accumulation of pathogenic bacteria for wood, which should be removed immediately. If the caulk causes complaints, then they get rid of it and insert a new one.
- A vapor barrier film is attached to the inside of the logs - vital activity from the inside allows for the production of a large amount of moisture, which will have nowhere to go except to accumulate in the wood. A foil membrane is best suited for this purpose; it is attached with the shiny side out.
- Next, repairing the walls of a log house begins with installing sheathing for attaching drywall. It is worth choosing a wooden beam, preferring it to a metal profile. Everyone remembers that the temperature difference between materials can cause condensation, and this is detrimental to the log.
- A house made of solid logs with a cross-section of 25 cm or more does not need to be insulated, so the sheathing will create excellent opportunities for hiding communications under the cladding - pipes, cables and other things. But if during operation there was a problem with maintaining temperature, then you should not neglect the insertion of foam boards or basalt wool into the sectors.
- If you decide to do cladding on all planes, then finishing the walls with plasterboard in a log house starts from the ceiling. It's all about shrinkage - pressure starts at the top and, possibly, damage to the skin. The sheets are cut into convenient squares or rectangles and fastened with self-tapping screws to the profiles.
You should not join drywall - a gap of 3 mm will become a necessary technological action due to constant shrinkage. It is better to fill the seams with elastic putty, then the sheets will move without fractures or other defects.
In this way, the walls in the log house are aligned. The essence of such repairs is simple and accessible to craftsmen of any level.
Leveling the walls in a log house may be required after the completion of the shrinkage period or several years after construction. It is quite difficult to achieve perfect installation, and after the walls dry, the timber may turn out to be curved, and additional rough work will have to be carried out before finishing. Leveling the walls of a log house can be done in several ways; most often, such work is inexpensive.
How to level walls in a wooden house made of timber
There are mainly three reasons for a wall made of timber:
- Insufficient drying of wood for construction.
- Incorrect sawing of the log into beams, with a displacement away from the core, as a result of which, during drying already in the wall and under the influence of dynamic loads, the beam bends in the direction opposite to the core.
- Non-use of dowels during construction.
A dowel (translated from German as “nail”) is a small (3-4 cm) block of rectangular or round cross-section, which is inserted into a pre-drilled or otherwise made hole in a log house made of timber or logs, fastening the elements of the log house together and not allowing them to move. Installed strictly vertically.
The leveling of wooden walls is carried out using the already described mechanical method. The walls are first measured with a plumb line - traditional, with a weight, or with a high-tech laser. If there is a curvature of the wall with the extrusion of the beam, to remove the excessive load, jack up the upper beam in the wall, tighten the bulges with corners with studs or large self-tapping screws. After leveling, the jack is lowered.
The easiest way is to straighten the curvature of the internal partitions at the openings - door and window, and then secure the corrected door and window jambs.
conclusions
Thus, we considered options for leveling walls in a wooden house. In fact, it’s difficult to advise anything, since everyone has their own idea. Some people just want to cheaply renovate a dilapidated village house, while others want to create a modern interior from a wooden house. On the one hand, there are not many finishing options, but on the other hand, it all depends on your budget. Agree, finishing walls with plywood without a frame and applying decorative plaster with all the associated work to prepare the walls are completely different budgets.
In any case, the choice is yours!
Write in the comments how you leveled the wooden walls of your house!
Candidate of Sciences, permanent expert of the site, a real, and not abstract (unlike other resources) person.
Houses made of wood will never lose their relevance. After all, wood is a unique building material. In addition to the fact that it can store the energy and warmth of nature, it is also beautiful. There is one more feature: it does not lose its attractiveness for a long time. Absorbing time, it ages gracefully.
In addition, wooden walls are warm, quiet, and cozy. Therefore, the idea of covering rounded logs or profiled timber with another type of finishing is somewhat barbaric. But in a private house there are several wooden walls that sometimes still have to be leveled: the bathroom and the kitchen. In the bathroom you need to get a flat surface for tiles, in the kitchen - for wall cabinets and an apron. Another thing is old houses, with untreated, cracked logs. Here, the alignment of wooden walls for a different type of finish is dictated by necessity.
Finish options
These can be surface materials - OSB, fiberboard, plasterboard, plywood. Fragmentary - lining or laminate. Covering – plaster that can be applied to surfaces.
Before sheathing the inside with any material, log or beam walls must be treated with moisture-proof and antiseptic compounds.
OSB board
Oriented strand boards are made from small industrial chips (shavings, coarse sawdust) bonded with various resins. This resin itself is a strong antiseptic that slowly evaporates over a period of years. Therefore, the walls of a wooden house covered with such a slab are less susceptible to putrefactive bacteria and fungi.
OSB is inexpensive, weighs little and has some moisture resistance (about 10%), which can be increased by using special impregnations.
Drywall
A material made of cardboard walls impregnated with gypsum during the drying process, and with a gypsum layer between them.
Flexible, non-flammable, non-toxic, light in weight. Easy to install, does not require drilling with special drills - with a little effort it is pierced with an ordinary awl, after which it is fastened with self-tapping screws using a regular screwdriver.
Fiberboard, or fibreboard (hardboard)
The material is environmentally friendly, as it consists of small wood waste compressed and bonded with adhesives or resins. Has a perfectly smooth surface on at least one side. Cheap, dense, resistant to mechanical stress, easy to install.
Plywood
Durable natural material, inexpensive and easy to install. Its main disadvantages – flammability and fear of water – are easily mitigated by special impregnations. It is better to use birch plywood, which is denser, for finishing.
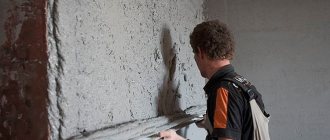
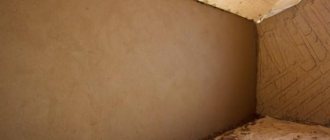
How to level walls in a wooden house from the inside using plaster
Fig.1
Plaster is applied to thin wooden panels fixed directly to the walls of the house. (Fig. 1) Or on an artificially made small sheathing. Or on plasterboard, plywood, OSB, etc. To prevent the plaster from cracking and crumbling during the inevitable movements of the walls as a result of seasonal swelling or drying of the wood, the sheathing must be “floating”.
Walls made from “wild” timber, that is, from natural, non-glued timber, are not plastered! Because when they shrink and dry out, they behave in the most unpredictable way!
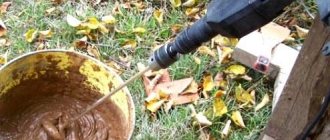
Plaster with special mixtures sold in stores, or with a homemade composition based on cement and fine sand with the addition of silicate or PVA adhesives.
Sheathing nuances
Next, we cover the walls with plasterboard in a wooden house. This can be done using self-tapping screws. You need to start from the bottom. If the length of the plasterboard sheet is not sufficient to cover the height of the wall, no problem. In such a situation, we cut off part of the piece from the new sheet and install it in place. Please note that the fastening of adjacent plasterboard sheets must be done in a staggered manner, offset.
The sheet is attached to self-tapping screws, but the latter are screwed in no closer than 10 centimeters from the edge. The step for fastening is 30 centimeters. It is important to carefully screw the screws into the plasterboard sheet. You need to stop screwing when the head of the screw has been recessed one millimeter into the sheet. This will be enough to securely fix the structure to the wall. Please note that if you tighten the screw too tightly, it can damage the plasterboard itself. In this case, the fixation will be unreliable. How to level walls in a wooden house? Then you can start decorating.
Installation of additional structures
As additional structures for leveling walls inside the house, plasterboard is most often used, installed on a frame (sheathing). This choice is due to all its positive qualities in comparison with its substitutes, namely: non-flammability, non-toxicity, flexibility, tensile strength, ease of installation.
Fig.2
Mounted on both wood and metal sheathing. The disadvantage is that due to the mandatory use of lathing, part of the area of the rooms is “eaten up” (Fig. 2).
Surface preparation and start of work
- The wall must be cleaned of dirt, old finishing if present, nails, screws, etc.
- Cracks and chips are repaired with putty.
- Impregnation is done with a special drying compound.
The walls inside and outside the house are treated with a deep impregnation antiseptic, the treatment is done twice. Lines for the profile and guides are marked.
- Markings are made of horizontal profiles that will add rigidity to the structure.
- Crooked walls are corrected mechanically before installing profiles.
Large gaps and cracks are sealed with mounting foam or moisture-resistant putty.
Installation of racks is done in increments of 600 mm, this is the standard. The joints between the finishing sheets must have technological gaps, which in rooms with excess moisture (bathrooms) are taped with a special moisture-resistant tape and covered with a layer of putty.
All structures for leveling inside the house must be checked with levels and plumb during installation.
How to level the walls of a wooden house using a frame
When leveling walls inside a house, the obligatory attributes when installing the frame are a level and a plumb line. With their help, a single plane is set up for the installation of plasterboard, plywood or other coverings.
Fig.3
The alignment of walls in a wooden house is carried out using a wooden or metal frame. Metal is sold specifically for drywall, so its range is the most extensive. Made from steel or galvanized sheet with a thickness of 0.55 to 0.8 mm. Has a U-shaped, T-shaped, L-shaped or otherwise bent cross section. Fastened with self-tapping screws of different lengths. (Fig. 3)
The vertical posts are installed first, using large “power” screws. Then horizontal lines in increments of 40-50 cm.
Sheets of plasterboard are placed on the sheathing in an order reminiscent of brickwork, that is, the seams and joints of adjacent sheets should be spaced from each other at a distance of approximately half the length of the side of the sheet. The installation distance between the screws is from 250 to 400 mm.
How to level log walls?
Wooden houses are built using a variety of materials . With their help, the walls are prepared for finishing. Thanks to the use of various materials, the walls of a wooden house acquire an aesthetic appearance and create a comfortable atmosphere.
Immediately before leveling the log walls, the most problematic areas and irregularities are determined , as well as the curvature of the corners and uneven joining of adjacent logs.
If there is already old finishing on the walls, it must be removed and the surface must be cleaned of nails or old screws that may interfere with the alignment with new materials.
To re-level the walls, you need to:
- Treat the surface with antiseptic substances to prevent wood rotting, the appearance of fungi and insect pests;
- When the antiseptic layer has dried, you need to install chipboard boards . Alignment will be carried out to them;
- Drywall may be suitable as materials for leveling . It can be attached directly to chipboard if the surface is flat. If the surface has slopes, it is best to use the frame method of attaching drywall, which consists of metal profiles;
- When the installation of drywall is completed, you can proceed to putty work.
Features of wall deformation in a new house
If possible, check the moisture content of literally every piece of wood used for construction yourself. If this was impossible, and the house you rented, which at first looked like an advertising picture, began to sag, changing the curvature of the walls, use the recommendations of the department “Mechanical method of leveling wooden walls of a house” with through holes for studs.
Wall deformations in a new house are usually subject to timber, which is subject to alternating action of heat and cold, dryness in sunny weather or humidity in rainy weather. At the same time, houses made from laminated veneer lumber are less susceptible to these deformations than those made from “wild” solid timber.
Fig.4
Pressing a part that is convex due to shrinkage into a strict vertical row can be done not only using a metal corner, but also using a thick, reliable wooden block. In this case, the supporting surfaces will be large washers for the nut (Fig. 4). This leveling method will cost you less. So when deciding what is the best way to level the walls in a wooden house, decide on the materials and your financial capabilities
Fig.5
The lower beam that extends beyond the vertical is knocked down using a dug-in support and wedges. The upper one is pressed with a jack on the stand; after correcting the deformation, the jack is removed (Fig. 5).
Let's start installing the frame
We continue to study the question: “How to level the walls in a wooden house?” So, everything is ready. All that remains is to make the frame and sheathe it. The plasterboard sheets are fastened directly to the frame using self-tapping screws. But to secure the frame to the beam, special fasteners will be required. Since wooden structures can not only shrink, but also swell, absorbing moisture, the eraser will definitely move. Therefore, the height of the drywall sheets should be 10 centimeters less than the height of the room. This gap is subsequently closed using skirting boards.
To make the frame, we need:
- Metallic profile.
- "Crab" (first level connector).
- Closed sliding rafter support.
So, first you need to cut the eye in the sliding support. We don't need it anymore. Next, holes are made in the “crab”. Through them the support will then be fastened to the surface. Only the horizontal strip is fixed directly to the wall, and then the “crab” to it (and nothing else). This system allows you to avoid future deformations.
We attach the steel profile to the “crab”. If the work was carried out according to the instructions, then the profile should easily move vertically due to the sliding support. What's next? After this, jumpers are installed.
an old house
Fig.6
Old houses include structures that are more than 5 years old. During this period from the beginning of the commissioning of the object, the entire structure completely subsides. The consequence of such subsidence is usually deformation of the wall near door and window openings. How to level wooden walls in an old house? By pressing using thick beams or metal corners with a side of at least 6 cm. Under the opening, supported by a jack on the rack, a corner with three drilled holes for large self-tapping screws is placed. They are lubricated with machine oil to prevent cracking of the wood and screwed in one by one, evenly pulling the corner to the socket block. The metal must be painted after installation to avoid corrosion.
Inside, the walls can be leveled using a combination of wooden support beams and metal bars, as in Fig. 6. Tires are installed at the top. In the middle and bottom of the wall, tightening the nuts is done gradually, at intervals of days to weeks. After straightening, the tires remain in the wood and are subsequently decorated with trim.
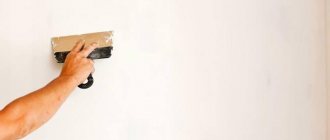
Method number 2. For small flaws - putty
Putty in the bathhouse is used to level the walls according to the beacons - but only when it makes sense - when the height differences in it are very small, or it is used to complete the alignment of the corners of the walls in all rooms. For this work you will need a narrow and wide spatula, a mixture and a flat-bottomed cuvette. So, step by step:
- Step 1. Prepare the mixture. To make it without dry lumps, it is better to knead with a construction mixer. Its consistency should be such that the cone retains its shape when stirred with a stick. After which the putty will thicken and will need to be periodically diluted with water or primer. To prevent the mixture from drying out, it must be placed in a cuvette and covered. And it’s easy to check whether it has sufficient density: if it holds well in a vertical position and doesn’t slide off the spatula, that’s what you need.
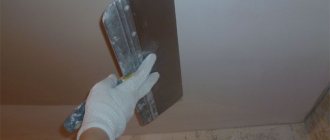
- Step 2. The mixture is applied to the surface of the wall to be leveled using a spatula - in small strokes. Next, using vertical and horizontal measured movements, it needs to be leveled to a thickness of 1-2 mm, while holding the spatula itself at an angle. There is a secret here: the greater the angle of inclination of the spatula to the wall, the thinner the layer will be - and therefore, to ensure its uniformity, the tool is fixed with a free hand.
- Step 3. As soon as the mixture “sets”, it is advisable to carefully rinse it with a primer - this will remove unevenness and sagging. And after the first layer has dried, which will take at least a day, the wall must be sanded with sandpaper - for convenience, it is wrapped on a small block. If a second layer is needed, then the first one is well primed - otherwise, cracks due to moisture that can be absorbed into the previously applied putty cannot be avoided.
In principle, even more serious irregularities can be dealt with with putty alone - if only you use a special mesh. Although the process itself will be more labor-intensive.
Necessary tools for leveling walls
Tips and tricks
- Don't rush to completely furnish your new home. After the builders hand it over to you, sometimes it takes at least a year for the processes of drying and shrinkage of its walls to be completed. In houses made of laminated timber, this process lasts months.
- After the first winter, if the walls are frozen, take care to cover them with plasterboard or other similar material on the sheathing, between the elements of which you can additionally lay stone wool insulation.
- When renovating an old house, make sure that the wood of the walls is not affected by rot, fungus or wood-boring beetles. This can be easily determined with any cutting tool: if the tree crumbles, the wood is diseased. And serious costs are required to replace rotten elements or impregnate the walls with antiseptic and strengthening compounds.
- Before you start repairing and leveling the walls, clean them of layers of old paint, putty, putty and other things. Remove all nails and screws from the walls and, if possible, dismantle communications.
Video: Leveling the walls of a timber house
The thickness of plywood for leveling is 6-9 mm; thinner material may be deformed. For fastening, frame and frameless methods can be used.
- When decorating old houses, plaster can be used. The plaster solution makes it possible to level the surface from the inside and outside, it will allow you to prepare the house for finishing.
A special feature for wooden walls will be the installation of an inclined frame made of so-called shingles - thin wooden planks that are placed in several perpendicular layers.
Without such a frame, the plaster simply will not stick to the wall. Leveling options must be provided at the construction stage so that the costs of this work are included in the estimate. The height of the walls of a one-story house made of timber is on average about 3 meters (the net height of the ceiling in the room will be 2.7 m), and, knowing the dimensions of the house, you can calculate how much it will take to cover the walls with plywood or lay other materials. Plywood can simply be painted; drywall will require additional finishing.