Logs as a wall material are superior in many respects.
Its advantages are completely justified. But for the sake of objectivity, it is worth considering the existing shortcomings of this popular material.
The most common disadvantage is vulnerability to external factors and biological pests. But this problem can be solved on our own.
Why do you need to process?
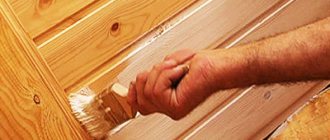
A log house is a choice in favor of environmental friendliness, taking care of your health and your loved ones. Treatment of the walls of wooden houses is necessary not only as protection, but also to extend the service life of the material and stability .
When it comes to the reliability of construction materials, each material, including logs and other types of wood, is considered based on all possible factors affecting it.
These are the following factors:
- Flammability.
- Fire resistance.
- Resistance to the activity of biological organisms.
- Resistance to changes in ambient temperature.
- Cracking, etc.
These and other factors force owners of wooden houses to take protective measures before such problems arise. To summarize on all points, the processing provides the following:
- Protection of logs from destruction.
- It is also important for the log to maintain its fresh appearance for as long as possible. This effect can only be achieved through timely processing.
- The treatment prevents the attack of fungi and other wood rot.
- Protects against moisture.
- Protects against insects.
- Extends the service life of the building.
- Improves the aesthetic characteristics of the building.
- Increases resistance to fire.
Why do you need exterior painting of a wooden bathhouse?
Bark is the natural protection of wood; during the construction of a log house, the workpieces are debarked, so the wood becomes vulnerable to atmospheric influences, insects and bacteria. The risk of damage to the material increases when building near forested areas and near water bodies.
What happens if you don’t do the exterior finishing of the log house?
- A debarked log is infested by wood-boring beetles.
- Constantly changing air humidity throughout the year creates optimal conditions for the growth of mold and fungi, which primarily multiply in hard-to-reach places, from where it is very difficult to remove them.
- A weathered log takes on a gray tint, which degrades the aesthetics of the exterior.
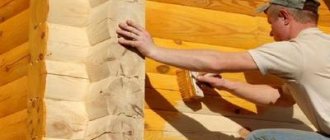
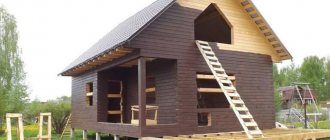
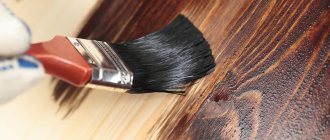
- Painting the outside of a log bathhouse will help avoid mold and rot and create beautiful facades.
The photo shows the result of painting a wooden bathhouse with Borma paint.
Types of materials
Materials for protecting logs are divided into the following types according to functionality:
- Whitening.
- Fire retardant.
- Antiseptic.
Let's look at each of the options in more detail.
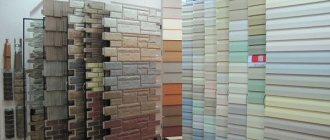
Bleaching agents
The most popular means for bleaching logs are as follows:
- Holzentgrauer is a universal water-based impregnation.
The manufacturer is the well-known DUFA brand, distinguished by excellent product quality. The brand offers a wide range of colors for the treatment fluid. Holzentgrauer not only protects the wood, but also helps restore the original physical properties of the material. By applying this product, you can forget about such problems as black or blue logs, cracks, dampness, fungi, mold, insect larvae or fire. The product is very easy to work with. It belongs to the safe types of chemical compounds. Price – about 200 rubles. for 1 kg.
SAGUS .
It is used for a wide range of sawn and planed materials, and is also capable of protecting even concrete, tiles, stone or brick. The product is suitable for both external and internal use.The drug actively protects the log from fungal infections and darkening of the surface. It also removes existing larvae of harmful biological microorganisms.
When working with SAGUS, it is necessary to monitor the ambient temperature - it should be at least +5 degrees. Before applying the composition, the surface of the wood should be sanded properly, the log houses should be dried and cleaned of dust.
Repeated application is permissible no earlier than 40 minutes. Complete drying will take about 24 hours if the humidity does not exceed 60%. From a technical point of view, SAGUS is a low-hazard composition for humans. Average price – 800 rub. for 10 l.
- NEOMID 500 is a popular whitening and cleansing composition.
It is effective against the larvae of destructive fungi. If the log already has the first signs of damage, then NEOMID 500 stops this process and restores the original properties of the wood. It is often used to process pallets on which food products are transported and stored. When working with NEOMID 500, it is important to ensure that the product does not get on the galvanized fasteners of the structure. It is permissible to use a glass or plastic container to dose the product. The product is applied diluted with water in a ratio of 1:1 - for the protective layer and 1:2 - in the presence of visible damage and darkening. Price – 3800 rub. for 24 kg. - League Bioshield – a radical product based on chlorine bleach. It is also considered a medicinal agent. Its action is also effective against the most insidious “enemy” of wood – the porcini mushroom.
Even if there are old foci of fungal infection, treatment with League Bioshield in 2 layers will return the log to its original characteristics.Bioshield can be effectively applied manually using a paint brush. With this method, the product is absorbed as much as possible by the log. From 600 rub. for 10 liters.
Fire retardants
Fire retardants should be applied to wooden structures as a priority. The market offers many options; let’s look at some brands in more detail:
PHENYLAX is a fire-bioprotective agent used for many types of materials.
It is used before applying a moisture-proof coating. Protection is provided against all types of biological damage, including fungi and mold.After treatment, the effect of application lasts up to 4 years. Cost for 220 kg. – about 18,500 rubles.
- PIRILAX-3000 – this product perfectly promotes the spread of fire in case of fire.
It also actively prevents the appearance of biological organisms on the surface of wood. A single application in an open space around the structure protects the log for up to 5 years, the antiseptic effect lasts up to 7 years. Internal treatment of buildings with this product remains effective for 16 years. Price for 50 kg. – from 18,200 rubles. - KSD-A – fire retardant composition.
The composition includes fire retardants and biologically active substances. The drug has fungicidal, bactericidal and adaptogenic properties. The product also has a high degree of fire protection. The product is available in various modifications, as well as in the form of a dry mixture. To apply, the mixture is soaked in water and the surface is soaked. Dosages and complete instructions are usually included with the product. The cost of a volume of 10 liters is from 1380 rubles. - SENEZH OGNEBIO is a product for primary and repeated fire protection treatment of wooden structures.
It cannot be used if the surface was previously covered with drying oil, paint, varnish or other film-forming compounds. Can be applied by soaking, dipping, spraying or brushing. Product consumption ranges from 300 to 600 g/m2. In some cases, injections are given. Cost for 10 liters – from 1200 rubles.
Antiseptics
Antiseptic treatment extends the service life of wooden structures. This treatment can be carried out both inside and outside. Initial processing is usually carried out at the log manufacturing stage - by the manufacturer.
Antiseptics are divided into two types: persistent and non-persistent. Less durable products are applied from inside the room. For external treatment, you should choose the most durable antiseptics. Persistent antiseptics dry extremely slowly, but they are necessary for their preservation.
Popular brands of antiseptics are as follows:
Aquatex is a broad-spectrum protective agent based on strong biocidal additives.
Well protects against blue stains, fungus, mold, fading, darkening and atmospheric factors. This product can also be used as a decorative solution. Apply at temperatures not lower than +5 degrees and humidity not higher than 80%.The log for processing can have a moisture content of up to 40%. Material consumption is 1 liter per 13-15m2. After the first coat, wait at least 2 hours before applying the second coat. You can choose a colorless or colored option. Cost for 3 liters – from 1200 rubles.
- Biosept ultra is a persistent antiseptic that effectively protects the original condition of the log. Can also be used for coloring purposes. The minimum consumption is 150 g. On 1 m2 of surface. Re-application is permissible after 2 hours. Complete drying requires at least 24 hours. Suitable for both indoor and outdoor use. Price for 1 liter – from 600 rubles.
- Prosept interior is a water-based antiseptic that can protect wood for up to 30 years.
Excellent fight against mold fungi and wood-boring insects. It is used both to prevent and to stop the already running process of damage to logs. The biocidal composition of the product creates resistance to condensation moisture and a barrier effect. Consumption per 1 m2 is 250-350g. Price for 1 liter – from 300 rubles.
Sealing cracks in a log
If the logs are cracked, then first you need to seal the cracks, and only then paint or impregnate them. Today, there is a very huge selection of wood putties and sealants on sale. In most cases, they can be divided into groups:
- Acrylic based sealants
- Polyurethane sealant
- Silicone sealant
Acrylic-based sealants can be used for various cracks, where the depth and width can reach up to 2 or even 3 cm. They are not afraid of deformation and are durable. It is mainly used for interior work, but there are also options for exterior work. It paints well with various paints, there are moisture-resistant and non-moisture resistant options. It is not very elastic, so if the log house shrinks, it is better not to use it.
Although there are special modifications that allow this sealant to withstand deformation. On sale you will find acrylic sealants of various colors, you can even choose according to the type of wood. If selected correctly, the sealant will be almost invisible against the background of the wood.
For example, acrylic sealant “Accent”-136 can be used both inside and outside the building. There are various colors on sale: white, gray, larch, pine, oak, walnut, rosewood. The deformation process after hardening can reach 25%, and this will not entail a deterioration in the quality of the repaired cracks. Therefore, if your log house still shrinks, you can use this sealant without fear.
Work with it can be carried out at temperatures down to -10 degrees, the main thing is that snow or rain does not fall on the working surface. The start time for hardening is two hours, complete drying can take up to three weeks.
Polyurethane sealant not only seals cracks but also glues them together. It is not afraid of vibrations and moisture, moreover, moisture makes it stronger. It is similar to polyurethane foam, so it hardens very quickly and you need to work with it carefully, avoiding contact with exposed skin. Main advantages: withstands large deformations - since it is the most elastic sealant, it can be painted, even with water-based dyes. It emits a pungent odor during hardening, so it is mainly used for outdoor work or in rooms with good ventilation. Available in color schemes: white, black, gray. Very suitable for sealing cracks in log houses.
For example, Sikaflex-221, a one-component polyurethane sealant, is not afraid of ultraviolet radiation. Can be used at temperatures from -40 to +90. Country of origin: Germany. Before application, the surface must be clean and dry. Work must be carried out at temperatures from +10 to +35.
Silicone sealant is probably a universal option. After all, it tolerates moisture and deformation well. Can be used for both internal and external work. Available in a wide range of colors. Very durable, can last more than 50 years. Not afraid of temperature changes, can be used from -50 to +80. The only drawback is the inability to paint it, but the wide range of colors that this material is available for sale can compensate for this.
Works outside and inside the building
Processing can be carried out both after completion of construction and during the process. The measures used during the construction process are called structural timber protection methods.
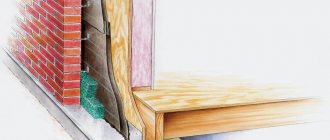
Wall ends
The ends of the log require a separate approach, since this part is very vulnerable to moisture. To protect against the effects of moisture, the log should be treated with a water-repellent compound.
It is important to intensively treat the ends of the lower logs, since they need to be protected not only from moisture in the atmosphere, but also from the ground. Therefore, the lower part is processed on average in 5 layers, and the upper elements need 2-3 layers of processing.
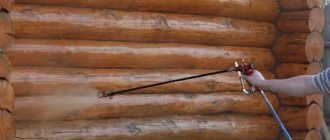
End processing is carried out in one of the following ways:
- If an aqueous solution, then use a spray bottle.
- Thick mixtures are applied using a roller.
- You can use a regular brush.
- Logs are often impregnated by immersion. But of course, this must be taken care of before construction begins.
What rules must be followed?
It is recommended to sand it properly before processing.
This solves a number of issues such as:
- Masking cracks.
- Removing tree bark, if any.
- Improves the aesthetic properties of the material.
- Makes the surface smooth.
- Increases the ability to impregnate other materials.
Sanding is carried out on a dry surface of the log. If the log is not dry enough, then sanding leads to delamination of the log. The process is carried out in several ways:
- Using a grinder and an abrasive disc.
- Using a sander with different attachments.
- Polishing with a fine-grained nozzle.
Healthy! It is recommended not to throw away sawdust after sanding, but to use it in the garden or vegetable garden as a valuable material.
The drug SAGUS is used at a rate of 150-200 g/m2. Phenylax can be applied at temperatures even -15, but not lower. If we take into account application in several layers, then the calculation should be made as follows: at least 500 g. products per 1 m2 of surface. The maximum consumption occurs during the initial application .
Description of technology
The most difficult work in this direction is considered to be the processing of already affected material. The procedure consists of the following steps:
- Find the most affected areas on the surface.
- Make markings with a marker.
- If you have to make an injection, make a deep cut with a long drill.
- Treating the surface with stiff bristles, removing dust, dirt and paint residues.
- A foam roller is used for application. It is dipped into the product and gently rolled over the surface.
- For injection, take a large syringe with a needle, fill it with the product and pour it into the prepared hole in the log. You can administer the product intermittently, in parts. This way it soaks in better. Upon completion of the procedure, the hole should be sealed with a piece of plasticine.
What to protect from
During operation, timber and rounded logs are subjected to various loads, the effects of which can be neutralized by compositions of narrowly targeted or universal action. Several types of substances are suitable for processing upon completion of log house construction:
- antiseptics prevent the spread of microorganisms, fungi, insects;
- a huge risk for housing is created by the flammability of wood, which can be reduced with fire retardants;
- the tendency to rot and destruction increases under the influence of moisture, and special water-repellent compounds can block access to the wood;
- Intense sun rays, which can discolor and dry out the material, causing it to crack, have a powerful effect on the outer surface of log houses. UV protection significantly reduces the negative impact of radiation from the sun on the log house.
The specificity of the influence of substances is that some of them should penetrate deep into the material, and the other should concentrate outside.
Step-by-step instruction
Processing a log frame consists of several simple steps. The order is as follows:
- Surface grinding.
- Application of bleach.
- Application of antiseptic.
- Fire retardant layer.
Reapplication is carried out after the first layer has dried completely . SAGUS, for example, can be reapplied 40 minutes after the first application. But the drying time varies for different products. Information about this is usually indicated on the packaging or in separate instructions.
How to coat a log house after sanding
Question:
Good afternoon, Semenych! Please tell me, in the spring of 2018, a log bathhouse was installed from a winter Siberian forest (diameter 36-48), the lower three crowns are made of larch, the top is pine. The roof and ceiling were done almost immediately after the frame was built. Now we sandblast it.
The question is what to cover after sanding (primer, bioprotection, fire protection), in what order and in how many layers. We want to coat the outside with matte or semi-matte varnish. Which products are better - there are many manufacturers, and prices vary. Please advise.
Best regards, Elvira, Irkutsk.
Answer:
Hello, Elvira from Irkutsk!
In our practice, we most often cover the outer surfaces of log houses with belinka, tecurilla, and penotex.
True, sandblasting is far from the best option. We prefer to grind with conventional angle grinders; they leave less abrasive on the surface of the logs.
However, if after any type of sanding you walk over the logs with brooms, mops or a vacuum cleaner, there will be much less of this abrasive.
Builders do not have a unanimous opinion regarding the order of operations for coating wood with specific compositions.
Some first treat with antiseptics, which include both fire and bio protection, then apply a primer, and only then paint and coat with colorless varnish. Others do not use this order.
There are now a lot of different compounds on the market, I wouldn’t like to advertise them. In each case, you should carefully read the instructions on their labels. In this case, the most important thing is that all subsequent compositions are compatible. Because sometimes this is not the case, and after a year or two, or even a shorter time, the layers begin to separate from each other, crystallization of salts, their peeling, cracking, etc.
As a rule, brands from more well-known manufacturers, preferably imported rather than home-grown ones, have higher quality and longer-lasting characteristics. Although sometimes I had to run into expensive counterfeits of domestic “Kulibin” ones.
As they say, there are no comrades according to taste and color. But choosing colors and shades of dyes is also a difficult decision.
No matter how high-quality the dye is, over time (when after a year or two, when after five, or even ten years) it can still change its color tone. Atmospheric environment - rain, fog, dew, snow, etc. doing their job.
Most often, darker colors (like rosewood) are less susceptible to changes over time compared to lighter colors (pine or Oregon).
But not everyone likes dark colors, too gloomy, lighter ones are much more pleasant.
When you paint it in a light tone, it can darken very quickly and it happens that you can’t look at the logs of such a log without tears.
Just for fun, walk around and look at the wooden houses with different colors. I'm sure you'll notice the differences right away. And only then make a decision.
Varnish finishes are generally the right choice because the varnish fills the pores left after painting and the wood is less affected by the atmosphere.
So read everything I have said and take action. I understand that I’m not giving you definitive recommendations, but what you read shouldn’t make things worse.
In any case - good luck!
The method of applying the compositions is also important. The use of compressor devices for spraying them is productive, but the traditional old method of rubbing in with brushes, although a slower process, is of higher quality.
Construction in Moscow and Moscow region
We work with a guarantee! Wide range of construction services.
Foundation, walls, ceilings, roofing, turnkey! +7 (905) 797-20-34
luxurycomfort.ru
Other questions on the topic of log houses:
- All about log houses
- Replacing logs in log houses
- About caulking log houses
Replacing logs in log houses
- Cost of replacing the top rims of a log house
- Replacing a cut-off wall with foam blocks
- Replace half a wall in a log house
- Replacing a rotten wall of a timber house
- Replacement of lower crowns and cracks in logs
- Replacing the lower logs of an already sheathed house
- Rotten places in logs
- Vertical log house made of round timber
- What to do with rotten logs from a log house
- Rotten crowns in the middle of the wall
- Replacing a log frame with a brick or block
- Replacing the lower crowns of a log house
- Replacing rotten crowns with bricks
- How to strengthen a corner in a log house
- When you need a fifth wall in a log house
- Vibrations in the log house
- Remove the three lower crowns of a log house
- Replacing a wall in a log house
- Replacing the lower crown with brick or foam blocks
- Joining logs of different diameters
- Replace the corner of a log frame with sleepers
- Replacing the lower crowns of a log house with a concrete wall
- Rotten log in a log house
- Restoration and cladding of a timber frame
- Reconstruction of an old log house
- Replacing a rotten corner of a house
- Repair of rotten beams in a log house
- Replacing the lower crowns of a log house with blocks
- Replacing rotten logs of a log house
- Replacement of the lower crown of the house
- Replacement of a main wall made of timber
- Transfer of logs in height in a log house
- Alignment and replacement of the lower crown of the log house
- Replacing rotten logs under the window with blocks
- 2 corners rotted at the level of the log house windows
- Cost of work to replace the top rims of a log house
- The log house is rotting next to the vent
- The wall near the log house in the five-wall building has rotted
- Repair of old logs
- Replacing a log house wall with a foam block
- Replacing the lower crown in a wooden house
- Replacing logs in a log house
- Replacing logs eaten by insects
- Replacing the lower crown of a timber frame
- Replacing the lower crowns in the house
- Replacing the top rotted crown of a log house
- Replacement of the lower crowns of the bath
About caulking log houses
- Caulking log corners
- Rules for caulking a log house
- Caulking of an old log house
- Cold corners in a log house
- Caulking and insulation of a log house
- Caulking a log bathhouse over old moss
- How to caulk a log house covered with clapboard
- Should tow for a log house smell?
- How to fix a chopped pediment
- Re-caulking of a log house
- Caulking and log processing
- Re-caulking the bathhouse with moss
- Calculation of the amount of jute for caulking a log house
- Caulking of a log house lined with bricks
- Caulking tight logs
- Dismantling inter-crown insulation
- Log caulking
- Log house for three years in the open air without a roof
- Re-caulking of a log house
- The basics of caulking a log house
- Caulking and sanding of a log house
- Caulk of a log house from the inside
- Do-it-yourself log caulk
- Caulking of a log house made of rounded logs
- Sanding timber
All about log houses
- Log house made of logs or timber?
- Estimate for finishing the log house
- Forced shrinkage of the log house
- How to fix a crooked timber frame
- The lower crowns of the log house are getting wet
- Correction of a 9-year-old log house
- Rot between the crowns of a bathhouse log
- The frame sank and the window jammed
- Led walls made of profiled timber
- The crown of the log house was turned out
- The dovetail insert moves apart
- Construction of a log house in the South of Russia
- Painting the outside of the log house
- Is casing necessary for small log windows?
- What to do to prevent the log house from twisting during shrinkage
- The quality of the log after 5 years of settling
- Protection of the sauna frame
- Rebuilding an old log house
- Strengthening the fifth wall of the log house
- Bathhouse gables made of rounded logs
- The top crown of the frame was torn out
- How to cut large arches in a log house
- Remaking door and window openings in a log house
- The partition made of logs was torn out
- Repair of an old log house
- Finishing the log bathhouse immediately after installation
- Which interventional insulation to choose
- Lining crowns made of logs with natural stone
- How to beautifully seal shrinkage window openings in a log house
- Tiles and laminate for log floors
- Ceramic tile floors in a log house
- Strengthening the log house
- Align the crown for installation of ceilings
- How to coat a log house after sanding
- Editing the geometry of a log house
- How to install profiled timber in a log house
- Installation of crossbars in a timber house
- New doorway in an old log house
- Reconstruction of a log house
- The bottom beam on the plinth gets wet from the inside
- Treatment of the log house before cladding the outside
- The walls of the log house got wet through and through
- The first crown of a log house made of oak
- Insulation of the stone base of a log bathhouse
- Overcut in the house
- Basement and blind area for an old shrunken log house
- Uneven shrinkage of the frame
- Repair of an old 2-story log house
- What kind of foundation for a 6 by 8 log house?
- How long does it take for a log house to shrink on a pile foundation?
- Increase the height of the log house without removing the roof
- Wind protection between the foundation and the log house
- Problems when lifting an old log house
- Insulation of a log house with sawdust and lime
- How to lay a log house from timber of poor geometry
- Pouring a concrete floor in a log house
- Interfloor ceiling in a log house
- Waterproofing the log house from the foundation
- Renovation of an old log house
- Repair of an old brick-lined log house
- How to strengthen a log house
- When to put a roof on a freshly assembled timber frame
- When to cover a log house with natural humidity
- Support under the log and shrinkage of the log house
- Beetles in logs
- Door in the end wall of a log house
- A team for the construction of a log bathhouse
- The cut of the log on the outriggers of the log house darkens
- Rot on the lower crown of a log house
- Vertical log house
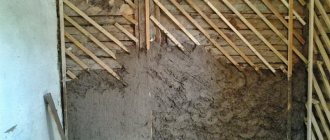
- Which finishing plaster for clay to choose
- Mushrooms on a log house
- Log house without frame and floor beams on slab
- Dry rot of the lower crown of a timber house
- The upper corner of the frame has been removed
- Demolition of a log house wall
- Displacement of profiled timber in a log house
- How to build up log extensions of a log house for a veranda
- The log house was mowed down
- Installing a shrinkage compensator in a finished log house
- Twisted the logs of the log house before assembly
- Log house with nails instead of dowels
- How to protect a log house without a roof from rain
- A set of works on the external finishing of a log house made from central fiber boards
- Repair of a log house after a fire
- Is it possible to put a roof on a log house for the next year?
- Warm joint with sealant for log house
- Insulation and cladding of a log house made of corrugated timber
- Insulation of a log house from the inside
- Concrete floors in a log house
- Shrinkage of log walls old and new
- The procedure for finishing a log house
- How to preserve timber from spring to winter
- What comes first: flooring or door casing
- Dismantling half of an old log house
- Types of beam connections
- Sealing the joint between the roof and the frame from OCB
- Cleaning a log house from old paint
- Connection of two log houses
- Support column in a log house on stilts
- The difference in the shrinkage of a log house between winter and summer felling
- Dismantling and moving a house made of profiled timber
- Supporting floor beams in a log house
- Preparing a log house for winter
- Guarantees when cutting a log house on a plot
- Chop into a bowl or warm corner
- How to lower the ceiling in a log house
- The timber turned blue in the rain
- Preservation of the log house in a non-temporary gathering place
- Consultations on a timber house
- Sheathing of a house made of cylinders without insulation
- Scheme of a log house with outlets and a ridge roof
- How to lay a carriage while lying down
- Reinforced concrete slab on a log frame
- How to assemble a log house from twisted timber
- Repair of a cut in a log house
- Installation of a log house on a columnar foundation
- The chopped gables of the log house are shaking
- Fastening beams in a log house
- The top beam in the log house was driven into the screw
- How to cover a timber façade
- Waterproofing the frame of an old house from the foundation
- A log house without nails is being pulled apart
- Sheathing a log house
- Cutting the lower crown in the log house
- Settlement of a log house made of used timber
- The log house rotted in the castles
- The corners of the log house are rotting
- How to strengthen a log house
- Work plan for interior finishing of the log house
- Log processing procedure
- How to lay a log house in the rain
- Cut the lower crowns of the log house
- Sheathing a log house immediately after construction
- Heating and windows in a new log house
- Processing the crown of an already built house
- Painting a timber house
- Blind area and shrinkage of the log house
- How to enlarge a house made of timber
- Connecting a timber house with a brick extension
- Finishing a timber frame with jute rope
- Diameter of a log for a permanent home
- Treating the log house with an antiseptic during assembly
- Reconstruction of a wooden house
- Connecting timber in cuttings
- Protection of the ends of the timber at the corners of the log house
- How to connect two log houses together
- Cutting a balcony doorway in a log house
- When to casing a newly assembled log house
- Insulation of gables made of lining
- Gaps between the logs of the log house pediment
- How to preserve logs before cutting a log house
- Raise the frame to increase the ceiling height
- Methods for joining timber in the walls of a log house
- Raise a log house to increase the underground floor
- Cladding a log house with clapboard before shrinking in winter
- When to remove the compensating jacks of a log house
- Log house for three years in the open air without a roof
- How to make a cut in a log house
- Make a house from an old bathhouse (timber)
- Moving the log house to another location
- Log house hanging on dowels
- The fifth wall in a log house made of smaller timber
- Should I paint the backing board in a log house?
- Remove mats to increase log ceilings
- The log house does not match the foundation
- Ceiling mats in the log house
- Construction from fire monitors
- How to remove bark from an already assembled aspen log house
- Transporting an old log house
- Connecting internal timber walls with external ones
- How to repair cracks in a log
- Gap between log and foundation
- Alignment of the first crown of the log house
- Stages of arrangement of the assembled log house
- Treatment of the log house after installation in the summer
- Processing the ends of the frame from the outside
- The log house floated - the walls moved
- An old wooden house sank
- Leveling the crowns when assembling a log house
- How to close the opening between the log house and the foundation
- How to straighten a log house
- Sheathe a log house with protrusions with corrugated sheets
- How to process the ends of a log house
- Collecting the first crowns of a timber frame
- Riser frame
- Preservation of the log house during assembly in rainy times
- Forgot to waterproof the log house from the foundation
- Installation of log shrinkage compensators
- Interventional gaps in a house made of profiled timber
- Gaps between logs in a house
- Communications and finishing in a timber house
- Precision when cutting log houses
- Which log house will be warmer?
- Log house made of timber 200 by 120
- Old log house - reconstruction or demolition
- Partitions in a log house
- Internal partition in a log house
- Beginning of finishing of shrunken timber frame
- Double timber construction technology
- Processing the log house from the outside
- Log shrinkage process
- The walls of the log house collapse during shrinkage
- Insulation of a log house from the inside
- How to build a house from sleepers
- The logs were kicked out of the log house
- Supports (pillars) instead of crosscuts in a 9x10 house
- Do-it-yourself timber log house without experience
- Preservation of a house made of rounded logs for the winter
- Embed additional beams into the frame
- Backing crown - installation tricks
- Log house on brick walls
- Sequence of work in the log house
- How to make a load-bearing partition in a log house
- The log house got wet during assembly
- How to seal cracks in a log house
- Align the vertical wall of a log house
- Vents in timber on foundation
- Timber 200 by 200 construction nuances
- The log house turned blue, what should I do?
- How to seal cracks in cutouts from the outside
- You can live on the second floor of a log house for shrinkage
- Replace rotten logs with mortar
- A non-load-bearing log has shrunk
- Replacing logs with boards in a house project
- Vertical supports in a log house for shrinkage
- Does a large log house need recutting?
- Metal tiles on a non-shrunken log house
- Permissible gaps between timber crowns
- Gaps in log beams
- Replacing parts of rotten logs in a log house
- The logs of the log house are shaking
- The log house was poorly assembled
- The gap between the log log and the foundation
- Protect an unfinished log house for the winter
- How to save a log house without a roof
- Log finishing service
- Assembling a profiled log house in the rain
- Gaps when fastening profiled timber
- Sealing cracks in a bathhouse
- Processing timber with a blowtorch
- Butt beam - is it reliable?
- The wall of the log house is littered
- How to align protruding ends in a built timber house
- Transferring beams in a log house in height
- The corners of the log house disappear from the timber during assembly
- The log house is wet, what should I do?
- Does a log house need a fifth wall?
- How to assemble a log house 10 by 11
- Restoring a log house after a fire
- Processing of a log house made of rounded logs
- Extension of a log house when replacing the roof
- Sand under the crowns for insulation
- Methods for lifting a bath to replace the crowns
- Impregnation of the log house inside and out
- The façade of the log house leaned
- Log shrinkage - problems
- Treatment of timber against bugs
- The smell in the house is from sleepers
- How to preserve the light color of a fresh log house
- Estimate for a house made of timber 7 to 9
- Treatment of exposed ceiling beams
- Strengthening the corner of a log house
- What is the dowel pitch?
- Protection of the lower crown of the log house
- How to check the diagonals of a log house
- Which timber to choose, square or rectangular?
- Spruce and pine log house
- Sequence of work when finishing a timber house
- Insulate an aspen log house from the outside
- How to install a casing on a log house
- What to put between the crowns
- Should I trim the paws of a log house?
- What is the best way to impregnate a log house?
- Window opening in a log house - how to seal it
- Gaps in the assembled frame
- Support pillars in a timber house
- How to move the 5th wall in a log house
- Ants and the lower crown of the house
- Sanding and processing of the log house after installation
- Barked or planed log for log house
- Repairing the corner of a log house of an old wooden house
- Should window openings in a log house be closed when it is in storage?
- Consultation on the size and shape of the log house
- Questions about construction from profiled timber
- Log house and foam block on a single slab
- Preparing an unfinished log house for winter
- Longitudinal cuts in a log house
- Cracks in the ends of logs
- Should I paint a log house with tikuril?
- Strengthening the corners of the log house
- How to secure a cross beam in a log house
- Ventilation gap between insulation and frame
- Moss or tow for building a log house
- Shrinkage of a timber house
- Fifth wall in the log house
- How to raise a 6 by 6 log house
- Distance from the corner of the frame to the windows or doors
- How to cut off the protrusions of the corners of a log house
- Log house without nails
- How to clean a linden bathhouse from darkening
- Impregnation of a log house with fire-bioprotection
- Velo log house
- Questions about cutting a bathhouse after installation
- Painting a log house
- Blackness between the crowns of the log house
- Types of cutting corners of half beams or carriages
- Attaching beam supports to a log wall
- Strengthening logs in a log house 7 meters long
- How to sort through the log gables of a log house
- The beam was squeezed out of the wall
- Is a matitsa needed in a 3 by 3 m bathhouse?
- Priority work after installing the log house
- Entrance door in a log house
- Maintaining the level when assembling the log house
- The corner of the log house and the lower log have rotted
- The sequence of finishing a timber frame
- Insulation of a settled log house
- Restoring a burnt larch frame
- Quality of a 40-year-old oak log
- Permanent roof on a newly assembled log house
- Cracks in logs
- What time of year is it better to cut a log house for a bathhouse?
- What and how to make partitions inside a log house
- Ceiling beams in a timber frame
- Installation of a metal door in a log house
- The crown molding of a log house
- Questions about assembling a log house at home
- Turnkey log house for a season - is it possible?
- Arrangement of the subfloor in a rounded log house
- Common roof for a new log house and its extension
- Ventilation system in the log house underground
- How much does it cost to change the lower crowns of a house?
- Finishing the log house after shrinkage
- Reinforcement as a dowel for a log house
- What to rest the floor joists on in a log house
- Attaching timber to a log frame
- Cover an old house with a new frame
- Extension made of foam blocks to a house made of timber
- Wet lower rims of a new timber frame
- House made of sleepers
- How to cover a log house on screw piles with bricks
- How to strengthen the motherboard in a log house
- Birch log house
- Sauna log - pine or aspen
- The lower crowns of a larch frame as a plinth
- Adjusting anchors for shrinkage of the log house
- How to properly assemble a log house
- Octagonal timber frame
- Is a fifth wall needed in a log house?
- An alternative to dowels when assembling a log house
- Problems after shrinkage of the log house
- What to make partitions from in a log house
- Tongue-and-groove slabs as walls in a log house
- Insulation of the log house inside
- How to strengthen floor joists in a timber frame
- Log houses in Kolomna
- House made of timber or frame house
- Insulation of a log house from the inside
- Work plan after shrinkage of the log house
- Squeezed logs out of the log house
- Where to start after installing a log bathhouse
- Rounded log with Finnish profile
- The timber frame is spreading
- How to align the geometry of a log house
- Large gaps between logs
- Are dowels needed for profiled timber?
- Is it worth overpaying for profiled timber?
- Repairing the corners of a log house
- How to cover an unfinished log house for the winter
- The beam bends out of the log house
- Construction of a log house in the rain
- Processing and insulation of external walls of a log house made of timber
- How far can the outer ends of the logs be trimmed?
- Ceiling beams 7.5 m in a house made of timber
- How to attach a room attached to a house
- Technology for assembling a log house from timber
- Waterproofing log walls outside
- Replacement of the lower crown of an old house
- Interior finishing of the corners of the log house in the paw
- Dry brown rot in log timber
- Shrinkage of timber frame
- Roof on only installed log house
- How to fill the gaps between the log house and the outbuilding
- When to install a log house for a house
- How far can the ends of logs be trimmed?
- When should a log house be treated with impregnation?
- Cutting the end corners of the log house
- Leveling timber in a log house
- Protection of the log frame from the outside
- Replacing log walls with stone
- How to seal the gaps between the foundation and the log house
- How to cover a timber house
- How and with what to seal the gap between the foundation and the log house
- Bark on logs - to remove or not?
- Sandwich panel or log house?
- Preservation of log wood
- How to change the lower crown
- Settlement of a log house made of laminated veneer lumber
- Log house repair
- What kind of foundation is needed for a log house made of 9 by 12 m timber?
- How much timber is needed for a log house 9 by 12 meters
- Foundation for a log house with chopped gables
- When to put a roof on a log house
- How to seal cracks in a timber frame
- Log house on the spring
- Preparing a log house for winter
- Oak backing for the lower crown of the log house
- Log house repair
- Photo of a chopped log house
Construction in Moscow and Moscow region
We work with a guarantee! Wide range of construction services.
Foundation, walls, ceilings, roofing, turnkey! +7 (905) 797-20-34
luxurycomfort.ru
Construction in Moscow and Moscow region
We work with a guarantee! Wide range of construction services.
Foundation, walls, ceilings, roofing, turnkey! +7 (905) 797-20-34
luxurycomfort.ru
Construction in Moscow and Moscow region
We work with a guarantee! Wide range of construction services.
Foundation, walls, ceilings, roofing, turnkey! +7 (905) 797-20-34
luxurycomfort.ru
Log houses and their maintenance
All questions to Semenych about construction
Semenych (author of materials)
Our site is regularly updated with interesting and unique materials and articles on the topics of lumber, building materials and works, the author's opinion and knowledge of a real coven with more than 15 years of experience are provided. There is a section - funny stories of shabashniks. If you would like to receive information about this, subscribe to our website's newsletter. We guarantee that your address will not be shared with third parties.
Apartment renovation in Moscow and Moscow region
We work with a guarantee! Wide range of repair work.
Professional craftsmen. +7 (905) 797-20-34
luxurycomfort.ru
| Country house | Bath |
| For the dacha | Tool |
| Materials | Tales |
| Foundation | Log houses |
| Roofs | Insulation |
| Walls | Siding |
| Floors | Cellars |
| Attics | Doors windows |
| Stairs | Extensions |
| Wells | Toilets |
| Balconies | Loggias |
| Condensate | Flooding |
| Fences | Kennels |
| Sidewalk | Birdhouse |
| Adobe | Carts |
| Garages | Barn |
| Greenhouses | Bath |
| Swing | Brazier |
| Shower |
| Horizontal bar |
What can destroy the integrity of the structure?
If classified by type of origin, destructive factors can be divided into the following categories:
- Technogenic factors.
- Natural phenomena.
- Anthropogenic factors.
These factors in practice are expressed as follows:
- Swelling of logs due to increased precipitation and atmospheric humidity.
In such an environment, mold appears, fungi and other harmful microorganisms appear. As humidity decreases, the log dries out and loses its original qualities. This leads to cracking of surfaces. If this process is not stopped in a timely manner, it can cause structural destruction. - The loss of lignin, which gives wood a reinforcing effect, occurs under the influence of ultraviolet rays. With such destruction, the surface of the log takes on a dark shade, the structure becomes porous, the logs easily absorb moisture and quickly evaporate back, which also leads to drying out.
- The same destructive effect is caused by insects, rodents and fungi, which love to settle in wooden walls.
- Fire is the surest and fastest way to destroy wooden structures. Fortunately, there is protection from it too!
- The influence of acid-base solutions also leads to the fact that the log loses its original physical and chemical properties.
- Indoor condensation and heating defects also do not contribute to improving the performance characteristics of a wooden house.
Given such circumstances, log walls should be treated as early as possible.
Required Tools
Only high-quality tools are suitable for such work, which completely excludes Chinese disposable products. The main criteria by which to make a choice are the lightness and power of the equipment. Depending on the type of timber, a grinder with special grinding attachments or a belt sander is used.
You will also need:
- vacuum cleaner;
- protective clothing, glasses made of unbreakable plastic, respirator;
- small rectangular wooden block;
- stand, ladder or stepladder.
A belt sander is typically used for initial polishing, while oscillating equipment is only suitable for repeat sanding. Professional craftsmen advise using the Makita device. This tool is convenient, equipped with a special dust collector, and is suitable for interior work.
The size of the abrasive paper is of great importance. It depends on the type of operation performed. In order to remove lint, use numbers 160-220, for leveling - 40-60, for removing paintwork - 100-140.
When choosing an angle grinder, you should pay attention to its weight. It is not advisable to use a heavy grinder, as this will complicate the already painstaking work. As for power, you need to focus on 850 W or more.
Corners and joints are difficult to reach places. To sand these areas, it is better to use a regular chisel or a wooden block.
During the working process, many small particles of wood dust are generated, therefore, in accordance with safety regulations, it is important to reliably protect the respiratory system. This means that the respirator must be of high quality.
How much will all this cost?
To calculate the cost, it is necessary to consider all types of work carried out to process a log house. Typically, the processing procedure includes the following types of work:
- Engineer consultation.
- Dismantling works.
- Processing procedures.
- Installation work.
Now let's look at the average prices. You can take Moscow price tags as a guide. So:
- Consultation with an engineer – 1900-2500 rubles.
- Dismantling of various structural parts - from 130 rubles per 1 m2.
- Applying antiseptic to a log - from 50 rubles per 1 m2.
- Coating with fire-fighting compounds - from 55 rubles per 1 m2.
- Treatment against mold, fungi, etc. – from 50 rubles per 1 m2.
- Installation of wooden structure parts - from 150 rubles per 1 m2.
Preparatory stage
During planing, a so-called radial structure can form on the timber, which threatens the wood to peel off. Therefore, the first task is to carefully inspect the tree.
The solution must dry completely, for this you need to wait a day. As a result, small particles will stop “ruffling”. This will help prevent failure of the grinding wheels and protect normal areas of the timber from defects.
If such a defect is found, you need to treat it in a special way (apply several layers of glue to these areas).
You can deal with this problem at the ends using a blowtorch. With its help, the pile is burned and removed. In addition, it makes the wood stronger and more durable. Since the ends are the weakest link of the structure, this approach provides better subsequent grinding and additional polishing with fine sandpaper.
Correctly carried out preparation and grinding of the ends will lead to the following:
- the wood will dry quite slowly, due to which the shrinkage will be uniform;
- painting and varnishing the timber will require much less material, which will make their consumption more economical.
Useful recommendations also cover other important points.
- It makes sense to start sanding work only after the roof has been erected. After this, new irregularities and defects may appear.
- It happens that the timber turns blue. Then, before sanding, you must first clean the walls with sandpaper and then polish.
- The beams may darken 6-7 days after treatment if they were not previously coated with protective agents.
You cannot grind fresh lumber material, as the equipment attachments may become clogged. In this case, you can use a plastic abrasive disc, but the wood must be collected in the cold season.
How timber is processed inside a house. Penetrating and paint coatings
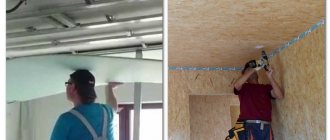
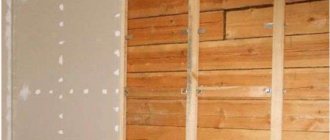
Wood is a natural building material, which is associated with some of its features, such as exposure to microorganisms, moisture and other negative factors. Of course, nowadays there are special compounds that allow you to change and improve the properties of wood. But which of them can be used for processing inside a timber house?
Treated walls of a timber house
Next, we will try to answer this question and consider all the most effective and common options.
Technology for sanding walls in a wooden house
It is most prudent to carry out sanding work inside the house before installing windows and doors, using safety glasses and respirators. This is due to the fact that during the grinding process a large amount of dust deposits are formed. The treatment is carried out on the dry surface of the lumber, as well as on the ends of the timber.
In your work, you can use electromechanical special grinding devices, as well as sandpaper with different degrees of grain, which is recommended to be selected depending on the current condition of the outer surface of the wooden wall. Typically, processing begins with 50-grit sandpaper and ends with 120-grit sandpaper.
Specialists most often use a grinder; it is also convenient for processing the ends of building materials. If there are hard-to-reach places, they are processed without the use of power tools.
Prices for timber sanding work
The price of grinding work is influenced by the following factors:
-The original condition of wooden surfaces. The most expensive work will be if the walls were previously varnished. This is due to the fact that you will first need to remove the paint layer;
-The height of the building that needs to be sanded;
-Area of the treated surface. The larger the walls, the higher the cost of the work. But it should be noted that when grinding large volumes, the contractor may provide discounts;
-Availability of additional services. The overall package of work can include not only grinding, but also coating with paints and varnishes. In this case, the cost of a set of works will be cheaper than paying for each individual service.
How to sand the walls of a house made of profiled timber with your own hands
It is recommended to carry out sanding work on a building made of profiled timber as follows:
1. It is necessary to make sure that the wooden surfaces are completely dry. This is a very important point, since working on raw wood will negatively affect the final result;
2. It is very important to build a personal time schedule for carrying out work. You need to adhere to strict time limits. For example, painting sanded walls should be done a week after finishing work is completed;
3. It is recommended to carry out all work on grinding profiled timber in two stages. At the initial stage, using coarse sandpaper, it will be possible to lift the large pile on the profiled timber and then remove it. After completing the first stage, it is necessary to change the sandpaper to a finer one, and use it to remove the residual lint.
4.You can use a grinding power tool, such as a grinder. But if you have not had experience with it before, it is best to abandon this idea. Otherwise, unwanted chips and cracks cannot be avoided;
5.When processing wooden grooves, you will need a grinder, which is also not a very safe device. But since grinding these places is impossible without it, it is still recommended to involve a specialist.
The feasibility of sanding laminated timber
In order to decide whether it is worth sanding an already perfect laminated veneer lumber or not, it is necessary to visually evaluate it.
Stage-by-stage work
Sanding is carried out in strict sequence and involves several main stages.
- First, you need to process it with a coarse abrasive with a grit size of No. 40. This helps eliminate unevenness and roughness. You need to be prepared for the fact that the nozzle will quickly become clogged with small particles of wood and will have to be constantly replaced. The main thing is to position the grinding tool correctly. The machine should be at an angle of 45 degrees to the direction of travel. You should not press it hard or sharply; you should work without delay in one place. With rough processing, up to 1 mm of thickness can be removed in the most prominent areas.
- Finer sanding, which removes lint and precedes painting, is done using sanding wheels with sizes 80-120. Ideally, the surface of the beams should be leveled with the general plane of the wall. For a beginner in this business, the processing process may take a long time, since in 10 minutes you can polish only about 60 cm of area. But speed depends not only on skill and experience. It is often influenced by the type of timber, the resin content of the wood, and the power of the grinding equipment.
- Then, using a grinder, they polish the ends and grooves down to the deepest recessed beams, eliminating all remaining errors from the previous work. For these purposes, abrasive No. 180 is used. The goal is to make the wall as even and smooth as possible.
When sanding with a belt sander, it is necessary to alternate vertical, horizontal and diagonal movements. Cleaning the interior with a vacuum cleaner should be carried out after each stage. It is also recommended to periodically check the walls for smoothness by turning on additional lighting.
If it is necessary to remove the old coating, the sanding process should also include rough cleaning with coarse sandpaper until the fresh color of the wood appears. All roughness must be smoothed out, and the natural color of the wood must be restored.
Corners and hard-to-reach places are processed manually at the very end. To do this, leave a strip of the required width (from 3 to 10 cm). The work is carried out using a chisel or a wooden block with abrasive paper wound on it.
At the final stage, the already polished surface is “passed” with a vibrating attachment to eliminate defects that appeared during the work process. It is also mandatory to treat the walls with special impregnations (this applies to all types of wood material). To check the quality of the surface, just run your hand over it - it should be perfectly smooth.
It should be noted that working with profiled softwood timber is the most difficult, as it requires a lot of time due to its hardness and high resin content. Sanding of glued material should be carried out immediately after the construction of the house, because compared to a solid product, it is more susceptible to atmospheric influences. The main disadvantage of such timber is the appearance of fibers that lift up after drying, which complicate and sometimes completely eliminate high-quality polishing.
Grinding, despite the apparent ease of the process, has its own subtleties and requires some effort. Therefore, in some cases it is better not to carry out the work yourself, but to use the services of qualified craftsmen.