Covering the walls of a wooden house with gypsum plasterboard sheets is the right solution for those who want to change the interior space of their home, reducing to a minimum the time and material costs of repair and finishing work. With the help of gypsum boards, all floors and partitions in the room become even and smooth, meeting all requirements.
Drywall is a building composite material that is increasingly used for renovations in private houses built of wood. This is due to the affordability of the slabs, ease of processing, environmental friendliness and complete safety for owners of country houses and their children.
Drywall on the wall
Drywall: pros and cons
- Relative cheapness : it is cheaper than lining, for example;
- Safety - when using special drywall impregnated with moisture or fire protection agents, the practical qualities of a wooden house will remain, and the reliability of operation will increase;
- You can not only finish the walls , but also make a plasterboard ceiling in a wooden house;
- Ease and practicality of installation - the large area of the sheets will allow you to cover impressive surfaces at once, in addition, drywall can bend and take a variety of shapes. It is easy to make small elements for installation from it to cover hatches, boxes or pipes.
- Combination of qualities : it is a good covering material, and, in addition, is used for additional insulation of the house or its vapor barrier;
The disadvantages of using drywall are worth mentioning:
- Fragility - both during transportation and in use. Without special fasteners, attempts to hang something heavy on drywall are guaranteed to end in damage to the material;
- Low temperature operating conditions - if it is colder than minus 10 °C, work with drywall is stopped;
- Bulky - compared to other materials, drywall during installation can eat up a dozen or two centimeters of valuable space, so its use in small rooms is not recommended.
Drywall can “eat up” part of the room due to installation features Source ko.decorexpro.com
Benefits of using drywall
The most important advantage is the environmental friendliness of the material: it consists of gypsum, covered with cardboard on both sides. Both gypsum and cardboard do not contain harmful substances, and this is very important for maintaining a healthy microclimate inside a wooden house. In addition, using plasterboard sheets you can create perfectly smooth walls in your house in a short time. Sheets of plasterboard are usually mounted on a frame base, under which electrical wiring, communications and additional insulation of external walls can be hidden.
The design of the resulting flat surface depends only on the imagination of the home owners. It could be:
- Hand painted.
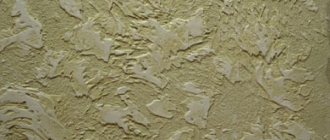
- Textured plaster.
- Painting.
- Wallpaper.
This is only a small part of the possible final finishing options.
Unfortunately, there are also disadvantages: various wood profiles can be used to build a house - unlaminated or laminated veneer lumber, rounded logs, log house. All of these materials have an important feature - shrinkage. Its value depends on the type of material. Therefore, in a new building, it is not recommended to immediately use plasterboard for finishing - it is better to wait a year and a half and only then start finishing the walls.
Features of finishing walls with plasterboard in a wooden house
Wood is a natural material, with all the ensuing consequences during operation. Before covering walls with plasterboard in a wooden house, you must complete the following steps:
- Provide additional protection against fungi and parasites that happily attack wood - that is, treat the walls before further work, caulk cracks, holes from knots and crevices in which moisture can condense;
- Also treat the walls with a fireproof (fire retardant) solution;
- A vapor barrier film must be laid under the drywall , regardless of whether you will insulate the house or not;
- The next problem with wooden houses is shrinkage , so you should wait until the house goes through this stage (the exception is already dry profiled timber, but such houses are much more expensive), and only then start finishing;
- And even after the shrinkage stage, it is recommended to carry out the sheathing on a frame independent of the load-bearing base , which is also not rigidly tied to the floor or ceiling - so that deformations do not damage the drywall;
Sliding fasteners for profiles under plasterboard Source remontcap.ru
- When installing electrical wiring, you should, again, remember about fire safety , so all wires should be placed in a metal “corrugation” or installed in an open way - in cable ducts.
For bathrooms and rooms with high humidity, it is worth choosing moisture-resistant plasterboard, and for chimneys and stoves when finishing them - fire-resistant.
See also: Catalog of wooden house projects presented at the Low-Rise Country exhibition.
What is needed for finishing
Finishing the inner surface of the walls of a house with plasterboard requires careful selection of materials. The master will need to purchase:
- GKL slabs are moisture- and fire-resistant (GKLVO).
- A sufficient number of screws for wood or metal (depending on the chosen frame).
- Putty and composition for priming drywall.
- Silicone and polyurethane foam.
- Solutions for impregnating timber to provide protection against insects and rodents.
- Insulation boards and soundproofing materials.
Tools and materials
For installation and assembly of the metal frame, additional fasteners will be needed so that the structure can withstand increased loads; sheets of drywall should be sewn in 2 layers with an offset. You also need to stock up on vapor barrier, which will prevent moisture from the house from penetrating under the assembled structure and being absorbed into the wood.
How to install the frame
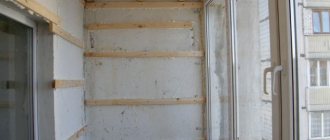
The frame in a wooden house under plasterboard can also be wooden or metal. The latter is considered more durable, in addition, a wooden frame can only be used in a house with complete shrinkage.
A floating frame for plasterboard in a wooden house is absolutely necessary, both in houses before the shrinkage stage and after, because fluctuations in the linear dimensions of rooms, ceiling and floor dimensions continue. There are two main types of frames, both are mounted according to a similar principle. If a wooden frame is used, like the walls, it must be treated with fireproofing agents.
The frame is installed after the wall processing stage, but before laying internal communications (which will be hidden under drywall).
One of the advantages of drywall is that electrical wiring and other communications will be hidden under it Source imhodom.ru
The metal frame is made of profiles (guides and ceiling) and self-tapping screws. Also used in the work are a grinder, a cutter, a level and a screwdriver, a pencil, a stepladder, a tape measure and a cutter. If you plan to cut sheets, use a special knife for drywall.
Using the entire set, the work is performed in the following order:
- The guides are attached to the floor, according to the level “beaten off” in advance;
- Lines are marked for vertical racks, at a distance of about half a meter, so that there are at least two or three guides per standard sheet, and the joint of the sheets should fall on the guide;
- The racks are cut according to the following formula: wall height minus approximately 10 cm (shrinkage);
- On each profile, grooves are cut about 10 cm long and slightly wider than the self-tapping screw on which it will be attached to the wall, and each profile is usually numbered (since the wood is very different, and the grooves can fall on knots or cracks, which is unacceptable: in such a case, the groove is shifted);
- There are at least 3-4 such fastening points
- Next, if necessary, a metal corrugation with wiring is installed;
The wires must be hidden in the corrugation. Source stroyert.ru
See also: Catalog of companies that specialize in finishing materials.
- are screwed to the installed profiles using a cutter or self-tapping screws (as if “topsy-turvy”) so that drywall can be placed on top;
- Transverse profiles are installed to maintain rigidity (usually cut from a regular profile).
Wooden sheathing for plasterboard in a wooden house is assembled in the same way, but since wood is a softer material, you can additionally provide a recess on the surface of the bars for a self-tapping screw head to create a perfectly smooth surface. In addition, all bars also need to be treated with agents against moisture, fungus and fire.
The following bars are used for the frame:
- Length from 2 to 4 m;
- The timber is well dried, has no visible damage or bends;
- Section 40 by 40 or 50 by 50, or 40 by 50 mm.
It is believed that a wooden frame will last less than a metal one, however, subject to the installation and processing technology, their service life is approximately the same (if, of course, the timber itself is of acceptable quality).
An example of finishing walls with plasterboard in a wooden house using a wooden frame with sliding fastening Source fasaddomstroy.ru
Attaching drywall to the finished frame
Installing drywall on a wooden frame is extremely simple. The gypsum boards are fastened to the finished sheathing using self-tapping screws with a conical head, which is recessed flush with the surface. The fastener pitch is 0.3 m.
On sheets without a factory chamfer, a bevel is selected on the edges using a construction knife or power tool. The gap is cleaned of debris and dust and primed.
After the primer has dried, the gap between the sheets is filled with putty, and reinforcing tape is pressed into the joint with a spatula.
Reinforcement of drywall seams
Dried joints are cleaned with sandpaper, cleaned of dust and the entire surface is re-primed. A thin layer of putty is applied over the primer layer and leveled. The dried layer is rubbed with sandpaper and the dust is removed.
We insulate the walls before installation
Before installing drywall, optional insulation is installed - mineral wool, polystyrene foam or another. To prevent the insulation from getting wet, a vapor barrier film is attached on top of it. All materials are purchased with a 10% reserve.
To install, for example, polystyrene foam, the following stages of work are performed:
- Additional alignment of the walls or the most protruding section along which installation will be carried out is determined;
- The wall is treated with a primer ;
- Polystyrene foam is installed in the reverse order of drywall - that is, pieces are first placed on small surfaces, and then large sheets are used;
- Window openings and other potential gap hazards are additionally puttied;
- After a couple of days, the sheets are additionally secured with disc-type nails, for which holes are drilled in the wall;
- If at this stage there are gaps left, they are covered with pieces of polystyrene foam or polyurethane foam (toluene-free!), the excess is cut off with a knife, and the joints are once again covered with an adhesive solution.
A special stapler is used to attach the cotton wool. You should also avoid the appearance of cracks or clearings at this stage, since otherwise the meaning of thermal insulation will be lost.
Insulation of a wooden wall under plasterboard with cotton wool Source gipsokarton-blog.ru
Wood frame
As you know, natural wood is subject to rotting processes and fungal infection. Sometimes insects even appear in it. To ensure durability and moisture protection, it is necessary to treat and impregnate the bars with special antiseptic agents, and then dry them thoroughly.
Under the load-bearing supports, take a block of at least 75 by 25 mm.
For crossbars, planks 50 by 25 mm are suitable. The support should be equal to the width of the drywall sheet. To ensure the reliability of the frame, you need to fasten the crossbars as often as possible.
And the support should be located in the center of the sheet. Place the crossbars at the joints of the panels. Use plastic dowels as fasteners.
Tip: attach the block to the wall, drill a hole through for the dowel so that a mark appears in the wall. Drive the dowel into the wall, and then, again attaching the block, tighten the screw.
Installation of drywall on walls
This step seems simpler than the previous one, but it still requires:
- observe the technological gaps - you can leave 1 cm at the bottom, then cover it with a plinth, you will need more at the top - about 5 cm;
- in addition, you need to leave 2 mm between the sheets themselves , then cover them with putty;
- of “overlapping” installation is allowed , when the edges of the sheets are manually processed, forming angles of 45 degrees, then placed “butt”; horizontal lines for laying drywall should not converge (sheets are laid in a “checkerboard” order);
- It is recommended to screw in the screws at a distance of a maximum of a quarter meter from each other, but no more;
- the seams on top with tape (“serpyanka”) and then putty.
Wall design options
The construction market is replete with various offers, forcing the modern consumer to rack his brains over the choice of finishing material.
Some opt for the simplest and most affordable methods, which are suitable both for finishing an old country house and new houses, which will be discussed below.
Painting
To implement this finishing option, you can use various types of paints (see photo), among which the most common are water-based and acrylic materials.
The advantages of this finishing method:
- painting is a very simple procedure that does not require special skills and tools;
- the painted surface can be easily repainted in a different color if necessary;
- an endless selection of colors and shades;
- ease of cleaning and disinfection.
Now about the disadvantages:
- Before painting, the walls require careful preparation, since if there is a rough surface, the paint will lie in an uneven layer, which will lead to the formation of peeling over time;
- the painted surface needs systematic wet cleaning;
Drywall
Installing drywall will not only allow you to perfectly align the walls in the room, but also lay thermal insulation material between the sheets and the main wall, if necessary.
Advantages of using drywall:
- quick and easy installation;
- the ability to construct structures of any complexity;
- drywall makes it easy to disguise wiring and various communications;
- Possibility of finishing with various finishing coatings.
Flaws:
- the usable area of the room decreases;
- low resistance to mechanical stress;
- the need for additional puttying of seams and joints after installation, as well as puttying of the material over the entire area;
- Drywall is susceptible to high humidity, which negatively affects the service life of the material.
Textile
This finishing method was often used in the old days, but now it has received a rebirth. Both natural textiles and artificial materials are used to cover walls.
The fabric is attached in various ways: pasted like regular wallpaper, stretched onto pre-constructed wooden frames, which are then installed on the wall, and fixed to the wooden wall with a stapler.
Advantages of the method:
- there is no need to level the walls (except for those cases when fabric is glued instead of wallpaper);
- resistance to various mechanical damage - textiles simply stretch under load without being subject to ruptures or cracks;
- the room acquires a special chic thanks to the texture of the material;
- fabrics for wall decoration are made in a wide range, so there are many options to choose from, as well as the possibility of combining the material with curtains and bed linen.
Flaws:
- the fabric absorbs a large amount of dust, so the material must be vacuumed regularly;
- textiles quickly lose their appearance, get dirty and rubbed easily.
A traditional option that provides the modern consumer with a wider range of options than in the old days.
Today you can purchase not only paper wallpaper, but also vinyl, duplex, non-woven, textile and other types of materials.
Advantages of wallpapering:
- walls require less thorough preparation, unlike painting, which requires repairing even the smallest cracks and irregularities;
- large selection of different types of material;
- the ability to independently carry out finishing work with minimal skills.
Flaws:
- the need to replace wallpaper (except liquid wallpaper) after 5-7 years, as they quickly lose their appearance;
- susceptibility to mechanical damage;
- difficulties in removing dirt, even when it comes to washable wallpaper.
Wall panels
Wall panels are products intended for decorative finishing of walls. They can be made from various materials (chipboard, fibreboard, PVC, wood) and in different shapes - in the form of slabs, sheets and slats.
They are mounted like drywall on a frame, which in this case can be either steel or wood.
Advantages of panels:
- relatively simple installation;
- the possibility of equipping the wall with sound insulation, which is laid behind the panels;
- there is no need to level the walls before installation;
- the ability to dismantle the panels for use in another location.
The disadvantage of this finishing method is that it reduces the size of the room, since the lathing on which the panels are installed takes up a lot of space.
Video description
In some cases, to save space, profiles are recessed into the walls.
In this case, it is necessary to take into account the inevitable shrinkage of a wooden house. It is clearly shown in the video: The gaps between the ceiling and the sheets are closed with decorative elements, but you should know that they should not be attached to the walls either. To maintain flexibility in the movement of structures, the screws are not tightened tightly; I leave a small gap in case the structure “walks.” But the head of the screw should be “recessed” so that later you can properly putty the surface or hang wallpaper.
In the bathroom and kitchen, plasterboard must be covered with waterproofing Source dp32.ru
The final finishing of a wooden house with plasterboard after installation also allows for laying tiles.
Installation of insulation
There is an opinion that additional insulation can cause wood to rot: moisture will appear in the space between the main wall and the drywall due to the temperature difference and the insulation material, accumulating it, will create conditions unfavorable for the wood. In addition, the insulation material itself will lose its thermal insulation characteristics.
To prevent this from happening, it is necessary to install a vapor barrier. Moreover, not only from the inside, but also from the outside, then condensation will not collect on the walls and the lack of moisture will not cause the wood to rot.
Calculation of a plasterboard partition
It is necessary to take into account that the material purchased is 10-15% more than the calculated norms.
Calculation table for plasterboard partitions
If you plan to install a partition with a door, then you can reduce the margin percentage to 7-8% without subtracting the opening. During the installation process, some of the materials will become substandard.
Counting the guides
They are installed around the perimeter: (opening height + length) x 2. We get the number of linear meters of the guide profile. This number is multiplied by 2 and divided by the length of one plank, thus obtaining the number of planks.
Rack profile
The defining parameters here are: the area of the structure, the distance between the posts. The recommended spacing of the vertical supports of a plasterboard partition is 60 cm. In this case, the sheet will be attached to three posts. At the ends of the structure, the distance between the profiles may be smaller if the length is not a multiple of 60 cm.
GKL against plaster
First, let's decide whether it's worth messing with drywall at all or whether it's better to use plaster the old fashioned way.
Here are the arguments in favor of gypsum boards:
- High finishing speed due to the large sheet area (3 square meters with a size of 2500x1200 mm);
- Possibility to eliminate significant unevenness of the base at minimal cost. Let's say, if the height difference between adjacent elements of a slab floor is 8-10 centimeters (yes, yes, this also happens), leveling the ceiling with plaster is very expensive and unsafe: the fall of peeling plaster of such thickness can cause a lot of trouble.
But for gypsum boards on the sheathing, the condition of the surface underneath does not matter at all - as long as there is something to attach the frame to;
It is easier and cheaper to level an uneven and littered wall with plasterboard.
- The surface of kraft paper (gypsum core shell) has excellent adhesive properties. You can glue wallpaper of any density to it using any wallpaper glue; tiles also adhere perfectly to cement tile adhesive or homemade cement-based mortar.
Interesting: I used spot-applied silicone sealant to adhere the tiles to the drywall above the bathtub. It was also used to seal the seams between the tiles and to connect the apron to the bathtub. All seams maintain absolute tightness for three years of active use of the bathroom; The tile holds more than securely.
Ceramic tiles adhere perfectly to drywall using any tile adhesive. And not only them.
How does drywall compare to plaster?
- Mechanical strength. Let me clarify: in this parameter, gypsum sheet material is second only to cement plaster. Using gypsum board to decorate walls in a gym or workshop is a dubious idea;
- Resistant to water with constant contact with it. Alas, even moisture-resistant drywall only tolerates high air humidity. If you immerse a gypsum core in water, it will get wet just like any other gypsum product. Accordingly, it would be a bad idea to use gypsum board without protection with a waterproof finishing finish for the construction of shower walls;
- Occupied usable area of the room. It is better to level walls with minor unevenness in a small room with a thin layer of plaster: even when glued directly to the wall, without lathing, a sheet of plasterboard, taking into account the thickness of the glue, will shift the surface of each wall by at least 20 mm. When mounted on a frame, each wall will move towards the center of the room by 60 - 80 mm.
The space under the sheathing is wasted.
Assembling the frame for the partition
To work you will need
- A guide profile (attached to the base), from which the base will be built, onto which the rest of the profile will be attached;
- Rack profile. The main part of the structure will consist of it; it creates bridges between the rails of the guide profile;
- Metal scissors, screwdriver, drill, cutter (optional);
- Profile for bends (it is advisable to have one, but you can use an ordinary profile, just specially cut). It can be easily bent, making it possible to create complex sections of large structures from it.
The guide profile slats must be installed where you made the markings. Use dowels and a drill to attach it to the base. If it is wooden, then you can use screws and a screwdriver. First install the slats on the ceiling, then, using a plumb line, secure them to the floor. The plumb line must be used to check the accuracy, because you may have made some errors in the distance at the marking stage, so always check the accuracy. Along with a plumb line, it is better to use a laser level, which can draw perfectly straight lines in any direction.
The most important thing you need to remember when creating a frame. If you are creating a thin and light standard partition that will simply perform decorative functions, then make one row of the guide profile. If there is a partition, inside of which there will be insulation, a niche, lighting, and a layer of sound insulation, then it is necessary to create a second row of a guide profile.
If the installation of the partition takes place in such a way that the room is completely divided into two parts, that is, all 4 walls will be used (it happens that the partitions do not touch one wall or are small in height and do not reach the ceiling), then the guide profile will have to be on each of 4 surfaces. After installing the guide profile, you can create jumpers from the rack profile. The frame will begin to resemble a square honeycomb, plasterboard sheets will be installed on them and, if necessary, the insulation will be located in these honeycombs from the profile.
The profile slats can be fastened together with self-tapping screws, but you can purchase a special device that will make the work easier - a cutter. He compresses the profile, thereby holding it together. Our remark is that the rack profile should always be positioned perpendicular to the guide (except for additional reinforcement for large sizes); if this requirement is not met, then you are doing something wrong, so watch the direction of the profiles.
In the same way, a doorway is created from profiles. If niches are planned in the partition, then the frame will need to be strengthened, but if it is a simple and light partition, then you can do without strengthening, the main thing is that the frame does not wobble. Connect the guide profile to each other with a rack, you can further strengthen the entire structure, but this must be done only if additional load is planned on the product (except for plasterboard sheets).
In those places where the project will bend, it is also necessary to install a profile. To do this, you can use either a special factory one or a regular one, the cuts on which are made independently. The only advantage of the factory profile is that it does not need to be cut, but can be immediately bent to give the desired shape. If you decide to make cuts on the profile yourself, then take metal scissors and cut only 2 sides without touching the 3rd.
Required tools and materials
To make a partition in a private house, you need to prepare a tool. Prepare:
- for connecting and fastening structural elements, a drill and a screwdriver;
- check the geometry of the markings of the partition elements: level, plumb line, construction angle;
- drywall saw for cutting;
- hammer, screwdriver;
- metal scissors or a grinder for cutting metal.
Various types of construction of plasterboard partitions
For puttying plasterboard: a set of spatulas (small and large), grout mesh. Materials:
- GKL sheets.
- Metallic profile.
- Self-tapping screws, dowels.
- Damper tape.
Putty: (starting, finishing), serpyanka tape, primer.
Installation of a metal frame on a wooden sheathing
This method will consume more space and money, but will surpass the previous option in terms of reliability. In addition to the gypsum fiber board itself and the timber for the sheathing, you will need a galvanized profile designed for installing plasterboard sheathing. The timber can be purchased in one size, because the wooden sheathing constructed from it has a slightly different function. According to this scheme, the preliminary wooden frame is rigidly attached to the frame. But the metal frame system will be attached to the preliminary wooden sheathing with sliding fasteners, allowing the wall to move.
Algorithm for constructing a double frame for plaster covering:
- Vertical wooden posts are rigidly attached to the log wall. The step of their installation is 59-60 cm. As usual, the beginning of the work will be the installation of the outer posts, between which a cord is stretched for reference. It is not very easy to ensure a tight fit of the timber to the log wall. To do this, you need to either modify the surface of the block adjacent to the logs by chipping, or fill the voids between the stand and the log with a sand-gypsum mixture. To make homemade putty, first plaster is diluted and kneaded to a dough-like consistency, then sand is added to it. The composition sets in 5 minutes; you should not prepare it for more than a liter.
- The position of the vertical elements is constantly controlled by a building level or plumb line. The entire subsequent process as a whole and the result of efforts will depend on the correctness of their installation.
- We screw horizontal strips to the vertical parts of the frame using fasteners with oval grooves. The installation step of horizontal elements is 40 cm.
- We “divide” the horizontal planks with a hacksaw into two or three independent sections. The cutting lines must be removed from the attachment points of the vertical and horizontal slats.
- We install the upper mounting beam at a distance of 2-3 cm from the ceiling. We will then screw a metal guide profile for GVL to it. We use fasteners with oval holes, screw in the screws without fanaticism.
- Having “raised” 1-1.5 cm above the floor plane, we mount the lower fastening beam using sliding fasteners.
- We screw the galvanized profile to the upper and lower beams.
- We mark on horizontal slats, then install vertical metal profiles in increments of 40 cm.
- We install plasterboard sheets on the prepared double base, taking into account the above rules for fastening gypsum boards.
For those who doubt the reliability of the structure, slats can be nailed along the edges of a plasterboard false wall.
The described methods of covering log walls with plasterboard will allow the log house to move freely without causing damage to the finish made on top of the rigid false wall.
