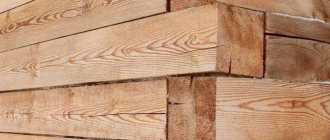
Adobe houses are a housing option made from natural and environmentally friendly materials: clay, sand, earth, straw and water are used for their construction. This method of construction was widespread in the last century, but even now there are many of its admirers. In the summer, such a house is always cool, and in winter it is quite warm. However, working with the material has certain specifics, so it is important to know how to properly plaster adobe walls inside a house.
What are the features of plastering?
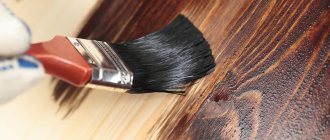
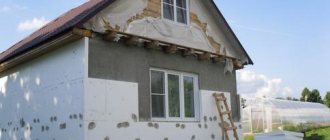
When plastering adobe walls, it should be remembered that the main feature of structures that contain natural materials is the need to protect them from the outside from frost, as well as take care to remove excess moisture from the wall itself.
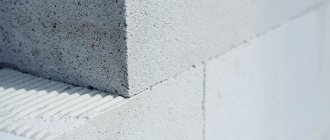
When performing work on external walls, you should decide what thickness of the plaster layer will need to be applied. If it is thick, then it is better to use a reinforcing mesh in the process, otherwise in the future the plaster will begin to fall off in pieces.
Finishing: features
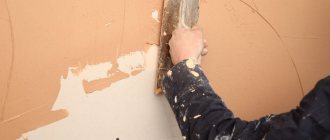
At this stage, you need to finally level the walls and grout using clay-sand mortar without any fillers. First, you need to prepare a fairly liquid grout with which you will plaster the wall with a second layer.
The layer of rough plaster for more or less even walls can be equal to 1 cm. For uneven walls, the thickness of the layer can vary from 0.5 to 2-3 cm.
Grout
Maintain a proportion of 3:1:1, where 3 parts are sand and one part each of cement and clay. The solution should be liquid for a more even application. As in the previous version, the sand must be dry, of medium fraction.
For fine sand you will need much more cement. A large one will look very rough. Mix dry sand with cement and only then add clay. After thoroughly mixing these three components, gradually add water.
This layer will also require quite a lot of time to dry completely, from one to three weeks, everything will depend on the microclimate of the room. It is strictly not recommended to dry both the first and second layers using a hair dryer.
This can lead to cracking of the walls, which, of course, leads to additional work, and you will again have to plaster the wall, sealing the cracks, and wait for drying.
Therefore, drying should take place under natural conditions, without additional means, even if you are in a hurry to finish construction. Everything may turn out completely the other way around, and you will end up spending much more time on remodeling.
What solution can be used?
Before plastering adobe, you should know that such structures are poorly able to tolerate excess moisture. Therefore, the main requirement for finishing material is increased moisture resistance.
Standard cement plaster is not suitable in this case. Such a coating will become heat-intensive, thermally conductive and have poor vapor permeability.
The result will be moisture seeping out from inside the house, settling on the inside of the cement layer and regularly flowing down. As a result, the plaster will either crumble in a couple of years, or the wall will collapse (this is more typical for warm regions).
The ideal option for adobe walls is a lime-based composition. It’s easy to make it yourself by mixing 1 part of the main component with 5 parts of sand. This is an excellent option for the lower volumetric layer of plaster. For the final layer, the same mixture is usually used, but in a 1:1 ratio.
Plastering adobe walls inside a house is often done using a mixture containing gypsum.
If there is such a need, then you can make the walls even by using a solution with the addition of straw, manure or sawdust. This strengthens the structure of the solution and allows you to avoid using a plaster mesh.
Clay plaster of an adobe house - inside and outside
Quite often we are asked about plastering our house and covering the walls (inside and outside). I’ll try to talk a little more about plastering an adobe house in this article.
Let's remember the spring of 2014. The house is finally built, the adobe walls have dried out, the wheat sprouts on the walls have faded - we can begin finishing.
It must be said that walls built using light adobe technology turn out to be quite breathable. This is felt especially well during strong winds)) During the first winter, while the walls were drying, we felt it fully. And in the spring, as soon as it got warmer, we started plastering the walls. We already had experience using clay plaster, and we had clay at hand, so we didn’t think long about choosing a plaster mixture.
Raindrops on the wall. At first, the walls steadfastly resisted the weather.
ADVANTAGES OF CLAY PLASTER: availability and low cost - the material, one might say, lies right under your feet, environmental friendliness, hypoallergenic, fire safety. Absorbs unpleasant odors and allows walls to “breathe”. Can be used as a finishing material.
THE COMPOSITION OF THE MIXTURE is simple - it is clay, sand and water. I also added a little plaster. It allows you to adjust the shade of the plaster mixture - making it lighter. And with it the solution dries faster.
Applying a rough layer of plaster. Clay sticks to death. You can tear it off later only with a piece of the wall.
The proportions of sand and clay are selected depending on the “fat content” of the clay, and its composition may differ even in two neighboring areas. If you plaster with fatty clay, i.e. with a small admixture of sand - the plaster will crack when drying. If the solution is “lean”, i.e. too much sand - the plaster will be loose and crumbly. There is a lot written on the Internet on how to determine the fat content of clay - by rolling balls or sausages, but there are no clear recommendations on how much sand to add in the end, so I immediately experimented on the wall. The result was a proportion of 1x2.5 (one bucket of clay and two and a half sand). Previously, in an old house in the city, we used a 1x4 mixture for stucco. Add just a little gypsum to the solution, about 1/8 of a bucket (the more, the lighter the solution). The clay can first be soaked in a container in which the solution is mixed and diluted with water to a homogeneous consistency, without lumps. And then add sand.
Correct consistency. )) The solution is not too thick, but it does not run off the trowel.
If the clay is dry and crumbly, you can remove or crush large lumps, immediately mix it with sand and gypsum, and then add water. Then, after preparation, the solution should be allowed to stand for a while so that all the clay particles become soaked.
The mixture is diluted with water to the consistency of “thick sour cream.” We applied the rough layer directly to the adobe wall, i.e., to put it mildly, on a non-smooth surface, and made the solution thinner - this way it better penetrates into all the depressions and crevices and, once dry, adheres very firmly to the wall, and is more convenient for the finishing layer make a thicker solution.
Smoothing out uneven plaster walls. Simply use a wet sponge. )) You just need a thick, hard sponge.
To prevent the finished wall from crumbling, crumbling or eroding when exposed to water, we secured it with a primer. We managed to try different primers from different manufacturers - acrylic, latex, concentrate, and ready-made solutions. In my opinion there is no difference. During operation, not a single crack has formed on the walls; it does not crumble or peel anywhere. When water hits the walls, it rolls down and is not absorbed. By the way, the stones with which we lined the walls in the kitchen were attached to the same solution of clay and sand. So far none have bounced)))
Kitchen finishing: clay and stones.
This concerns the interior decoration.
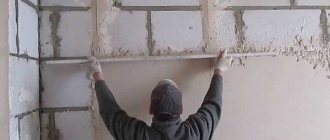
With external walls it is more difficult. We also plastered them with clay and coated them with a water-repellent primer. We used a more concentrated primer, tried to wet it deeper and better saturate the walls with it. The final layer of plaster was applied to the plaster mesh.
At the end of August 2014, our house began to transform... Light adobe is covered with beauty made of clay.
The result pleased us at first. Both in appearance and stability. The walls withstood rain and temperature changes. But one of the walls was less fortunate than the others. The primer could not resist the lingering slanting rain for long, and the plaster gradually began to get wet. There was a frost at night, and in the morning, in the sun, the plaster began to fall off in flakes. True, only the very top layer and not over the entire area of the wall, with small spots. It didn't seem to be a big deal, but it looked unsightly. So the house stood until spring. The remaining three walls were not affected by the weather at all.
With the onset of heat, all the remaining plaster on the south wall had to be peeled off. I re-secured the plaster mesh and plastered it with a standard cement-based mortar as a finishing layer. I secured it with a primer and then covered it with two layers of façade acrylic paint. I also painted the rest of the walls. So our house became a cheerful peach color.
Andrey is finishing the last piece of the wall. True, then they covered it with another layer of paint. ))
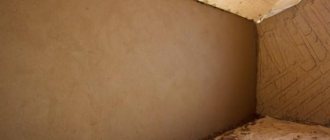
In general, for interior spaces, for my taste, clay plaster is ideal. And the external walls either need to be protected from slanting rains - make one-story houses with large roof slopes in the directions of the prevailing winds, or use other materials.
Our house turned peachy.
You can, of course, experiment with old “grandfather” methods. For example, covering walls with lime. But it smears too much - it’s better not to lean against such a wall, and requires constant renovation (we had experience of “communication” with whitewashed walls, we didn’t want to repeat it here). Or you can mix the mortar with horse manure - manure reinforces the plaster mixture well, prevents it from cracking and, it seems, makes it more moisture resistant. But we have not yet had time to test such technology. We took an easier route - we used a special plaster mesh to reinforce the finishing layer.
PS More photos of our house and the construction process here https://vk.com/album-52254272_201408033 (we will update the album)
We wish you, friends, to build your own beautiful, cozy and environmentally friendly home in the Family Estate!
The article was prepared by Sergey Rudenko, owner of the Agudaria estate (PRP Skazochny Krai).
MORE of our articles on the topic: Kitchen in the Family Estate with your own hands.
How we built our house on the estate from light adobe. How to install plumbing in a house on the Family Estate.
Do you want to live on our estate in a forest near the river? Welcome to Apiterem (sleeping on beehives and other wonders).
We invite you to the website dedicated to our favorite ECO-deal! Coffee made from acorns Amulet of the Family.
And if you feel that you know little about life on an estate and want to learn the most honest and practical information first-hand, from successful practitioners, we suggest listening to our webinar “Family Estate from A to Z” (duration 4.5 hours).
When using materials from this site, an active link to the source is required. Thank you for understanding.
Did you like the article? Support us with a link on social networks!