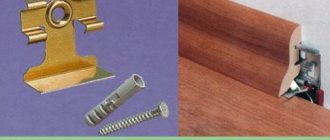
Why do you need to attach corners to slopes?
Let's start with the most important thing - why is this necessary? What role do the corners play - only decorative or do they have more serious functions? Let’s not argue with the fact that if you frame the slopes of doors or windows with special decorative elements that fit perfectly into the design of the room, then the interior will immediately change for the better.
But besides this, they also perform a very important protective function. Sooner or later you have to carry large items through the opening, which can damage the corners, and you can simply accidentally touch the outer corner and damage it. There can be a lot of situations, the main thing is that the result is the same - a damaged surface and, accordingly, a damaged appearance. In addition, as practice shows, most often the wallpaper begins to peel off in these places. So it is best to protect the outer corner of the slope with the help of a decorative element, which will also transform the interior.
Corners are not only protection, but also a neat aesthetic appearance
Plastic corner for slopes and its dimensions
The modern construction market offers a variety of materials that can significantly speed up repair or construction time, as well as significantly improve the appearance of finishing work. Plastic corners are effective for finishing the corners of window and door openings, arches. There are a huge variety of these accessories, different in shape and color. This article will help you figure out which profile, depending on the location, will be optimal.
Plastic corner: the best choice
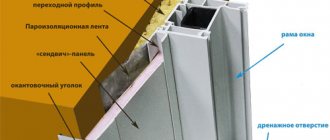
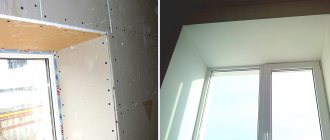
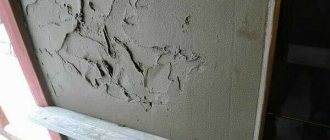
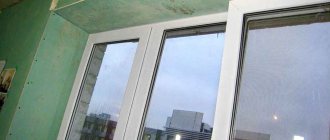
Effective energy saving in houses and apartments requires not only the installation of high-quality plastic windows, but also competent arrangement of slopes. After installing new windows, a gap remains around the perimeter, the width of which can reach 20 centimeters, and because of this, during the cold season, cold air can penetrate into the apartment. Plastering window slopes does not solve the problem, because... it does not perform heat-insulating functions, and tearing off windows for ventilation during the cold season leads to cracks appearing on the surface due to temperature changes and increasing heat loss. The use of plastic slopes made of polyvinyl chloride solves these problems, because these slopes have thermal insulation qualities, and installing them with a layer of insulation (spray foam, which is always used when installing new windows) will allow you to retain heat in the house for a long time. It is important that the installation of plastic slopes requires much less time than plastering.
Finishing work will have a complete look if the door and window openings are made using plastic corners. Using them, minor flaws in the plaster and wallpaper are hidden, and a smooth transition line is created. The openings have a clear corner line, and the window corners, among other things, provide additional thermal insulation.
The scope of application of plastic corners is quite extensive; they are installed in the following cases:
- replacement of windows, inside and outside the room;
- framing door openings and arches;
- as protection for corners, after wallpapering or plastering;
- during the process of laying tiles.
SLOPE 5 min. How to glue a plastic corner on slopes and outer corners of walls. Angle Plastic Video
It doesn’t matter whether you buy a professional tool made of metal or more ordinary versions of plastic or wooden devices; they will help you do this work in a makeshift environment without unnecessary problems.
In this case, the cost of a professional device is justified if you often have to do such work. For small volumes, you can limit yourself to more ordinary and cheap variations.
Fundamentally. The height of the walls of the machine should overlap the height of the trimmed strip to obtain an even cut.
A device for sawing down molded products, arrows indicate technological gaps for performing work in accordance with the instructions.
- prepare two pieces of river for joining;
- We take the first piece, insert it into the miter box from right to left so that it lies as if on the floor and leans against the wall of the device far from us, as if against a wall;
- we cut the product from the left end, passing the saw through the holes numbered 1;
- We insert the 2nd segment into the device from left to right, accurately observing the orientation of the floor and wall;
- we cut it from the right end, passing the saw through the holes numbered 3.5.
- prepare two pieces of plinth for joining;
- Take the first segment and insert it into the tool from right to left so that it lies on the base. as if on the floor and leaned against the wall of the instrument, far from us, as if against a wall;
- we saw it from the left end, passing the saw through holes numbered 5;
- We insert the 2nd segment into the tool from left to right, accurately observing the orientation along the floor and wall;
- we cut it from the right end, passing the saw through the slots numbered 1.
Advice. At the joints along the walls, it is better to cut the planks at 45 degrees; after such a connection is completed, the joint will be virtually invisible. The strips to be trimmed are inserted into the tool on both sides, seemingly leaning against the wall; trimming occurs through one technological slot. First, they cut one, then push the second one towards it, moving the first one away from the slot, and cut the second one.
How to cut correctly
Before discussing how to attach corners to slopes, you should find out how to cut them correctly. After all, this stage is the most labor-intensive and, perhaps, even the most important, since it determines how closely their edges will be joined, and this directly affects the aesthetic appearance of the entire room. It is best to trim with a fine-tooth hacksaw. First you need to measure the length of the opening, then put marks on the corner so that the segment corresponds to this parameter. Then we cut off the part that will be adjacent directly to the slope strictly according to the marks, and the part that will be adjacent to the wall at an angle of 45°.
To trim the corner, use a fine-toothed hacksaw
How to glue corners to the ceiling
To work you will need:
- liquid nails or glue,
- pencil,
- hacksaw,
- knife,
- soap solution,
- miter box,
- sponge,
- sandpaper,
- tassel,
- building level.
You need to start working before gluing the wallpaper to the walls and ceiling, but after preparing the surface.
- It is necessary to level all places using a building level and prime them.
- The next step will be to apply markings.
- The first corner needs to be placed between the wall and the ceiling and outlined,
- Then repeat the procedure on the other side of the wall.
- Next, you need to attach it to the wall and make marks at the intersection points.
- The resulting measurements will help you cut the length correctly.
- To solve this problem, a miter box for cutting at an angle of 45 degrees is useful.
Liquid nails are carefully applied along the edges of the corners, and the corner is pressed against the wall. The joints are puttied and sanded down.
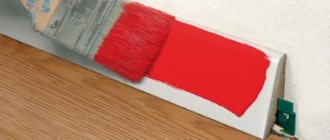
What to attach to
The choice of method for attaching corners to protect the corners of walls depends on the material of the corner and on what surface they will be attached to. The most commonly used glue is glue. Moreover, “liquid nails” are among the leaders. This is a universal compound, but before purchasing, check that the specific brand can bond the materials you need.
You can put a corner on the glue if it is even, without large flaws. If there are holes/depressions, you are unlikely to glue it. In this case, you can use silicone. If you are gluing white corners, you can use white silicone. For colored ones it is better to take transparent ones. It is not advisable to use acidic everywhere. Although it is cheaper, it can damage metals or paint.
In both cases, the wall and corner must be clean and dry. The compound is applied to the corner, it is pressed against the corner, and fixed with strips of masking tape. We grab it after 40-60 cm. If everything is smooth, you can do it after 60 cm; if you need to repeat the shape, after 40 cm or even more often.
How and with what to glue a PVC corner to the wallpaper
Leave it in this state until the glue dries or the silicone hardens. See the packaging for the exact time. Then the masking tape can be removed. It differs from ordinary tape in that it comes off even from paper wallpaper without damaging the surface. But to be sure, try sticking and peeling in an inconspicuous place.
Foam rubber corner
How I glued plastic corners to the wall and windows.
There is another option for how to glue corners to a wall with wallpaper or paint. You can use double-sided tape. First glue it to the corner, then, after removing the protective coating, press it to the corner. There are corners to which the tape is already glued. Some types of foam rubber or plastic (usually flexible or universal).
How to attach plastic corners?
First, we note that before directly installing the plastic corners on the windows, it is necessary to cover the corners with wallpaper, paint, etc. That is, you can start attaching them only after all finishing work has been completed.
To install a plastic corner you will need the following tools:
- assembly adhesive (liquid nails)
- masking tape (scotch tape), and in a room with high humidity - silicone sealant
- metal scissors or hacksaw
- pencil
- directly PVC corners
Finishing windows with plastic corners consists of several stages . Let's look at each of them:
Corners for protecting wall corners: selection options
This technique for decorating wall corners - protective corners - is not liked by everyone, but there are no special alternatives. In any case, on walls covered with wallpaper, a corner is still better than sticking out and torn canvases.
There is only one solution available for the integrity of the wallpaper without the use of decorative corners - to make a rounded corner rather than a sharp one. In this case, there will be no problem with finishing it. You can simply roll up the wallpaper without cutting it. But the corner must be drawn out perfectly, otherwise you will have to cut it again, which means that the question of protecting the wallpaper joint at the corner will again arise.
It is important to choose the right decorative corner so that it does not look alien. There are special techniques for this.
The interior looks good in the appropriate style
You need to select corners to protect the corners of the walls based on the overall design of the room. There are several standard solutions:
- To match the wall decoration. A complete color match is desirable, and even better if the texture is similar.
SLOPE 5 min. How to glue a plastic corner on slopes and outer corners of walls. Angle Plastic Video
Either match the wall trim or match the doors
- Matches the doors. It is better to choose the same material - wood, MDF. And match the color one to one. This technique is often used in hallways and corridors where there are many doors. In rooms it is more appropriate to match the tone of the walls.
- The one with baseboards.
- Use one of the additional colors (read about the combination of colors in the interior here), which will be not only on the corners, but also in the framing of pictures or in the upholstery of panels, decorative medallions, etc.
- Same color and texture as the floor covering.
One of the options is quite logical
In general, you need to select corners to protect the corners of the walls depending on the design of the room. This can be done after the furniture has been arranged and textiles have been hung. In this case, it is easier to imagine the end result. Because the picture in our head can be very different from reality.
If you just can’t find an acceptable color, and you need to protect the corners in your apartment, pay attention to the transparent plastic corners. They are of different types - rigid, flexible, with different wall thicknesses.
Options for installing corners on walls
How to design a slope? Installation methods:
Suitable for non-relief, simple wallpaper. Deep embossing creates cracks that fill with dust, weakening the bond between the corner and the wall.
This involves cutting out part of the wallpaper on the slope and applying glue to the wall surface. It is called “detailed” because it looks like a whole composition, but is an assembly of parts - pieces of wallpaper, corners, glue.
Detailed installation plan:
- The corner is placed in place, marks are made with drawing tools.
- The strip of wallpaper is cut according to the marks. Clean the wall at the slope.
- Apply glue to the cut plastic piece, press it to the slope, and hold until the composition sets. Press it to the wall with tape for a day.
- After 24 hours, the tape is removed and the installation is considered completed.
Shapes and sizes
Finished corners usually have an angle of 90°. The corner itself is not always sharp; there are options with a rounded one. By type, corners for protecting wall corners are divided into:
- external;
- internal;
Universal corner made of MDF
Questions can only be about universal ones. These are two strips of plastic or MDF connected by a thin strip of flexible material of the same color. Thanks to this connection, you can create an obtuse or acute angle, internal or external - without much difference. But in terms of reliability of protection, it is inferior to rigid ones - after all, the flexible part is quite thin.
It is also worth knowing that corners can have shelves of the same or different widths. More often they are found with the same ones, but it is quite possible to find those in which one is wider, the other is narrower.
READ How to cut a plastic corner at 45 degrees
The width of the shelf varies from manufacturer to manufacturer. Plastic ones, for example, can have shelves from 10 mm to 50 mm. MDF corners are made with a minimum shelf width of 20 mm, metal ones - from 10 mm, but the maximum shelf length is 90 mm (aluminum). So there is plenty to choose from.
How to cut PVC wall panels: suitable tools and recommendations
Covering surfaces with PVC panels is a finishing method that many people choose today as the most optimal. After all, it is fast, simple and relatively inexpensive.
But during the work, the question always arises: how to cut PVC panels? There are several possible methods, after considering which you can choose the most suitable option for yourself.
How to cut PVC panels correctly?
To successfully cope with the task, it is worth knowing some secrets of cutting plastic. This will significantly reduce the number of rejected and damaged panels, and will save the novice craftsman from wasting time, money, and, above all, from injury.
- If you are carrying out finishing work in the cold season, do not cut panels that have just been brought in from the street. Let them warm to room temperature. The best option is to keep them at room temperature for at least 1 night. Otherwise, the plastic, which becomes brittle in the cold, will break off in large pieces, and cracks may appear along the entire length of the panel.
- Regardless of which cutting method you choose, the panels should be placed face up (photo above), otherwise the panel may become deformed and its installation will be difficult. In addition, if you make an incision from the inside out, the front side may become covered with microcracks, which will only reveal themselves over time, ultimately ruining the design. It will not be superfluous to mark the cutting line in advance; a simple pencil or felt-tip pen (which can easily be erased from the surface after finishing work) and a student’s ruler are suitable for this.
- To cut several PVC panels at the same time, you need to stack them and provide a two-point support for this stack so that the panels do not sag. It is also worth resting the opposite edge of the stack against the wall, otherwise the panels will move during cutting and you will end up with parts of different lengths.
Basic cutting rules
To ensure that your efforts in cutting PVC panels are not in vain, and that the result of the work meets your expectations, experts recommend adhering to a number of rules for working with plastic. These little secrets will not only help to significantly reduce the amount of spoiled material, but will also protect the craftsman from unnecessary financial expenses and injuries.
When carrying out work during the heating season, you should not start cutting panels that have recently been brought into the room. The plastic must naturally warm up to room temperature, which is achieved in at least 12 hours. The fact is that at low temperatures the plastic panel becomes brittle, and therefore can crack and break off in large fragments.
Regardless of the chosen method of processing the material, it should be placed with the front side facing you, which will avoid deformation of the panel and difficulties during its further installation. When cut from the reverse side, you can find microcracks on the front part, which will appear over time and significantly damage the interior.
You need to mark the straight line of the planned cut in advance, which can be done with a simple pencil and a ruler.
To speed up the process of preparing the material for installation work, you can cut or saw several PVC panels at the same time. To do this, just stack them and create a two-point support. It is best to rest the opposite edge of the stack against the wall, which will help avoid shifting of the products, and accordingly, the result will be parts of the same length.
Power tools
For quick sawing of PVC panels, it is best to have a power tool on hand. For this purpose, you can use almost any device, which will help to significantly reduce the time spent on preparation for installation.
Often cutting is performed using the following devices:
- jigsaw;
- Bulgarians;
- circulars.
When working with plastic material, it is allowed to use only low speeds, because with significant heating it begins to melt and release fumes that are toxic to the human body, and in this case the cut will turn out torn.
Using a jigsaw will help make the process of preparing PVC panels for installation much faster than when using hand tools.
However, with this processing method, the following nuances must be taken into account:
- even before starting work, it is necessary to turn off the pendulum stroke;
- You should use a file with the smallest teeth possible;
- you need to set the saw blade to the lowest speed, which will avoid excessive heating of the plastic at the cut site.
Using a jigsaw is very convenient for cutting stacks of panels, but you should make sure that their height does not exceed the length of the file installed in the tool.
The grinder is recognized as the most convenient and practical power tool with which you can cut PVC wall panels. By installing a cutting disc, you can make not only straight, but also shaped cuts on the surface of the plastic. When processing plastic around the grinder, it turns on only at low speeds, which will avoid damage to the material due to melting of the edges.
In the absence of more practical and convenient tools, you can cut PVC using a knife.
To solve this problem, the following types of cutting products are suitable:
- Kitchen knife. This tool is suitable for cutting multiple panels during repair or replacement. For large-scale wall decoration, such a procedure is unnecessarily lengthy and painful.
- Construction knife. Among hand-held cutting tools, such a device is one of the best options for achieving an even cut with relatively little effort.
- Stationery knife. Using a wooden ruler or square, this tool allows you to achieve a perfectly even cut of the panel, so it is often used for cutting them.
Choosing a cutting tool
Repair specialists who have to install PVC panels in their professional activities know many secrets regarding the correct cutting of plastic materials lengthwise and crosswise. After analyzing them, every owner who wants to make repairs themselves will be able to choose the most suitable professional tool for him or use improvised means.
READ How to Adjust the Carburetor on a Carver Chainsaw
The choice of method for cutting panels usually depends on the tasks assigned and the capabilities of the craftsman. Below are the types of cutting materials.
Molar knife
The most common tool for cutting PVC. But for an unusual kitchen or shoemaker, all you need is a molar knife.
Its blade, while new, is extremely thin and sharp. And when it gets dull, the blade can be replaced instantly.
By biting off a part or inserting a new one. An ordinary knife is inconvenient and cannot be sharpened quickly. And yet, it will not be so thin.
The molar knife is limited in its abilities. You can only cut the panel lengthwise with it. Naturally, you can try to make a cut across. But nothing good can come of this.
How to cut panels lengthwise? This is difficult to explain within the scope of this article. But the basic principle can be outlined.
The blade extends a small distance of 3 mm.
From the back side of the panel we take the place where the slot will be made.
Then we cut out a strip, from edge to edge (we are talking about the internal edges of the panel). A cut is made near the rib, and later another cut is made near the adjacent one.
A strip of plastic falls out and a groove appears.
Then, on the same back side, you need to make a shallow incision near the desired rib. And break the body over it.
The molar knife has advantages: speed, noiselessness and simplicity. Its disadvantage is that the panels can only be cut lengthwise.
Types of protective corners: from what materials
According to the area of application, corners are available for external (outdoor) and internal use. For now, let's talk about how to protect corners in an apartment and a house - indoors. Let's start with the materials. Corners for protecting wall corners can be:
- Made of plastic (PVC). Different colors, textures, there are even transparent ones.
- Made of metal. Brass, aluminum (polished and not), stainless steel, with or without painting.
- Wooden. Made from different types of wood, smooth, with relief.
The corner on the arch is covered with a flexible plastic corner
Cork corners to protect corners
DIY installation of a decorative PVC corner
Plastic (PVC) corners are very widely used in interior decoration; they are installed on the slopes of plastic windows, they frame the outer corners of walls and the slopes of doorways. In this article we will take a detailed look at the process of installing a PVC corner on the slope of a plastic window, and also consider how to make a neat joint between two corners.
We make markings. We need to attach the PVC corner to the slope and make a mark along the edge of the vertical slope:
The minimum length of the applied corner (L) must be greater than the height of the slope (a), by the width of the corner (b), taking into account a small margin (c):
For example, if the height of the slope is a = 1500 mm, and the width of the corner b = 30 mm, then the length of the corner must be at least abc = 1500 30 15 = 1545 mm.
We make a cutout on the PVC corner, removing one edge, as shown in the photo below:
The corner fits perfectly, you can proceed to the next step.
The plastic corner is glued only to the slope, this is enough for fixation, so we apply glue only to one of the edges.
As glue you can use “Moment Montazh”, “QUELYD Masterfix” and their analogues. It is not recommended to use super glue, as it will be almost impossible to correct mistakes.
Glue is applied to the inner surface of the corner either pointwise or in a thin strip:
We fix the PVC corner with masking tape (while the glue dries):
Repeat step 1-3 for the right slope:
We mount the corner on a horizontal slope. The length of the corner is taken with the same margin as for the vertical one, but taking into account two sides. Markings are also made, and then cuts are made and the corner is glued to the slope:
Mark the cutting location. The corners will be joined at an angle of 45°:
Carefully cut two corners at once. It is very important that the knife is sharp:
Seal the joint between the corners with white acrylic sealant. After the glue has dried, remove the masking tape. The installation of the PVC corner is completed.
Arch finishing
Arch design often becomes a problem. In general, there are not many external corners in the apartment, but there are always some on the arch. And in the aisle they very often get touched. Either furniture, or other cargo, or simply a resident who did not fit into the opening. And there are no questions with the straight part, but the rounded part can be a problem.
And not only in the doorway can there be an arched vault
In general, you can use universal corners for an arch. They are flexible, which is very convenient. There are flexible, non-universal ones - plastic, made from a special polymer with increased elasticity.
But in general, corners with different shelf widths are used to decorate arches. They are even called arched. They have one shelf 10 mm (external) and the second - internal - 30 mm or more. They bend easily. You can’t twist it into a donut, but it’s not difficult to get an arc of any curvature. You just need to use a secure hold while the glue dries.
If you want to bend a regular corner, you can do this by heating the plastic. For this work you need a hair dryer. The usual one - for hair - will not work, since its temperature is too low. We also need a template according to which we will bend the plastic corner. Take a piece of fiberboard, tighten screws or drive nails, forming the profile that you require.
This way you can decorate the corners of the arch with protective corners
They start bending from the middle. Warm up the area, constantly pressing on the middle, and using a hairdryer, moving from the center to the edges. So you need to bring the corner to the desired curvature and leave it in this position to cool. To prevent it from straightening out, holes are made in parallel with a row of screws for the second row. The distance between the rows is equal to the width of the corner shelf. After the plastic has bent, insert and lightly tighten the screws. After the plastic has cooled, remove them.
Installation of plastic corners
The work of installing plastic corners on slopes is as follows:
- Regardless of where you need to glue the plastic corners - on the door, if there is no trim or window, outside or inside, you need to take measurements and cut the material correctly to length.
- Prepare the surface where the gluing will take place - remove excess elements, clean the base.
- Install and glue the strips correctly.
How to properly glue plastic corners to any slopes:
- Degrease the surface thoroughly before attaching the corner piece.
- Polyurethane foam is not used during the design process.
- Excess protruding plaster is cleaned to a noticeable smoothness.
How to properly glue plastic corners
- The sticker is marked with a pencil.
- Before gluing all the parts, you should take this advice: it is better to measure the corners for the slopes of doors and plastic windows locally. Install the top horizontal element first, and then use a cutting tool to mark the vertical stripes.
Important! Using photos and videos, every beginner can cope with the gluing process on their own. The metal element is also fixed using self-tapping screws.
Covering with corners also involves additionally securing the strips using narrow masking tape. Fix the strip with it in several places and leave it for about 24 hours. This time is enough to reliably glue the corners to the surface.
If the corner is used as a finishing touch, then the place where it is glued should be cleaned of finishing materials. This increases the quality of grip. When fixing to an area decorated with trellises, you should cut a strip a couple of millimeters wider than the plastic corners. By adhering to simple design rules, fixing decorative elements will be simple and quick, and in the end they will delight you with an aesthetic and relaxed appearance.
Installing plastic profiles is not a difficult task at all, so you can handle this task yourself, without the help of professionals. But, nevertheless, everything should be done carefully and in accordance with the rules. You can also follow the following step-by-step instructions:
- Preparation. Before you get started, you need to make sure that the following materials and tools are available:
- Scissors for metal.
- Pencil.
- Scotch.
- Assembly adhesive.
- If the room has a high level of humidity, you will also need a special silicone sealant.
- Plastic corners.
- Surface preparation. If all the tools and materials are available, then you can begin preparing the surface. In this case, special attention must be paid to the following:
- On the surface, it is necessary to remove all protruding elements, such as nails and others. This will only get in the way in the future.
- The surface must be leveled using plaster.
- The greasy surface must be avoided, so it is recommended to use a solvent.
- If there is wallpaper in the place where the plastic profiles will be glued, then they will need to be cut off, since it is not recommended to glue them directly to the wallpaper.
- Preparing plastic corners. Now you need to prepare the profiles themselves. To do this, you need to place them on the sides and measure their sizes. You should start from the top side, then the sides, and then the bottom side. During the measurement process, on the corners themselves you will need to mark with a pencil the lines corresponding to the required size. Then along these lines you will need to cut the material using metal scissors. You need to cut carefully so that no irregularities or indentations remain. After this, you can proceed to the last stage of the entire process.
- Installation. This is the most crucial moment, so you should be more careful.
- You need to apply glue to the inside of the profile using a special glue gun. In this case, it should be applied closer to the center. The distance between drops should be 15-17 mm.
- After the glue is applied, it is necessary to attach the PVC profile to the slope. In this case, you need to press it down evenly in all areas, so the help of a friend will not hurt. After it is glued, you need to remove excess glue and seal the profile with tape. This is done so that it does not fall off before the glue dries.
- Then after a day you can remove the tape. You can leave it for several days so that the glue completely dries.
How to cut finishing corners
Almost always, corners have to be cut to protect the corners of walls. They are sold in strips from 2 to 3 meters long. The cutting tool is selected depending on the type of material. For wood and metal, thick plastic, you will need a hacksaw, but the blade is different - for wood, and with a fine tooth for metal or thick-walled plastic.
Thin plastic can be cut with a construction or stationery knife or sharp scissors. If you need to cut perpendicularly, it is easier to use scissors. We use them to cut to the corner on both sides, bend the corner, and cut the remaining millimeters with a stationery knife. If there are flaws, they can be easily corrected with the same knife or very fine-grain sandpaper (polishing).
How to cut protective plastic corner (PVC)
If the plastic corner needs to be cut along the fold, cut it along the inner corner using a stationery knife. There is no point in cutting through the entire thickness. You just need to leave a noticeable stripe. Then we bend the piece that needs to be removed. It comes off at the cut site. We remove irregularities with a knife or sandpaper.
How to cut a plastic corner
How to properly saw off a corner for a bathtub if it is made of plastic? This material is so malleable and easy to use that it can be cut with almost any tool. An ordinary hacksaw for metal is perfect for this task. You can use a simple saw, but its widely spaced teeth will create a cutting line that is too thick.
also cut a plastic Some experts use a red-hot utility knife blade for this purpose. This method is more labor-intensive, but the result is magnificent, especially if the cut areas are properly processed.
How to cut an inside corner
To cut out the internal corners, the plinth must be inserted into the miter box, its edge pressed a little further than the slot along the right 45 degree mark and cut off with a hacksaw blade. It should be noted that if the long part of the ceiling plinth is on the left, then the cut corner is expected to be left-handed, if it is on the right - right-handed. It is better to immediately cut off two corners to control accuracy. Next, they need to be placed in the corner of the room, where they will then be glued. If the corner of the room is 90 degrees, then there should be no problems with gluing, but if there are discrepancies, then the baseboards can be carefully trimmed with a construction knife. After all the preparations, the ceiling plinth can be safely glued.
READ How to turn a screwdriver into a grinder
How to cut corners to 45? Glue the plastic corner onto the slopes of the windows. Installation of slope corners
Types of finishing products
This material is intended for decorative finishing of the ceiling area, visually separating it from the walls and covering the joints of diverse finishing elements. Almost any decorative option or interior design involves the use of such details. Otherwise, the room will look unfinished.
To secure this part, fillets are used, which are attached to the ceiling using glue. But a problem arises - how to properly trim the ends of the fillets so that they meet each other successfully. There are rooms with a non-standard configuration, where ingenuity is required for the normal joining of material. How to cut ceiling plinths in corners? There are different options for cutting and joining - with or without tools.
The choice of mounting option depends on the type of product:
- PVC is the cheapest, but also the most brittle and prone to defects, but it is easy to use and can be cut with a knife.
- Expanded polystyrene is also inexpensive, fragile, and requires easy cutting. Another option is slightly more expensive - made from extruded polystyrene foam, it is more difficult to cut , but it crumbles less.
- Polyurethane is the most expensive and moisture-resistant, durable and elastic. It is more difficult to work with; it deforms at high temperatures.
- Wooden is a dense and heavy material that can only be cut with a hacksaw.
What is a miter box used for?
A miter box is a special tool used for very precise cutting of baguettes. This is a special tray that consists of 3 boards connected to each other. There are special slots there. Any one there is placed at a certain angle relative to the axis (45, 60 and 90 degrees). They are designed to guide the hacksaw blade correctly during cutting.
Trimming in a miter box
The miter box is useful for being able to correctly and perfectly join the ceiling plinth in the corners. Let's look at how to correctly perform this function.
The right strip of the ceiling plinth should be placed in the tray on the left side with the wrong side on the bottom. Then this very part will be in contact with the ceiling.
The bar must be pressed firmly against the tool and carefully cut through the slot.
Then a second ceiling strip is inserted into the tray from right to left. Trim it carefully.
The finished planks are placed together and the joints are adjusted with a knife. Do you have any doubts about how to connect the ceiling plinth in the corners correctly? Of course it's the right method. When designing an internal corner, the edge adjacent to the wall may be longer than that adjacent to the ceiling. When finishing an outer corner. against.
How to join the ceiling plinth in the corners? This function is performed independently, climbing to the ceiling of the room on a stepladder. It's awkward, though. Therefore, some experts advise immediately gluing polymer and foam elements on the floor using special glue. It's pretty easy and great.
How to cut 45° corners perfectly? Lifehacks for working with plastic.
How to cut 45° corners perfectly? Lifehacks for working with plastic. One-handed corner cutting! Fast.
How to cut a non-standard corner
The most difficult process is cutting out non-standard corners. Sometimes during the installation of skirting boards you even come across rounded corners that are very difficult to work with. What to do in such cases? If the corner is rounded, it is best to cut into several parts. Usually their number reaches four or five. Next, each part of the baseboard needs to be cut at an angle on both sides. At the same time, at the beginning of the rounding of the corner, the plinth should be even. The parts of the plinth are cut at the desired angle and joined. If necessary, they must be carefully trimmed with a construction knife. After gluing the baseboard, you need to clean it, treat it with acrylic sealant and paint it.
If there is no miter box
What should you do if you don’t have a miter box nearby? It is not at all difficult to adjust the slats without using a special device. There are 4.5 methods that allow you to solve this problem quickly:
- independently construct an imitation of a miter box;
- Mark the desired angle on the wall.
Sources:
https://stroychik.ru/vnutrennyaya-otdelka/plastikovye-ugolki https://stayoneday.ru/raznoe/plastikovyj-ugolok-chem-rezat-kak-razrezat-plastikovyj-ugolok-pod-45-gradusov-kak-rezat -potolochnyj-plintus-uchimsya-delat-pravilnye-ugly.html
How to glue a plastic corner: types of glue, installation technique
An important part of finishing work in a room is protecting the corner lines of the walls from possible damage. Even after a quality repair, wallpaper on the corners, as well as door and window slopes, can quickly become unusable. It is recommended to strengthen wear-prone areas with PVC corners. Let's look at what you can use to glue a plastic corner and how to do it.
Types and purpose of products
Plastic corners are finishing elements that can protect the outer corners of walls from damage. They also play a decorative role, giving the interior integrity and completeness.
Among the many types of corners, PVC products are considered popular. They are universal. They are finished with:
- door, window, arched openings;
- window sill niches;
- places where the walls meet the ceiling;
- external and internal corners of walls;
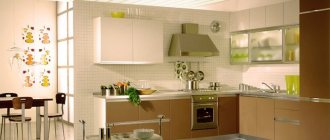
- gaps between the wall and the surface of the kitchen unit.
PVC panels come in white, colored (with various shades and textures) and double-sided painting. According to the form they are distinguished:
- standard version (equilateral corners for wall corners);
- T-profile;
- L-shaped (arched).
Why do experts advise gluing plastic corners to the wallpaper? Corner profiles made of polyvinyl chloride differ:
- Durability. The products retain their properties for more than 25 years.
- Durability. They have anti-corrosion properties. Resistant to cracking and abrasion. Not affected by humidity and ultraviolet radiation.
- Easy to install. They are easy to cut with a knife or scissors.
- Low price.
- Unpretentiousness in care.
- Light weight.
There are also negative aspects. PVC products lose color over time. If a fire occurs, they melt, releasing toxic substances. They should be protected from damage by sharp objects.
How to glue a plastic corner
To ensure that the work done is not in vain, you need to choose an adhesive that is best suited for plastic corners. Construction stores offer a wide selection of adhesive compositions. Finishing of corners and slopes is carried out using the following adhesives:
- Liquid Nails. The composition has a high degree of strength. Using liquid nails, you can securely attach a PVC or expanded polystyrene corner to any surface, in particular to textured wallpaper, wood or concrete. The glue has excellent adhesive properties and sets quickly. If necessary, a composition of a certain color is selected. It is better to glue white plates with a colorless compound.
- Polyurethane glue. Durable, elastic, tightly glues PVC and MDF. The instructions say that not every polyurethane-based adhesive is intended for PVC corners. A significant disadvantage is the pungent odor and high cost.
- Silicone sealant. Recommended for fixing profiles to wallpaper, plastic panels, as well as ceramic tiles in the bathroom and kitchen. It is advisable to use acrylic sealant. However, when using silicone glue, over time you can observe a weakening of adhesion, especially in places where the corners are most often touched. Therefore, if you are planning to attach a plate to a tile using silicone, you should choose compounds with high adhesive properties.
- Liquid plastic. The purpose of the composition is to glue exclusively PVC parts. It is good to work with it, for example, when finishing the joints of plastic windows or insulating them. This type of glue must be used carefully, since a special chemical reagent will be needed to remove the mixture that accidentally gets on the wallpaper.
PVC profiles are self-adhesive. It is necessary to glue the plastic corner onto the wallpaper after taking measurements. After this, the protective tape is removed from the product, and the plastic is pressed against the outer corner.
Tools for work
To fix the plastic you need a glue gun. It allows you to accurately apply the composition used. You also need to stock up on:
- hacksaw or metal scissors;
- stationery knife;
- metal square;
- tape measure, pencil;
- masking tape;
- glue mixture.
You can obtain profiles of the desired size and shape using a miter box. However, if this tool is not there, it’s okay.
How to glue a plastic corner
To glue plastic corners to wallpaper or slopes, you should take into account the surface to which the plates will be attached. Corners can be glued to wallpaper in two ways:
- Directly to wallpaper. Important: the wallpaper texture should be shallow, otherwise dust will accumulate in the resulting gaps.
- With cutting out the strip and applying glue to the wall. To do this, you need to place a plastic corner on the installation site, and then cut off the wallpaper on both sides with a knife.
If there are curved slopes, flexible PVC profiles will be useful.
How to cut correctly
Before gluing the corner, the required length is measured. Trimming at an angle of 45 degrees is carried out using a sharp scalpel knife or hacksaw. Blanks are also made using a miter box.
How to glue
If you need to attach plastic corners to the wallpaper, first the area to be treated is freed from the finishing material. The width of the cut strips should be slightly less than the width of the profile. Next we work like this:
- Apply the selected glue to the inside of the plank;
- We apply the polyvinyl chloride profile to the surface and press it along its entire length using a napkin or dry rag;
- We secure the plastic with masking tape;
- After the glue has set, remove the tape.
Before gluing the PVC profile to the windows or doorway, it is necessary to examine the surface for any unevenness. If it is not possible to correct the defect, use flexible plastic panels.
When it is necessary to glue the corners between the wall and the bathtub, it is important that the surface of the bathtub edge that is adjacent to the wall is clean. To protect the tiles from possible glue getting on them, you can use masking tape.
First, treat the side of the bathtub and the adjacent section of the wall with an antiseptic and degreaser. The next step is filling the cracks with silicone sealant. The PVC corner is glued after a day or two.
How to glue the inner corner to the ceiling? When fixing products, it is important to avoid the formation of gaps. If adhesive has come out, it should be removed. After installing the PVC profile, finishing putty is used.
Some points and tips
When making preliminary markings, you need to be as precise as possible to avoid gaps between the joints. It is better to increase the profile length by 0.5-1 mm. Thanks to their elasticity, the panels will fit perfectly into place.
Before installing the corners on the walls, the panels are cleaned of dirt. If the cutting of the panels turns out to be uneven, do not fill the gaps with silicone. Gradually, the defective areas will become covered with dust and become noticeable.
To attach the arched corner, you will need a hair dryer. If after 2-3 warm-ups it was not possible to bend the profile, further attempts should be stopped. Prolonged heating makes the material hard and brittle.
When making door jambs, it is important to choose a suitable adhesive composition: it must securely fix the plastic to the existing surface.
Corners made of polyvinyl chloride are good protection for corners and slopes from accidental damage. Thanks to them, the interior becomes more attractive. The finishing results depend on the choice of glue and adherence to installation techniques.
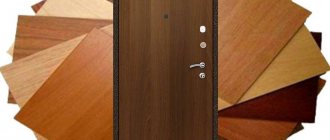
Selecting corner material
When you are convinced that installing corners is necessary and not just a whim, you should study the construction market in order to make the right choice. Such products are made from different materials, it can be:
- MDF;
- wood;
- plastic.
Each of these types has its own advantages and disadvantages. Before gluing corners to slopes, you should consider in more detail the features of elements made of different materials. It could be plastic. Such products are made by hot bending of polyvinyl chloride fabric. Typically, the width of the shelves varies from 10 to 40 mm. There are asymmetrical options. If it is necessary to refine an arched opening, this can be done using a flexible profile.
The advantage of plastic corners is their low cost; in addition, the elements do not require painting, which distinguishes them from wood. Cork corners are also available for sale. Such elements are used for arched openings, but their use is not limited to this area. Cork corners can also be used to finish slopes of various shapes. Cork has a lot of advantages, among which are:
- fire resistance;
- strength;
- environmental friendliness;
- practicality.
This material has almost no disadvantages, but it can be vulnerable if your pet wants to sharpen its claws on it. The surface is easy to damage. Among others, bamboo and wooden products should be highlighted, which are a sign of excellent taste. Such corners will fit well into almost any interior. We must not forget about environmental friendliness, but such products are more expensive than analogs made from other materials, and in addition, they often require painting. MDF can also be compared to natural wood, but this material is cheaper, because it is wood dust.
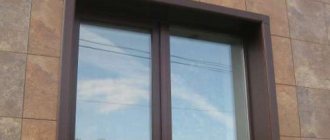
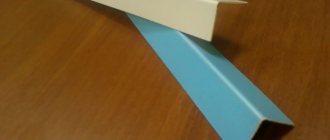
Plastic corners for external slopes. Varieties and features
Finishing plastic slopes with corners
Plastic corners are an indispensable element of decoration and decoration. Their installation does not require much effort, and after installation is completed, it is quite possible to hide the defects of the plaster. Decorative elements perfectly complement the design of the entire room, but this is not the most important function that plastic corners perform.
- For window slopes inside the house
- Door slopes also need decorative corners
- For arched openings
- Can be used to protect the corner of a wall after wallpapering
- In order to fix the corners that appear with the help of drywall, and which are subsequently subject to sealing
- In furniture production
- For forming joints when using ceramic tiles
- Finishing external and internal seams during plastic covering
- Draping a joint when finishing a building with siding
On the outside of the building, when it is necessary to protect the polyurethane foam and for a favorable appearance
Decorative plastic corners
Thanks to this list, which undoubtedly can be continued, it becomes clear that plastic corners are widely in demand in construction and facing work. To produce the profile, a PVC sheet is used, which, after strong heating, is bent on the floor at the desired angle. Thanks to this method, the PVC plank remains smooth and has no cracks. L-shaped PVC corners are most often used in installation work; they are used to trim the corners of slopes on windows and doors. The sizes of the corners will tell you where it is best to use them.
PVC construction corner
Due to the harmful effects of precipitation, it is recommended to use profiles for external work, the dimensions of which start from 20 mm. While indoor conditions are less severe, it is possible to install smaller elements. Plastic parts are suitable for plastic panels, window slopes and lining.
There is also a huge number of advantages that will emphasize the need to use decorative plastic corners for slopes. Some of them are given below:
- Low weight does not burden slopes
- There are many shapes and varieties of PVC corners
- Colored plastic strips can be combined with various decors
- Convenient to cut - this is especially pleasing when installation is done independently
- Installation is possible using self-tapping screws, glue or putty
- The lines become clear
- Such corners can last up to a hundred years
- Low cost allows everyone to use the elements
Plastic corners for finishing slopes
For arches, unequal plastic corners are used. Thanks to this cross-section, they are pliable and easy to attach. A section of one side makes a bend of the desired radius. PVC planks are used for external and internal work, for the first the angle is 90 and 105 degrees.
Important! Recently, self-adhesive corner corners for slopes have become popular. In addition to the fact that there is no need to buy glue, they are easy to bend and unbend. An interesting feature is that the material is sold in rolls.
Which glue to choose
Before gluing the corners to the slopes, you must select an adhesive composition. It is important to remember that if it is necessary to glue a narrow product, the composition may leak out and get on the walls. The result may be damage to the decorative material, which will negatively affect the appearance. Therefore, you should choose a composition whose excess can be removed from the surface.