Icer
13129 0 0
Icer September 19, 2016Specialization: master in the construction of plasterboard structures, finishing work and laying floor coverings. Installation of door and window units, finishing of facades, installation of electrical, plumbing and heating - I can give detailed advice on all types of work.
Tell me, did you know that finishing the slopes costs 2-3 times more than the materials needed for this? When I talk about this fact, many developers are very surprised and think that since this work is so expensive, it means that their implementation requires high qualifications and experience. In fact, almost anyone can make slopes from plasterboard on windows; I will tell you two technology options, and you need to choose the more suitable one and repeat all the steps described in the corresponding section.
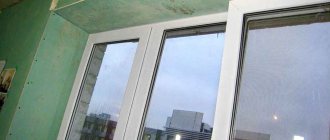
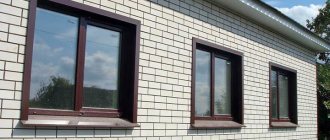
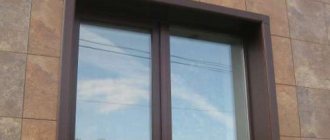
In the photo: here's how you can transform a window with your own hands
Properties of drywall
When planning to make window slopes from plasterboard with your own hands, you need to learn about the advantages and properties of the material. The first thing to notice is the ability to carry out work with your own hands, without the help of craftsmen. The final result will please you and meet all repair requirements.
After cladding, the material can be sheathed, the opening can be decorated with tiles and other finishing materials, for example, using painting or wallpapering. The main properties of drywall when designing slopes are presented in the table:
| Properties: | Description: |
| Decent level of sound insulation and thermal insulation: | If you need a window opening and window sill, you can not only cover it with plasterboard, but also lay an additional layer of insulating materials to strengthen the structure and insulation qualities. |
| A light weight: | Due to the small mass of plasterboard, there is no need to use special technologies for installation; installation is carried out on a metal profile from which the metal frame is created or on adhesive mixtures. |
| Ideal plane: | The plasterboard sheets are perfectly flat, due to which the slopes on windows and doors will be smooth, which greatly facilitates the process of finishing with putty, and also speeds up the creation of slopes. |
| Breathability: | Due to its properties, the slope does not allow deformation, even if there are strong temperature changes or there is high humidity in the rooms. |
| Environmental friendliness: | Although plasterboard sheets may contain additives, the material is environmentally friendly and slopes can be made in children's rooms. Drywall does not emit toxic substances. |
| Minimum amount of garbage: | During installation work, there is almost no waste, dust and other debris from the plasterboard material. |
For window slopes made of plasterboard, it is necessary to choose the right sheets, which will have certain types of additives and other additives:
Drywall window slope
- To design slopes in a normal environment, in a residential building or apartment, standard drywall is used, which can withstand humidity up to 70%.
- When using plasterboard on the street side or in the bathroom and other damp places, moisture-resistant plasterboard is used; the material additionally contains antifungal and hydrophobic impurities.
- To reduce the likelihood of fire, fire-resistant material is used for the slopes of windows and doors, which already contains admixtures of mineral wool and fiberglass. This type of plasterboard sheet is rarely used, but it is very durable in itself.
Important! Drywall is a breathable material, due to which it can absorb moisture and, if necessary, release it into the atmosphere without changing its shape.
Finishing a window slope with plasterboard (video)
Beautiful window slopes made of plasterboard: assembly stages
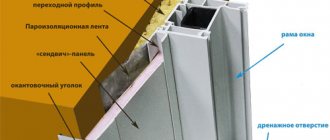
There is a method for installing slopes using a metal profile. Its essence is to create a metal frame on which drywall is installed.
Main stages of profile installation:
- Installation of vertical and horizontal profiles.
- Take measurements of parts.
- Lay insulation.
- Attach the drywall to the profile, preferably using self-tapping screws.
- Seal the joints with special tape and cover them with putty.
- Shape the corners. Putty. To ensure a smooth surface, the putty is rubbed down.
- Finishing and decor.
Work using drywall and profiles is carried out quickly, and a minimum of construction waste is generated. This method significantly reduces the space of the window opening, and the cavity between the drywall and the wall must be closed with insulation. This method of finishing is good because the sides of the windows are perfectly insulated.
Advantages of plasterboard cladding
The material has been used for window and door slopes for quite some time. This is not surprising, because it has a number of advantages:
- Environmental friendliness and safety for human health.
- Low material cost.
- Easy to install.
- Minimal maintenance of ready-made slopes.
- Stylish look.
- The ability to make an arched opening and other complex shapes.
- Long service life of plasterboard slopes.
- Possibility of additional insulation of windows or doors.
- Versatility: used not only for windows and doors, but also used for leveling ceilings and walls.
Important! Although plasterboard material has a number of advantages, it also has a disadvantage: the sheets are easily damaged mechanically, even material protected from water can be destroyed due to prolonged contact with it.
Installation using putty
Finishing putty can be used as an adhesive material - it has better adhesion. The putty should have a paste-like consistency.
Finishing slopes with plasterboard with your own hands using putty is done in the following way:
- when the surface is cleaned of dirt and dust, it is moistened with water;
- on parts made in advance, putty should be applied in the form of separate islands;
The putty is applied to the panel with strokes, the product is placed in the required position and moved so that the adhesive mass spreads. In this position, the slope is left for 12 hours, supported if necessary;
After installing the drywall, install a support
- After a while, the support can be removed and wait for the adhesive mixture to dry completely.
Preparation for finishing
Before making slopes from plasterboard, you will need to prepare a window or door. In terms of preparation, a plasterboard door slope and a window slope are almost the same, but for doors the following is taken into account:
- Presence of communications. For example, wires for the Internet, electricity or a call. The installation is done before the installation of the doorway begins.
- Possibility to install second entrance doors. The need arises if the first door is not insulated, and the sound insulation of the doors does not matter.
Removing foam from a slope
Preparing the opening is as follows:
- When an old window or door is dismantled and a new product is installed, the foam remains and its remains are cut off.
- Use a hammer or other device to remove plaster and other protruding parts on windows and doors. Often there may be a metal pin and other elements under the plaster; they are cut off.
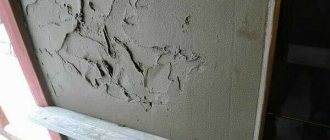
- The gap, hole and other defects in the opening must be puttied.
- The joints that appear between the window frame or interior doors must be coated with sealant.
- After the putty and other mixtures have dried, a primer is applied in two layers around the perimeter of the opening.
At the end of the preparatory work, the opening is completely cleaned of dirt. Everything is swept and dried. In order not to damage the window or door frame, it is sealed with masking tape and cardboard.
How to achieve horizontality of the upper slope?
To achieve strict horizontality of the upper slope of plasterboard, it is necessary to check its location during installation using a level in two directions.
If any place needs to be brought closer to the wall of the opening, this can be done by lightly hitting the drywall. But you shouldn’t pull the plate in the opposite direction. The mixture does not have the properties of rubber and will not return to its previous state. Therefore, it is better to apply a layer of the mixture with a reserve, and the excess substance will spontaneously distribute between the surfaces being connected, partially filling the voids.
Some craftsmen, for the upper slope of plasterboard, come up with supports or use dowels to fix the slab in the desired position. In most cases, this is not necessary. Surface tension forces can easily hold the drywall, preventing it from changing its spatial location.
Frame method of finishing slopes
Frame method of finishing slopes
The frame method of decoration is convenient and practical. True, installation of the material is somewhat more complicated, because the U-profile needs to be fastened with self-tapping screws, which is more difficult and takes longer. The fixation is carried out securely, everything is screwed in flush with the drywall so that the frame is strong. Step by step, you can make the sheathing of the opening yourself like this:
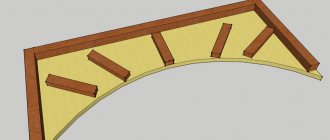
- Wooden planks or metal profiles are used for the frame.
- The material is cut to fit the opening. The slats need to be installed along the entire perimeter of the slope, at the internal and external corners. For reliability, cross bars are attached.
- If desired, insulation, in the form of mineral wool, is placed into the frame; it is installed in ready-made cells.
- Now the plasterboard sheets cut to size are fixed. Trimming is carried out only if the manufacture of the frame is completed.
- At the end, sheathing is carried out with plasterboard sheets directly to the profile or slats.
The advantage of this method is the need to line the slope and adjacent walls. The disadvantage of this method is that it reduces the space in the opening, especially when it comes to a door.
Mixed method
You can also install window slopes made of plasterboard yourself using a combined method, which has several interesting varieties.
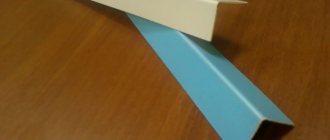
- 1. A metal L-shaped profile is attached to the window frame (see photo) and immediately lubricated with acrylic sealant. After this, a plasterboard slope is placed along the marks on the frame and window sill and secured with self-tapping screws - in a vertical position, the gypsum board sheet is held with sealant.
- Combined method.
- After screwing in the screws, the space between the wall and the slope closest to the window is filled two-thirds with insulation (mineral wool). The remaining part of the empty space is covered with putty or glue.
- 2. A PP (CD) ceiling profile is taken and cut to the height of the slope. On the floor, drywall is laid on it, also cut to height (it should be larger in width). The gypsum board is attached to the profile with self-tapping screws in increments of 25-30 cm. The resulting structure is turned over or placed vertically.
- A damper tape is inserted into the PP groove. The corner of the window opening is foamed with a small layer of foam. The slope together with the profile is pressed into the foam close to the window frame. The vertical is checked with a level. If necessary, the protruding side is slightly knocked down with the handle of a spatula or a rubber hammer.
- Then everything is the same as in the first option: insulation and glue (can be replaced with putty or foam). After the adhesive has dried, use a knife to cut off the part of the drywall protruding into the room flush with the wall. The work is done quickly and without complications.
Glue method for finishing slopes
Glue method for finishing plasterboard slopes
There is an option for decorating a slope using an adhesive solution or putty. Instructions on how to glue drywall are presented below:
- Place putty or glue on the cut parts. When using putty, it is better to use a finishing compound. The material is applied around the perimeter and slightly in the middle.
- The prepared slopes are moistened with water and drywall can be glued to the slope. Initially, the top element is installed, and then the side parts.
- When the wall and drywall are connected, you can press down the sheet and shake it a little to the sides so that the glue spreads and the drywall itself sticks.
- If the sheet is fixed tightly and does not move, then everything is left until it hardens completely. According to the advice of the experts, it is better to wait about a day or even two. If the drywall is not securely fixed, it is recommended to support it with strips at the edges and in the middle. When the mixtures dry, the planks are removed.
The disadvantages of the method are similar to the frame technology, but the advantages are obvious: the work is done faster, not as expensive, and as reviews show, the installed slope lasts for 10 years, nothing lags behind the walls. From the outside, the glue is immediately removed if it comes out, until it hardens.
Finishing by gluing
Judging by reviews on construction forums, gluing gypsum boards is the simplest and most common method of cladding slopes. Since the technology does not provide for fastening drywall with screws, to fix the upper part you need to prepare a support consisting of a wooden plank and a board. The dimensions of these parts are selected according to the height and width of the opening.
Having completed the preparatory work, proceed to finishing according to the instructions:
- Cut out some of the foam around the window frame. The width of the groove should be enough to insert the plasterboard blank into it.
- Prepare the adhesive according to the instructions on the package.
- Measure the dimensions of the top panel and cut the gypsum board to size.
- Using a spatula, apply glue to the edge of the opening, as shown in the photo.
- Insert the workpiece inside the cut groove. Holding it with one hand, blow out the inner cavity with polyurethane foam from a gun.
- Press the panel onto the adhesive layer and secure it with a vertical support. Check the horizontal level.
- Remove any excess mixture with a spatula (you can fill the remaining cracks).
Recommendation. Pour a minimal amount of foam into the cavity. Otherwise, when it expands, the composition will move the plasterboard sheet and prevent it from sticking.
The side slopes are finished in a similar way. When finished, install perforated corners along the edges and apply a layer of finishing putty. When the building mixtures have hardened, you can proceed to grouting and further painting. Watch the video for a master class on gluing slopes.
Installation on polyurethane foam
Fastening window slopes with polyurethane foam
You can seal the slope by fixing drywall with polyurethane foam. The sealing is very simple, but it is used if there are few defects on the slopes and the holes are small in size, up to 3 cm. For larger sizes, the defects need to be sealed with foam before installation; the correct method for sealing potholes is using cement mortar or a starting type of plaster. You need to sew it like this:
- Dismantle the old coating, remnants of plaster and foam. Next, large potholes are filled.
- When the holes are dry, polyurethane foam is applied to the drywall from the back side of the material. The foam layer is no more than 1 cm. The material is applied in the form of a snake.
- The plasterboard material is placed on the slope and pressed against it. The pressure on the drywall must be strong so that the foam adheres to the slope.
- After this, the drywall comes off, leaving foam on the slope and finishing material. After 10 minutes the foam will increase in size.
- The drywall is again mounted into the slope and pressed against the wall. If necessary, fix the material with spacers and leave it for up to 24 hours without continuing work.
- The next stage is sealing the drywall seams on the slopes using plaster.
Puttying a window slope
The disadvantages of this design of door and window slopes are quite large. The biggest disadvantage is that the surface will first need to be leveled, otherwise the sheet of drywall will not work. Drywall on slopes may bend during installation. There are voids left on the door/window slope, making the fixation not very reliable. But this is the fastest method for finishing slopes with plasterboard. When a window or doorway is covered with plasterboard, using any described method, the opening is finished with various materials. But before finishing the slopes, you need to do the following:
- The slope is puttyed with a thin layer.
- On the outside of the opening, protection is placed and a corner is formed using a plastic perforated corner, which is covered with putty.
- Another layer of putty is laid down to completely level the surface.
- Finishing material is selected.
Advice! Painting is used for decoration; you can paint it in any color, for example, the color of a door or window, wallpaper in a room, or use standard white paint. Photos on the Internet will help you decide on your choice; a bay window in an apartment in different colors looks very nice.
Painting is not durable, so for part of the slopes a panel type of material is used, for example, plastic for slopes, instead of plasterboard, PVC panels and other materials, this is a good material, made according to GOST, and is distinguished by its durability. The video shows step-by-step work with drywall; you can use the method for doors and windows:
Various installation options
Finishing slopes with plasterboard is carried out in three main options:
- Installation using polyurethane foam.
- Pasting on putty.
- Frame mounting.
Various options for installing plasterboard slopes. Each of these methods is suitable for independent use and gives a complete idea of how to make slopes in different situations. These methods are used for finishing all types of surfaces.
Is it possible to plant slopes on foam?
The simplest options for facing slopes are discussed above. However, there is another one, the most difficult to perform - fastening drywall with foam. The technology itself is easy to understand. Problems arise when planting a slope on foam - as it expands, it complicates the process of fixing a sheet of drywall in the desired position.
They resort to it when there are narrow gaps between the wall and the frame (up to 3 cm) and there is a need to insulate the window between the profile of the window structure and the wall material - the foam simultaneously functions as insulation. The method is also good for correcting the curved surface of the wall of a window opening.
Let's look at the whole process step by step.
- All holes and gouges in the wall of the opening are sealed - if this operation is ignored, the drywall may fail in these places. Use foam, cement-sand mortar or starting type of plaster.
- After the holes and potholes are completely dry, polyurethane foam up to 1 cm thick is applied to the back side of the gypsum board using a snake.
- The slope is placed against the wall and pressed against it with force - the foam should adhere to the wall material.
- A sheet of drywall comes off. If everything was done correctly, the foam remains on the wall. After 10 minutes it will begin to expand.
- After the process of foam expansion begins, the gypsum board is again pressed against the wall and fixed with spacers.
Here it is important to set the slope correctly according to the geometry. If necessary, the sheet can be pressed in a little by tapping it. The main thing is not to overdo it - you won’t be able to squeeze it off the wall, since the foam does not have the properties of rubber.
Landing on putty
But how can you make plasterboard slopes more reliable so that no problems arise? The option with putty is perfect for this.
How to attach drywall to a profile frame
In order for a wall finished with gypsum board to serve for a long time and without complaints, it is necessary to follow all the technology for working with the material. In general, attaching drywall to a frame is quite difficult and, if you are not confident in your abilities, it is better to entrust this task to professionals.
How to attach a profile under drywall
First you need to figure out how to attach the profile itself to the wall. In order to fix the frame elements, you need to follow this sequence of actions:
- A PN guide profile is fixed at the junction of the floor and wall
- A plumb line is lowered and another guide is attached to it on the ceiling.
- A corner is assembled from PS brand profiles, which is attached to the back of the frame element
- The resulting frame element is inserted into the guides and secured with self-tapping screws
- For strength, the rack profiles are reinforced on both sides with hangers
Now let’s talk about which screws to use to attach the profile to the wall: it’s best to take long fittings, at least 150 mm. The distance between two such screws should not exceed 20 cm.
