What requirements must slopes meet?
All requirements and standards for the arrangement of window openings are specified in SNiP and GOST. Each type of building material has its own standards.
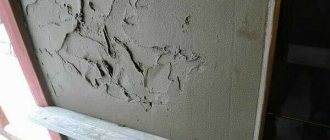
- Plaster. The surface of the external and internal slopes must be equally flat and have an equal slope along the entire length. Depending on the characteristics of the solution, unevenness of no more than 1-5 mm is allowed. There should also be a bevel from the frame and frame outside to drain rainwater. Modern builders, when installing plastic double-glazed windows, do not use plaster, but use additional elements included in the kit or ordered separately;
- Drywall. Finishing an opening with even sheets is much easier than with mortar, but the material must be: moisture-resistant, tightly adjacent to the frame and surface, and it is also important that it be carefully primed and painted;
- Plastic and sandwich panels must be free from flaws, equipped with a layer of insulation and also not leave “cold bridges”.
Any type of arrangement of external or internal sides must first of all fulfill its main functions: create an aesthetic appearance, prevent heat loss and moisture penetration, and have a service life no less than the window frame itself. In addition, windows and slopes should fit as tightly as possible to each other, preventing moisture and sunlight from entering. Only in this way can the destruction of sealants, heat-insulating gaskets and box foam be avoided.
Installation of slopes
offers its customers another service - finishing slopes with sandwich panels.
Today, this material is considered optimal in terms of price/quality ratio and is widely used for PVC windows with double-glazed windows. The sandwich panel consists of two PVC sheets of increased rigidity, between which there is a filler (polystyrene or foam). This panel design provides the window opening with excellent heat and sound insulation qualities, and the slope takes on a beautiful, neat, finished look.
Advantages of slopes made of sandwich panels:
| Completely “dry” installation, carried out by our company’s specialists quickly and without dirt. Such slopes can be installed even in apartments with completely completed renovations, without causing damage to other finishes. If necessary, such slopes can also be easily dismantled and repaired. |
| Plastic panels are ideally combined with modern double-glazed windows; a window framed with sandwich panels takes on a neat, aesthetic and finished look. |
| Additional insulation and sound insulation. Together with the window profile, the sandwich panel frame forms a so-called “bowl”, which, firstly, protects the window opening from freezing, and secondly, prevents the formation of condensation. The entire structure will have the correct microclimate, extending the life of your windows and making their operation more comfortable. |
| Preservation of appearance throughout the entire period of use. The plastic used in the production of sandwich panels is highly resistant to all external influences. It does not fade in the sun, does not crack due to temperature changes, does not rot from moisture, does not warp, or turn yellow. |
| Easy care. Plastic panels are easy to clean and do not require any special care during operation. |
| Affordable price. Despite all their positive qualities, slopes made from sandwich panels are characterized by a very low cost. |
Despite the apparent simplicity, when installing slopes from sandwich panels, it is necessary to follow the technology. Incorrect (makeshift) installation can lead to a number of problems:
| Blowing in from under the slope due to a broken window installation seam. |
| Deterioration of heat and sound insulation qualities due to insufficient foaming. “Empty” slopes are also often found in new buildings. |
| Errors and damage as a result of unqualified actions lead to the need to replace the corners (F-profile) or the panels themselves - hence the extra costs |
Entrust the installation of slopes to professionals! Contact us right now!
Price for installation of slopes made of sandwich panels:
| Retail cost of slope panels (available only in specified sizes) | |||||||
| Slope length/depth, mm | 20cm | 25cm | 30cm | 40cm | 50cm | ||
| 150cm | 280 rub. | 360 rub. | 430 rub. | 580 rub. | 720 rub. | ||
| 200cm | 380 rub. | 480 rub. | 580 rub. | 770 rub. | 960 rub. | ||
| 250cm | 480 rub. | 600 rub. | 720 rub. | 960 rub. | 1200 rub. | ||
| 300cm | 580 rub. | 720 rub. | 860 rub. | 1030 rub. | 1440 rub. | ||
| Retail cost of F-profile/starter is 150 rubles/piece. (1 piece = 3000mm) | |||||||
| Cost of installing slopes (labor + material) | |||||||
| Slope width | 5-15cm | 16-27cm | 28-34cm | 35-50cm | 51-60cm | over 60cm | |
| Cost per linear meter | 750 rub. | 900 rub. | 1030 rub. | 1250 rub. | 1360 rub. | Price negotiable. | |
Working materials and tools
Before purchasing materials, you should carry out the appropriate calculations and, for convenience, draw a small cladding diagram. First, the total area of the sheathed surface is determined by multiplying the length by the width, and then the number of auxiliary structures, additional elements and fasteners is calculated.
List of required tools:
- building level;
- marker;
- brush or roller for primer;
- spatula for applying leveling solution;
- roulette;
- square;
- screwdriver for screwing in screws or self-tapping screws.
Other tools may also be needed, depending on the type of decorative material used.
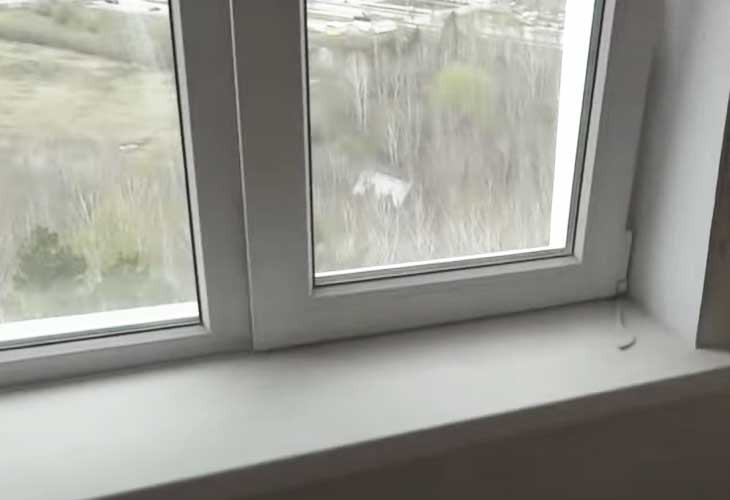
Do-it-yourself plastic slopes for windows
If the apartment has a plastic window, the slopes can also be made of plastic. Installation work in this case does not require serious skills and can be easily done with your own hands.
Installation of plastic slopes is carried out in the following sequence:
1. The starting profile is cut to size depending on the dimensions of the window and attached to the very edge of the window block and across the window sill. The last segment should not extend beyond the wall. Special screws are used for fastening;
2. Plastic panels are cut to size. Their dimensions must correspond to the distance between the installed and secured starting profile;
3. The prepared elements are carefully installed inside the starting profile. For ease of positioning, you can help yourself with a wide and thin spatula;
4. Plastic elements are connected to each other and secured along their entire length to prevent them from being squeezed out after filling the gap between it and the wall with foam. To do this, first, using self-tapping screws, the vertical and horizontal strips are connected to each other, and the mounting foam is introduced into the free space in small quantities and in increments of 20 - 25 cm. In this case, when the space is finally filled, the plastic elements will not change their position.
In some cases, the starting guide profile can be mounted around the entire perimeter of the installed plastic elements.
In this case, the design turns out to be more beautiful, but not everyone can design the slopes in this way.
Characteristics of plastic panels
Now plastic panels are produced in various versions, differing in size and appearance. The length of finished products can start from 2.7 m and reach up to 6 m. Previously, the maximum width was considered to be 37 cm, but now half-meter panels can be found.
Inside plastic panels without insulation there are stiffening ribs that are located along the entire plane. These ribs form air channels that provide sound insulation and keep out the cold from the street.
Most panels use plastic, for which temperature differences of no more than ± 20 degrees are acceptable. If this indicator is not satisfactory, then you can buy special panels for which a difference of ±50 degrees is acceptable. Drawings and various textures can be located on the upper side. The top coating is a special varnish, which protects against external factors.
That's all the theory you need to know. Now you can study the main question - how to trim window slopes with plastic with your own hands.
Technical aspects of installation
During installation, it is necessary to ensure a sequence of layers so that the most vapor-permeable layer lies on the inside, then, as you approach the outside, the level of performance decreases. This is required so that moisture that gets under the finishing of the opening can evaporate from there.
When installing plastic windows, it is important to install slopes in the following order:
- The surface layer that protects against steam penetration must be coated with mastic or silicone. An alternative is bityl rubber tape.
- The second layer is polyurethane foam.
- External – PSUL tape. It protects others from exposure to sunlight and rain.
Materials
If you plan to make plastic trim, you will need the following materials:
Installation of PVC slope
- PVC panels, up to 3 m long. For each window, a whole blank. For an opening with standard dimensions, two strips will be required.
- L-shaped, starting, contact profiles. It is not important to make them whole.
- Additionally, a profile of 60x27 mm is suitable as a frame element.
- Self-tapping screws with a flat head.
- Silicone sealant.
Tool
Required tools:
- Measuring instruments and pencil.
- Plank level.
- Perforator with a set of cue balls.
- Boer.
- Set of attachments for screws.
- Hammer, hacksaw.
- Construction pistol.
Surface preparation
A day after installing the window, you can start installing the slopes. You will need to clean off the excess foam with a utility knife. Clear the surfaces of construction debris.
Installation of the guide profile
Pre-measure the dimensions of future profiles along the visible edge. Calculate the outer width, then additionally measure the height of the opening. It's easier to do this by removing the frame.
To install slopes, use an L-shaped profile of suitable width. Afterwards it is cut into sections and secured to the opening with screws at 20 cm intervals.
Lathing
For the sheathing, wooden beams 20x40 mm are used, which are attached to the side and top parts of the opening. Fasten with dowels in increments of 30 cm.
Panel installation
After measuring the dimensions and cutting out the strip of the required size, it needs to be attached to the sheathing and the top profile. Fastening must be done carefully. The side profiles are attached similarly to the top. The same applies to sheathing with a PVC panel.
Sealing the slope
Installation of F-profiles
After installation is completed, it is necessary to hide the ends with an L-shaped profile. Initially, the length is measured, then the profile is cut and inserted. In areas of contact with screws, lightly cut the edge profile.
Setting up a profile
Plaster slopes on windows for beginners
Plaster slopes are a universal option. Such slopes will look appropriate on both plastic and wooden windows.
The work is performed in the following sequence:
1. Masking tape is glued to the window frame to prevent it from being damaged during installation work. Markings are applied in accordance with which the slopes will be formed. To ensure the correct geometric shape, a square should be used to mark. The slope should begin at the edge of the window block;
2. The rule or metal corner is installed perpendicular to the mark made on the window sill and pressed tightly against the wall. Fixed with self-tapping screws;
3. The space between the frame and the wall is sealed with a prepared solution to prevent drafts and achieve an optimal level of tightness of the window unit;
4. Beacons are installed. A solution is used to fix the beacons. The correct spatial position is checked using a square along several lines. It should barely touch the beacon. Using a level, the position of the beacons in the vertical plane is controlled. We leave the beacons for a day;
5. We remove the mixture from the frame and rule, carefully scraping it off with a spatula. Mix the gypsum mixture. We plaster the slopes, leveling the composition in the plane along the beacons. Letting the mixture dry for about 10 minutes, stretch the surface several times. After the mixture has completely dried, unscrew the rule.
Attention! After the solution has completely dried, the slopes are painted in the desired color.
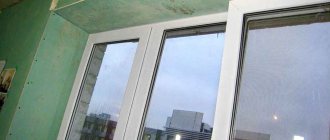
Plastic slopes
Another way to get aesthetic and reliable slopes is to cover the opening with double-sided sandwich panels. They have not only good thermal insulation properties, but also sufficient rigidity.
It is not recommended to use one-sided sandwich panels and decorative wall panels made of thin cellular plastic for finishing the window opening. They do not have the necessary strength, wear resistance and thermal insulation qualities. It is better to use special panels for making slopes.
USEFUL INFORMATION: Choosing the best window sill for plastic windows (prices)
Plastic finishing is gaining increasing popularity. The material of the slopes not only visually harmonizes with the window frame made of PVC, but is also securely fastened to it using special sealants. This method of finishing the opening has other advantages:
- Low price.
- A smooth surface that retains its properties for many years and does not require additional finishing or regular maintenance.
- No cracks or temperature changes due to the use of the same material from which the frame is made.
- Additional thermal insulation that strengthens the weak point of the window opening - the seam between the frame and the wall of the room.
- Fast installation. Plastic slopes are installed faster than plasterboard and especially plaster ones.
- Minimum amount of dirt and dust when facing with plastic.
- 100% moisture resistant.
- It is possible to replace part of the slope if damaged.
- The frame covering the outer contour reliably protects the junction of the wallpaper and the window opening.
Minuses:
- Susceptibility to mechanical damage.
- Impossibility of local repairs. If it breaks, you will have to replace the entire panel.
- Low quality of additional elements, such as corners. Often these small parts are made from recycled plastic, which turns yellow over time and stands out unattractively against the background of snow-white slopes.
- Incompatible with interior. Glossy plastic will look unnatural in a room decorated in a classic style, as well as in any other design direction where natural materials are used.
USEFUL INFORMATION: Blinds on plastic windows: install them yourself
To avoid adding others to these disadvantages of plastic slopes, you need to choose the material wisely, guided by two main rules:
- Panels must be made from virgin plastic. Only such products are absolutely harmless even when heated in the sun and will not turn yellow after a year.
- The PVC layer must be thick enough. This will help avoid damage to the slopes.
When choosing between matte and glossy plastic, you need to take into account that stains and fingerprints are more visible on a glossy surface. Matte panels look more natural and are similar to classic painted slopes.
Glossy plastic
Matte plastic
Expert opinion
Anton Tsugunov
Construction expert. Entrepreneur. 17 years of experience. More than 100 completed objects.
Depending on the width and length of the slopes, I use different plastic slopes; fortunately, Leroy has a large selection. Here are the ordering links for common sizes:
Slope width 250 mm
Length 1.5 m - Insulated window slope 1500x250x10 mm >>>
Length 2 m - Insulated window slope 2000x250x10 mm >>>
Length 3 m - Insulated window slope 3000x250x10 mm >>>
Slope width 400 mm
Length 1.5 m - Insulated window slope 1500x400x10 mm >>>
Length 2 m - Insulated window slope 2000x400x10 mm >>>
Length 3 m - Insulated window slope 3000x400x10 mm >>>
Slope width 600 mm
Length 1.5 m - Insulated window slope 1500x600x10 mm >>>
Length 2 m - Insulated window slope 2000x600x10 mm >>>
Length 3 m - Insulated window slope 3000x600x10 mm >>>
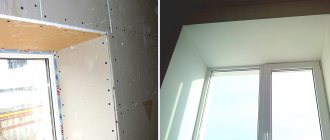
Drywall slopes - step-by-step instructions
Quite often in private houses and apartments, slopes are made of plasterboard.
Installation work is carried out in the following sequence:
1. Dimensions are taken to determine the dimensions of the upper element of the mounted system. The sheet of drywall is cut to size along the front side. Only the cardboard itself is cut through;
2. Prepare an adhesive composition designed specifically for gluing drywall. The composition is applied to the cut drywall element. The latter is installed in place. Its correct spatial position is controlled using a level;
3. The side elements are measured and cut to size. Mounted in the same way as the top one. Measurements are taken and the metal mounting angle is cut to size;
4. Putty is mixed. With its help, the mounting angle is mounted along the entire perimeter of the installed slope. Its spatial position is verified. A putty designed specifically for drywall is being prepared. The composition is prepared in accordance with the instructions;
5. Slopes are plastered. The composition is carefully leveled using a spatula. After the composition has completely dried, the sagging is cut off with a spatula, the surface is cleared of dust, and a second layer is applied. After the composition has dried, the sagging is cut off and the surface is carefully leveled using sandpaper.
Advantages of panels over other materials
Panels are considered a universal finishing material. Finishing slopes using this product is a simpler procedure than applying plaster or using gypsum boards. Plastic varieties stand out especially. They are characterized by good durability, low cost and ease of installation.
Covering window slopes with panels has many advantages, namely:
- The work is completed in a short time. The process usually takes no more than one day, which is significantly less than putting putty and subsequent painting.
- If properly sealed, such slopes will become an excellent barrier to the penetration of cold.
- Modern materials have good properties. They are durable and indestructible from exposure to ultraviolet radiation.
- There is no need to carry out additional finishing measures. The fact is that the panels have different colors and textures, which makes them suitable for use in various interiors.
- The result is an attractive decorative surface. It is also necessary to take into account that there are additional elements (profiles, corners, moldings) that make the coating even more sophisticated.
Do-it-yourself wooden slopes for plastic windows
If plastic windows are installed in a wooden house, the slopes can also be made of wood. For this purpose, a board 18–20 mm thick is used, which is cut to size and varnished on all sides.
Installation is carried out in the following sequence:
1. Polyurethane foam is applied around the perimeter of the upper part of the window opening;
2. The wooden element is installed in place and leveled. Self-tapping screws are used to secure it. The side panels are installed in the same way;
3. Sealant is applied along the perimeter of the window block in places of contact with the slopes;
4. A wooden corner is installed along the perimeter of the installed slopes.
Massive slopes
Massive slopes are edged boards, polished on all sides, made of dense wood. They are distinguished by durability, structural strength, and ease of installation. However, they can only be mounted on concrete, brick surfaces or timber walls. Before installation, it is imperative to impregnate the material with an antiseptic, fire retardant, and then apply a decorative layer.
Stacked slopes
To cover slopes, you can use stacked wooden planks (siding panels). Finishing is carried out in a direction perpendicular or parallel to the plane of the window. Unlike solid boards, they are characterized by lower cost, as well as strength and durability. But, despite this, they are in no way inferior in decorative properties, and due to their lightness they can be installed on materials even with minimal load-bearing capabilities.
To protect against external negative factors, stacked structures should be protected by applying appropriate coatings.
Repair of slopes from GVL
In this case, the slopes were installed more than 8 years ago. During the process of cosmetic renovation (dividing the room into two parts), the slopes were partially puttied, sanded and painted. The work on the slopes took 2 days, the cost of the work is insignificant (compared to installing new slopes - even when compared with budget plastic ones). The walls were also painted, so no corners were needed.
An entire corner of the slope was missing. Crushed from being hit by a window for 8 years.
The slope has been completely restored and painted in 2 layers.
Expert opinion
Anton Tsugunov
Construction expert. Entrepreneur. 17 years of experience. More than 100 completed objects.
I use moisture-resistant GVL Knauf-Supersheet with dimensions 10x2500x1200 mm. One sheet is enough for several windows. I order and pay by card in Leroy along with delivery, here is the link >>>
Ceramic tile finishing
Finishing slopes with ceramic tiles is in demand for rooms with high humidity or unheated. For installation, it is necessary to level the surface to an almost ideal plane. Deviations of no more than 1 mm per linear meter are allowed. The screed is made with a cement-sand mortar, on top of which tiles, chipboard, and moisture-resistant plasterboard are laid.
Laying is carried out by building up vertical slopes, and then the upper horizontal one. The thickness of the seams is controlled by special plastic beacons. Seams should be treated with moisture-proof impregnations.
Installation of slopes and PVC window sills
Installation of slopes and PVC window sills in the city of Ryazan
We can offer you: - Free visit, measurement and consultation. — High-quality materials — Fast production times — Professional installation — Reasonable prices
| Service | Price, rub./m.p. |
| Installation of window slopes up to 250 mm wide | 350 |
| Installation of window slopes up to 400 mm wide | 450 |
| Installation of window slopes up to 600 mm wide | 600 |
| Installation of PVC window sill | 1450r. sq.m. |
Before installing PVC slopes, it is necessary to install a PVC window sill
Installation of a window sill includes the following steps: - Preparing the bottom of the opening - Clearing debris, leveling the surface, etc. - Accurately measuring and cutting the window sill to the required dimensions. — Inserting a window sill into the opening — Leveling using special plastic wedges. — Sealing of seams using polyurethane foam — Treatment of the joint with the window block with liquid plastic.
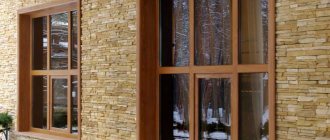
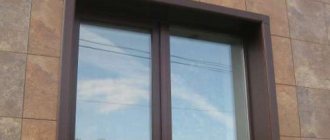
Artificial or natural stone
When decorating windows with stone, the main thing is to correctly match the width of the opening and the size of the decorative items. Decorative elements should not make the window massive; their thickness should be a maximum of 2 cm. Artificial and natural stone is laid on a special glue, on a previously leveled surface.
Slopes made of stone and tiles are the most expensive option. They enhance the status of the room, making the window expressive and presentable. The high-strength material is not deformable, has a long service life, and is easy to clean. It is laid out only in a horizontal position. If necessary, you can trim with a hacksaw or a circular saw, depending on the composition and type.
After installation, the joints are grouted. A special epoxy and silicone mixture is applied to the joints and smoothed with a rubber spatula. Artificial bricks can be laid end to end without rubbing.
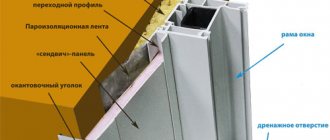
Installation of window slopes from sandwich panels
Technical characteristics of sandwich panels for window slopes
- Huge selection of colored slopes
- noise and sound insulation not less than 21 dB;
- density – 30–35 kg/m³;
- compressive strength – 0.25 MPa;
- thermal conductivity of the product – 0.029 W/ (m•K);
- product flammability class – G1;
- service life – about 50 years;
- temperature – from -50 to +60 degrees;
- heat conductivity – not less than 0.041 W/ (m²•K).
- Installation of slopes from sandwich panels
*To find out what the cost of installing slopes on plastic windows is in your case, you can call the manager or calculate the cost of installation yourself using our calculator. Warranty on all products.
If you want to install the slopes yourself, you can order their production from our website.
Lamination of the finished window slope panel from the customer’s material 2500 rubles/sq.m.
Laminated corners for window slopes 600 rubles for a 3-meter product.
Laminated “F” and starting profiles 600 rubles for a 3-meter product.
The manufactured repair laminated overlays for window sills are 1.5, 2 and 3 meters long and are available in widths from 10 cm to 80 cm.
Steam plug, painted for the window sill cover 600 RUR.
Order a call back
After submitting your application, we will call you back as soon as possible and answer your questions.
Color spectrum
How to install window slopes yourself
Sandwich panels for window and door slopes have the following positive qualities:
- They are light in weight with sufficient strength.
- The use of panels with lamination will allow you to fit colored window slopes into any interior.
- It is possible to select the size of the material depending on the parameters of the window opening.
- Slopes made of sandwich panels are resistant to temperature changes, moisture ingress, and are not susceptible to rotting or the spread of mold.
- Finishing with sandwich panels allows you to increase the heat and sound insulation properties of the window system.
- Easy to install and maintain slopes.
For DIY installation you will need the following tools
- A jigsaw or hacksaw for metal.
- Screwdriver, screwdrivers.
- Roulette, level.
- Polyurethane foam.
- Construction tape.
- Caulking gun
- Liquid plastic or silacrylic sealant
Stage 1
Measure the height of each of the three slopes near the window frame and near the corner, and also measure the width in two places. Due to the curvature of the walls, dimensions may vary.
Stage 2
Trimming sandwich panels according to measurements taken. Transfer the resulting dimensions to the sandwich panel and cut according to the resulting pattern.
Stage 3
Installation of P-profile. It is also called the starter, it is attached to the window frame, and installation begins with it.
Stage 4
A sandwich panel is installed in the profile. Next, a little polyurethane foam with a low expansion coefficient is applied to the seam between the wall and the panel. The level is measured and the panel is fixed with molar tape.
Stage 5
When the foam has dried, the tape is removed and an F-profile or decorative plastic corner is mounted on the end of the panel.
Stage 6
To get a beautiful joint, the part F of the profile or corner facing the room is cut at 45°, from corner to edge, the other part located on the panel is cut at 90°
Stage 7
Next, all joints between each other are sealed with liquid plastic or silacrylic.
Foamed plastic slopes
This material is easy to process, which allows you to finish even slopes of non-standard shapes and sizes. If necessary, foamed PVC can be bent and cut using an angle grinder. Flexibility in processing allows you to create spherical and other shapes of slopes.
To bend the slope in the required shape, cuts are made on the inside of the plastic panel. The number and distance between cuts is determined based on the shape that needs to be obtained in the end.
The main thing is not to make too deep cuts, this will negatively affect the strength. After bending, the material must be treated with glue in the places of cuts.
Installation of such slopes is also carried out using a metal profile. It is recommended to fill the space between the panel and the wall with insulation or polyurethane foam. Including, you can use sprayed insulation. This will ensure reliable fastening and good thermal insulation.
- Glue slope
This is when thin plastic is glued to the surface of the slope. Despite its simplicity, this method has serious drawbacks. Namely, unreliability due to thermal expansion or contraction of the material used. And, as a result, the plastic peels off. Moreover, there is the formation of condensation and freezing of slopes, since they are not insulated due to the specifics of this method.
Since this article discusses the finishing of window slopes using all existing methods, it is impossible not to mention this. Thin plastic is glued to a sheet of drywall. The disadvantages are that the adhesive connection is not particularly reliable due to the high labor intensity of the work performed. And the notoriously weak resistance of drywall to dampness and moisture.
Some friends of mine developed cracks on their plasterboard slopes after some time. Now they really regret that they didn’t immediately install plastic slopes. So we will not consider plasterboard slopes due to the high probability of their destruction in the near future.
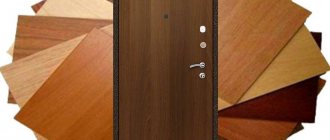
Slopes made of plastic or PVC panels: advantages and installation features
In addition to the aesthetic appearance, such materials have other undoubted advantages. Their installation is very quick, and the slopes will be durable. If we talk about plastic, it is extremely easy to care for and mold will not grow on it. It is interesting that craftsmen do not note any significant shortcomings of this material, except in cases of purchasing cheap, counterfeit products. Let's try to figure out how to install slopes from plastic panels with our own hands.
Step-by-step instructions for finishing slopes with plastic panels
Most often, window frames are produced in white, which means it is better to choose the plastic to match. To make the slopes look more aesthetically pleasing, it is better to choose matte plastic.
It may seem that finishing window slopes with plastic is a very complex and time-consuming process, but this is not so. You just have to start and be careful. After all, everyone probably remembers the saying: “The eyes are afraid, but the hands do.”
Other unusual materials for finishing slopes
The original design of the window can become the highlight of the interior. And we are talking not only about different color options for the plastic frame, but also about the design of the entire window opening.
To finish slopes you can use:
- Ceramic tiles are an excellent option for a bathroom or kitchen (here you can make a smooth transition from the apron to the window);
- Mirror plastic (mosaic or film) - suitable for small rooms where there is not enough sunlight;
- Artificial stone - in combination with imitated frames, this material can create a unique window opening design.
In all cases, the design arrangement of elements looks good when part of the tile or mosaic extends beyond the slopes onto the walls near the window. In the same way, you can “frame” the doorway to give the room a certain style.
What is not included in the price
The slope calculator calculation does not include the following work, which may affect the total cost of the order:
- Dismantling gypsum slopes, dismantling gypsum or cement-based plaster, dismantling a reinforced concrete window sill;
- Removal of waste remaining after dismantling;
- Insulation of slopes with mineral wool;
- Brickwork and other work to form the opening;
- Removing the glass unit from the window frame (in cases of finishing a street slope);
Prerequisites
- Before ordering window slopes, read the mandatory conditions:
- – Finishing of window slopes is carried out only after inspection of the openings by an OknaMag specialist, execution of an agreement and making an advance payment;
- – We may refuse to provide the service if the size of the windows does not correspond to the size of the opening or in cases where the window structures are installed in gross violation of GOST.
How does the PVC window finishing calculator work?
You will find out how much money this or that item costs when ordering rectangular slopes. The following indicators are taken into account:
- Opening for finishing the slope - select the opening necessary for installing the slopes: window, balcony door, balcony block (door with window).
- Material – at the moment, two materials for finishing slopes inside are available in the calculator, these are: a white sandwich panel 10mm thick and a laminated sandwich panel 10mm (suitable for installation with colored windows).
- Dimensions - indicate the height and length of the window opening in millimeters (indicate the size of the opening from wall to wall), select the width of the slope.
- Window sill installation - if you need to install a window sill, select the brand: Stained glass (Russia) or Möller (Germany), enter the dimensions of the window sill board. Accepted standards for window sill sizes: length - plus 100 mm to the length of the opening, window sill width - covered ⅔ of the central heating radiator.
- Threshold setting—enter the threshold parameters for the door or balcony block.
- Installing a corner – select this option if you want the end of the sandwich panels to be covered with a corner. Plastic corners with a shelf width of 20-50 mm are used.
- Seam sealing - filling the joints of sandwich panels, windows, window sills with a special compound, makes the joints invisible while simultaneously improving the sealing of the window. The joints can be coated with sanitary silicone or liquid plastic at your choice.
- Finishing from the street - as a rule, finishing of the slope from the street side is carried out at the time of installation of window structures. If for some reason your windows are not facing the slope from the street, add this option.
- Number of openings - add the required number of window openings of the same size. If your order includes the installation of slopes on translucent products of different sizes and configurations, click on the plus button, the calculator will add fields for entering new parameters.
- Delivery - by default, delivery of material and finishing of slopes in St. Petersburg , you can also choose delivery to the suburbs or remove delivery to find out the cost of finishing only.
How to install slopes on special profiles
To make a slope you will need plastic profiles and sandwich panels.
PVC panel and profiles
The sizes of the panels are selected taking into account the window parameters. During the installation process, pieces are cut from the entire panel according to the dimensions of the vertical and horizontal slopes. You can cut with a grinder with a metal disc, an electric jigsaw, a mounting knife or other tools. If burrs are formed during circumcision, they are removed with the tip of a knife or sandpaper.
First of all, we install the window sill
Step 1. A plastic U-shaped profile is screwed around the perimeter of the window frame. Check the horizontal and vertical position carefully. The ends of plastic slopes are installed in this profile. Use small self-tapping screws to secure.
We cut a U-shaped profile slightly larger than the width of the window. We screw small screws into it
Installation of the starting profile
On the side where the profile will be adjacent to the window, apply a layer of sealant and attach the profile to the window
Profile layout diagram
Important. It must be remembered that violating the integrity of the metal profile of a window frame with self-tapping screws negatively affects its performance.
First, fix the two outer screws, and after checking the position of the element, screw in the fasteners every 15–20 cm.
Frame for plastic slopes
Step 2: Make sure the dimensions are correct. Everything is fine - insert the slope into the profile. To make work easier, use a piece of plastic. Insert it into the gap between the panel and the profile and gradually move it along the panel, pressing on the end. The element will fit into the seating groove along its entire length without much effort.
Installation process
Inserting panels into the profile
Along the depth of the window, we cut out a slope from the plastic panel and insert it into a U-shaped plastic profile pre-attached to the window.
On the other hand, the slope is inserted into the F-shaped profile, which is then attached using a stapler
Step 3. Place strips of masking tape on the second (free) end of the slope and leave free pieces. With their help, it will then be fixed to the wall before foaming. The tape will prevent the slopes from bending under the influence of expanding foam.
Step 4. Carefully seal the gap between the slope and the wall, install the elements in a horizontal position and secure its positions with loose pieces of tape. Don't forget to wet the surfaces. Water not only improves adhesion, but also speeds up the hardening of the foam.
Foaming
CemStone
Highly effective complex additive for masonry and other building mortars.
More details
That is why plaster mortars for slopes require the use of special additives, such as the complex additive for masonry and mortars CemStone. It is a useful additive not only for plastering, but also for masonry work.
Possessing the properties of a plasticizer, the CemStone additive, first of all, regulates the consistency of the solution: it allows you to achieve high plasticity without adding excess water, prevents the solution from separating, extends its “life”, allowing you to work at a comfortable pace. Due to the fact that the mobility and plasticity of the solution increases, it becomes more convenient to apply and level, it adheres better to vertical surfaces and does not slip, which is especially important if you make slopes with your own hands.
After completion of the work, thanks to the use of the CemStone additive, the plaster solution hardens very quickly, in just a week, which can be decisive during repairs, and it does not cause shrinkage deformations.
In addition, the use of CemStone allows you to save dry mix, obtaining a high-strength solution.
It is very easy to use the CemStone additive, because it is sold in liquid form, conveniently packaged and ready for use, and you can buy it wholesale from the manufacturer or retail, in Leroy Merlin and other construction chains, and even in online stores.
Installation of insulation:
- Prepare a plaster solution with the addition of CemStone.
- Using plaster mortar, fill up all the unevenness and potholes left after beating the slopes.
- After the solution has hardened, prime the surface with an antiseptic primer
- Expanded polystyrene panels for slope insulation should have a thickness of no more than 15 mm. They are attached using mounting foam or mounting adhesive, which is applied in strips directly to the insulation. First, the side parts are insulated, then the top, and the joints are foamed.
- On wide slopes, the insulation is additionally secured with special “fungi” fasteners.
- Before finishing with mortar, the slopes are strengthened with reinforcing mesh, perforated corners are installed and glued.
- The mesh is glued with a thin layer of mortar, which will become a preparatory layer.
Plastering works:
- Guides made of a metal profile are installed around the window niche and secured with dowels, so that the profile protrudes beyond the window opening by the thickness of the plaster layer.
- The plaster mixture or cement mortar is poured first onto the side parts of the slopes, then onto the top.
- The mortar is leveled using a rule or a level lath, and at this stage you will appreciate how much more convenient and pliable it is with the addition of CemStone.
- After the solution has set, leveling is carried out, starting from the window sill. The rule moves along the guides, removing excess solution.
- After curing, which will occur in just a week if CemStone is used, the outer guides are removed.
- Perforated paint corners are secured to the corners using gypsum mortar and another layer of plaster is applied.
- The finishing putty is applied with a thickness of 1–1.5 mm.
- The surface is rubbed in a counterclockwise circular motion and primed.
- After drying, you can begin finishing work.
Installation of PVC panels
Plastic slopes are made from plastic lining or from ready-made sandwich panels containing an insulating layer.
Work order:
- Wooden slats are fixed along the perimeter inside the window opening, excluding the window sill.
- A starting profile is attached to the frame, and corner profiles are attached at the junction of the top and side parts.
- On the outside of the slopes, an F-shaped profile is attached to wooden slats, which extends onto the wall and acts as a platband. At the corners it is cut at 45° and joined.
- Parts of the required size are cut out of plastic lining or sandwich panels and installed in the grooves of the profiles. In this case, sometimes you have to bend the profiles, and it is advisable to glue them with silicone sealant afterwards.
We recommend studying: Sealants
Important!
There are several methods for installing PVC panels. For example, they can be attached without the help of profiles, using liquid nails and polyurethane foam.
How to finish slopes with plasterboard
To work, you will need waterproof drywall, galvanized profile, and polyurethane foam.
The slopes can be installed within a day after installing the double-glazed window.
Installation of plasterboard slopes can be carried out with or without a frame.
Frameless technology is used when new slopes are installed on top of old ones.
After the plasterboard slopes are installed, it is necessary to prepare them for decorative finishing. To do this, apply a thin layer of putty on them.
Wooden door slopes
Door slopes can be made using different methods.
For wooden and metal doors, they often choose “wood” finishing, but this is not always literally wood: MDF panels and laminate are often used.
Finishing materials are screwed onto self-tapping screws or glued using mounting adhesive, and the cracks are sealed with silicone sealant, however, such finishing is always based on leveling the slopes with plaster mortar or drywall.
Finishing the slopes of door and window openings is an important procedure that gives the home a finished look and protects it from noise, cold, and dampness. These works must be carried out not only efficiently, but also carefully, because the slopes are in plain sight, and finishing errors cannot be hidden. High-quality performance of such work is unthinkable without high-quality materials, which you will always find in the CEMMIX product line.
You can buy CemStone CEMMIX without leaving your home, with discounts from 5 to 33%!!!!
Buy on Ozon
Buy on VseInstrumenty.ru
Buy on Wildberries
Buy at Leroy Merlin
Options for finishing window slopes
A plastic window installed in accordance with all the rules will not be able to fully perform its functions if the finishing of the slopes is done poorly. This is due to the fact that the window opening is the main source of moisture, extraneous sounds and drafts entering the room.
This is important! Some believe that to form slopes it is enough to use only polyurethane foam. But this is far from true. Over time, the foam changes its structure and even loses its original properties.
This finishing method also includes a number of finishing works that need to be done for a more aesthetic appearance.
Finishing slopes with plastering
The building materials market offers a large number of plasters that have thermal insulation, waterproofing, and antimicrobial effects. Despite this, over time, plaster slopes tend to lose color and become covered with cracks. Insufficient thermal insulation capacity contributes to glass fogging. The plastering process itself takes place in several stages. Each layer must not only be applied evenly, but also wait until completely dry.
Finishing slopes with plasterboard
Finishing with plasterboard can increase the level of thermal insulation. To do this, it is necessary to carry out preliminary insulation using special materials, for example, cotton wool. In addition, the surface is repeatedly primed and painted. This may take more than a week.
Finishing slopes with plastic
Currently, specialists in the field of PVC structures use exclusively plastic slopes. This is explained by the advantageous features of the material, which allow achieving maximum thermal insulation, waterproofing, sound insulation, practicality and aesthetic appearance of the room. Modern plastic finishing of window openings occurs through the installation of sandwich panels.
Finishing slopes using the gluing method
Preparation is carried out by analogy with the process of plastering the slopes of an apartment. Before finishing the opening with materials that are attached with glue, a moisture-resistant primer is used to treat the surface, aimed at increasing adhesion.
To make it easier to do the work yourself, profiles for inserting sheets are often installed along the window frame. This allows you to minimize the curvature of the canvas. This method of finishing slopes is especially relevant in the case of thin walls.
In order to decorate slopes with decorative sheets without sheathing or frame, you can use three adhesive options:
- If the base is level, as in a modern new building, then liquid nails can be used for fixation. For acrylic-based drywall or neutral: for plastic products - universal or for PVC panels.
- When the walls have slight differences (for example, in a brick house), then a good solution would be polyurethane foam or adhesive foam with low expansion. If you take a composition that greatly increases in volume, then there is a high risk of the finishing sheets bursting.
- A universal solution for working with your own hands on any surface is an adhesive solution. These can be mixtures for facing work, for gluing slab materials. There are also ready-made polymer-based masses. Here, when choosing, it is important to take into account the permissible layer, shrinkage, and resistance to the expected load, so that peeling or deformation of the canvases does not occur.
In any case, before further work, it is important to wait until the adhesive inside the structure has completely dried. Additionally, the edges at the corners should be secured with masking tape. The thicker the layer of glue, the more pieces of tape you need to use. If decorative profiles are not attached to the frame, then temporary supports can be installed.
Finally, the corners are finished, since the cut edges and the gap between them and the base remain open. For reliability, it is recommended to fill the void with foam or plaster. For framing, you can stick beautiful decorative corners on liquid nails or double-sided thin tape.
Decorative window decoration with textiles
A beautifully designed window opening can act as the accent of a room, on which the interior of the room will largely depend. Such designs should not be hidden behind massive curtains; it is enough to use tulle and organza. If this option is not suitable, you can hang roller curtains. They are attached to the frame, leaving all the details of the opening visible.
When choosing the right type of curtains, you should consider the following points:
- Room area. For small rooms it is better to use light blinds and roller blinds; for spacious rooms, massive models in darker shades are suitable.
- Location relative to cardinal directions. If the windows face north, then use pastel, beige, peach tones; to add coolness to the house - gray, blue.
- Illumination of the room. It is better to hang reflective textiles on windows located on the sunny side.
- Seasonality. In summer, you can use chintz, satin, in winter - velor, velvet.
- General design style. For example, for a country style, the color of the curtains should be combined with the color of the furniture and tablecloth; it is advisable to choose cotton or linen. In minimalism they use Roman and Japanese curtains that do not have bright colors.
Option 2: installation without initial profile
The first method of fastening the slopes of plastic windows has a disadvantage: the U-profile is very clearly visible after installation. And if you consider that it is sometimes very difficult to choose the colors of the slope and profile...
That is why we recommend making slopes without an initial profile .
A slot in the foam - instead of the initial profile
1. Using a wallpaper knife, make a slot in the foam around the window frame. It should be 1 mm wide and 1 cm deep.
2. After constructing the sheathing, insert the panels with a tenon into the resulting nest. And fasten the opposite end with screws as well.
3. If you use panels without fasteners, for example, sandwich panels, you can make the tenon yourself.
On the side of the panel that will be adjacent to the window, draw a 1 cm wide strip. Then carefully cut along the line to cut through only the top layer and insulation. Make a slot at the end and remove the “excess”. So, your bottom layer will remain intact. This is what is inserted into the homemade groove.
Otherwise, the technology for installing slopes No. 2 is similar to technology No. 1. So don't get confused.
Also on the website you can read about installing a window sill. In the article you will find step-by-step instructions for carrying out the work.
Do you want plastic slopes not to age? Wash them at least once a year – along with the windows. Read more in this article.