Installation of H-profile
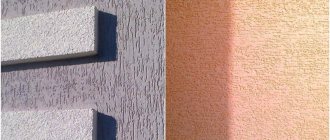
H-profile for metal siding is an element that serves as a design for the joints of the main cladding panels.
Installation of the H-profile is not difficult: the main thing is to correctly calculate its location.
Installation is carried out similarly to the corner elements: first, the upper screws are attached, then other screws are screwed in along the entire perforation in 4-cm increments. In this case, it is necessary to indent a few millimeters above the cornice and retreat down from the starting strip - 6 mm.
To lengthen the H-profile, the profiles are joined with an overlap (the upper part overlaps the lower by 2.5 cm). It is recommended to join the profiles at the same level so as not to disturb the decorative design.
Installing the H-connector
Installing the Outside Corner of Siding
Install the outside corner of the siding, leaving a 6mm gap at the top to the eaves or J-rail. Attach the piece by driving nails into the top holes on either side of the piece. The part should hang on these two nails. Place the nails in the center of the nail holes provided in the parts, at a distance of 20–40 cm from each other. This will leave room for expansion and contraction at the bottom of the wall. Don't nail too tightly!
Preliminary work
Before buying material, you need to decide not only the color and relief of the finishing panels. It is necessary to take all measurements and decide exactly how the facade will be faced: vertically or horizontally, with a highlight of the plinth or a solid canvas, how the openings, eaves overhangs and other elements of the building will be designed. In addition, the need to insulate walls and install sheathing is taken into account.
Before covering an old house, it is advisable to remove the previous wooden paneling, if any, or make sure that it is in good condition: there are no rotten, fungal or cracked boards, replace them, foam the seams. This is done if it is decided to install metal siding or vinyl panels directly on the wall without insulation and creating sheathing. But the walls must be treated with antiseptic and water-repellent agents.
It would be more correct to first cover them with moisture-resistant plywood or OSB boards, or even better - to mount a frame for fastening the cladding, which will become a reliable load-bearing base and create a ventilated space under the siding.
Metal profile frameSource the-master.ru
The sheathing is attached in a direction perpendicular to the panels: standing up if the siding will be mounted horizontally, and lying down if vertically. The step between elements is at least 40 cm.
However, insulating the walls will require changes to this scheme. First, a frame is made for the thermal insulation material, taking into account the width of the roll or insulation boards. And after fastening it and installing a wind-hydroprotective membrane on top of it, a load-bearing frame is created in the chosen direction and with the required pitch.
Sheathing diagram with insulationSource files.builderclub.com
All existing openings must be framed around the perimeter, taking into account the angle of the slopes. As a result, the installed sheathing should level the walls and create even vertical planes on which the siding will be laid.
Second step: Setting the starting bar.
This is an important stage by which the quality of all work is determined. Therefore, the installation of the starting strip is carried out exactly horizontally!
- Using a level or water level, find the bottom point on the sheathing, from which it is 5 cm higher. Place a mark and screw in the screw.
- Place screw marks in the corners and along the entire perimeter in a similar way.
- Pull the nylon threads between the marks on the corners.
- Attach the corner profile and mark the boundaries on the sheathing.
- We retreat 6 mm from the corner bar. (thermal expansion gap) and attach the starting rail to the frame. Keep a gap of 1 cm between the slats.
- We check the horizontality of the installed J-profiles. It is important to avoid deviations, otherwise the siding panels will warp!
We install external corner profiles
Attaching the outer corner siding profile
First step. We mark the soffits. We need to see where the edges of these elements will be located in the future.
Second step. We apply the guide to the corner of the frame. We do this with a 3mm gap to the soffit or roof. We fasten the profile with self-tapping screws.
Place the bottom border of the element 0.6 cm below the edge of the starting profile.
Third step. Checking the vertical installation. If there are no deviations, we fix the bottom, and then the remaining places. Experts do not recommend placing fasteners in corner elements too often.
The principle of increasing the length of a corner profile
If the house is higher than 300 cm, the profiles will need to be placed one on top of the other. To do this, we trim the top profile. As a result, there should be a 9 mm gap between the planks of the joining elements. When laying the elements, maintain an overlap of 2.5 cm.
Electric saw for cutting sidingTo cut vinyl siding panels, use tin snips, a hacksaw, a cutter knife, or a hand-held power saw with an abrasive wheel.
If the base has a protruding structure, shorten the profile so that there is a 6 mm gap between it and the base.
Using two starting J-profiles of siding instead of a corner one
How to connect siding together using a connecting strip
Installation of the connecting strip (H-profile). (photo No. 3)
The connecting strip (H-profile) is installed before installing the siding. The process works like this:
- Mark where the soffits will end.
- Fix the profile so that the gap between it and the edge of the soffit is 3 mm, and the bottom edge is 6 mm below the edge of the starting profile.
- Check that the installation is vertical.
- Secure the profile with self-tapping screws. First from below, then from above.
- Insert the siding panels into the connecting strip.
Any connections of the H-profile with other elements must be made in such a way that there is a gap of 6 mm for thermal expansion of the material.
If the height of the house is greater than the length of the planks, use two overlapping planks. In this case, the upper profile must be trimmed so that the gap between the slats is 9 mm, and the overlap is 25 mm.
Metal siding: preparation for work and equipment
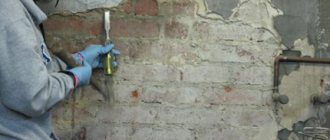
To properly install metal siding, you must first prepare the walls: clear debris from them, seal cracks (if any), and cover them with a primer mixture. Inspection of the walls is important: you should check the perpendicularity of the corners, the vertical and horizontal lines of the wall (check by level and plumb line).
At the stage of preparatory work, the markings should be applied correctly: the quality of installation of the metal cladding depends on how correctly it is done.
In addition, it is important to properly prepare the cladding material itself: it is necessary to cut and cut the panels for further work. The metal sheets are covered with protective foam, which must be removed before starting work. If a panel with a protective film is left in the sun, it will be quite difficult to remove it, since under the influence of sunlight the film sticks to the surface even more
If a panel with a protective film is left in the sun, it will be quite difficult to remove it, since under the influence of sunlight the film sticks to the surface even more
The metal sheets are covered with protective foam, which must be removed before starting work. If a panel with a protective film is left in the sun, it will be quite difficult to remove it, since under the influence of sunlight the film sticks to the surface even more.
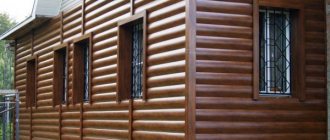
House with metal siding
Siding cover kit
In addition to the main covering - metal siding panels - it is necessary to purchase component materials for the complete design of the cladding:
- Cornice strips. Necessary for the design of window and door openings, as well as for the design of panel joints;
- window slats. For the design of slopes of openings and windows;
- external corners. For decoration of external corners;
- internal corners. To design internal joining corners of panels;
- starting bar. To create a lower support and guide under the siding panels;
- finishing bar. To design the top (finish) panel;
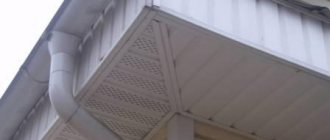
- soffits. For decoration of the cornice part of the facade and overhangs;
- connecting strips. To design connecting adjacent planks;
- J-bar. For decoration of windows and doorways.
NOTE! When purchasing siding panels, you should immediately purchase components. It is recommended that all materials be selected from the same manufacturer: in this case there will be a complete match of elements in fastenings and a complete match in color.
If you take additional elements from other manufacturers, the color and dimensions may not match
If you take additional elements from other manufacturers, the color and dimensions may not match.
Metal siding is divided into the following types:
- Under the tree;
- Under the beam;
- Ship plank;
- Under a stone;
- Under the brick;
- Under a log.
Equipment
Advantages
The main advantages of metal siding are:
- Long service life. Most manufacturers guarantee the service life of their products for 20-25 years without burnout and up to 50 years before through corrosion;
- Light weight structure. Since thin sheets of metal (about 0.5 mm) are used in production, and protective coatings are applied in a layer calculated in micrometers, then 1 m2 is only about 4 kg;
- Economical. By using domestic metal, creating an extensive logistics network and distributing production facilities throughout Russia, manufacturing companies can offer metal siding cheaper than foreign manufacturers;
- Environmental Safety. Metal panels, unlike PVC, are not only non-flammable, but also do not emit harmful substances during operation;
- Ease of installation. Due to the fact that metal is not so susceptible to thermal deformation and is not afraid of low temperatures, the installation process is not complicated by the need to control the tightening force of fasteners, there is no need to leave special temperature gaps, etc.
We mount the pediment
We sheathe the pediment around the perimeter. All fasteners, except the top one, are installed in the center of the holes. We install the upper fastening element at the top of the hole. It can be sheathed either with profiles for arranging internal corners or with a starting profile.
The installation procedure is similar to fastening wall panels. We trim the edges of the elements and connect them to the locks of the receiving profiles. We remember the 6 mm indentation when installing in warm weather and 9 mm when doing work in winter.
We fasten the last element of the gable cladding directly through the panel material - this can only be done here.
The cladding is complete.
In order for finishing a house with panels to be as successful as possible, you need to know certain subtleties of performing such work. There is a list of general recommendations for any siding, as well as specific tips for panels made from a specific material.
Now you can perform it yourself at the highest level.
| Name (model) | Benefits | Length x width x thickness, mm | Quantity per package, pcs. |
| Vinyl Siding "Canada Plus" | 1. Coloring in dark colors is performed using the “Cool Color” method (heat absorption), which involves the use of masterbatches. 2. Excellent appearance remains unchanged even when exposed to high and low temperatures, the range of which ranges from -50°C to +60°C. 3. Retains shock resistance, even if the ambient temperature drops to -20 to 60°C. 4. Not susceptible to microbiological corrosion (fungi, mold). | 3660 x 230 x 1.1 | 20 |
| Acrylic Siding "Canada Plus" | Among other useful qualities of acrylic siding “Kanada Plus” it is worth highlighting: Increased resistance to direct ultraviolet rays; Excellent tolerance to acidic and alkaline solutions, as well as to various fats; Good tolerance to washing with chemical detergents; High degree of deformation resistance (perfectly tolerates temperatures up to 75°-80° C). | 3660 x 230 x 1.1 | 20 |
| "Alta-Siding" - Vinyl Siding | "Alta-siding" is: one of the safest finishing materials on the Russian market; frost resistance and the ability to maintain strength even at very low temperatures (from -20 to -60°C); resistance to significant temperature changes and environmental influences; durability: the service life of Alta-siding is up to 30 years; resistance to aggressive substances (detergents can be used to clean siding); non-susceptibility to infection by mold fungi. | 3660 x 230 x 1.1 | 20 |
| Facade metal siding INSI | INSI siding is made of galvanized steel coated with a layer of polymer composition, which means it inherits all the advantages of this material: resistance to temperature changes (-50°C – +80°C) and mechanical damage; long service life with preservation of original properties (about 50 years); environmental friendliness; non-flammability; Possibility of installation both horizontally and vertically; protection of the building from overheating (in a ventilated facade system); and when choosing one of two new colors (alder or rosewood) - a complete imitation of the appearance. | Length up to 6000, width up to 200, thickness 0.5 | – |
Good luck!
Video - Do-it-yourself siding installation
From old wood you can make a garden path, steps, country furniture, and a firewood shed. See how to use scrap boards for gardening tools.
Many people are familiar with this picture: when you go into a country shed, the shovel tries to fall, and the rake, if you step on it, hits you on the head. Sometimes it’s so difficult to find the right tool, so you need to make an organizer for your garden tools. Here is another problem regarding where to put the old tree, or rather, boards, that will be resolved.
Eighth step: Sheathing the gables.
- Finish the gables around the entire perimeter in the same sequence as the installation of the main panels, using an internal corner or starting rail.
- Trim the edges of the connecting elements and attach the receiving strips with locks. Maintain an interval of 6/9 mm.
- Fix the last panel to the sheathing directly through the material.
Key points in siding finishing work.
- Perform horizontal cladding in the direction from bottom to top from left to right.
- When connecting two panels into a lock, effortlessly slide the top siding into the bottom until it clicks.
- Take into account the thermal expansion of the material. Fix metal and PVC siding with a slight gap.
- Only stainless steel (for example, galvanized) screws or nails with a length of 35 mm or more, with a head of at least 8 mm, are suitable for fastening.
- Fasten the self-tapping screw exactly in the center of the factory holes specially designed for this purpose, do not press the panel tightly. The exception is the last plank on the pediment.
- The panel fixation step is no more than 45 cm, components – 25 cm or less.
- Assembly on the façade of a log house can begin only after the building has settled, otherwise the siding will “lead.”
At Vasha Roofing, you can always order siding installation. Our installers will professionally complete the work within the agreed time frame. With us you will receive a written guarantee for installation and keep the manufacturer's warranty card for the material.
Sheathing materials and installation tools
The sheathing can be made of wooden blocks or metal profiles.
The timber is easier to fit, it is easier to attach siding to it, it does not serve as a cold bridge between the cladding and the wall, and does not change geometry when temperature changes occur. But the tree does not tolerate high humidity. Therefore, the timber must be seasoned (dry) and treated with an antiseptic.
Installation of siding on a wooden sheathing can be seen:
It is more difficult to work with a metal profile; it has high strength and durability (if it is galvanized). The only operational drawback is high thermal conductivity. Therefore, the supporting brackets must be mounted to the wall through heat-insulating gaskets.
To install sheathing and siding you need:
- a set of tools for marking and level control;
- a hacksaw for metal or wood (depending on the material of the siding and sheathing);
- metal scissors for fitting panels (for metal siding);
- hammer drill or drill (depending on the material of the walls and base);
- hammer, pliers, screwdrivers or screwdriver with attachments for the hardware head;
- fasteners;
- twine, chalk for marking;
- stepladder, ladder, scaffolding.
The video shows how to install a metal frame for siding:
First step: Installation of sheathing.
Installation is carried out on a pre-prepared frame made of metal or wood.
- Choice of sheathing.
The sheathing is assembled from a metal profile or wooden blocks. The pitch is 40cm for vinyl and 50cm for metal.
The metal frame is stronger, it is not subject to rotting and deformation, and it is easier to install it on an uneven surface. The profiles are attached to the wall with brackets or hangers, which allow you to adjust the structure according to its level.
Lathing made of timber will cost less. The main thing is that the wood is dry and free of defects. The timber must be treated with an antiseptic and fire retardant impregnation. Fasten with screws.
- Surface preparation.
The walls are cleaned: unnecessary parts are removed (platbands, tiles, etc.), adjacent elements are removed (gutters, lamps, canopies). If necessary, cover up cracks. The wooden facade is impregnated with an antiseptic solution.
- Frame installation.
The guides are fixed following the rule: if the cladding is horizontal, the profile/beam is placed in a vertical position, and vice versa.
The connection is made with dowels for a brick wall and self-tapping screws for a wooden one. The structure is leveled.
The facade can be thermally insulated in two ways:
- adjust the pitch of the sheathing according to the width of the insulation, lay the insulation between the slats,
- for the insulating layer, build an additional frame, then the sheathing will go parallel to the top.
General principles of vinyl or metal siding
To have an idea of how to properly cover a house with siding, it is enough to know the general principles of installation:
- Cladding occurs on the principle of filling the contour panels from additional profiles.
- Install the sheathing with a spacing of vertical purlins of 250-300 mm.
- They make markings for the starting strip, the correct installation of which largely determines the quality of the cladding.
- First, beat off the low tide fastening line. If the entire façade is sheathed around the perimeter, then it should converge “to a point.”
- The starting bar attachment line is above the low tide plus a gap to compensate for thermal expansion.
Installation of the ebb, starting strip and all cladding parts to the sheathing occurs according to the general rules:
- the fasteners must be positioned strictly vertically relative to the sheathing;
- the fastener head must be in the middle of the perforated hole (except for the upper fastening of corner profiles);
- tighten the screws or drive the nails in not completely, but leave a gap between the head and the surface of the part of about 1 mm.
Installation of the first, load-bearing strip of sidingSource otoplenie-gid.ru
After the starting strip, corner profiles are attached, hanging them vertically at the top attachment point. Install window strips or J profiles around the openings. Finish the “framing” of the contour with a finishing strip or J profile.
The siding is increased in length either by overlapping by 20-25 mm (by trimming the perforations of the bottom panel), or through a connecting profile with an internal gap at each end, as in a corner profile.
Every 5-6 rows control the level.
Example of installation of metal sidingSource thestroyker.ru
Finishing features
Basement siding, both in characteristics and in appearance, is noticeably different from ordinary wall lamellas, because in order to sheathe the foundation, a particularly stable and durable material was required.
- Base panels have the appearance of rectangles with uneven edges, as they imitate stone or brickwork.
- The thickness of the product is greater - 2.5–3 mm compared to the usual 0.9–1.2 mm for wall slats.
- The finish has higher impact resistance and exceptional wind resistance. To increase strength, panels are produced not only with the usual type of connection - tongue and groove, but also with a special anti-hurricane lock.
- The color range of the cladding is unlimited. The material imitates any natural stone and brick, as well as all installation features.
- The additional elements of the basement finishing are also different. Near-window strips or starting strips are similar in appearance and application. But the corner, that is, the corner element, also imitates masonry. This detail looks so attractive on its own that it can be used on its own.
The wall can be finished with ordinary wall slats or plastered. You can cover the corners of a wooden house with siding without any preliminary preparation of the wall.
Features of cladding a wooden house
When covering a wooden house with siding, it is necessary to take into account the characteristics of the materials:
- finishing of the facade, as well as interior work, must begin after the house has settled;
- for the lathing, it is advisable to use a wooden beam (seasoned and treated with an antiseptic);
- It is mandatory to treat the surface of the walls with an antiseptic, since after installing the sheathing it is impossible to control the condition of the wood and promptly carry out preventative measures for areas affected by fungus;
- for additional protection, you can lay a waterproofing membrane;
- Even if the walls are smooth and the siding is installed without insulation, the panels cannot be attached to the wall - for proper use of the wood, a gap is required that the sheathing creates.
Cladding a wooden houseSource elka-palka.ru
The ease of installation of siding does not exclude care and accuracy when carrying out work. An error when installing the starting profile, fasteners that are “tightened” or incorrectly installed in the hole, non-compliance with recommendations for the size of the temperature gap - all this can lead to serious consequences for the skin, which will not be so easy to eliminate.
Siding Installation Instructions
When installing siding, you must follow each step of the installation instructions. The most difficult thing is to correctly frame the façade so that the siding lays flat, without waves. If the walls are straight, then lathing is not required.
Common mistakes when installing siding : not using galvanized steel or aluminum nails, not leaving a 1mm gap between the nail head and the vinyl sheet. In the first case, rusty stains form on the material, in the second, the material inevitably warps and deteriorates, since it cannot expand and contract under the influence of temperature.
The design of the sheets contains a mounting edge with perforation, therefore, if you hammer a nail into the middle of the technological hole with the required gap, the strip moves depending on the temperature, which compensates for the change in its length. It is also necessary to leave a small gap between the strip and the accessory so that it can move freely horizontally.
Siding can be installed horizontally, vertically or diagonally. But if the material is horizontal, then under no circumstances should it be placed vertically, and vice versa.
Does a house covered with siding breathe? Of course, due to ventilation through perforations. In addition, correct installation of panels and accessories ensures high-quality ventilation of the walls of the house without allowing water to pass through.
The technology for installing vinyl siding involves observing the effect of possible expansion and contraction during heating or cooling. Following all of the following instructions will allow you to install siding so that your home looks beautiful and prestigious for many years. Do not drive the nails all the way in. Leave a distance of 1–1.5 mm between the top of the nail and the panel being nailed. The nails are driven in at a distance of 30–40 cm from each other. After nailing, the panels should move freely horizontally. Drive the nail exactly into the center of the special hole in the panel, but not from the edge - this can lead to breakage of the panel. Do not drive a nail into the face of the panel!
Leave a gap of 5–6 mm between the siding panel and accessories for possible expansion and contraction of the panel. When installing in cold weather, leave a gap of 9-10 mm. After snapping the siding panel into place with the bottom panel (or starter strip), do not tighten it. Once secured, the panels should hang without tension. When installing shutters, formwork, electrical wiring, etc., drill holes in the siding 5 mm wider than the diameter of the bolts used. This will allow the panels to expand or contract freely.
Nails must be made of aluminum or galvanized with a head with a diameter of 0.9–1 cm. The nail shank must have a diameter of 0.9–1 cm. The nail shank must have a diameter of 0.3 cm and a length sufficient to penetrate the base to a depth of at least 2 cm.
Vinyl siding is nailed down so as not to interfere with possible tension and compression. Leave a gap of 5-6 mm for possible expansion when attaching panels to chamfers and edges. Don't nail the siding too tightly! Leave approximately 1-1.5mm of space between the top edge of the nail head and the vinyl. This is necessary for free expansion and contraction. This will also prevent the ripple effect. The center of the nail should be in the middle of the special hole. Point the nail straight! A bent nail will bend the panel and can cause the siding to bulge.
Do not drive a nail into the face of the panel! Punching a nail through vinyl paneling can cause resistance to possible expansion and contraction, causing the siding to bulge. Do not pull on the siding when attaching it. Excessive tension on a panel changes its shape and can cause panels and other parts to not connect properly. The panel must first be connected to the bottom panel and pushed upward until it clicks into place. After this you can nail it.
Metal siding: preparation for work and equipment
To properly install metal siding, you must first prepare the walls: clear debris from them, seal cracks (if any), and cover them with a primer mixture. Inspection of the walls is important: you should check the perpendicularity of the corners, the vertical and horizontal lines of the wall (check by level and plumb line).
At the stage of preparatory work, the markings should be applied correctly: the quality of installation of the metal cladding depends on how correctly it is done.
In addition, it is important to properly prepare the cladding material itself: it is necessary to cut and cut the panels for further work. The metal sheets are covered with protective foam, which must be removed before starting work.
If a panel with a protective film is left in the sun, it will be quite difficult to remove it, since under the influence of sunlight the film sticks to the surface even more
The metal sheets are covered with protective foam, which must be removed before starting work. If a panel with a protective film is left in the sun, it will be quite difficult to remove it, since under the influence of sunlight the film sticks to the surface even more.
House with metal siding
Siding cover kit
In addition to the main covering - metal siding panels - it is necessary to purchase component materials for the complete design of the cladding:
- Cornice strips. Necessary for the design of window and door openings, as well as for the design of panel joints;
- window slats. For the design of slopes of openings and windows;
- external corners. For decoration of external corners;
- internal corners. To design internal joining corners of panels;
- starting bar. To create a lower support and guide under the siding panels;
- finishing bar. To design the top (finish) panel;
- soffits. For decoration of the cornice part of the facade and overhangs;
- connecting strips. To design connecting adjacent planks;
- J-bar. For decoration of windows and doorways.
NOTE! When purchasing siding panels, you should immediately purchase components. It is recommended that all materials be selected from the same manufacturer: in this case there will be a complete match of elements in fastenings and a complete match in color. If you take additional elements from other manufacturers, the color and dimensions may not match
If you take additional elements from other manufacturers, the color and dimensions may not match.
Metal siding is divided into the following types:
- Under the tree;
- Under the beam;
- Ship plank;
- Under a stone;
- Under the brick;
- Under a log.
Equipment
Innovative material
The word "siding" means a material intended for covering various surfaces. At the same time, its main functions are aesthetic and protective. Once upon a time, an ordinary board was used for this, which was processed accordingly. And only much later panels appeared on the construction market, which we call siding. They began to be produced from a variety of materials.
Siding has gained immense popularity due to its strength and lightness, durability and attractive appearance. But that's not all. Such panels are a very convenient material for fastening. And this sometimes acts as a determining factor for those who study the question of how to install siding in order to do the work themselves.
The profile of siding panels can be made in two versions. This is a “ship plank” or “herringbone”. They provide, respectively, a double or single fracture. But for installation this does not matter.
All siding panels are covered with a protective layer, made either by painting or by applying a polymer film.
A huge advantage of this material is its excellent performance qualities, as well as maintainability. After the owner finishes the house with these panels, he can forever forget about impregnating the wood with special compounds, tinting the facade and other similar work. And to eliminate damage in the shortest possible time, it is enough to simply replace 1-2 products, which does not require any preparatory measures.
Vinyl siding care
Vinyl siding differs from other types of siding (cladding panels) in its practicality, unpretentiousness, attractiveness and does not require special care in order to look great. However, like other products used outdoors, vinyl siding will need maintenance from time to time. By following our tips for cleaning and maintaining vinyl siding, it will always look its best.
Vinyl siding can be easily washed with a regular garden hose. If in some areas the dirt is the strongest, you can remove it with a soft cloth or a long-handled brush with soft bristles. If there are contaminants that cannot be washed off with plain water, then it is better to use a special solution: 1 part detergent (any washing powder will do) and 2 parts trisodium phosphate per 4 liters of water.
In areas where high humidity prevails, a problem may arise with the appearance of mold on the siding. To clean it in the solution mentioned above, you need to replace 1 liter of water with 1 liter of five percent sodium hydrochloride. To remove stubborn stains, you can use abrasive cleaning powders or stain removers without harming the siding.
The maximum damage they can cause to a vinyl siding panel is scratches and, as a result, surface roughness. Such damage will not be noticeable even at a distance of several meters from the house. Before using cleaning powders, it is recommended to first rinse the entire paneling with water. It is advisable to leave cleaning products on the surface of the siding for only a few minutes, after which they should be thoroughly rinsed off with water.
Attention: do not use cleaning products containing organic solvents, pure chlorine (they can “corrode” the surface of the panel), grease removers, solvents, nail polish remover, or furniture polishes. These products can damage the surface of vinyl siding.
These articles may also be of interest to you:
- Siding installation
- Vinyl siding installation
- What is siding?
- Options for finishing the facade of the house
What else would you like to read?
Tags: Siding Installation Instructions, Installing Siding, Lathing and Insulation, Proper Placement of Siding Panels, Cutting Siding, Siding, Installing Outside Corner of Siding, Installing Inside Corner of Siding, Installing Horizontal Siding, Installing First Panel of Siding, Installing Lath Around Window and Door Openings , Siding Installation, Gable Siding Installation, Under Window Siding Installation, Starter Strip Installation, Vinyl Siding Maintenance
Description of components
- starting profile - a load-bearing element, the first siding panel is attached to it;
- the finishing strip is the last one in the row, hiding the top edge of the last panel;
- corner elements - they are used to form corners, the profiles have grooves in which the siding panel is placed;
- platbands for doors and windows - perform a decorative function, decorating door and window openings;
- window and door profiles - if the window or door is not located flush with the wall, but in a recess, then these profiles will help close the slopes during finishing;
- J-profile is needed for fastening panels, sometimes used instead of corner profiles;
- The J-chamfer is necessary to decorate the edge of the roof, otherwise it is called a wind board;
- ebb tides are designed to drain water from the walls;
- ceiling soffits can be perforated or solid; they cover the overhanging part of the roof from below; perforated ones provide ventilation between the siding and the wall;
- moldings connect panels located in different planes;
- H-profile is required for joining panels.