If you have decided to carry out a long-planned renovation of a toilet or bathroom, then you, of course, know that the work of professionals will be quite expensive. Therefore, many people opt for DIY repairs. Having a great desire and financial capabilities, you can choose the option with plastic panels. In addition, the installation of PVC panels in the bathroom can be done by a person who has never encountered repair work. Especially if you know how to attach the panels in the bathroom with your own hands step by step and what is needed for this.
Preparatory stage
Experts recommend starting repairs by preparing the surface where the frame or plastic materials will be attached. This primarily applies to old plaster, which can slightly expand the space between the wall and the panel. In addition, with a frameless fastening method, the walls will need to be treated with plaster to eliminate possible unevenness, and if the presence of small depressions is not prohibited, then large bulges are unacceptable.
With any method of do-it-yourself fastening, the walls must be treated with special solutions with an antifungal effect.
The better the walls of the room are treated, the less likely it is that fungus or mold will form on them. Therefore, you should not save on them; it is better if you go to a hardware store to purchase them.
If the bathroom has not been renovated for a long time, then right now you need to start replacing metal communication pipes. If your renovation involves replacing or installing sockets in the bathroom, then before attaching the material, take care of supplying electricity to them.
Before installing panels in the bathroom, you will first need to get rid of the old plaster. It is better to replace metal pipes in the bathroom with plastic ones
All detected defects are repaired with putty.
Methods for installing panels in the bathroom and types of frames
Plastic panels can be installed with your own hands using two fastening methods:
- frame;
- frameless.
To make it easier to figure out which fastening method to give preference to, here are a few differences between the two fastening methods:
- the metal frame takes up quite a lot of useful space, which is so critical for a toilet or bathroom;
- the metal frame consists of separate profiles, so the installed plastic has voids underneath that are easy to push through;
- in the case of the frame fastening method, there will be a void between the wall and the plastic in which various microorganisms will develop;
- to make a frame for plastic panels, you will need to purchase metal profiles and various fasteners, while for the frameless method, you will only need glue and liquid nails.
The most common methods of fastening plastic panels
Panel mounting options
Tools and materials
For frame cladding you will need:
- bathroom cladding panels;
- guide rails for sheathing;
- finishing profiles made of plastic;
- plastic corners;
- ceiling and floor plinth for the bathroom;
- hacksaw;
- self-tapping screws;
- dowels;
- perforator;
- Phillips screwdriver or screwdriver.
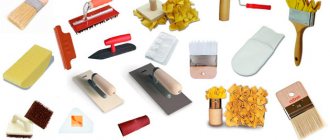
Tools for installing PVC panels
For cladding using the frameless method, you need to prepare:
- glue for PVC panels in the bathroom;
- facing panels;
- ceiling and floor plinth;
- standard set of tools.
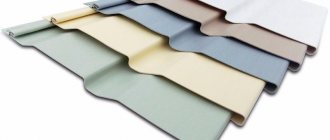
Variety of colors and patterns of PVC panels
Types of moldings and corners for plastic lining
Installation of panels using the frameless method, step by step
If you decide to do the tiling of a toilet or bathroom with your own hands using a frameless fastening method, in addition to preparing liquid nails with glue, you need to do some preparatory work. The most important point when performing this work is preparing the foundation.
In this case, we are not talking about a perfectly flat wall surface; differences of up to 3 mm are allowed. There should be no hills at all, but shallow depressions are allowed. To correct visible defects in the wall, it is plastered or puttied.
The next important point in the frameless fastening method is working with the corners of the room. Most city apartments have slightly rounded corners; in the case of plastic, such corners will create additional difficulties when installing panels. To correct these shortcomings, you can use a hammer drill and make the corners more expressive.
All that remains is to prime the surfaces of the walls and you can begin to attach the panels. For these works you will need to stock up on liquid nail glue. Having calculated the area of the toilet and bathroom, calculate how much liquid nail glue you will need if its consumption, on average, is 1 bottle per 5 sq. m.
Having prepared the panel of the required size, you need to apply liquid nails to it pointwise, placing the glue areas in a checkerboard pattern. Liquid nails are not applied close to the edges, since when the panel is applied to the wall, excess glue will come out, smearing the front side of the coating.
Fasten with liquid nails in tubes
Glue must be applied to the PVC panel
The smeared side of the panel is applied to the wall and pressed with the palm over the entire area. Then the material is torn off the wall and the liquid nail glue is allowed to dry for about 5-7 minutes. After 5-7 minutes, the strip is returned to the wall and pressed over the entire surface. This installation technology is not an invention of builders, but the specifics of working with liquid nails glue. If you ignore this technology, the installed panels can easily move and the installation process will be disrupted.
Particular attention in this work is paid to fastening the first panel. To do this correctly, you need to use a level. And in order to avoid shifting of the strip while laying the remaining strips, dowels or screws are driven in at the bottom and top. In the finished version, their installation sites will not be visible, since they are usually covered with ceiling and floor plinths.
Fastening panels with glue directly to the walls without using lathing
Don't forget about starting strips and corner joints. It is recommended to install them in those places where they are really needed. If the toilet or bathroom room is equipped with a floor plinth, then there is no need to think about the starting profile.
The plinth well reinforces the fastening of the panel at the bottom, and the frame strengthens the ceiling at the top, so it is not recommended to start repairs with cladding elements from the ceiling.
Application benefits
The main advantages include:
- Wide range of use. In addition to the classic use for finishing walls, PVC is involved in the production of door and window slopes, kitchen aprons. The material is lightweight, versatile and cheap.
- Design. In addition to the traditional white sheet color, manufacturers also produce other options. There are plastic panels that externally imitate tiles, paintings, mosaics and frescoes. If desired, you can order a print on plastic sheets;
- Durability and stability. The material has high tensile strength. If the production technology is correct, then the fracture strength is also high. Durable, ceiling plastic is almost impact-resistant.
- Simple and fast installation process. Due to the low weight and production technology, in which the panels are connected to each other using the tongue-and-groove method, installation on the wall is very simple even for beginners. For smooth surfaces, you can install the sheathing with glue. If there are bends, you will have to level the wall or install a frame.
- Easy care. The finished structure is smooth and easy to clean. All you need is a cloth with soapy water. However, there may be problems with cleaning the joints.
Possible decor options
Installation by frame method
You can mount plastic panels with your own hands using a frame method. The work begins with the installation of horizontal plastic guide rails along the entire perimeter of the wall. To do this, you need to apply markings on the walls to install metal profiles. Using a hammer drill, drill holes in the places on the markings, hammer in dowels there and, placing the guides against the wall, attach them using self-tapping screws.
Metal hangers for lathing
Materials for mounting a metal frame
At the same time, it is not recommended to use wooden panels, since ideal joints cannot be achieved, which will lead to the destruction of the wooden frame due to constant humidity. The frequency of horizontal slats depends on how strong you want to make the cladding, but in general, it is customary to use the following distances:
- when facing the ceiling - 30-40 cm;
- when facing walls - 40-50 cm.
In this case, the distance of the first and last slats from the floor surface should be about 5-7 cm. And the end parts of the profiles should fit exactly into the corners of the room. The slats of the future frame must be attached perpendicular to the panels being installed. In most cases, the panels are placed vertically, which means that the slats should be perpendicular to them and parallel to the floor. The vertical arrangement of the panels not only visually increases the height of the ceilings, but also better removes accumulated moisture, since drops of water will flow down, and with horizontally installed panels, water will linger on them.
Stages of installation using the frame method
Having completed the frame, you can start attaching the panels, but how to do this correctly? The panels must be mounted on the frame using self-tapping screws, which can be easily screwed into them. In this case, you need to start from the corner farthest from the front door. To avoid moisture getting between the panels, it is recommended to seal their joints with sealant.
In order for the panels to fit beautifully in the corners of the room, it is necessary to use a device such as an external and internal profile, which in appearance resembles the English letter L. You can use a plinth at the junction with the floor, then an additional profile will not be required.
Ready metal frame
Having installed the side profile, one panel is inserted into it and secured to the frame rail. The remaining panels are inserted into the gaps of the previous one, very tightly. If you have provided an outlet on the wall of the toilet or bathroom, then you need to cut a suitable hole on the panel to be installed and install it to the wall.
To give the room a more complete look, after installing the panels, attach floor and ceiling skirting boards; in addition to the aesthetic function, they will also perform a practical one, hiding minor defects.
Insulation is placed under the panels
The frame slats should be mounted perpendicular to the location of the plastic panels
Finishing touches: completion of renovation
Today I will mention ceiling installation in passing, so as not to overload readers with unnecessary information. Let me just say that I made the ceiling slatted, for which I secured 3 combs along the bathroom with dowel nails. Further assembly is completely elementary. Aluminum slats are inserted into the grooves and snapped into place, and holes are cut for spotlights (I got four of them). This can be done with simple scissors - aluminum is very thin and soft.
After all the work done, the garbage was removed from the bathroom, which turned out to be negligible. All that remained was to bring in and put the sink in place, connect both faucets and hang a shelf with a mirror. But these were already trifles; the bathroom had already acquired its appearance.
Top view - looks good
Shelves are hung, mirror and sink are installed, faucets are connected
Expert advice
To make the work go quickly, you should listen to the advice of experts:
- if the toilet or bathroom is small in size, then it is recommended to carry out renovations with cladding in light colors in order to visually increase its area;
- If you want the renovation of your toilet or bathroom to look spectacular and unique, use panels of various sizes or colors for cladding. For decoration, you can take panels with drawings, but the main thing here is to fit them together harmoniously;
- before you start tiling the room with your own hands, take the purchased panels into the bathroom and leave them there for about an hour to avoid their deformation;
- you need to fasten the material from the farthest corner from the front door, in this case you can complete the most visible places without errors or flaws;
- Before making repairs yourself, look at all problem areas where pipes or plumbing are located, this will help you install the frame and plastic panels faster. For the frame, we usually make markings, observing the horizontal and vertical lines along which you will attach the sheathing;
- To disguise water and drain pipes in the toilet, it is recommended to make a fake panel, which will only improve the interior design.
Care
Selection of products
For correct care, you need to familiarize yourself with several rules:
- First, protect your eyes, hands, and skin from contact with detergent. Wear personal safety equipment – hat, gloves.
- Remove all hanging items, if present.
- If there are large seams, you need to clean them with a rubber spatula.
- To clean PVC panels, use a soft, non-scratch sponge. For rags, you can use those that do not have lint.
- To protect the casing, do not allow the water to overheat above 40 degrees.
- When choosing a detergent, choose liquid or gel detergents. Powders can leave minor cracks, which become clogged with dust and spoil the appearance of the structure;
- After you finish cleaning the plastic with dust, be sure to rinse the solution with clean water. This way, fading does not occur.
- If the coating of PVC panels is glossy, additional treatment with polish will be required.
- Before using a new detergent, it is advisable to check for reaction with the material. Apply a small amount in an inconspicuous area, then wait 15-20 minutes. If visual changes appear, the product is not suitable for use.
Caring for panels
Using polyvinyl chloride sheets as a facing material for the bathroom is a good choice for people who do not have free time to install tiles or other materials. Quick installation, low cost and an abundance of color schemes are the main advantages of plastic, which is why it has become in demand.
