Table 1 shows type of priming
for each type of wall (
plaster, concrete or brick
), type of primer (
adhesive or lime
), as well as
the consumption of materials for priming work
.
TABLE 1: PRIMER CONSUMPTION PER 100 M2 OF THE SURFACE OF WALLS AND CEILINGS (IN KG).
| P/P | MATERIAL | TYPE OF PRIMING | ||||||
| GLUE | LIMEMEAL | |||||||
| soap maker | vitriol | |||||||
| FOR PLASTER AND CONCRETE | FOR PLASTER AND CONCRETE | BY BRICK | ||||||
| 1 | 2 | 3 | 4 | 5 | 6 | 7 | 8 | 9 |
| 1 | Primer soap maker | 16,1 | 17,9 | X | X | X | X | X |
| including - soap-making soil concentrate (KMG) | 1,46 | 1,63 | X | X | X | X | X | |
| 2 | Vitriol primer | X | X | 16,7 | 18,4 | X | X | X |
| including - | X | X | X | X | X | X | X | |
| - copper sulfate | X | X | 0,23 | 0,25 | X | X | X | |
| — laundry soap 40% | X | X | 0,27 | 0,30 | X | X | X | |
| - hard animal glue | X | X | 0,23 | 0,25 | X | X | X | |
| - drying oil | X | X | 0,03 | 0,03 | X | X | X | |
| - chalk | X | X | 2,5 | 2,75 | X | X | X | |
| - chalk paste | X | X | 4,15 | 4,57 | X | X | X | |
| 3 | Lime primer | X | X | X | X | 16,4 | 18,0 | 20,0 |
| incl. - quicklime | X | X | X | X | 7,8 | 8,6 | 9,5 | |
Depending on the type of walls and ceilings
Using Table 2 you can select the desired primer. As can be seen from Table 2, each type of wall or ceiling requires a primer in different proportions.
TABLE 2: PRIMER CONSUMPTION PER 100M2 OF WALL AND CEILING SURFACE TO BE TREATED.
| P/P | MATERIAL | TYPE OF PRIMING | |||||||||
| casein | silicate | water-based | |||||||||
| FOR PLASTER AND CONCRETE | BY BRICK | FOR PLASTER AND CONCRETE | BY BRICK | FOR PLASTER AND CONCRETE | |||||||
| walls | ceilings | walls | ceilings | walls | ceilings | walls | ceilings | walls | ceilings | ||
| 1 | 2 | 3 | 4 | 5 | 6 | 7 | 8 | 9 | 10 | 11 | 12 |
| 1 | Casein primer | 21,7 | 18,0 | 10,9 | 12,0 | X | X | X | X | X | X |
| incl. - drying oil | 0,28 | 0,31 | 0,18 | 0,2 | X | X | X | X | X | X | |
| - casein paint | 9,4 | 10,3 | 6,0 | 6,6 | X | X | X | X | X | X | |
| 2 | Silicate primer | X | X | X | X | 21,4 | 23,5 | 14,3 | 15,7 | X | X |
| incl. silicate paint | X | X | X | X | 12,6 | 13,9 | 8,4 | 9,2 | X | X | |
| 3 | Polyvinyl acetate aqueous primer 7% concentration | X | X | X | X | X | X | X | X | 28,6 | 31,5 |
| incl. PVA dispersion 50% | X | X | X | X | X | X | X | X | 4,0 | 4,4 | |
READ ALSO: Efflorescence: how to remove
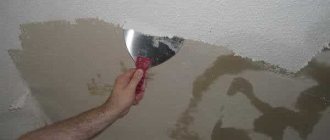
NOTE: After drying
The ceiling is cleaned with fine sandpaper and primed again.
And so on in several layers with each layer drying for at least a day. Until you get a smooth, uniform surface. Painting should be done after the primer has dried
.
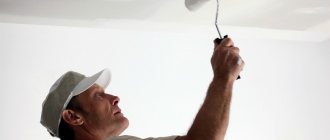
Now you can paint the ceilings
lime milk or water-based paint.
When painting
The quality of the prepared bases must meet the following requirements:
- surfaces
when painted with oil, adhesive, and water-based compositions must be smooth, without roughness; - surface cracks
are opened, primed, filled with putty to a depth of
at least 2 mm
and sanded; - shells and irregularities
are primed, puttied and smoothed; - peelings,
mortar drips, traces of processing by trowelling machines have been removed; - the seams between sheets
of dry gypsum plaster and the areas adjacent to them are primed, puttied, sanded flush with the surface or treated with rustication (in accordance with the project), and when wallpapering, they are additionally covered with strips of paper, gauze, etc.; - Before wallpapering the surfaces, painting of the ceilings and other painting work must be completed.
Painting compounds
must be applied in a continuous layer.
The application of each paint composition should begin after the previous one has completely dried
.
It is also necessary to paint in several layers, allowing each layer to dry for at least a day
. The sequence of work on painting the ceiling and walls is shown in Fig. 3.
If the ceilings have not been primed, then they are pre-moistened with water (primed ceilings do not need to be moistened with water). Chalk for water-based paints is sifted, and lime milk is filtered through a sieve.
ATTENTION! Lime for lime paints should be greasy and slaked 10-12 days before use (so that there are no “dumbs” after the whitewash dries).
Pigments
, used in lime paints, as well as in adhesive colors applied over a primer with a lime soap maker, must be alkali-resistant.
ATTENTION! Glue painting
Wall surfaces with old oil paint are done after priming it
with a solution of copper sulfate
.
Composition of adhesive color
It is imperative to check with a test paint to determine the optimal number of components, as well as to prevent chalking and other defects.
NOTE: Finishing and protective coatings on substrates that have rust, efflorescence, grease and bitumen stains are not allowed
.
Preparing for painting
In order for self-painting of the ceiling with water-based paint to be high-quality and uniform, preliminary preparation of the ceiling is necessary. Uniform coloring can only be achieved on a flat, puttied surface. Therefore, before starting work, you need to clean the ceiling from any previous coating (with the exception of water-based emulsion, which holds up very well).
How to remove whitewash
If you have whitewash on the ceiling - chalk or lime - you need to moisten the ceiling with water and remove the coating with a spatula. They clean everything down to concrete. Even the smallest fragments must be removed. Sometimes it is very inconvenient to scrape small areas with a spatula; it is easier to do this with a wet cloth.
It is easier to remove whitewash by wetting it with water.
In any case, after removing the whitewash, the ceiling must be washed with water and detergent. After complete drying, prime and putty with gypsum or cement (preferably white) putty until smooth, which is also called “egg-like.”
How to remove old water emulsion
If the ceiling has already been painted with water-based emulsion, you won’t be able to simply remove it. The procedure depends on how the paint adheres to the ceiling. If it just changed color and you need to renew the ceiling, there are no swelling, cracks or other similar problems, you can get by with a little blood. First, remove the dust (with a cloth and water), dry it, then prime it. After the primer has dried, you can paint it. But once again we draw attention to the fact that this procedure is used only if the water-based emulsion holds well and there are no defects.
Cleaning waterproof emulsion from the ceiling is still a pleasure
If there are cracks or swellings on the surface of the water-based emulsion, it must be cleaned off. There are two ways - dry and wet. Dry means cleaning with sandpaper (manually or using an angle grinder), wet means rinsing off. This method must be used for paint that is not afraid of water. But it is very difficult to remove such paint. If water-based paint holds up well, no tricks help, but there are surface defects and putty is needed, take sandpaper with coarse grain and make the surface rough. After this you can putty. Next - according to technology: we prime and then paint.
Wash off the ceiling painted with water-based emulsion by moistening it twice with plenty of hot water. The water should be almost boiling water - about 70°C. After wetting part of the ceiling, wait 10 minutes, then wet the same area again with hot water. After about five minutes you can remove the paint with a spatula.
Removing old paint is a lengthy process
You can repeat this procedure several times, gradually removing loose paint from the ceiling. Small residues can be sanded off, and then the ceiling can be washed, dried and primed. You can putty and sand over the primer, smoothing out imperfections.
Sanding the ceiling after puttying
Whatever the putty mixture used to polish the ceiling, its surface cannot be completely leveled. All kinds of tubercles and irregularities remain, which are a consequence of working with a spatula. The question arises - how to rub putty on the ceiling and what kind of sandpaper to sand the ceiling before painting. After a day or two, the surfaces are usually sanded. Then they start priming.
Materials and tools
Be sure to prepare the necessary tools:
- Special block
- Sandpaper or abrasive mesh
- Sanding sponge
- Elevation
- Lighting device
- Putty knife
- Eye protection glasses
- Respirator
It is also advisable to cover your hair with a hat.
About abrasive mesh and sandpaper
Good results are obtained by using a special grinding machine, but are often limited to the manual method. The second method, if the ceiling needs to be grouted after puttying, is what professionals resort to most often, since this is the easiest option to remove roughness in areas that are difficult to access. The choice of machine polishing is logical if you need to process a large area. But even after such work, there may be a need for manual processing - anyway, during inspection, tubercles of different sizes are found.
Before purchasing material, inspect the treatment surface. Then you will understand how to sand the ceiling after puttying without interruptions. If it seems difficult and uneven, more coarse mesh will be needed.
Let's see what you can use to sand the ceiling for painting.
Abrasive mesh
Grinding mesh is a material with many advantages. Dust does not clog the cells that make it up as much as sandpaper. The removed putty passes through it. If it is worn out, it is easy to understand by its appearance, and then it is better to simply replace it. The sanding mesh is waterproof.
At retail, the mesh is sold in block sizes. It is better to choose materials that match in size. The block should be smaller than the mesh. Curved edges are secured using nails. Stores also sell a special holder.
The sanding mesh is available in several cage sizes. When working with a normal surface, two types will suffice.
The main disadvantage of abrasive mesh is its high cost.
Sandpaper
Sandpaper is different in that its surface fills with dust faster. It needs to be replaced more often. But the cost of the material is significantly less. It is also easier to sand corners with sandpaper than with a mesh.
When choosing which sandpaper to rub the putty on the ceiling with, you need to focus on the grain size - it is this indicator that will tell you what type of work can be carried out. Understand the labeling. Our country has a special GOST, and the FEPA and ISO 6344 standards used abroad also apply. The degree of “graininess” is indicated by a number. The larger the abrasive, the lower the indicated figure.
You can save money by choosing rolled emery - the material consumption is not small, and sandpaper cut into a block is more expensive (although the price is worth the time saved, which you will not have to spend cutting paper).
Sandpaper is divided into categories:
- sandpaper size and grit
- scope of use
- release form
There are a certain number of abrasive particles per square inch of sandpaper. They are indicated by the sandpaper numbers. According to this indicator, the material is divided into several categories:
Sandpaper that cleans surfaces from old coatings (varnish, paint) and traces of initial processing. It consists of coarse abrasive, large fractions, and after removing the top layer, grooves and scratches remain on the material. Further processing is required. Using this material, the surface can be ground well, but achieving final evenness is very difficult. With its help, the first grinding is performed. Numbers 12-80.
Multilayer processing becomes smoother and better quality. The surface can be smoothed and leveled, but marks will still remain. Numbers 80-160.
Necessary for removing defects from previous polishings, when the surface needs to be prepared for final processing (for example, before applying paint). A suitable option is zero. Numbers 160-4000.
Each material has differences, but the order of work is the same for them. When deciding which sandpaper to sand the ceiling before painting, it is important to remember that sandpaper with the coarsest particles is used first. Then they move on to using paper with a finer abrasive, and the final stage is polishing.
How to clean the ceiling after puttying: the grinding process
So, how to properly sand the ceiling after puttying? At the first stage, they calculate how much sandpaper or mesh will be needed. They clog quite quickly and need to be updated frequently.
In the second stage, we directly sand the ceiling before painting. Using smooth movements, with light pressure, we begin to sand the surface of the ceiling. It is important to distinguish between an area that has already been sanded - there is no need to process it a second time.
If a large depression is found, it can be skipped. Once you've finished the entire ceiling, come back and refinish it, and when it's dry, sand it individually.
Having wiped the entire surface with a coarse-grained abrasive, we repeat everything using fine-grained sandpaper. If scratches remain, choose a lighter abrasive.
Sanding with a sander
A very practical sander. A large area is processed in a short time, and the high cost of work is justified by productivity.
After processing with a sander, you will still have to work with your hands at the end, but when figuring out how to sand the ceiling after puttying, you can still stop there. And even at heights, working with a grinding machine will not be difficult.
An abrasive mesh is put on the machine (for starting grinding - from No. 60 to No. 80, for finishing - No. 100). You will also need a stepladder or table. We process the ceiling in a circular motion, starting with the largest defects. We don’t stay in one place for a long time, because of this, unevenness may appear. We remove the dust, correct small errors with a spatula and perform the final grouting with fine-grained sandpaper.
Dust protection
If you are interested in how to sand a ceiling after puttying without dust, then the answer is no, it will still appear. All things that can be moved are removed from the premises. If anything remains, the items are protected with polyethylene or paper.
Do not forget about respiratory and vision protection. Use special glasses and a respirator. Wear suitable headgear.
How to sand a ceiling after puttying - video:
!
Source: https://remontcap.ru/kak-shlifovat-potolok-posle-shpaklevki.html
How to choose and prepare water-based paint to paint the ceiling
There are a huge number of water-based materials on sale from a variety of manufacturers, from domestic chemical plants to foreign brand companies. For a person unfamiliar with the process of painting with water-based paints, selecting a material can be a real problem. It’s not enough to be able to properly whitewash the ceiling with water-based paint; you also need to choose the material wisely. The easiest and worst way to learn more about paint is to listen to the manager - the salesperson in the salon. If you have patience, then it’s better to read the instructions on the can, the manufacturer’s recommendations, or talk to professional painters.
Concrete ceiling primer
To get started, you need to read the instructions on the primer package, following the manufacturer's recommendations. Basically, this product is sold ready-made and you just need to pour it into a special container into which the roller is immersed. The work must be carried out in special safety glasses, and clothing must be for protective purposes.
If there are cracks on the wall, they need to be cleaned, a primer applied, then covered with putty and smoothed using a special mesh. When this surface is dry, you need to paint the entire ceiling with a primer.
For these purposes, a deep penetration primer will be required. It will ensure good interaction between the old surface and the applied paint. The secret of applying the primer: when working in the room, the air temperature should be 5-30 oC; if the temperature is too high, the primer will crack, and if it is too low, it hardens, this reduces its effectiveness.
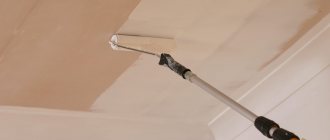
If the ceiling is very uneven, then you need to prime it twice, using a roller and a brush, which will paint all hard-to-reach places. After this work is completed, you can begin to putty the entire surface.
Advantages and disadvantages of whitewashing
Painting the ceiling with water-based paint has its pros and cons. The advantages include:
- no unpleasant stench;
- the smell of dampness disappears after airing;
- whitewash components are non-toxic;
- easy to use (easy to dilute, stir, tint and apply);
- the ability to get any color after adding color;
- easily washed off from the body, clothes, floor;
- can be done by non-professionals - it is possible to whitewash the ceiling with water-based paint yourself;
- low cost of finishing;
- combination with various types and types of interior.
The disadvantage is:
- inability to withstand low temperatures - when exposed to frost, the paint surface may crack;
- large labor costs in preparing the ceiling for whitewashing;
- the painted surface quickly becomes dirty and loses its original appearance.
Tips and tricks
Advice from experienced builders will help improve the quality of work.
- It is better to start putting putty on newly created building structures after one to two weeks. Final shrinkage of the materials must occur.
- For less experienced builders, the process of purchasing putty may be difficult. In this case, you can opt for universal putties from well-known manufacturers.
- It is advisable to select a primer for wet rooms that contains an antiseptic.
- You should not prepare a solution of more than 4-5 kilograms at a time: after 40-60 minutes it will set and will be unsuitable for work.
- Grinding must be done with a mask: the dust that will fall off during work is harmful to health.
- Heaters and hair dryers should not be used to speed up the process when the putty is drying, so as not to provoke cracking of the finishing layer.
- The degree of surface evenness can be checked using the long length rule.
- The putty is mixed only in a clean container. Tools should be washed and dried immediately upon completion of work.
After completing all the stages of putty work yourself, painting the walls will seem like an easy and enjoyable process. In gratitude for their patience and hard work, the painted surfaces will delight their owners for a long time with their beautiful color and even shine.
You can learn how to putty walls for painting with your own hands from the following video.
Advantages and disadvantages
Water-based paint has been and remains a fairly popular material, there is an explanation for this. Among the advantages of this design option are:
- low price of the coloring composition;
- simple preparation and application technology;
- Record-breaking fast drying of paint—several hours;
- safety for household members, no suffocating odor;
- the ability to change the color by adding a special color that has the same water-based base;
- easy cleaning of the tool after completion of work;
- combination with any types of finishing of other surfaces of the room.
The disadvantages include:
- mandatory knowledge of the nuances of the process, otherwise spots and streaks may appear;
- relatively rapid loss of the original appearance;
- the need for high-quality ceiling preparation.
It is this last requirement that scares off some owners, but work done conscientiously once will give you a chance to not worry about major ceiling repairs for a long time.
Benefits of putty
High-quality ceiling putty for painting has many advantages over other finishing options:
- Affordable price for materials. The most expensive mixture costs no more than $30-40.
- DIY repairs. Puttying a ceiling for painting does not require much experience or complex expensive tools.
- Variability of finishing. The range of materials is large, and also differs in price, quality, and shades.
- Versatility of use. Thanks to various additions, you can select compositions for finishing ceilings in rooms for any purpose.
- Non-flammability. The materials have the ability to self-extinguish, which helps reduce the fire hazard of the room.
- Environmentally friendly. The natural components of the composition are safe for human health. After drying, the putty does not emit harmful fumes and is a hypoallergenic product.
- The ability of the material to level ceilings is extremely high. Properly done ceiling putty for painting with your own hands can eliminate serious defects in the base. As a result, the owner receives a smooth and aesthetically attractive coating that is not inferior in beauty to more expensive finishing options.
Average noise and thermal insulation values do not allow the product to be used to eliminate problems. To solve the problem, you should pay attention to special materials with higher levels of the required characteristics.
Preparing for painting
Whitewashing the ceiling using old paint or wallpaper is possible, which is why many people do it. However, the result of such a decision will be visible literally the next day: the snow-white surface of the ceiling with a different structure of applied paint immediately catches the eye and neutralizes the entire effect of the repairs.
In order for a matte or glossy ceiling to look aesthetically pleasing, it must first be prepared for painting. The entire process of preparatory work step by step is as follows:
- walls, floors, windows and doors are protected from dust with plastic film;
- previous finishing materials (paint, wallpaper, tiles) are removed;
- the surface of the ceiling is repaired and, if necessary, reinforced with fiberglass;
- the ceiling is treated with a primer and then puttied.
The entire preparation process is described in detail in the article “How to prepare a ceiling for painting with water-based paint?”
Which roller to paint the ceiling with water-based paint
To paint the ceiling, it makes no sense to purchase a spray gun or compressor: they are too expensive for one-time use. But the roller will fit just right. In construction markets and hardware stores you can see a huge number of these simple devices. You need to figure out which one is best.
Velor
This material will help create an even coating without side stripes or streaks. The only problem is that its absorbency is poor - you have to constantly dip it into the tray. As a result, the process may take longer than you expected.
Foam rubber
There will be no problems with a tool made of foam rubber. It is believed that it can be used to paint any surface, and it absorbs much better than rollers made from other materials. But at the same time, the foam rubber leaves a lot of small bubbles. As a result, the coating will have to be further leveled with something.
Faux fur
Faux fur rollers with short pile are also good in their own way. However, when working, they splash a lot and some of the paint is wasted. Perhaps the best option is a tool with the same artificial fur base, but with medium and long pile (12-22 mm): the coating will lay down softly and evenly, without splashing, drips and unevenness.
Before making a purchase, check the quality of the product. Make sure the pile is thick and free of bald spots. To understand how strong it is, tug on it. The threads should not come out at the first effort. Try to find the seam: with high-quality rollers it is located obliquely and is made in such a way that it is very difficult to see. It's good if it's not there at all.
What you need to have for work
In order to ensure high-quality putty on the ceiling for painting, you should select the right materials and tools for the job. You will need not only putty, but also primer for pre-treatment of the surface. In case of large unevenness or a curved ceiling, you will have to purchase two types of putty - starting and finishing. Moreover, the starting one will be much larger.
In case of very significant defects, it is still better to refuse to use the plaster mixture, as some craftsmen advise. Only a specialist with sufficient experience can perform such work efficiently. If you don’t have one, then covering the ceiling with plasterboard will be faster, easier and not much more expensive.
From the tool for puttying the ceiling for painting with your own hands, you need to prepare:
- electric drill with a construction mixer attachment;
- angle grinder (grinder);
- large and small brush;
- paint roller on a long handle;
- rubber and 3 metal spatulas of different widths;
- plaster trowel (trowel);
- grater, fine sandpaper and abrasive mesh for grouting;
- bubble level at least a meter long;
- containers for mixing working mixtures and carrying water.
To protect your eyes and respiratory organs, buy a protective mask (thick glasses) and a respirator.
Recommendations for choosing soil
The primer is applied 2 times, first on the surface of the ceiling, and then on each putty layer. Therefore, you will need quite a lot of it and it will take up a significant part of your financial costs. In order not to waste money, you need to choose exactly the material that is best suited for the room being renovated.
Ready-to-use primers and dry mixtures are available for sale. Since the difference in cost is not very large, it is better to take a ready-made solution. It will be easier and better this way. In this case, the soil for treating the ceiling must have deep penetration.
Based on the composition of the base, there are 4 types of primers:
- acrylic, for impregnation of concrete, drywall and plastered surfaces;
- phenolic, for processing wood and metal;
- alkyd, recommended for treatment before painting the ceiling with alkyd paint, as well as for impregnation of plasterboard and plaster;
- glyphthalic, for metal and wood, but only when performing outdoor work.
The humidity conditions of the room do not affect the choice of soil type. The main indicator is the building material of the primed surface.
What primer to use
A primer is necessary for better adhesion of the paint to the surface being painted. It allows you to avoid the appearance of cracks and blisters after the paint dries. If there is no primer, this can happen. You'll have to clean everything off and putty again. Because in order for painting the ceiling with water-based paint to be of high quality, the surface must be well primed.
The base of the primer should match the base paint. Acrylic water-based paint requires the same primer; silicone paint requires a silicone-based primer, etc. Moreover, it is advisable not to save: the quality of this composition determines how smoothly the water-based emulsion will lie on the ceiling.
Acrylic primer for the same water-based paint
There is an economical method of priming: the base paint is diluted with water (1 to 2) and the surfaces are painted with this mixture a couple of times. It's certainly better than nothing, but the primer gives a better grip.
On a note
- With gloss and semi-gloss paints the result is more unpredictable. With them, more often than with matte paint, obvious stains remain.
- On a snow-white ceiling, any nuances are much more noticeable than on a cream or beige one. If you doubt your capabilities, lightly tint the paint.
- Know that the larger the surface, the higher the likelihood of getting a questionable result. Therefore, do not be surprised if in a small bedroom the ceiling turns out like in the picture, but in a large living room you cannot look at it without tears.
- Paint quality matters! You can save money on wall paint, but you need to buy the best for the ceiling! After all, he is much more picky.
- Don't strive for absolute perfection. Painted surfaces are almost never flawless. The main thing is that in bright light, stripes, stains, smudges and stains are not noticeable.
See also:
What is better for walls: wallpaper or painting?
Which bathroom ceiling to choose?
How to paint the walls in a room?
How to repair a hole in a wall?
How long does it take for water-based paint to dry on a ceiling?
On average, the water-based emulsion on the ceiling dries in 2.5-3 hours at room temperature. The drying speed largely depends on the temperature and humidity of the air. Typically, the manufacturer indicates the average for standard conditions on the packaging.
You should not try to speed up the drying process of the ceiling using drafts, hair dryers or the heating system turned on at full power. The layer must dry naturally, this is the only way to achieve good quality coating.
How to tint water-based paint to paint a ceiling
There are two options for tinting the mixture. Firstly, water-based material can be tinted using special equipment upon purchase. In this case, dry fillers are used that are highly stable, color stable, and do not wash out or settle to the bottom of the container.
If you tint the material yourself, you will need to buy a toner in liquid form, always from the same manufacturer as the water-based emulsion. In addition, you need to take into account that the real color of the ceiling will be slightly different from what happened in the container. The evaporation of water during the drying process makes the coating less bright and rich. Therefore, many craftsmen take control measurements in the process of preparing for painting. To do this, a small amount of the finished material is applied to ordinary glass. After the water-based emulsion has dried, from the back through the glass surface you can see the approximate shade of the ceiling after drying.
How to sand a ceiling without dust
Whatever the putty mixture used to polish the ceiling, its surface cannot be completely leveled.
All kinds of tubercles and irregularities remain, which are the result of working with a spatula. The question arises - how to rub putty on the ceiling and what kind of sandpaper to sand the ceiling before painting.
After a day or two, the surfaces are usually sanded. Then they start priming.
Ceiling sanding: how to do it yourself correctly, photo and video instructions
After the walls and ceiling have been puttied, they need to be sanded. Unfortunately, this work is quite difficult, since, among other things, dust interferes, which also harms the worker’s health.
Painting defects and their causes
Sometimes it is difficult not only to paint the ceiling evenly and smoothly, but also to find the cause of some unevenness. Let's look at this issue point by point.
Stripes of paint
They appear due to insufficient paint rolling. Also, due to this error, smudges may appear, because the paint flows down and drops form. To prevent this from happening, it is necessary to thoroughly roll the roller over the surface after each application until there is no paint left on it.
Another reason for this defect is the uneven distribution of the load on the roller, that is, a person puts more pressure on one side than the other. Try to press the roller as tightly as possible to the ceiling so that such a problem does not happen.
To prevent the paint from being applied in stripes of different colors, you need to evenly distribute the load on the roller and roll it evenly over the surface after each application.
Different shade of stripes
It happens that after painting you begin to notice that the wide stripes on the ceiling are almost different in color. The reason for this situation is that the water-based paint is not mixed well enough. Another reason for such stripes is constant gaps during painting.
Spots and highlights
This defect occurs most often and its cause is sometimes really difficult to identify. One of the possible reasons is an insufficiently leveled ceiling surface or the presence of depressions. It is not possible to eliminate such glare using paint; to get rid of them, you need to repeat the putty.
Spots and highlights may appear after painting on an uneven ceiling
And so that you don’t have to repaint everything again at one point, try to follow the rules and recommendations when painting. There is no need to rush; this process cannot be rushed. Constant lunch breaks will be inappropriate, it is better to do all the work at once. As a result, you will get a perfectly painted ceiling.
Recommendations for ideal ceiling painting
Professional craftsmen share with beginners the following tricks for painting a ceiling with a roller:
- It is better to apply the last layer of paint from the window, then the joints will remain invisible, since the light will fall along the stripes;
- If even a small area remains unpainted, it will not be possible to correct the defect. You will have to apply a new layer of emulsion to the ceiling;
- Evaluate the results periodically. To do this, look at the painted ceiling from different corners of the room;
- Prime the ceiling surface before painting. The primer will improve the adhesion properties of the dye, the composition will lie more evenly;
- work quickly to ensure a streak-free surface.
Painting the ceiling with a roller will be easy and quick if you carefully prepare the ceiling for work, purchase high-quality tools and paint, and also follow the sequence when applying the composition.
What you need to prepare
If the rough leveling of the ceiling has already been completed (plaster, gypsum board), or the base does not need it (monolithic concrete floor), for finishing preparation - puttying you will need the following tools and devices:
- Portable trestles or stepladder;
- Container for primer composition;
- Paint brushes and a roller with a long handle - for applying primer;
Electric drill (from 500 W) with an attachment for stirring solutions;
Electric drill (from 500 W) with an attachment for stirring solutions;
- Container for mixing putty;
- Steel smoother 400-500 mm wide;
A set of metal spatulas of various widths - 350-450 mm (main), 70-150 mm and 200 - 250 mm (auxiliary);
A set of metal spatulas of various widths - 350-450 mm (main), 70-150 mm and 200 - 250 mm (auxiliary);
- A grater with a set of mesh or sandpaper for sanding putty;
- Rule lath 2-2.5 m long;
- Portable lamp;
- Personal protective equipment - respirator, safety glasses, overalls.
List of required materials:
- Primer composition;
- Putty – basic and finishing;
- Reinforcing fiberglass mesh - for ceilings made of slabs or plasterboard;
- Sandpaper or sanding mesh.
How to avoid stains
The headache of any painter is the appearance of streaks. This problem is especially acute for beginners in the painting business. How to paint a ceiling with water-based paint without streaks? Firstly, strictly follow the painting process. Secondly, follow these tips:
- remove all heating devices (this especially applies to lighting on the ceiling), turn off the batteries or cover them up during work;
- prevent drafts;
- conduct constant monitoring of the quality of painting either with the help of light or move to the side, changing the viewing angle;
- do not interrupt work for smoke breaks and respites;
- do not paint directly above your head;
- do not jump from place to place.
Following the technology allows even a beginner to get a perfectly painted ceiling surface.