Almost all finishing and repair work involves sealing cracks in the walls. Such defects arise for various reasons and cause a lot of inconvenience. The fact is that if the problem that has arisen is not resolved in time, the consequences can be extremely unpleasant. After some time, the deformations gradually increase and detachments appear. If the defects are deep, then there is a high probability of cold bridges, which contributes to the formation of mold and mildew.
Factors causing cracks in walls
It must be taken into account that cracks in the wall can occur due to various factors:
- Gradual shrinkage of the building. Unfortunately, it is impossible to change this situation. The process occurs especially intensively in the first 3–5 years after the construction of a house, so it is not recommended to make expensive, major repairs within two years.
In fact, the appearance of cracks in walls can be almost completely eliminated if the cause is determined and the correct leveling compound is selected. Of course, it is not possible to eliminate some nuances, but it is quite possible to reduce the scale of their impact. When working with recently constructed objects, it is better to use cladding mixtures with a plastic effect, and for showers and bathrooms it is necessary to use cement-based solutions with the addition of polymers; gypsum options will constantly deteriorate.
On a note! Completely correcting any deficiencies that have arisen is a rather expensive undertaking, so it is quite possible to get by with a simple repair.
How to wash it off?
Often, after using a sealant, its particles remain on a clean surface. These traces need to be removed. Among the methods for cleaning the coating from hardened sealant, mechanical and chemical removal are distinguished. Both methods do not require special skills and are accessible to everyone. They are used by both professionals and novice craftsmen.
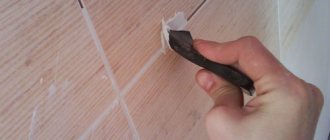
To clean the surface mechanically, you need a blade - a razor or a stationery knife will do.
Excess glue is cut off with careful movements. The sealant must be removed carefully, layer by layer. Small residues are rubbed off with pumice stone or steel wool. Care must be taken to ensure that cracks do not form on the coating. For more delicate work, you can use a wooden scraper.
After completing the work, the surface should be washed with cleaning powder dissolved in water. The coating can be rubbed with a soft brush and left until completely dry. It is contraindicated to remove frozen glue by hand. This may negatively affect the flawlessness of the coating. Monitor the quality of work at every stage - scratches cannot be corrected.
If the plastic surface is contaminated with sealant, clean the areas using a plastic spatula. The use of metal cleaning devices on plastic surfaces is prohibited. PVC is most sensitive to sharp objects. After treating the coating with a spatula, wipe the areas with a rag.
Steel wool and scouring powder should only be used on surfaces that can withstand light external loads. Wipe the coating with light circular movements and light pressure. This type of work requires patience and accuracy. But the result will justify the investment of time and effort.
The chemical method of removing sealant involves using a special solvent. Chemical cleaners are produced in the form of a paste and aerosol. After applying the product to the glue, its surface becomes plastic. The soft substance can be easily removed with a napkin or wooden spatula.
Before using the cleaner, it must be tested. Due to the large number of aggressive chemical additives, the solvent can damage the surface. To avoid loss of color or partial dissolution of the coating, the composition is applied to a small area and wait for some time. If the test is successful, then begin processing the entire surface.
You need to work in a protective mask and special gloves. The substance is applied and waited for an hour. But before work, it is important to read the instructions on the solvent packaging - different compositions require different amounts of time. The solvent is not recommended to be applied to a painted surface.
Fresh acrylic sealant can be easily cleaned by wiping it with a cloth containing gasoline, vinegar or acetone.
When working with chemicals, the premises must be well ventilated. The solvent composition can be very toxic, so do not neglect safety rules. It is not recommended to remove the protective mask during work - the chemicals can irritate the mucous membranes. Touching the composition with bare hands is also prohibited. You should also work with sharp blades carefully.
To protect the surface from contamination with sealant, it must be sealed with masking tape. Adhesive tape is glued along the seam, protecting against excess adhesive. It is better not to neglect such protection, because it is not always possible to remove the sealant carefully.
Materials for sealing cracks
The question of how to repair a crack is quite important; the correct choice of material depends on the type of coating. The most commonly used options are:
- Cement-sand mixture and its varieties. Excellent for repairing damage in concrete and brick walls. The best results are obtained by compositions with the addition of plasticizers, which have virtually no shrinkage.
Gypsum plaster De Luxe Class
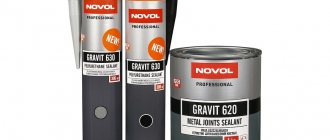
- Sealants. Serve to level minor damage. It must be taken into account that acrylic-based products have the best performance, provided they are used correctly. Silicone sealants are not used for this process.
Options for sealing cracks in different surfaces
To properly repair a crack in the wall, you need to focus on the material that is used to make the coating. Before performing this procedure, you should ensure that the defects do not indicate serious problems with the supporting structures.
Brick walls
Damage to brick walls is usually divided by size into two categories: up to 5 mm or more, so there are 2 ways to perform the work.
The first option is quite simple and is as follows:
- The process begins with jointing. This procedure is a slight enlargement of the gap. The main thing is to embroider the edges with a hammer, but you shouldn’t get carried away.
- A thorough cleaning is carried out. Accumulated debris and dust should be completely removed. The area is pre-wetted with a spray bottle.
- A simple cement mixture is prepared. A trowel or spatula is used for application.
- The solution is placed in the existing recesses and rubbed well. It is important to get a level surface.
Sealing cracks in a brick wall larger than 5 mm is done with greater care. First of all, the amount of damage per square meter is assessed. If the defects are located in one large area, then it is advisable to partially dismantle the masonry in order to replace the damaged fragments. If there are through cracks and subsidence of part of the wall - which is typical for private houses - then the entire section is completely re-laid with additional reinforcement of the rows.
But if such large-scale work is not required, then you can repair a crack in the wall according to the following scheme:
- The initial steps exactly repeat the previous procedure, but the work uses a cement-sand mixture with special additives that give the composition elasticity.
- The damage is carefully treated with a deep-penetrating primer; it will increase adhesion.
- The solution is applied gradually to ensure its penetration to the full depth. To do this, the composition is literally pressed in until excess begins to appear.
- All areas are well leveled.
It often happens that the resulting gap leads to the weakening of several bricks in the middle and at the edges of the masonry. At the same time, it is not possible to disassemble the structure, and using liquid solutions is problematic. Then polyurethane foam comes to the rescue. Small rigid spacers are first placed so that the bricks take their place, and the damage is carefully foamed. After drying, everything is cut flush with the surface.
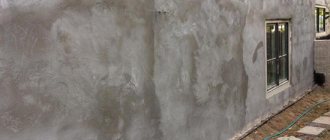
Plastered coatings
First, the damage is assessed. The fact is that cracks in the plaster can be the result of a defect in the base. If the cracks in the wall are deep, then it is advisable to dismantle the entire layer of plaster and eliminate the root cause. But often it is necessary to carry out only internal work.
When sealing, they are guided by the following principles:
- If the coating is used as a basis for cladding with decorative materials, then the process is not particularly difficult. The main thing is to choose a composition that is suitable in structure. Sealing is carried out using a spatula. First, the solution is applied by holding the tool perpendicular, and then leveled with parallel movements.
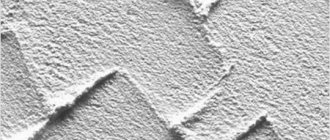
- Sometimes it happens that plaster plays an independent decorative role. For example, it is applied to create different textures. Then more painstaking work is performed - the texture of the damaged area is recreated.
- If there are numerous small cracks, the coating is treated with a very liquid gypsum compound using a brush.
In general, cracks on a plastered surface are an alarming signal, which may indicate that there are numerous voids under the layer.
Consumption
Manufacturers of sealants indicate on the packaging the average consumption of material per square or linear meter. The indicator is calculated subject to compliance with the technology for applying the composition of the temperature and humidity conditions. In practice, the mixture takes more or less than the specified value. If there are significant deformations on the surface of the facade, differences in the depth of the joints relative to the vertical plane, the excess consumption of the mixture can be double the norm. Therefore, before performing work, you need to calculate the approximate consumption of interpanel sealant for sealing seams, taking into account the following parameters:
- Dimensions of joints - width and depth.
- Length of seams on the surface.
- Average flow coefficient.
After multiplying the values, the amount of sealant required to process 1 linear meter of interpanel joint is obtained. If external triangular seams are to be sealed with silicone or other sealant, the resulting flow rate can be divided by two.
Attention: If the seam dimensions are significantly larger than 6 mm, a silicone cord is laid in the joints as an auxiliary seal (wooden facades). The mixture consumption depends on the type of surface (porous or dense) and the dimensions of the seam. In order for the funds to be enough to complete the work, you need to apply sealant to the seams of brick, concrete, and wood strictly according to technology.
Purpose of expansion joints
Concrete is not a plastic material, so it can crack due to temperature changes, shrinkage, or due to contact with any building structures. To avoid this, deformation slots are made.
They can have different purposes.
- Structural – separate areas poured on different days. It is not always possible to fill the entire floor in a day, which is why it dries unevenly, which can lead to cracks where different zones come into contact.
- Shrinkage - needed to eliminate the effects of shrinkage of the floor after drying. For this purpose, special grooves are made or inserts are used during pouring.
- Insulating – separates the screed from other building structures – walls, columns. Different materials may have their own operational characteristics, so additional insulation is provided between them so that the surface is not exposed to excessive pressure in the joining areas.
Injection
Injection is based on the supply under pressure of special compounds into the openings that appear, which completely fill the resulting voids and harden. The filling mixture is pumped using pneumatic, electric or mechanical pumps. Their design capabilities are designed for precise dosage of injection components and support of the required level of pressure. The injection materials are polymer cement materials and epoxy resin. To carry out this procedure, holes are drilled in concrete along the crack on both sides and packers are installed through which the injection composition is supplied (Figure 1).
Classification
Sealing agents can be divided into the following groups according to the method of action:
- surface – create a protective film that prevents contact of concrete with moisture;
- penetrating - act deeper, close the pores from the inside and prevent moisture from penetrating into them.
The composition of sealants intended for concrete may differ due to the active components.
Among the most common, it is worth noting the following:
- acrylic - suitable for indoor use, give good grip;
- polyurethane - create a stable protective layer due to the elasticity of the dried product;
- thiokol - tolerate temperature changes and chemical influences well.
Sealants may also have other active ingredients - silicone, bitumen, rubber.
Despite the difference in composition, these products are subject to the following requirements:
- high adhesion not only to concrete, but also to stone, brick, iron, glass;
- presence of water-repellent ability;
- resistance to sunlight;
- ability to withstand temperature changes;
- easy application.
The compositions can be ready for use, in which case they are called one-component. Some of them need to be pre-mixed - these are two-component sealants.
Products are also classified according to a number of other criteria related to their properties:
- type of hardening;
- method of application;
- elasticity index.
All sealants used for concrete floors meet the general requirements that apply to them, but may be intended for interior or exterior use, have higher adhesion to certain materials, or have other individual properties. Therefore, before starting work, you need to select a suitable tool, taking into account the existing conditions.
Acrylic
Acrylic sealant is better suited for interior work, since it is less resistant to temperature and humidity changes than others. In addition, it is the most environmentally friendly of all types of products. Most often, acrylic sealant is a one-component composition. It can be used during repairs to seal cracks in concrete and where individual areas do not require serious protection. It has good vapor permeability.
The product is easily diluted with water and poured into the hole, leaving a smooth surface on top. It is easy to clean the sealant until it completely hardens. It levels well, so it can be used to level and smooth the joints between walls and the floor or ceiling.
Since the composition does not contain solvents, after hardening the surface can be painted or varnished. Among the well-known manufacturers are O, Tektor and Ecorum.
Polyurethane
These products are waterproof and are used as joint sealants to ensure strength and increase the service life of the screed. When applied, the product will not flow over the surface, but will set immediately, so a construction syringe is used to work with it. Due to their resistance to constant exposure to moisture and the ability to withstand significant temperature changes, such sealants can be used outdoors, to work on house facades and foundations. After application and hardening, the surface may be subject to high mechanical stress. Polyurethane products withstand contact with oils, acids, and alkalis well. The compositions can be one-component or two-component, but the latter are demanding in terms of dosage and must be prepared exactly according to the instructions.
Among the manufacturers of polyurethane sealants, Soudal, Sazilast stand out.
Silicone
Such products provide better protection against moisture. They come in two types - acidic and neutral; the first option is not suitable for concrete. During contact with an acidic sealant, cement stone releases soluble salts, which deteriorate the quality of the surface and can subsequently lead to corrosion, so you need to choose a neutral composition. Many silicone products have antifungal components and can be used in places where there is constant exposure to aggressive substances, for example, to seal a septic tank from the inside to protect the joints of concrete rings.
When working, it is mandatory to pre-prime the surface, since without this the silicone product will not provide good adhesion. They do not contain solvents, are elastic and resistant to various influences. The material has dielectric properties. Tektor is also a well-known manufacturer.
Thiokols
This group of sealants is based on polysulfides, which are characterized by elasticity and high resistance to chemical components. Most sealants of this type are two-part. After mixing, they turn into elastic rubber that does not shrink. They are suitable for use in conditions of temperature changes and contact with aggressive media. They protect the coating from dynamic and static deformations.
The manufacturer of thiokol sealants is.
Silane-modified
They are usually one-component, without solvents, so they are also suitable for protecting wet surfaces. Moreover, they can retain their properties even under water. Such products are elastic and adhere well to the surface. After finishing the work, they can be coated with paint. They are compatible with bitumen. Almost immediately after application, sealants provide maximum adhesion. They are more expensive compared to other types of sealants.
Popular manufacturers include Sealant.
Laminate sealant
Features of choosing wooden skirting boards for the floor, its types and installation technology
Acrylic sealants are used to seal voids and joints in laminate flooring.
Dirt and dust often collect at the junction of laminated panels; in addition, these places receive moisture. One of the effective methods of combating moisture is the use of a special sealant. According to experts, the most suitable sealant for laminate flooring is a silicone product. It is distinguished by high technical and operational qualities. Germany is the leader in the production of silicone sealant for laminate flooring; they have created a product with high moisture resistance. You can apply sealant even without specialized skills. Note to consumers: this sealant does not release toxic fumes into the air.
Plywood sheet flooring
Wood sealants can be painted in distinctive colors
It should be understood that the basis for many floor coverings - laminate, parquet, linoleum - are plywood sheets. Plywood becomes a real savior when your floor has a lumpy, unsmooth surface. Sheets of this material, laid under the main coating, serve as an excellent leveler. Plus, such work can be done independently. So, when you choose rather expensive laminate or parquet tiles as a floor covering, it is advisable to strengthen and level it from the inside with sheets of plywood, so that in the foreseeable future you will not have to spend money on restoration. But plywood leveler flooring also requires a base. As a rule, it becomes a concrete screed, completely dried and waterproofed. The joints between sheets of plywood also need to be sealed with sealant. In cases where plywood sheets are laid under the laminate, it is necessary to take care of the substrate from the thermal insulation layer: it will act as shock absorbers for the laminate panels.
Parquet sealant
A wooden floor will give unprecedented warmth to your home. But you won’t be able to admire the exquisite pattern of the wood for long, since wooden floor coverings are not very durable; after some time from the start of use, the wood becomes very vulnerable to aggressive external influences. Gaps are unpleasant consequences of wear. You can prevent the destruction of aristocratic parquet tiles or parquet using sealed putty. Most often, a concentrate based on acrylic dispersion is used as a sealant for parquet; it has excellent adhesion to wood.
Again, don't forget about the plywood flooring. If the floor surface is relatively flat, then a plywood layer 10 mm thick will be sufficient; for a lumpy floor, use a sheet no thinner than 12 mm.
https://youtube.com/watch?v=fBHEFJARfLs
Price
The most affordable are acrylic compositions, prices for which start from 150 rubles per 1 kg. Two-component polyurethane ones cost from 172 rubles per 1 kg. Thiokol products cost from 192 rubles per 1 kg. Silane-modified sealants are produced in tubes, the price of one is from 695 rubles.
The specific cost depends on the manufacturer and the store where the product is sold.
Sealing
First you need to prepare the surface for work, since the adhesion strength depends on this. The concrete coating must be dry, clean, oil stains, traces of foreign substances, and corrosion are not allowed. If the gap is narrow, it is first widened and also treated with a primer and primer, although for some types of sealants it is not needed. After this, you can begin sealing. There is no need to prepare one-component products; they can be applied immediately. Two-component sealants must be mixed according to the attached instructions, which indicate the permissible proportions. You can add gasoline or white alcohol during preparation if you need to increase the fluidity of the solution.
Types of education outside
After renovation work, minor cracks may appear in the house, which resemble a “cobweb”. They can appear even on high-quality putty. It's not scary! What are the types of cracks and what are the causes of their appearance?
Horizontal
Horizontal cracks in the building mixture are considered less dangerous, and the walls can last longer than during repair. The main cause of horizontal cracks is shrinkage of the foundation or the proximity of groundwater.
Shrinkage
This type of crack is called hairline. They not only deform the fundamental foundation, but also the entire structure as a whole. To prevent this from happening, the correct cement composition must be selected in the foundation. And most importantly, it must withstand a uniform load.
Vertical
Cracks can occur due to builders’ failure to observe expansion joints during construction. And also when the lintels, partitions are overloaded and the quality of the concrete is poor. Foundation deformation occurs mainly in winter. At this time, the soil freezes, which clamps the foundation, as a result, defects appear on the walls of the house.
Through slot
A cleft through and through is the most dangerous phenomenon. In this case, the house may be considered unsafe. The appearance of through cracks is affected by the deformation of the foundation if an extension is added to the house or construction work is underway in the neighborhood.
What to do if the plaster in your apartment is cracked
Defects on plaster often appear. To prevent the wall from collapsing, defects must be removed in a timely manner. Why is this happening? Having examined all kinds of ruptures, the palm among the defects is occupied by small cracks. This happens for several reasons:
- If the greasy solution is poorly mixed or when it dries quickly on the wall. It is not allowed to apply a thick layer of plaster in one go. What is the best way to cover it? Finishing putty, water-based paint, gypsum plaster or fiberglass will help “cure” small cracks. But when large cracks appear, you need to open it up, remove all dust, moisten it well with water and fill it with solution.
- If large cracks appear at the joints, it is better to use reinforced mesh, which is glued to the flaw and plastered.
Is it possible to strengthen brick walls if cracks appear?
Only a specialist will give qualified advice: how to strengthen the walls to avoid further spread of defects.
- Defects up to 5 mm are sealed with mortar, putty or sealant, if their increase is not observed.
- If major changes occur in the brick walls, the foundation needs to be strengthened. Just do not immediately dig a trench along the entire perimeter, but in parts. First, strengthen the corners of the house. The trench is dug 50-60 cm wide, and the depth should be 20-25 cm below the foundation level. Only then do they move on to strengthening the middle of the wall. The trench is filled with layers of reinforcing mesh and reinforcement, which are gradually filled with concrete. This is a long process. Each section must be thoroughly dry to prevent the wall from deforming.
- Strengthen brick walls if cracks appear using corners, reinforcement or channels. They are located around the perimeter of the house.
- Screw wire is used to strengthen brick walls. It is sold in a reel, 10 m long. First you need to groove the wall along the entire length, going to an angle. Strobe size 1. 5-3x1. 5-1. 6 cm. The grooves are located between the masonry, 3-4 on the entire wall. Then use a construction “gun” to introduce glue into the groove, level it and lay the screw wire. Also pour glue on top. Align the grooves with adhesive solution.
- To fix cracks, dovetails are used, which are shaped like reinforced concrete beams.
What can I cover with to prevent them from cracking?
Minor defects can be corrected yourself if they are related to the plaster. If the appearance is associated with deformation of the main structure, then you need to seek help from specialists.
Exterior materials for cracks
- Neomid Professional ─ universal putty. For deep cracks and potholes. Contains reinforcing fibers.
- SEMIN Fibrelastic ─ elastic putty for external and internal work. Especially for “breathing” cracks and joints.
- Profix ─ mounting and putty mixture. This is a flexible putty with easy application.
Crack mixtures for interior work
- SEMIN Rebouchage ─ filling putty for interior work.
- UNIS High-thickness ─ gypsum putty. Universal, easy to apply, crack-resistant. Warranty up to 15 years.
- TERRACO Handyflex ─ super elastic crack filler.
DIY repair
Often during repair work you have to deal with unpleasant defects. They are discovered while re-sticking wallpaper or leveling a wall for painting. You can deal with minor flaws yourself. When there are more defects outside than inside the house, it makes the job more difficult. Of course, it is difficult to deal with the cause, but you can try to hide this defect.
Puttying cracks in a monolithic house
To “cure” defects in monolithic walls, you will need the appropriate tools and materials:
- sealing composition (sealant, foam) and concrete mortar;
- putty knife;
- sanding mesh and holder for it;
- brush with stiff bristles;
- jointing tool.
First you need to widen the flaw by beating the edges with a hammer for better adhesion of the crack to the putty. Clean the defect from dust and pour sealant into it, then level the seam with concrete mortar. What to cover with? You can, of course, use only the solution, but the sealing compound will not allow it to appear anymore. After drying, you need to sand any unevenness well.
What is the best way to cover up cracks in a load-bearing block wall?
Smooth cracks appear on the masonry when it is not reinforced. There are several putty options for wall repair. Let's look at some ways to eliminate the defect.
- clean and, if necessary, expand the crack;
- clean from dust;
- using metal E-shaped anchors secured with dowels, strengthen the crack between the blocks;
- add pieces of broken cinder block to the solution (the smaller the better) and plaster the defect.
- widen the crack;
- prime;
- seal with mortar.
For small cracks, it is permissible to use tile adhesive, mounting foam or special foam for blocks.
If there is a straight crack in the corners, how to fix it correctly
A straight corner crack must first be opened, primed with a tenacious “Soil-Contact” primer and the seam sealed. To do this, take the Isogypsum putty on a spatula and rub it well into the flaw. Place a mesh on top of the putty. After drying, smooth out all uneven surfaces.
Repairing cracks in brickwork: how to remove them
- Repairing cracks in brickwork begins with removing dirt, dust, chipped bricks, fallen mortar and other unnecessary elements.
- It is good to wet the crack with a spray bottle, since the base of the brick tends to absorb water. By throwing the solution, it will penetrate deeper into the crack.
- Cover the wide part of the defect with mortar, and fill the narrow part with sealant from a “gun”.
- Since the sealant is white and the solution is gray, the crack needs to be given an aesthetic appearance. To do this, apply tile adhesive with a spatula. It tolerates temperature changes well, is frost-resistant, and moisture-resistant.
- After the building material has dried, sand the seam and smooth out any unevenness.
Repairing cracks in a concrete wall of a panel house with cement mortar
- First, check the condition of the crack, widen it with a hammer and chisel.
- Use a compressor to blow off all the dirt.
- Depending on the brand of cement, prepare a solution. To do this, mix sand, cement, water, beat until mushy.
- Lubricate the defect with PVA glue for better adhesion of the crack to the solution.
- Fill the hole with mortar to the level of the wall.
- Smooth out the seam.
- After drying, clean up.
If there are cracks in a new house, how to repair them
- Use a special tool to widen the crack.
- Clean it from dust.
- Prime to improve the adhesion of the putty.
- Seal the seam with putty using a putty knife.
- To prevent recurrence of formations, glue with sickle tape.
- Hold the top of the tape with one spatula, and smooth the tape with the second.
- Reapply putty and allow time to dry.
- After 24 hours, sand the surface of the seam.
Repair technology
In general terms, the repair technology is based on the following steps:
- preparing the foundation for restoration;
- installation of formwork and moistening the base (if necessary);
- preparing the solution;
- applying a concrete repair mixture to the base to be restored.
In the future, the restored area will be maintained.
Preparatory work
A concrete structure is prepared for restoration in the following ways:
- Mechanical preparation involves the use of a chisel, hammer, hammer drill, or other tool to help remove unreliable areas of concrete.
- Thermal preparation is based on heating the surface of the concrete base with a burner to a temperature of 90 ° C. Firing removes pollutants from the artificial stone. After thermal preparation comes mechanical or hydraulic preparation.
- Chemical preparation involves treating the base with reagents and is used where mechanical methods cannot be used.
- Hydraulic preparation is based on the use of equipment that creates high pressure up to 120 MPa. The method is used wherever it is safe to increase air humidity.
The purpose of preparation is to remove damaged areas of concrete. It is optimal to sample a layer up to 20 mm deep, with a minimum width of 100-150 mm.
Preparation of the solution
The dry mixture for concrete repair is diluted with water. It is optimal to use a concrete mixer for large quantities; for small batches, a drill with an attachment. The amount of water added is indicated in the instructions, but usually 0.13 liters of liquid are added per 1 kg of powder.
The preparation of composite, sealing and injection compositions involves mixing the components in a clean container. The proportions are similarly indicated in the instructions.
The required amount of any solution is prepared taking into account its pot life.
Elimination of a large defect using formwork
Action is necessary when repairing large defects caused by builders. The formwork is made of boards and plywood; long sections are reinforced with supports to prevent deflections.
The resulting excess protrusions are cleaned off, and the technological voids are sealed using the injection method.
Repair with composite compounds
The technology is used when it is necessary to strengthen a structure without making it heavier or changing its geometry. First, the base is sandblasted or sanded, an epoxy primer is applied, and left to dry for up to 12 hours.
The liquid mixture is applied with a roller or brush. If sand is present in the composition, it is leveled with a rule or trowel. After hardening, the restored surface is sanded and epoxy resin is applied with a roller to seal the pores.
Elimination of cracks, liquid composition, filling and injection
Repair of cracks is carried out after eliminating the causes of their formation, restoring the waterproofing, and completely drying the base.
The method depends on the depth of the defect:
- Small spider-like cracks are eliminated by applying liquid compounds that form a protective coating.
- Deep cracks on both sides are widened to approximately 150-200 mm, and deepened to 50-70 mm. Dust is blown out of the grooves with a compressor, a polymer composition is injected by injection, or a seal is placed by filling the voids with fiber-reinforced concrete.
The composition of the mixture for injection and the technology for its delivery depend on the size of the crack. Small grooves are filled using a pneumatic injector, creating a pressure of 0.2-0.3 MPa. The composition is injected into cracks with a depth of 450 mm using a hand pump and packers.
The operating pressure is maintained at 20 Bar, but during the process it can be increased to 40 Bar. The mixture is supplied until it comes out of the adjacent packer installed in the crack.
Areas with large cracks are stitched together with anchors; after injecting the channels, a layer of mortar about 20 mm thick is applied over the entire base area.
Thixotropic torquetting method
In order for thixotropic mixtures to firmly adhere to the base, after preparation it must have a rough texture. The concrete surface is abundantly saturated with water and treated with soil when wet.
In small areas, thixotropic concrete repair is performed manually. The mixture is applied with a spatula, trowel or trowel. For large areas, the torquetting method is used. The thixotropic mixture is supplied using compressed air or a pneumatic concrete pump.
One cycle provides for the application of a layer up to 30 mm thick. The mixture is leveled over the base to be restored. The number of layers, as well as their thickness, is determined by the project.
What to follow when repairing cracks: main rules
In order for the load-bearing capacity and enclosing properties of walls to be preserved for a long time, you need to be guided by the “General Recommendations for Crack Repair Technology.”
Repair of cracks is carried out after drawing up a map of defects and a defect list, which confirm the results of the examination and the reasons for their occurrence.
When choosing a technology for repairing unpleasant formations, you need to consider:
- wall material;
- number of flaws;
- defect width;
- branching of flaws;
Only then carry out repair work:
- embroider;
- clean from dust;
- Rinse;
- fill with suitable plaster.
If you notice a crack in the house, you need to monitor its changes: whether it expands or remains the same. When design changes have occurred, you need to seek advice from specialists. Only they will be able to professionally assess the condition of the surface and recommend measures to prevent and eliminate them.
Compositions based on epoxy resins and other polymers (Elacor, Technoplast, KrasKO)
Such materials are used for various types of concrete repair, for injection work to protect concrete from various types of influences (polyurethane, acrylate, epoxy).
Rigid, semi-rigid, and elastic solutions are used. Polymer materials require preparation and priming. Application is carried out using a smooth spatula or polyamide rollers, or with special equipment for injection.
Repair acrylate compounds are used to seal cracks, chips, and increase the strength and water resistance of the base. To enhance the positive properties, you can fill it with quartz sand.
Two-component epoxy compounds are used in cases where it is necessary to restore the load-bearing capacity of concrete, create an adhesive layer, and repair cracks. Two- and three-component polyurethane are effective in localizing leaks and blocking the flow of water.
Scope of application: repair of concrete floors for industrial and civil purposes, warehouses, garages, workshops, hangars, etc.
Advantages:
- high levels of chemical and mechanical resistance;
- high wear resistance;
- fire safety;
- good adhesion to the base;
- waterproofness, waterproofing.
Flaws:
low viability.
Specifications
| Viability | 30 minutes |
| Curing time | 24 hours |
| Adhesion to concrete | Over 1.5 MPa |
| Consumption | 200-300 g/sq.m. |