At what temperature can you putty?
So, let’s answer the first question - what is the minimum temperature for plastering walls?
The first thing you need to look at is the packaging. However, not all manufacturers write the optimal temperature for puttying. Among professionals, it is believed that puttying cannot be done when the room temperature is below +5 degrees Celsius. And the most optimal temperature when you can start puttying is from +15 to +25 degrees Celsius.
Temperature for plastering work
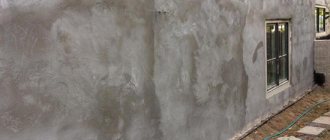
When carrying out work in winter outside or in an unheated room, it is important to decide at what temperature this can be done, and when it is better to hold off on finishing.
On the street
There are building codes that determine the temperature regime for applying plaster to building facades:
- the air must be heated to at least +8 degrees, although some mixtures can be applied at +5 degrees (we are talking about both the operating time and the drying period of the composition);
- provided that special frost-resistant additives are added to the plaster, work can be carried out even in frost (the specific minimum temperature is always indicated on the packaging);
- the temperature of the mixture itself should also not be lower than +8 degrees, which is especially important for machine plastering;
- on the day of applying the plaster there should be no wind, as well as any precipitation;
- it is important that the wall has already thawed by more than ½ thickness;
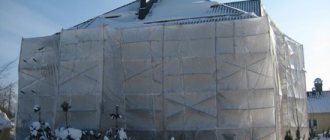
- if it is not possible to meet the specified conditions, walls or other street structures can be temporarily insulated.
How to putty walls?
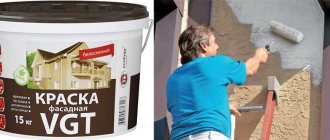
Before moving on to describing the procedure, we need to decide on the materials and tools that we will need during the work. So, it is advisable to purchase two spatulas - a large one and a small one made of stainless steel. Using two spatulas will make it easier to clean them and you will be able to use all the putty. You will also need paint, putty, primer and finishing putty.
Instructions for puttying walls:
1. Prepare the base of the wall. First of all, you need to carry out the preparatory work and clean all the walls from dust, paint, grease stains and residues from previous plaster. If the wall is frozen, you must first apply a primer in one layer and only then begin puttying.
2. The wall is ready, now we move on to preparing the putty mixture.
To do this, take the dry mixture and mix it with water. Next, mix all this with a mixer. As mentioned above, the optimal room temperature for puttying should be from 15 to 25 degrees Celsius. Before applying the finished mixture to the surface of the wall, it must be moistened.
3. We begin to putty the walls. To begin with, if there are uneven spots or holes on the wall, you need to cover them with a small spatula and wait for the putty to dry. Next, you can pick up a large spatula and carefully apply the putty in a thin layer, thereby smoothly leveling the entire wall. One layer should not exceed 1.5 millimeters. If you need to straighten a corner, you can use an angle putty knife.
When the entire surface is dry, it can be wallpapered or painted.
Tips for puttying walls:
— To ensure that you get a thin layer of putty when applying it, hold the spatula at an angle of 80 degrees. — When the job is finished, rinse all tools with warm water. Never pour water into the toilet or bathtub. Otherwise, you will have to think about cleaning and replacing the pipes when the remaining putty sets. — Try to apply the putty in an even layer. Later, when you glue wallpaper, a straight wall will look much nicer than a crooked one
Permissible temperatures for facade plaster with the addition of potash
Potash is a powder isolated artificially from familiar ash. Using it to plaster exterior walls is a good idea, especially where reinforced structures are expected to be covered. The advantages of the additive are its anti-corrosion properties. Coated metal will not rust. The air temperature for plastering the mixture with potash ranges from 0-30⁰ and directly affects the amount of additive:
- at -5⁰ add 5% of the dry mass of cement;
- if the temperature outside is from 6 to -15 to -20⁰, add 10% potash;
- when the frost is 25⁰-30, feel free to add 15% of the substance.
Carefully! Potash dissolved in water is a very strong alkaline liquid. Skin and mucous membranes must be protected!
Preparation of working compositions, the choice of which depends on the preference of the owner. It can be
- Cement 1 part + clay, 40% of cement;
- Cement, 1 part + sand, 3 parts;
- Cement, 1 part + lime, 1/5 of cement.
Next, they look at the temperature readings and add potash dissolved in water.
Working with a plasticizer consists of the following stages:
- Mixing dry mixtures: cement and other selected filler. Take into account: the temperature of sand, clay, and other fillers should be +5- +10⁰.
- Potash is dissolved in water +5⁰, not lower.
- Pour, mix, plaster.
Plastering is carried out quickly; if the solution is not used within an hour, it will no longer be suitable for installation.
At what temperature can you putty walls?
In the modern world, no repair work is complete without putty. As a result of their implementation, a flat surface is obtained, on which it is convenient to glue wallpaper and apply other decorative elements. Puttying walls and installing plasterboard panels is easy to do if you follow certain recommendations. Using the right construction tools in the right order and strictly following the procedure will allow you to successfully complete such work, even for those who are doing it for the first time.
Puttying process
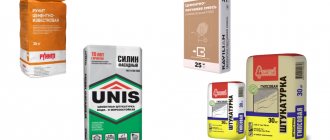
Before starting work, it is necessary to select the material of the required quality, which is ideal for the room being repaired. There are the following types of putties presented on the website https://yugcom.com/shpaklevka:
- with the addition of gypsum, used for coatings of low humidity (hallway, corridor)
- Polymer, for medium humidity.
- Made of cement, resistant to high levels of humidity (bathroom, toilet)
Particular attention is paid to having the right tools. The service life of the putty also depends on the correctly selected construction tools. To complete the work, you will need the following tools: two spatulas of different sizes, a drill with a special attachment, a suitable container for mixing the mixture and a building level.
After selecting all the necessary materials, you can begin the main stages of work:
One of the most responsible, it should be taken very seriously. Wallpaper, various types of stains, and old plaster should be completely removed from the wall. After this, a layer of primer is applied to the wall.
First, you should carefully study the preparation recommendations and carry out all the actions completely in accordance with what is written. Before applying the finished mixture, the surface should be watered with plenty of water.
If there are any unevenness or small cracks on the surface of the wall, they must be completely sealed with putty and wait for it to dry completely. A small spatula will work well for this type of work. After a short period of time, using a larger spatula, apply the main layer of the mixture. During the application process, you should slowly level the already applied layer. The thickness of one layer should not exceed 1.5 cm. Craftsmen advise placing it at an angle of 80 degrees. If necessary, make an angle, use an angle spatula.
- Surface grinding work.
After completing all putty work, you should wait about 24 hours so that both the wall itself and the other materials used are completely dry. After this, all unevenness is smoothed out using a piece of sandpaper.
Wall putty technology
Mixtures used to level the surface
Before you start puttingty, it is important to carefully select a high-quality material that will suit exactly the room in which the renovation is planned. Putty can be:
- gypsum, for rooms with minimal humidity (hallway, corridor, room);
- polymer, for rooms with normal humidity;
- cement, for rooms with high humidity (bathroom, kitchen, toilet).
Particular attention should be paid to the availability of the necessary tools. The quality and durability of the putty depends on the correct selection of equipment. What tool will help you cope with the task? To carry out the work you will need: two spatulas (large and small), a drill with an attachment, a mixer, a container for mixing the solution and a level.
Having selected the necessary material and equipment, you can begin to work.
- Preparing the walls. An important stage in the work, it must be approached with all responsibility and scrupulousness. Initially, it is necessary to thoroughly clean the surface of grease stains, remnants of old plaster, wallpaper, paint and dust. Cover the walls with primer.
Preparation and conditions
In summer, the procedure for plastering walls inside a building is greatly simplified, since the humidity is low and the temperature allows the solution to dry quickly and not deform.
In winter, you will need to follow certain rules.
Firstly, the humidity in the room where the renovation is being carried out should be no higher than 8%.
Secondly, the temperature of the solution itself should be at least +8 degrees.
When plastering slopes on openings and corners of a building, you need to know that they are most exposed to cooling, so it is better to carry out work before the start of the winter period.
Excessively high room temperatures will lead to improper drying of the mixture and the appearance of defects
It is recommended to putty walls at a temperature equal to +10 degrees or above this mark. Before starting work, preparatory work must be carried out. You will need to caulk all the cracks that exist.
If there are no windows and doors, then they need to be inserted. After this, insulation work must be carried out. When working in a living room, you need to remove old finishing materials and, if necessary, remove some of the old plaster.
Additionally, it should be noted that it is possible to putty walls in winter if the temperature near the floor is no less than +8 degrees, and near the ceiling no more than +30 degrees.
If the room temperature is more than 30 degrees, the solution will dry out quickly and, as a result, dry out. Due to this, the strength of the plaster is lost, it begins to crack and may fall off over time.
Air temperature and drywall
Drywall helps create perfectly smooth walls, but they still need putty work. This must be done to preserve the cardboard layer. Each repair is done for a certain time and sooner or later it will have to be replaced. And then, by removing the old coating, you can lose the cardboard layer, and this is a big problem, since the material is damaged.
The putty process is no different from ordinary wall putty, but it has its own characteristics. Before you start puttingtying the drywall, you need to treat the area where it connects to another sheet and where it is attached with self-tapping screws to the profile. Then move on to the entire wall.
Heating and drying
Any putty requires thorough drying after application, and different types of building mixtures contain different binders that need to be dried under certain conditions.
Lime-based plaster requires a small amount of carbon dioxide to dry and harden. Drying the solution using the quick method is prohibited, since the solution will lose its elasticity and develop many cracks.
How many days does it take for plaster to dry? Lime and gypsum plaster dry completely within 2 weeks. At this time, the building should be ventilated 2-3 times a day. Drying is carried out not after a separate area has been plastered, but when the work is carried out in the entire room or along the entire wall.
If the composition contains cement, then such mixtures will dry faster, in just a week. When using materials with cement, there is no need to ventilate the room, since cement requires moisture, which is in the air.
After the putty layer has dried, the room must have a constant temperature of at least 8 degrees
At home, the best heating for drying walls after plastering is stove heating or central heating. If it is not possible to use such heating systems, then it is necessary to temporarily heat the room.
Air heaters and heat guns are used for these purposes. With such equipment, the mortar on the walls will dry out within a week if the room temperature is 25-30 degrees.
After drying, the heating elements can be removed, but make sure that the temperature in the building is at least 8 degrees Celsius. This allows the walls to remain warm and not become stained with moisture. For a detailed process of plastering walls, watch this video:
Air heaters can be used as heating devices.
Is it possible to live in an unheated room in winter?
There are lime-cement and lime plaster mixtures, the air temperature when working with them is from -10˚ to +25˚C.
The mixture should be prepared in a heated part of the building, when the temperature drops below +5˚C during the day, and at night
At what temperature is it possible if there is no heating
Work on plastering buildings can be carried out at sub-zero temperatures. Mixtures are used that contain cement and sometimes lime, with the addition of anti-frost components:
| Modifier | ambient temperature ˚С | in proportion to the weight of the binder% |
| from | before | |
| Potash | -5 | 5 |
| -6 | -15 | 10 |
| -16 | -30 | 15 |
| Sodium nitrite | -5 | 5 |
| -6 | -9 | 8 |
| -10 | -15 | 10 |
| Calcium nitrate with urea | -5 | 5 |
| -6 | -15 | 10 |
| -16 | -25 | 15 |
To reduce labor intensity, it is better to prepare aqueous solutions of the required percentage and pour them into the prepared composition.
It is prohibited to use potash, calcium nitrate with urea or sodium nitrite as frost-resistant additives when plastering buildings with high (above 60%) humidity or operating at temperatures above 40 °C.
Types of putties
Putty is divided into types according to:
By purpose
Based on their intended purpose, solutions can be divided into three main groups:
To find out which putty is best to putty on walls, you should study the properties and scope of each type.
Starting
Leveling putty for walls is intended for initial surface preparation. The composition contains large fractions, eliminates large defects (cracks, potholes, chips), and is used for leveling. Has good adhesion to the base. The starting putty is applied in a layer up to 30 mm thick.
Suitable for concrete and masonry. The starting layer can be applied directly to the surface requiring leveling or to a reinforced mesh. When leveling walls with putty, the composition is applied in several layers.
- filling voids between window frames or door jambs and the opening;
- sealing of grooved channels;
- leveling slopes;
- sealing joints between reinforced concrete panels.
Finish
This putty for walls is used to prepare the surface for applying finishing material. It is designed to create a perfectly smooth base for paint, fabric wallpaper or other demanding materials.
The plastic composition fills the smallest cracks and, thanks to small fractions, creates a thin, even layer. As a result of applying the finishing putty, the wall is a smooth surface that does not require additional processing (grinding).
Universal
Mixtures of this type perform the functions of a starting and finishing composition: they are used to level the wall and create a flat surface. It is convenient to work with a universal solution: with one mixture you can eliminate all unevenness and prepare the surface for applying the finishing material. However, to create a high-quality leveled surface, it is recommended to use special compounds - filling walls with universal mixtures brings worse results.
By composition
Wall putties intended for interior work are divided into 4 types.
Disadvantages: when used in a room with high humidity, it changes its properties - it begins to swell and lags behind the surface. Does not tolerate mechanical stress well
When ready
Putty for ceilings and walls is available ready-made and dry.
Dry
The dry mixture is diluted with water immediately before puttingty the walls.
The advantages of such compositions:
- less weight;
- ease of preparation;
- the ability to independently choose the desired degree of thickness;
- low price compared to ready-made solutions.
- The need to prepare the solution yourself. It is necessary to thoroughly mix the solution until homogeneous, which is impossible without a construction mixer.
- Limited shelf life of the prepared mixture. After a short period of time (from 15 to 60 minutes, depending on the composition), it begins to harden and loses its properties. You need to prepare it in small portions and apply the putty immediately.
Ready
Plastic mixtures supplied in plastic containers of various sizes do not require dilution with water and are ready for use.
The advantages of solutions of this type include:
- better plasticity compared to dry mixtures;
- long shelf life (even after opening, the containers do not freeze immediately).
The main disadvantage is the high cost.
How long does it take for putty to dry on walls?
The drying speed of any material is directly dependent on temperature and air humidity.
The peculiarity of obtaining mixtures for leveling surfaces is the need to dilute the dry ingredients with water. When strength is gained, the water evaporates, and the treated surface acquires the necessary characteristics. High temperature and dry air speed up this process, while low temperature and high humidity slow it down.
In construction, there are standards under which the process of strength gain occurs in an optimal mode:
- the temperature must be positive, from 5 to 25 o C;
- air humidity from 50 to 75%;
- coating thickness;
- features of the base material.
Let's talk about the last two points in more detail.
At negative temperatures, the process of strength gain practically stops and special additives must be used to restore it. Too high a temperature leads to premature and uneven drying of the solution, which reduces the strength of the coating.
A layer 3-4 mm thick will take longer to dry than a layer 2-3 mm thick, and therefore it is customary to apply several thin layers, ultimately forming a durable and smooth surface.
On a porous surface, the process of putty gaining strength is faster than on a denser base, but rapid absorption of moisture can also lead to uneven hardening. In this case, it is important to properly treat the surface with a primer before starting work.
How to choose putty?
In order to putty the walls with your own hands to bring the desired result, you need to choose the right mixture.
- Compatibility. It is advisable to use materials from the same manufacturer: primer, putty, paint or wallpaper glue. In this case, there is no risk of unwanted changes in the building compositions upon contact with each other.
- Purpose. When looking for putty, it is important to consider the conditions in which it will be used (indoors or outdoors, high or moderate humidity, etc.).
- Finish type. To create a base for paint, it is recommended to use ready-made compounds - they are more flexible and form a high-quality, smooth surface without flaws. Puttying walls with dry mixtures is acceptable if you plan to glue wallpaper.
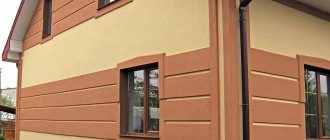
Types of frost-resistant facade plaster
Frost-resistant plasters for external use can be classified according to several criteria. One of them is the state of mixture in which the material remains at the time of sale. Plaster can be dry or liquid.
Materials may differ from each other and in composition. They are:
- mineral;
- silicate;
- acrylic;
- silicone.
The first ones are the most affordable and have good vapor permeability. Mineral mixtures are temperature resistant and fireproof. As for acrylic frost-resistant plasters, their main advantage is their readiness for use after purchase. Such mixtures adhere well to almost all types of surfaces and have low water absorption.
Silicate frost-resistant decorative plasters are made from potassium glass and are characterized by good elasticity. They are quite simple to apply, and during operation the silicate plaster layer resists mold well. Frost-resistant plaster can also be made of silicone. It has high adhesion, copes well with weather conditions and is easy to apply due to its high elasticity.
Chlorine water
For external work, different types of frost-resistant plaster can be used, some of them are made with the addition of additives in the form of chlorine water. It is intended for cement mixtures and acts as a base.
It is this substance that is responsible for the quality of frost resistance. After introducing chlorine water into the mixture, the plaster can be used at temperatures down to - 25 °C. 1.5 kg of bleach is added to one bucket of water. The water is preheated to 35˚C. The composition is infused for one and a half hours, and after that it can be used in work.
Potash
When the temperature outside the window drops below zero, and plastering work needs to be carried out in a temperature range from - 10 to + 20 ˚С, potash is added to the frost-resistant plaster. It is administered in a volume of 3% by weight of the liquid. The solution must be supplied to the construction site in insulated boxes. The mixture can be applied to a dry, clean surface.
Ammonia water
Ammonia water, which is one of the popular additives, can also be added to the plaster for the basement of a house. Typically this substance is used in factory settings. It is added to the prepared liquid and sealed in an airtight container. During the dilution process, the temperature of the liquid and additive should not be higher than + 5 °C. If this value is exceeded, ammonia will begin to evaporate. Application of waterproof facade plaster with the addition of ammonia water is permissible on a cold wall. The composition can also be intended for interior work, but during the formation of the plaster layer the temperature should not be lower than - 30 ˚С.
Modern materials
Among the most popular moisture-resistant frost-resistant facade plasters, organic-based mixtures should be highlighted, which do not require preparation before application and can be tinted in bulk. We are talking about a composition that is additionally reinforced with fibers. This type of plaster can be applied to organic and mineral substrates. The bark beetle and fur coat act as a decorative effect. However, decorative structures on the surface can be very different; they are created during the work process and are additionally modeled.
Putty application technology
Before applying putty to the wall, you need to prepare everything for work:
- Drill or construction mixer. It will be needed if the choice is made in favor of a dry mixture. It will not be possible to mix the composition manually until it has a homogeneous structure.
- Plane. Required for removing protrusions and bumps in the process of preparing the surface for applying putty to the walls.
- Spatulas. It is advisable to purchase a set of devices of different sizes - a wide one is used for processing flat open areas, a small one is used in hard-to-reach areas or at corners.
- Spatulas for forming external and internal corners.
- Construction rule. They check the evenness of the surface obtained after leveling.
- Roller and paint tray. Tools are needed to apply the primer. The use of a primer increases the adhesion strength of the putty to the wall and protects the latter from mold.
- Grater or abrasive mesh. The device is used to clean the surface. The leveling putty layer is treated with a coarse-grained abrasive, and the finishing layer is cleaned with a fine-grained abrasive.
- Primer.
- Container for mixing the composition.
- A broom and brush for removing dust from the cleaned surface.
And a little about the author’s secrets
Have you ever experienced unbearable joint pain? And you know firsthand what it is:
- inability to move easily and comfortably;
- discomfort when going up and down stairs;
- unpleasant crunching, clicking not of your own accord;
- pain during or after exercise;
- inflammation in the joints and swelling;
- causeless and sometimes unbearable aching pain in the joints.
Now answer the question: are you satisfied with this? Can such pain be tolerated? How much money have you already wasted on ineffective treatment? That's right - it's time to end this! Do you agree? That is why we decided to publish an exclusive interview with ARMEN DZHIGARKHANYAN, in which he revealed the secrets of getting rid of joint pain, arthritis and arthrosis.
What are the consequences of non-compliance with the temperature regime?
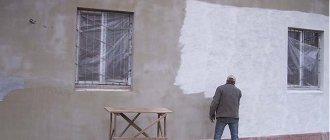
With a short-term deviation from the temperature regime or its violation within insignificant limits, plastered walls usually lose their ideal evenness, as the coating becomes wavy. Often the walls “float” a little - the finishing is deformed and slides under its own weight.
If technological deviations were more serious, this could cause a lot of other problems:
- the appearance of a network of cracks or very deep crevices;
- loss of adhesion of plaster to the base;
- collapse of the entire layer of the building mixture.
Specifics of work in summer
For comparison, we note that it is necessary to keep in mind when finishing work in conditions not of hypothermia - but rather of overheating.
In the hot season, the plaster lays down, dries and holds well, but the following points must be taken into account:
- The façade should not be finished in direct sunlight if the temperature is above +30 degrees. Uneven and too rapid drying of the outer surface can lead to cracks and collapse of the layer.
- When plastering interior spaces, ventilation must be provided to reduce humidity.
Plastering in winter according to standards
The basic requirements for plastering work are specified in SNiP 3.04.01–87 “Insulating and finishing coatings” and SP 82-101-98 “Preparation and use of building mortars”, which stipulates the permissible temperature for plaster.
Air temperatures below +5°C make it possible to use solutions only with anti-frost additives - chemical hardeners, which enable the plaster to gain its design strength at sub-zero temperatures. Chlorine water, potash and ammonia water are recommended as such additives.
Parameters of winter plastering of walls
The quality of plastering work at low temperatures depends on compliance with a number of conditions:
- suitable microclimate indoors and outdoors;
- the surface of the walls inside the house without heating or outside the building is prepared in advance;
- humidity of enclosing structures – no more than 8%, temperature – no lower than +5°C;
- the mixture is heated to the desired temperature;
- Heating or drying is used to dry the material.
Conditions may depend not only on the time of year, but also on the location of the work. The easiest way to plaster walls is in heated rooms, where it is sufficient to prepare the surface to be treated and the temperature does not exceed +30°C. In unheated rooms, the temperature regime must be observed. When plastering with cement mortar on the street, anti-frost additives are added to the mixture.
Features of plaster
The proportions and composition of the binders determine the name of the plaster mortar:
- Plaster;
- Gypsum-lime;
- Calcareous-sand;
- Lime-cement;
- Cement-sand.
Various types of sand are used as filler. Special additives guarantee different technical characteristics of the mixtures and a wide range of application temperatures.
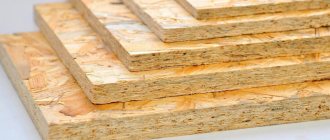
Separately, there are dry gypsum sheet plasters - plasterboard (gypsum board).
How to dry plaster in winter
Since plaster solutions have different compositions, they require different conditions for drying. For example, building mixtures with lime require carbon dioxide from the air: this is the only way they will retain their strength when dried. Therefore, if you forcefully accelerate the process, the plaster layer will not be strong and reliable. The room should be regularly ventilated for 1.5-2 weeks to ensure sufficient air flow.
If we are talking about gypsum mortar, it also needs to be dried with daily ventilation, but without the appearance of drafts. For example, in winter, you can leave only a small gap in the window to allow the air to renew. Cement plasters dry up to 2 weeks, and they do not require ventilation, but they do need sufficient air humidity (50-60%).