Selecting materials
There are several types of concrete plasters:
- Cement-sand mixture. Durable and durable plaster is suitable for rooms with high humidity. It has good thermal conductivity and vapor permeability. Provides reliable sound insulation.
- Gypsum mixture. It is also used for finishing on concrete walls, but it is not suitable for bathrooms, toilets, kitchens, and other rooms with high humidity. Gypsum is more susceptible to mechanical damage.
- Polymer mixtures. These materials are used when it is necessary to eliminate minor defects on a concrete surface. They are not afraid of moisture, have waterproofing and antiseptic properties. Such mixtures are suitable for interior decoration and exterior work. However, such mixtures are used only on an already leveled concrete surface.
Sometimes plastering is carried out with tile adhesive. Its properties are approximately the same as those of cement mortar, but adhesion is higher. However, the composition exhibits noticeable shrinkage, and cracks appear on its surface. It is suitable in cases where the depth of unevenness does not exceed 8 mm. Apply in two layers. The first is up to 6 mm. Then the second one. While the plaster has not set, processing is carried out for leveling. This material can also be used to putty the façade of a building.
Rice. 2. Materials for plastering concrete walls
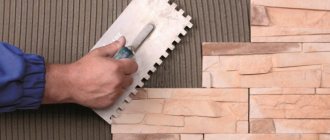
Another option is gluing using a notched trowel. Applicable only to block concrete surfaces to improve adhesion with subsequent materials.
Selection of plaster
Before you start work, you need to decide how to plaster the concrete walls.
There are quite a few different types of solutions, however, only two can be identified as the most optimal for these purposes:
- Cement-sand mortar - excellent for rooms with high levels of humidity or for exterior wall decoration.
- Gypsum-lime is a good option for finishing dry rooms.
Preparing a cement-sand mortar is not difficult. To do this, mix one part cement with three parts sand and mix with water until a creamy consistency is obtained.
To prepare a lime-gypsum mortar, you need to mix gypsum with water until a dough-like consistency is obtained and then add 3 parts of lime mortar (lime diluted in water in a 1:1 ratio).
Priming a concrete wall
How to plaster concrete walls
If you are interested in plastering concrete walls with your own hands, you will need to select the appropriate composition, follow the technology and purchase the following tools:
- spatula, square for applying the solution, ladle;
- bucket and mixer for mixing;
- mesh for reinforcement;
- guide rails used as beacons;
- falcon - a tray with a handle for laying out the solution;
- the rule is a wooden or metal strip for leveling;
- building level;
- float for texture or smoothness.
Is it necessary to install beacons?
You can plaster without beacons. But you can’t do without them if you need to get the ideal geometry of surfaces in a living space and make partitions smooth and even. They are especially important if there are noticeable vertical differences. If the work is carried out in a garage, utility room or other non-residential premises, where aesthetics are secondary, it is enough to disguise noticeable defects, then beacons do not need to be installed.
Lighthouses are:
- plaster;
- from concrete mortar.
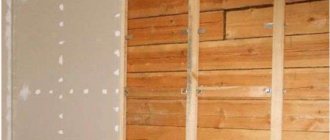
A wooden sheathing or a metal profile can be installed. It does not need to be removed once the plaster application is complete.
Preparatory procedures
Preparing the walls begins with removing the old finish - tiles, whitewash, paint or wallpaper. Then the bumps and other bulges are eliminated. Using a suitable tool, you need to roughen the wall. If you plan to lay a cable, channels are made. To do this, use a wall chaser or grinder.
Dust is removed with a jet of water or a damp sponge, then the wall is dried. Once this part of the work surface preparation is completed, a coat of primer is applied. Let it dry and repeat the procedure. Lay the cables in the punched channels. Secure the mesh with dowels.
How to plaster concrete
Rice.
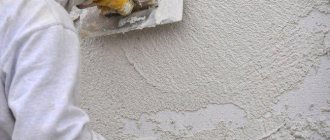
3. Applying a cement-sand mixture to concrete. Concrete should be plastered in this order:
- Preparatory cement spray is the first layer applied with a ladle or trowel. Apply to a damp wall. Recommended thickness – up to 5 mm. The consistency of the mixture is liquid. Excess is removed and the surface is dried. No alignment required.
- Applying a base layer 10 mm thick. You can sprinkle the solution or spread it on. The base is aligned from bottom to top according to the beacons using the rule.
- Covering – front third layer of plaster (2 mm). It fills small pores and scratches left by tools. It is important to achieve a creamy consistency of the mixture. After applying it, the corners are treated, the beacons are removed, and the traces left by them are filled with putty. Alignment is performed by a rule.
- Grouting is the final step necessary to achieve smoothness or texture. It is performed with a grater at the moment when the surface has already set, but has not dried. Movements - circular or running, vertical or horizontal swings.
Before starting work, be sure to sift the sand used to mix the solution. A sieve with cells up to 1.5 mm is used. If you don’t want to make notches on the surface for better adhesion, buy concrete contact primer. It will help save time.
How long does it take for plaster to dry?
Drying time depends on the material and layer thickness. If the plaster of concrete walls is cement-sand 10 mm, after 10 days it gains strength. Cement-lime compositions used when laying the second layer are applied 7 hours after applying the first. Complete hardening occurs within a month. Parameters change with changes in temperature and humidity. The finish will dry fastest in a warm, dry room.
How to avoid mistakes
Manufacturers usually indicate how this or that material should be applied, which protects against erroneous actions. However, there are certain points that you need to pay attention to:
- You should take care in advance about the proper placement of beacons on the walls. The quality of the coating depends on this. With the help of these guides, the entire surface is divided into several sections no more than 1 meter wide.
- When working with foam concrete, gypsum plaster is suitable. When using cement mortar, the surface needs to be constantly moistened.
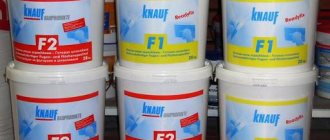
- It is better to give preference to those manufacturers who have proven themselves in the construction market. Knauf, Yunis, Volma, Prospectors - these brands will not cause any complaints about the quality of the coating.
- To start, buy 1 or 2 packages to test the mixture. And if the drying time of the composition is within the norm, you can purchase the material in the required volume.
- Violation of the storage conditions of gypsum plaster, the solution sets within 5-10 minutes. Due to non-compliance with the proportions of cement products, the mixture will flow down the wall.
- High-quality ready-made mixture is sold in three-layer packaging - 2 paper, 1 polyethylene. Knowing this helps to protect yourself from buying a fake.
Using a compressor allows you to increase labor productivity. The operating time is reduced, and it is possible to regulate the size of the droplets by adding water. The output is a uniform coating with an original texture.
Thermal insulation of concrete surfaces requires careful planning of upcoming work
Plastering concrete surfaces is not the most difficult job that any home craftsman can handle. Moreover, not only men can do such work; women also show good results. The main thing is to adhere to technology and be careful. Only with this approach will the finishing last a long time and will not require repairs.
Was this information useful to you? Share in the comments!
Features of outdoor work
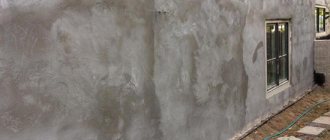
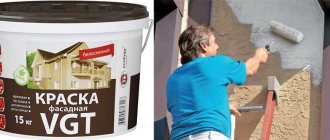
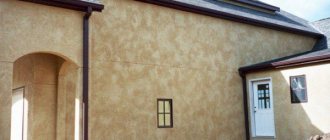
Is there a difference in how to plaster a concrete wall inside and outside? Plastering of residential premises inside can be done with gypsum mortar. It is not suitable for the street, as it will not withstand exposure to rain and snow. In the bedroom, living room, and dining room, plaster does an excellent job of leveling. It can be used to finish the ceiling. External work is carried out using heavy cement mixtures that are more resistant to high humidity.
Components are often added to façade mortars to increase plasticity, moisture resistance, and protect against cracking.
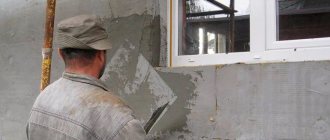
Rice. 4. Applying a cement-sand mixture to a concrete façade
Insulation of concrete walls outside
Having decided to plaster the facade, owners often think about its additional protection and insulation. It is important to provide protection from the cold from the outside. It is also important to calculate where the dew point will be. Mineral wool will not work. It absorbs moisture, losing its thermal insulation properties. It is better to use foam boards. If greater strength and durability are required, use extruded polystyrene foam.
Plastering begins with applying glue to the back of the slabs. This is done pointwise around the perimeter. Then the sheet is glued to the wall, starting from the bottom corner. Secure it with umbrella dowels. Install the remaining slabs. Cover the seams between them with polyurethane foam, secure the fiberglass reinforcement mesh, and apply a layer of glue. After it dries, you can plaster it. All that remains is to prime and paint it. Or, as an option, install a ventilated siding facade.
External insulation is carried out only with the installation of slabs in a checkerboard pattern. Seam matching is prohibited.
How to choose plaster
Before you begin the actual repair work, you need to think and decide how to plaster the concrete walls in your apartment. The modern construction market offers a large number of solutions, but among them there are 2 main ones:
- Plastering concrete walls with cement-sand mortar implies the optimal and most common components for leveling the walls. Copes well with its main purpose, protecting against moisture, dampness, etc. The cost makes the product accessible to any consumer;
- Narrowly targeted mixtures. Focused on carrying out work on noise and heat insulation, protection from harmful influences. Such functions, for example, may include plastering concrete walls with gypsum plaster;
- Decorative. They are used for finishing work, transforming the surface, fulfilling an aesthetic purpose.
All 3 types of mixtures are suitable for working on concrete. But how to plaster a concrete wall on the street? Is it possible to plaster concrete walls with a compound for interior work? For outdoor work, experts give preference to cement compositions that are less sensitive to moisture. This rule should not be neglected, otherwise the leveled layer will not last long.
Carrying out work manually and mechanically
Plastering walls and ceilings in an apartment by hand is possible, and some craftsmen prefer this method. They believe that this makes it easier to control the process. The mixture used also hardens faster.
However, the duration of work increases significantly. Also, layers often dry unevenly, and creating a solution for different areas of the room with the same consistency is problematic. The task becomes more complicated if the wall area is large.
The machine method allows finishing surfaces of several tens of meters. Also, you don’t have to waste time on mixing and achieving the desired consistency of the solution. All you need to do is throw the components into the plastering station. The method eliminates significant differences in the density of the plaster that you use for concrete surfaces.
Rice. 5. Mechanical plaster
There are other advantages of the mechanized method of applying plaster for concrete bases:
- Versatility. It is suitable for walls and ceilings in residential, office, commercial and industrial areas.
- Affordable price. The price per square meter of mechanical finishing is cheaper than manual finishing.
- No tension in the inner layer. Accordingly, there will be no settlement or cracks.
The mechanized plastering procedure is performed by two performers in the following way. The installation is connected to the network and water supply. It automatically mixes the dry solution with water. Next, beacons are installed and plaster for concrete walls is supplied under pressure through a hose. The second worker levels the surface using a wide rule. After the mixture has dried, final leveling is carried out.
We install beacons
Those who do not know how to properly plaster concrete walls should definitely pay attention to such an important stage as installing beacons. The beacon can be a metal profile or a plastic one.
It is installed like this:
- First, a self-tapping screw or dowel is installed. It must be installed under the ceiling, approximately 15 cm from the corner. The thickness of the plaster will be commensurate with the distance from the head to the wall;
- The second one is installed on the same line with the first screw. It will be located near the floor;
- Next, balls of gypsum mortar are placed between them, which should protrude slightly beyond the screws;
- Then the profile is applied and embedded in gypsum mortar. The rack level must be checked with a special device. If there is a deviation from the norm, you will need to remove one of the screws and use the building level again;
- The beacon is installed on the other side according to the same principle;
- Between the installed beacons you need to tension the thread and install the remaining slats along it. The distance between the beacons should be less than the rule itself, which will be needed for work. The result is a vertical arrangement of the slats in the same plane.
After completing all the preparatory work, you can proceed to the main part, because you must learn how to properly plaster a concrete wall, which still remains relevant.
- We start by preparing the solution. The mass prepared for the first layer should not be very thick;
- If you do not know how to plaster a concrete wall with cement mortar by spraying, we recommend that you carefully study this item. You need to throw the solution sharply so that the finished mass sticks to the wall and does not deform. Thus, the entire surface must be treated. The first layer will reach about 10 mm. Excess material protruding beyond the beacons will need to be removed as a rule;
- The first layer must be well dried. The second batch should be thicker. The application method can be either spraying or using a trowel. Often two layers of plaster are sufficient;
- Using the rule, stretch the solution along the beacons in the direction from top to bottom. Movements should be smooth and swaying, without breaking away from established guidelines.
- Before the front layer dries, you need to grout it. Take a special grater and, using one of the methods, finish leveling the surface. Movements can be in a circle, or running, that is, vertically, horizontally.
- After finishing work with the walls, you can start working on the corners. A special spatula and profile will help you make them even and avoid chipping.
Advice!
To avoid the formation of lumps during the mixing of the solution, it is necessary to add water to the dry ingredients.
Main types, advantages and disadvantages
Before deciding which wall plaster is the best, you need to understand its varieties.
| Dry mixtures according to their purpose can be: | ||
| Simple | Decorative | Special |
| Used to level the surface for painting, before laying tiles or gluing wallpaper. | Used for finishing or eliminating minor cosmetic defects. | Contains various substances that impart new properties to the mixture. |
Simple types of building mixtures include:
- Cement-sand. They contain cement and sand in different proportions. With its help you can eliminate the biggest surface imperfections. After its application, a smooth but rough surface is obtained. Therefore, it is additionally smoothed over with putty on top.
- Calcareous. To prevent the cement mortar from hardening too quickly, limestone is added to it (cement content no more than 10%): the mixture becomes plastic and applies well, which simplifies the work of the master. As in the previous version, most ready-made mixtures require finishing putty at the end of the work.
- Plaster. If you need to decide which plaster is best for leveling the walls in the bathroom, then you definitely shouldn’t take mixtures with gypsum. It does not have moisture-resistant properties; on the contrary, it absorbs moisture well. But you can immediately apply a decorative coating to the gypsum coating.
Attention! The gypsum mixture must be diluted in small quantities, as it dries quickly.
Which is better, gypsum or cement?
When faced with the choice of which plaster (gypsum or cement) is better to plaster the walls with, you need to compare the pros and cons of both.
Cement mortars have a wide range of applications. Compositions with a coarse sand fraction are used for rough coating, and with a fine sand fraction - for finishing plastering.
Such mixtures are inexpensive, you can prepare them yourself, they are easy to work with, and the coating is durable.
Important! When using cement mortar on concrete facades, a preliminary primer is required, since concrete has low adhesion.
Gypsum-based mixtures are used in rooms with low humidity levels: bedrooms, living rooms, kitchens. It holds well on ceilings and inclined surfaces due to its high ductility. Dries quickly, you can make a layered smooth coating of great thickness. Gypsum coatings have high heat and sound insulation.
What tools and materials will be needed:
To plaster a wall, you should stock up on the following consumables and tools:
In addition, you need to take care of work clothes, protective gloves and a hat. The above list is quite large, but the main thing here is a hammer drill and a set of drills; everything else is not very expensive.
Construction level (it’s more convenient if it’s long), a trowel or spatula for spreading the mortar, a rule for leveling, fasteners (dowels + screws), a hammer drill, a grater to create smoothness, cords, beacons, pliers, mesh, primer, etc. ..
Plastering walls with your own hands is recommended only for those home craftsmen who have experience in finishing work.
If you do not have such experience, you should choose a small section of the wall or take a sheet of drywall and practice on it. If the result is far from the desired one, it is better not to try to save money, but to immediately contact a construction company. Others are advised to follow the instructions provided.
Plastering walls with your own hands can be done in two ways.
- In the first case, the solution is simply applied to the walls, after which it is leveled using the rule.
- In the second, before plastering the walls, paint beacons are installed or threads are pulled to indicate the level. This operation is only required in the case of very uneven walls. These two methods of plastering walls are considered the main ones, but each master can make small adjustments to the technology.
Since it’s all the same - yourself or the master
In repairs, the main thing is not the process, but the result, which may not be of particularly high quality if you deviate from time-tested technologies and dozens of masters, especially when plastering the walls with your own hands. The surfaces should be perfectly smooth, without flaws or deviations from the vertical. Therefore, we learn to give the room the correct geometry.
