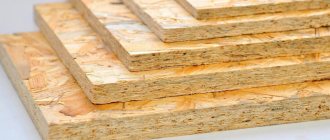
Description of lime plaster
This variety is still the traditional version of the mixture for finishing. A special feature of the material is the lime it contains, which gives the solution unique qualities.
Area of use
Lime plaster, depending on its composition, can be used for interior and exterior work. It is used for application to mineral and wooden bases, leveling and repairing walls and ceilings with a layer of 2 to 30 mm.
Lime-based solutions are ideal for plastering areas where fungus and mold are most likely to appear. These can be the corner walls of apartments that face the street, window slopes, bathrooms or toilets, loggias and shelves of apartments located on the top floor. Recommended for wet areas.
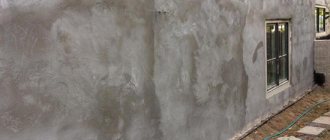
Lime plaster is excellent for facades
Advantages and disadvantages
Lime plaster has its pros and cons. Among the advantages are:
- has high adhesion not only to mineral surfaces, but also to wood;
- unlike gypsum and cement mixtures, this composition is elastic after drying, which reduces the likelihood of cracks;
- a lime wall breathes and regulates room humidity, which reduces dampness in rooms with high humidity;
- low cost;
- very favorable consumption compared to cement mortars;
- long operating time and survivability of the mixture;
- plasticity, which simplifies application and alignment;
- Fungus or mold never appears in lime.
Despite such a large number of advantages, lime plaster also has disadvantages:
- relatively low strength, especially compared to the cement composition;
- requires working only in a respirator and gloves;
- the need to create special conditions for drying the plaster or adding additives to the solution;
- requires a special approach when mixing with water.
These disadvantages, in particular, have contributed to the fact that today pure lime plaster is rarely used.
Elasticity is one of the advantages of lime plaster
Material requirements
As with any mixture for repairing and plastering walls, the following requirements apply to lime mortars:
- Thixotropy - during operation, the mixture applied to the wall should hold its shape and not “float”.
- Strength - according to the requirements for the operation of buildings and SNiP, this indicator should not be less than 2-3 MPa.
- Adhesion - peel strength for any such mixtures must be greater than 0.2 MPa.
- Frost resistance - the repaired wall must withstand more than 35 cycles of freezing and defrosting.
- Fraction – the size of sand in the mixture should be no more than 1.2 mm.
- The operating temperature should be from 5 to 35 degrees.
- The amount of shrinkage - the indicator of the decrease in layer thickness after drying should tend to 0.
In addition to the basic requirements, it is important that the composition is easy to use and apply.
Strength is one of the requirements for this material.
Properties of lime
In construction, slaked lime is used to create mortars. It is a white crystalline powder obtained by mixing calcium oxide and water. To improve various characteristics, CaO can be pre-fired. The resulting product is also fired at temperatures up to 2000C. The formula of slaked lime is Ca(OH)2. This substance is considered to be slightly soluble in water and has good binding properties.
When building materials are mixed with water and sand, a hydration reaction occurs. As it flows, silicates are formed that firmly bind the remaining particles together, resulting in durable concrete. Excess water is also released, which increases the humidity in the room for some time.
Lime plaster
Lime slaking before mixing
The mixture for plastering surfaces includes slaked lime. To prepare the solution at home, it is more profitable to purchase quicklime and hydrate it.
The lime slaking process is carried out at room temperature in a metal container. It must be taken into account that this generates a large amount of heat. The process formula is as follows:
CaO + H2O → Ca(OH)2+67 kJ.
To prepare a binder for plaster mortar you will need:
- metal bucket;
- 5 kg quicklime;
- 3.5 liters of cold water;
- unnecessary large spoon or small spatula;
- respirator;
- gloves.
Before performing this process, you need to protect your hands with gloves and your respiratory tract with a respirator. Water is poured into the bucket, after which lime is poured into it in small portions. In this case, the mixture must be constantly stirred. The result should be a homogeneous mass similar to yogurt or kefir.
The mixture should be covered with film or a lid and set aside for 36 hours. After this time, all parts will react and the result will be fluffy lime.
Lime dough is prepared in a similar way. The amount of water differs, which is 10-12 liters. In this case, the reaction occurs within 30 minutes. The mixture must be stirred during the reaction process. Cooled lime dough can be added to the solution.
Lime slaking
Lime plaster mixtures
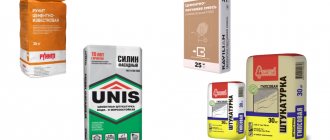
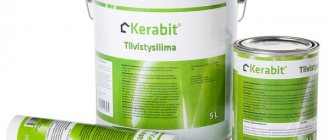
When renovating apartments in urban areas, it is more advisable to use ready-made dry compositions containing all the necessary components in the required proportions - this will eliminate mistakes in choosing lime. In addition, such plasters contain additives, analogues of which can be difficult to find even in the city.
An example of a ready-made plaster mixture is lime plaster for machine application "MKE" (suitable for manual finishing) - a product of the domestic JSC "Quick-Mix", which has proven itself well on the Russian market.
Specifications:
- compressive strength of at least 1.5 MPa;
- grain size of the solution – up to 1 mm;
- the survivability of the mixture after mixing is 2-3 hours;
- grouting method - with felt 3-5 hours after leveling;
- work temperature – from + 5 to +30° C;
- water requirement - 7 liters per bag;
- solution yield - 20 l from 30 kg of mixture;
- dry composition consumption - 15 kg/m2 with a layer thickness of 1 cm;
- packaging – bags of 30 kg.
When performing large-scale work, lime plaster can be prepared from a homemade mixture of the following components:
Proportions of components in lime mortar
| Lime variety | Lime/sand ratio | Mark of solution with time aging | ||
| 28 days | 3 months | 6 months | ||
| Air 1st grade | 1:4,5 | 4 | 4 | 10 |
| Air 2nd grade | 1:4 | 4 | 4 | 10 |
| Hydraulic | 1:4,5 | 4 | 10 | 10 |
When using puffed lime in plaster or masonry, you should know that it will add more plasticity to the solution than construction lime, but will be inferior in strength and less moisture resistant.
Lime plaster composition is prepared as follows:
- Slaked lime is ground through a sieve;
- Pour water little by little into the powder and knead the “dough”;
- According to the proportions indicated in the table, clean sifted sand is added to the “dough”, water if necessary, and mixed;
- After half an hour, the solution is thoroughly mixed again, after which the composition is ready for use.
Types of lime mortars
Several types of mixtures are used for plastering surfaces:
- cement-lime;
- hyposo-calcareous;
- lime-clay;
- terrazite;
- limestone-sandy.
Each of them has its own characteristics, advantages and disadvantages.
Comparative characteristics of lime plasters are presented in the table below.
| Characteristic name | With plaster | With clay | With cement | Classical |
| Strength, MPa | up to 4 | until 3 | from 3 | until 3 |
| Adhesion, MPa | 0,5 | 0,3 | 0,3-0,5 | 0,4 |
| Frost resistance, cycles | — | — | from 25 | up to 50 |
| Vitality, min | up to 15 | more than 180 | no more than 120 | 60 |
| Consumption, kg/m2 | 1 | 1,4 | 1,1-1,5 | 1,2 |
How to plaster a wooden house with clay. Clay plaster
Clay plaster is unique among all other types of plaster for interior and exterior walls. The growing interest in clay plasters has recently been associated with the trend of choosing natural, environmentally friendly materials for finishing. Clay is also used for plastering wet rooms (except for showers and walls that are directly affected by water and moisture), but clay plasters are most widely used for masonry and finishing of fireplaces and stoves. Decorative clay plasters with fillers made of straw, sawdust, and plastic fiber occupy a special place in the decoration of eco-interiors. One of the main advantages of clay as a material for plaster is the absolute naturalness and environmental friendliness of the composition. Red and white clay are more common. Natural clay is a sedimentary rock that does not contain mineral components harmful to human health; in addition, clay plasters are able to adsorb harmful components from the air of the home and bind them, which makes clay walls the best finishing option for people prone to allergies. This beneficial effect for the indoor microclimate is complemented by the ability of clay walls to regulate humidity in the house: a layer of clay easily absorbs excess moisture and just as easily releases it back into the indoor air when the humidity level decreases. A few more benefits of clay finishes:
- Ability to conduct heat;
- Hygroscopicity and the ability to accumulate and release moisture;
- The plastic properties of clays make it possible to plaster surfaces operating under conditions of strong heating and sudden cooling: stoves and fireplaces, chimneys;
- Cost-effective, low prices for materials. Possibility of independently procuring clays of excellent quality. Preparing clay is a fairly long but simple process;
- The hardness of clay is less than that of cement plaster, but is sufficient to protect enclosing structures from both mechanical and thermal influences. Clay is impractical only for exterior plinths, but with reinforcing fiber in combination with lime and other binders it is also used for exterior plasters;
- Clays can be used more than once.
Features of cement-lime mortar
Lime-cement mortar remains a popular mixture. It has long proven itself well and is an excellent combination of strength, durability and ease of application. This type of mortar can often be found in hardware stores as a dry mixture. It has many advantages:
- strength above 5 MPa;
- adhesion not less than 0.4 MPa;
- plasticity of the finished mixture;
- breadth of use;
- low consumption 1.1 – 1.3 kg/m2
- service life from 10 to 15 years.
A wall made of such a solution can withstand temperature changes, high humidity and impacts from heavy objects.
Lime-cement variety
Where is it used?
Thanks to the addition of cement, the solution can be used not only for internal walls, but also for facade ones. This composition can also be used as a repair mixture. Depending on the components used:
- plastering walls and ceilings;
- patching repair of vertical and horizontal surfaces;
- applying a layer up to 3 cm;
- wet areas for tiling, painting or other finishing materials;
- finishing of external walls up to the basement level, mainly on terraces.
Cement-lime mixture is a universal material that is superior to similar compositions in many respects.
Proportions and preparation
The finishing material can be prepared from lime paste or dry powder - fluff.
The budget method is a dough solution. To do this, first the required amount of lime is slaked. After this, an equal part of water is added to it. At the same time, cement is mixed with sand. After which lime mortar is poured into the dry cement-sand mixture.
When mixing components, it is necessary to maintain the proportions for plaster. A solution with proportions of 1:1:1:6 is more durable.
Lime-cement mortar
Conclusion
In a modern home, it is almost impossible to do without a variety of artificial materials, albeit with acceptable contents of various chemical compounds, but far from being environmentally friendly. Plaster compositions based on lime are not only a time-tested method of leveling walls, but also an opportunity to improve the microclimate in the room. And this is not a marketing slogan, but a fact proven by independent research.
The optimal wall material is chosen at the design stage; if you prefer monolithic technology, we recommend reading a useful article on this topic. The video is about a brick cube house with a regular roof.
Subscribe to our Telegram channelExclusive posts every week
Features of gypsum-lime plaster
A good way to improve some of the qualities of plaster is to add gypsum to it. This mineral is a binder that speeds up the setting process and increases adhesion to the substrate.
This lime plaster is used for interior work. This is due to the characteristics of gypsum, which cannot withstand high humidity and temperature changes.
Advantages
Adding gypsum to the solution reduces its mass. With increased adhesion, this makes it possible to use it for repairing horizontal surfaces.
In addition, there are other advantages:
- high vapor permeability, which increases the rate of moisture exchange in the room;
- creating an excellent smooth surface for painting;
- gypsum simplifies working with the lime mixture, which reduces labor costs and speeds up finishing work;
- high thixotropy rates;
- acceleration of setting.
For interior work, this type of lime plaster is the most convenient to use.
Lime-gypsum variety
Proportions and preparation
To prepare the lime-gypsum mixture, you will need any convenient bucket of suitable volume, for example 12 liters, and a construction mixer. The composition includes the following components:
- lime;
- gypsum;
- sand;
- warm water.
It is very important to maintain proportions. Otherwise, cracks may appear on the wall or the plaster may peel off:
- Lime tends to stick well to the walls of the bucket and is slightly soluble in water, so first prepare lime dough according to the recipe given above.
- Then, separately, according to the recommendations, gypsum is mixed with water in a 1:1 ratio.
- After preparation, 4 parts of dough are added to the gypsum mixture and 10 parts of sand are added.
The prepared solution sets very quickly, so it needs to be used up in 10-20 minutes.
If filler is not added to the mixture, it can be used as putty.
Preparation of gypsum solution
Applying plaster
There is a certain sequence of applying lime plaster to the work surface. The mixture is applied in three layers:
- the first layer is called spray;
- the second is the soil;
- the third, final layer is necessary to eliminate defects - this is the finishing layer.
Let's take a closer look at each stage and identify the important points of the work.
- First layer.
It improves adhesion to the working surface. The finished mixture is thrown onto the wall using a trowel as a working tool. The initial stage does not require leveling the surface.
Note!
The first layer should not be thick.
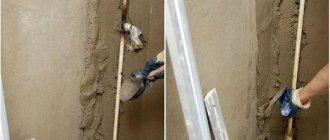
The spraying technology is simple: the solution is applied with a trowel to the wall with a wave of the hand from a short distance.
Pay attention to the picture, which shows the application of the solution on both sides: on the right and on the left.
- Second layer.
This is the main stage of the work being carried out. The applied layer thickness should not exceed 50 mm. The solution should be thicker than the spray. The work uses the already familiar trowel or trowel. The excess mixture is removed from the working wall with a plaster cutter. After completion of the work, control is necessary: checking the uniformity of the applied layer horizontally and vertically.
- Third layer.
At this stage, defects are eliminated and the finishing (final) finishing of the walls is performed. Small irregularities are removed and smoothing is carried out. The composition of the solution should be the same as the spray. The mixture is applied to a damp wall. The layer thickness should be within 2 mm. The surface is rubbed with a special grater.
If the soil gradually dries out during work, it should be slightly moistened using a brush.
Note,
that lime plaster can be grouted in several ways, as shown in the figure.
Features of lime-clay plaster
A lime-clay composition is used to decorate the interior walls. It has great adhesion to wooden surfaces and is well suited for plastering shingles.
Advantages
Adding clay to lime dough creates a unique building material with the following advantages:
- clay is endowed with healing properties - it is able to absorb harmful substances and remove them;
- low price - in some areas it can be dug up in the garden;
- increased elasticity after drying;
- ease of application;
- imparting thermal insulation characteristics;
- even better regulation of indoor humidity.
This supplement will be very useful if among the owners of the premises there are people suffering from allergies or other chronic lung diseases.
Lime-clay variety
Proportions and preparation
To prepare such a building mixture you will need:
- container for creating clay dough;
- metal container for slaking lime;
- two blades made of non-flammable material for mixing.
The process of preparing clay dough takes longer. First, water is poured into the clay powder in a 1:1 ratio. The resulting solution is mixed for several minutes and set aside for 2 days. After time, it is washed through a sieve. The result is clay dough. After this, the lime is slaked. The two doughs are mixed together in approximately equal proportions and 6 parts of sand are added. It is important not to make a mistake here. Clay can vary in fat content. Therefore, you need to look at the adhesion of the solution to the spatula. If it does not stick, then you need to add sand. If it sticks too much, add more dough.
Preparation of the solution
Elimination of irregularities and cracks
After the wall has been treated with a primer, the damaged clay plaster is repaired. Seal existing cracks and restore areas from which peeling pieces were removed.
Plastering on clay is done with a clay solution prepared in the following proportions: 1 part clay, 2.5 parts sand, sawdust as a binding material.
The cracks are widened to a depth of 1 cm, the sides are formed at an angle of 45 degrees.
Clay is soaked in water for a day
The clay is soaked in water for a day to make it plastic. Add the dry ingredients, then add water to create a solution with a creamy consistency.
Clay plaster is applied in several ways:
- using mesh - serpyanka as a base for plaster;
- using the same mortar from which the walls are made.
Use a spatula to apply the solution to the damaged area.
Rub the plaster over the clay using movements in all directions: along, across, down, up. Then rub with a grater. When the surface is dry, apply two coats of primer again. For clay, you cannot use plaster solutions made from ingredients other than clay. The cement mortar will not hold, as it does not adhere well to the clay and does not allow the surface to breathe, which leads to the destruction of the lower layer. To learn how to plaster clay walls using mesh, watch this video:
For plastering on mesh, you can use any putty.
Features of terrasite plaster
Terrasite plaster is a building mixture for finishing, which is used primarily on the outside of buildings and performs protective and decorative functions. This is a rough mixture consisting of the following components:
- lime in powder form;
- cement;
- limestone chips with a fraction of 1.5 mm;
- coarse quartz sand;
- mica;
- pigment.
Marble or granite chips can be used as filler.
A special feature of the mixture is the possibility of coloring it with pigment. This allows it to be used as a finishing coating without subsequent application of paints and varnishes.
The mixture is prepared in a factory, so it is difficult to comply with all the parameters and conditions at home. The dry mixture is supplied in bags and sealed immediately before finishing work.
Terrasite variety Runit
The mixture has the following advantages:
- service life more than 15-20 years;
- resistance to any type of precipitation;
- creating a beautiful facade design;
- frost resistance;
- long-term color retention;
- moisture resistance.
This type of decorative finishing is the best in terms of price and quality ratio.
Terrasite plaster surface
Peculiarities
Lime has long been obtained by burning sedimentary rocks, such as chalk, shell rock, limestone, marble unsuitable for finishing, which contain a lot of calcium carbonate and partially contain magnesium carbonate (the proportion of which varies in different deposits). Therefore, the quality of lime obtained from different deposits varies. These rocks become lime after firing.
Depending on the clay content in the raw material, lime can be:
- airy, almost free of clay (<8%), hardening in air;
- hydraulic, containing 6-20% clay particles, hardening under water.
During the firing process, calcium and magnesium carbonates decompose, transforming into oxides, which become the main active substances of lime.
lime
Lime arrives at construction sites in different states:
- lump quicklime - a product directly obtained as a result of firing;
- quicklime ground – a product of lump grinding;
- fluff - the product of extinguishing the previous two in the form of powder;
- dough (IT) – a pasty mass, also a slaking product;
- milk is a suspension in which slaked lime is partially dissolved and partially suspended.
To prepare lime plaster, the pros and cons of which are outlined below, use fluff or lime dough, which is obtained by extinguishing boiling water. Kipelka is the name for ground and lump quicklime, due to the high temperature that is released during slaking. The composition of ready-made dry mixtures (SS) contains fluff.
Lime, especially lime lime, is a caustic substance, so when working with it, you need to take safety precautions. If lime gets on your skin or eyes, rinse them with plenty of water.
Due to its high reactivity, lime (in any form, except dough) is stored in a dry place, protected from water.
When solutions are prepared using ground quicklime, pouring it into a concrete mixer, they harden much faster, and the coatings made from them are much stronger. In addition, such solutions can be used at low temperatures, since they are heated by the heat generated by the lime and quickly harden.
Lime decorative plaster can be tinted using alkali-resistant pigments/dyes. The color of others is “eaten away” by lime. For tinting, no more than 5% (without the risk of reducing strength) pigments are added to the lime mortar, obtaining the following colors:
- green (chromium oxide);
- yellow (ochre);
- brown (umber);
- red-brown (iron lead);
- blue (ultramarine);
- black (soot).
The paints are not afraid of light, however, it will not be possible to obtain bright, saturated tones.
Features of lime-sand mixture
Lime-sand is a classic mortar for finishing premises. It is prepared from dry ingredients - lime and sand in a ratio of 1:3, 1:4, 1:5. The mixture is used for finishing premises mainly indoors.
It can be prepared either from dough or powdered antiseptic. The sand is mixed at the last stage of preparation. If the composition is made from dough, then the lime is slaked a little in advance.
Lime-sand variety
How to smear clay on walls. Advantages and disadvantages of clay plaster
Clay plaster is considered an environmentally friendly and natural material that has been used in construction since ancient times. The practical use of plaster will provide a beautiful design for the room. Walls plastered with clay will breathe without releasing harmful substances into the air. Moreover, this material is not harmful, unlike other putty solutions made on the basis of polymers and other synthetic substances.
Previously, plastering walls in this way was the only option for finishing work. Despite the fact that modern manufacturers offer a wide selection of different solutions, many buyers still prefer to use natural materials. Plastering a house with clay has many advantages, which will be described below:
- Eco-friendly and natural product.
- Clay mortar is capable of absorbing moisture, which will prevent walls from collapsing.
- Low cost of materials compared to other types of products.
- After using the solution, there is practically no waste left, and the remaining clay can be reused.
- Ease of preparation of the mixture.
- Clay for plastering walls will protect the surface from mechanical and other influences.
- The material is elastic in its structure.
- Clay can be used for finishing work indoors and for the facade.
- Technologies for applying clay will allow you to create an original decorative pattern on the walls, and adding paint will create a certain shade.
Clay plastering has its drawbacks, which are determined by the following parameters:
1. Natural clay, which does not have various additives, is a unique material that requires experience to work with. When preparing a solution, the main thing is to correctly calculate all the components, because there is no specific recipe for making the mixture.
2. Plastering the facade of a house is not an easy task. It is important to consider that clay absorbs all moisture well, which is why small cracks appear from time to time around the perimeter of the building. Thus, clay walls will need to be renewed every year.
3. Recently, there are not many craftsmen who would professionally plaster walls with clay, and therefore paying workers can be expensive.
Most hardware stores offer a wide range of products, and on the shelves you can see decorative clay, as well as mixtures of different shades and variations. The physical and other characteristics of the clay are usually indicated on the packaging, and manufacturers also provide short instructions for use. In fact, it is not necessary to purchase clay in its natural form, because you can buy a prepared mixture, which will make the work process easier for a beginner.
It is important to know! If you decide to choose natural clay for your summer cottage or other places, you need to remember that using the material without special additives can cause the plaster to crack when exposed to moisture or active sunlight.
Tools for work
To carry out finishing work you will need the following tools:
- roller or muffler;
- mixer;
- Master OK;
- beacons with a layer greater than 6 mm;
- putty knife;
- rule;
- mixer or drill with a special attachment;
- abrasive mesh;
- solution container;
- respirator;
- gloves with a rubberized surface on the palms and fingers.
After preparing the tools, you can begin work.
Required tools and materials
Adviсe
Recommendations for repairing and leveling clay walls:
- If the clay crumbles and does not adhere firmly to the wall, you need to remove the entire layer down to the shingles and apply a new one.
- In order for the plaster solution to set better, add PVA glue or make notches on the wall surface.
- If you need to level small areas, you can use clay that has already been applied to the wall. To do this, you need to wet it well and rub it on the wall with a spatula.
- To quickly level gypsum walls, use plasterboard, which is glued with special glue. The walls must be completely dry. If necessary, install thermal insulation. To learn how adobe walls are plastered, watch this video:
Leveling clay walls with your own hands is quite simple if you adhere to the technology for performing the work.
Source
Step-by-step application instructions (5 steps)
All finishing work is carried out using technology in accordance with SNiP 3.04.01-87. Engineers studied all operating conditions for plastering work. Using an experimental method, a methodology was developed that must be strictly adhered to. Otherwise there may be a severe reduction in performance.
Step 1. Preparatory work before applying the solution
Before applying lime mortar, it is necessary to prepare the base. To do this, you need to test it for strength by lightly tapping it with a hammer. All crumbling, peeling, cracking parts of the surface must be dismantled.
After dismantling, the surface is dust-free and degreased. The end of the preparation is priming the base using a roller and mat. The primer is applied in one layer, after which the water absorption of the wall or ceiling is checked. If water is excessively absorbed, then priming the surface must be repeated. In this case, it is advisable to dilute the primer with water 1:1.
If you plan to plaster concrete or other surfaces that do not absorb moisture, a contact primer is applied.
Typically the primer dries within 2-4 hours. After this period, the beacons are installed and you can move on to the next stage of work.
Preparing the wall
Step 2. Spray
To improve adhesion to the mineral base, the surface is sprayed. It is carried out with a lime mixture, which is diluted to a semi-liquid state and resembles kefir in consistency.
The building material is picked up with a trowel and thrown onto the wall. After this, use a spatula to spread the mixture tightly onto the wall. The next layer is applied the next day.
Step 3: Base Layer
The base layer or primer can be plastered with a thick layer of up to 5 cm. The composition is prepared to such a consistency that it resembles thick sour cream. The material is picked up with a spatula and thrown between the beacons until their level is reached from top to bottom. After which the layer is tightened from bottom to top using zigzag movements. And so on at every stage. In this case, it is necessary to strictly monitor compliance with the level of beacons. If as a result a hole is formed on the surface, then it should be filled in with light movements with a spatula. After this, the rule is used again.
Applying plaster
Step 4. Grinding
This stage of work involves creating a finishing surface and leveling out minor irregularities. Grinding is done with an abrasive mesh when the top layer of plaster has hardened sufficiently.
To do this, the mesh is pressed tightly onto the surface by hand. Processing is carried out using horizontal, vertical or circular movements until a completely smooth surface is achieved.
Step 5. Dismantling the beacons
After 24-48 hours, the beacons are removed. At this point, the mixture has already set, but has not fully gained its strength. If the beacons were installed on plaster, then they must be carefully pryed off with a spatula and removed. When attaching strips to self-tapping screws, you first need to unscrew them.
After removing the beacons, the remaining recesses are sealed with the mixture flush with the rest of the surface.
Removing beacons after applying the solution
Usage
Preparing the base
After the lime has been quenched and all the required materials have been prepared, you can begin to prepare directly for application. All furniture should be removed from the room, the windows and floor should be covered with plastic film, and all places where the walls and ceiling are connected should be sealed with masking tape. After this, all metal elements, for example, the same screws, should be cleaned from the surface. Using a grinder, cut off the reinforcement, and then apply a corrosion inhibitor to its surface. The surface should be sanded, dust wiped off and a primer applied.
Please note that in some cases the use of a primer alone is not enough, in which case a reinforcing mesh should be used. It is this that will help strengthen the coverage.
Now you should tighten the mesh and secure it with self-tapping screws. If the base is made of wood, it is permissible to use shingles, and for a concrete base, you can use a painting mesh or a thin chain-link. After this, the walls should be covered with a primer material and beacons can be installed. These types of elements will make it possible to make the surface as smooth as possible. When installing beacons, you should often use a building level.
Application method
The first step is spraying. Some builders skip it, but it is better not to neglect it, since spraying makes it possible to ensure an excellent connection between the surface and the plaster. Ideally, you should use a solution that has a consistency similar to jelly - it should contain a little more water than a regular solution. Next, take the mixture onto a trowel and spread it onto the surface. After this, stretch the material along the wall, but do not try to make the coating perfectly even yet; leave everything for a day. After this, you can begin applying the second layer.
The base layer can be made thick, up to 5 cm. Apply lime plaster using a spatula and stretch with a trowel. The layer must correspond to the level where there are beacons. The movement must be carried out from top to bottom. When the treatment of one area of the surface is completed, remove excess plaster using the rule. Now you can start covering. This requires the same liquid material as spraying. The thickness of the coating should not be more than 0.3 cm. After application, level the layer and wait a couple of hours. Afterwards, treat the entire surface using a grater with coarse sandpaper. Finally, you can switch to fine-grit sandpaper.
If you take into account all the tips that are described in the article, and also do not, like some masters, skip important stages in the work, you will receive a high-quality coating, and you will not have to do any finishing work. If you want to use tiles or wallpaper afterwards, you don’t have to cover it.
Features of facade plastering
When using a lime mortar composition for plastering facades, it is not recommended to leave the wall without a finishing coat in the cold season. This is due to the fact that lime always attracts moisture. But at sub-zero temperatures, accumulated moisture in the wall can freeze, causing the plaster to crack.
To avoid this effect, it is necessary to coat the walls once a year with a water-repellent agent or paint them with acrylic or other paint with low vapor permeability.
Finishing materials
Clay walls are plastered on the outside with lime mortars, and gypsum or clay mixtures are used on interior surfaces.
Cement compositions are immediately excluded, as they will crumble due to their heaviness.
The technology requires the application of a rough, finishing and decorative layer.
The table shows the components of the solution for the rough layer and their characteristics:
| № | Components | Characteristic |
| 1 | Clay | Most often it is red, sometimes gray, yellow, white, black. By weight it is divided into light (0.17 -0.27) and heavy, more than 0.27. |
| 2 | Sawdust | They serve as a reinforcing component and give reliability to the solution. Waste wood from lumber production must be well dried; it is not recommended to use fresh sawdust. |
| 3 | Sand | Sand of medium fraction is used, large particles are sifted out. |
First, sand and sawdust are mixed, then clay and water are added.
The quality of the solution is checked by rolling a ball. Its components should not stick to your hands. If, when pressed, the ball changes shape without cracking, it means that the solution is quite elastic.
Preparing sand for preparing lime mortar
Several types of sand are used in construction, differing in their origin. Quarry or river sand is used to prepare repair mixtures.
Quarry sand is extracted from the depths of the earth at mining enterprises. It is distinguished by a disproportionate shape of the particles, which increases the strength of their binding. On the other hand, such sand is often combined with clay, which does not always have a good effect on solutions, but at the same time reduces shrinkage. Before adding such sand to the mixture, it is sifted on a special seeder with a size of 1.5 mm.
River sand can be rich in shell rock and other large particles. In addition, its particles have a smoother surface, which reduces adhesion. Before adding to the mixture, it is additionally washed and then also sifted.
Wall putty
To properly level the walls, you need to putty them.
Solutions for putty are prepared with a fairly liquid consistency. You can make gypsum putty yourself or buy it ready-made in a store.
The lime-clay mixture and clay-gypsum solution are respectively prepared in the following proportions:
| Clay | Fine sand | Lime dough | Gypsum |
| 6 parts | 16-17 parts | 2 parts | — |
| 1 part | 3-5 parts | — | ¼ part |
If the walls are being prepared for painting, the clay layer must be reinforced with fiberglass mesh, which is attached to nails or a layer of putty.
If the clay is over-moistened, it absorbs moisture and loses strength, so the putty is applied in thin layers, each subsequent layer being applied after the previous one has dried.
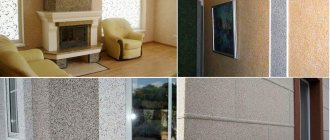
Coating textures
Construction stores sell decorative lime plaster, which has different textures:
- bark beetle;
- lamb;
- Venetian;
- under a stone;
- marbled
Depending on the manufacturer, you can find other texture options. Decorative plasters are sold in buckets and are made from gypsum, lime, limestone and coarse grains of natural stone or sand. Used for finishing interior walls.
Lime mortar is a universal building material that is low in cost. The best part is that it is easy to prepare and apply yourself. At the same time, it stands out for its advantages compared to today’s usual cement-sand mixtures.
Was the information useful to you? Share in the comments!
Preparing the work surface
For long-term operation of the plaster finish while maintaining strength and appearance, proper preparation of the base is important.
We prepare surfaces for plastering walls with lime mortar in the following sequence:
- we remove the wallpaper, inspect the wall to identify defects and weak points, tap the old plaster coatings (if left), knock off the peeling areas;
- We neutralize areas affected by mold and fungus;
- remove oil stains, rusty deposits, efflorescence;
- remove or isolate metal objects;
- we repair punctures and cracks (for large ones we use reinforcing mesh);
- remove dust;
- prime with a composition appropriate to the base and finishing material;
- install beacons;
- dry.
Plastering wooden walls inside a house with clay. Clay plaster - composition and recipe
There are many clay plaster compositions, but there is no universal recipe; the quality of the composition depends on the components. And the main one is clay for plastering walls, it is divided into 2 types: light and oily, the latter is the most suitable.
To check the quality, you should roll a ball of small diameter out of clay, place it on a flat surface and flatten it. If the edges remain intact, then the material is suitable for plaster; if cracks appear, the composition is of little use. Another test is to roll up a flagellum 200-300 mm long, with a cross-section of 10-20 mm and carefully bend it; the edges of high-quality material do not crack.
Ways to check the quality of the material
Recipe table, proportions in parts:
For plastering stoves, you should use fireclay clay 1 tsp: 2 tsp sand: 1 tsp. cement.
Due to the fact that there are a lot of recipes, let’s look at the characteristics of the most popular ones:
- Sand-clay mortar for plastering walls - used for finishing, has high thermal conductivity, and is therefore not suitable for the base layer.
- To improve the thermal insulation characteristics, finely chopped straw or sawdust, or in the modern version, synthetic fibers (fiber), are added to the solution of clay and sand.
- Plaster with clay and sawdust, without sand. The composition dries quickly, loses elasticity, is difficult to work with, but the finish is very strong and durable.
Tip: To increase the elasticity of clay plaster, it is recommended to add dung and wheat flour. To improve thermal insulation - finely chopped straw, reed fibers, hemp, wool, cattails.
A clay-sand mixture is suitable for a smooth finishing layer.
How to mix the solution
To prevent clay plaster from losing its qualities, it must be prepared according to strict rules:
- The clay is crushed, placed in a container, filled with water, and left for a day.
- Grind through a construction sieve, mesh no more than 3*3 mm.
- Mix with sand and add other dry ingredients, mix the mixture well so that it comes off easily from your hands.
- Add crushed fiber, straw, sawdust, etc. The finer the fractions, the easier it is to apply the plaster on the walls, the layer will be smoother.
- Dilute with water to the desired consistency (thick sour cream).
Useful tips
The preparation of lime mortar is not a difficult process. But many, in an effort to save time, buy ready-made material in construction stores. Of course, such mixtures differ in their composition, quality, and, accordingly, cost.
If you decide to purchase a ready-made solution, experts advise:
- After covering the wall, you need to wait time for the composition to adhere well, because lime is not a very durable product.
- It is imperative to clean the surface until it is spotless.
- To prevent the astringent from being washed out, it is recommended to add water using a sprinkler.
- It is better not to leave the lime mortar for a long time, as it will lose its viscosity.
- It is necessary to use a container of large volume, since when lime is slaked it increases in size.
- The container for mixing lime dough must have a flat bottom, since the material does not mix easily with water and lime may remain on the bottom. But due to the incorrect consistency, the entire result of the work can deteriorate, which will lead to excess consumption of the mixture.
Thus, lime-type plaster is a universal, multifunctional and inexpensive material with which many cladding problems can be successfully solved.
Applying the mixture
Lime plaster for walls, like other types of plasters, requires applying the finished solution in 3 passes:
- splash,
- Priming,
- Covering.
For each stage, a separate consistency of the prepared solution is required. For spraying, the proportions of lime, cement and sand are equal to 0.5:1:4, for soil - 0.7:1:3, for the top layer - 1:1:2.
With proper application of all layers, you can achieve an even and smooth base.
The variety of plaster mixtures presented on the construction market makes buyers think more than once when choosing a mixture with the desired characteristics. Having good strength and durability, lime plaster for interior work is very easy to prepare, durable, practical, and affordable.
The most popular myths about clay plaster
- It cannot be painted and wallpaper cannot be stuck to it. In fact, this is a big misconception, since when using vapor-permeable wallpaper or paint and varnish products, the connection is strong and durable. If we are talking about wallpaper, then it should be on a fabric or paper basis. If the paint is silicate, or any suitable for such surfaces;
- Clay plaster is monotonous. In fact, there are a large number of types of clay. And even in different places of extraction of this material there can be completely different colors. Therefore, even without additional visual finishing, the variety of shades is quite wide;
- Cellulose can be added to the composition. Indeed, this organic filler may be there, but it strongly absorbs water, and you should be extremely careful with its quantity;
- Clay plaster comes off on many substrates. In fact, if all the rules for preparing the base and preparing the composition are followed, no peeling is observed;
- Clay plaster often cracks. This is a myth, since in fact such a composition should not crack at all. And in the vast majority of cases, it’s all about banal violations in the preparation of the walls, since in this case, even a correctly mixed composition can crack over time. In particular, this happens due to the voids under the layer of clay, which settles and cracks in these places.
Features and benefits of use
To ensure quality work, you need to remember the following technical rules:
- Lime by itself is not a practical material. After applying the lime mortar to the walls, the ceiling needs to dry completely in order for it to harden well. After which you can use the finished surface.
- In order for the solution to be strong and retain the binding material in full, water must be added to the mixture through a sprayer or watering can. It is forbidden to simply pour. A sharp jet can wash out the main components.
- The area must be cleared of dirt, sawdust or old material. Next, clean it if necessary, and only then apply lime mortar. This will help you save on mixture costs.
- To speed up the hardening process, you can add PVA glue to the solution (amount: up to 2% of the mixture).
- When preparing, observe the correct ratio of components, then the finished surface will not crack or crumble.
What is limestone plaster
- The applied layer thickness does not exceed 0.3 cm. It is laid gradually, 1 m2 at a time. It is possible to use beacons.
- It is possible to carry out work with colored mixtures. When making plaster, you need to add a suitable color scheme. It is recommended to leave a small amount of the solution in a sealed container so that you can use it later when performing repairs.
- To use lime, it is first slaked. This process is carried out in a large container, since when slaked lime tends to increase in volume.
- It is better to mix the solution before using it. Even after a short shelf life, the material loses its viscosity, and adding binders is not recommended.
- To determine how dry a plastered wall has dried, simply look at how much whiter it has become after applying the mixture.
- Finished walls can be whitewashed, painted, wallpapered, or tiles laid on them.
By observing all these points, you can not only save your budget, but also the consumption of solution, time and even your own efforts.
Lime plaster. Saving or not? (video)
Plastering the stove with clay. Types of mortar for plastering stove walls
The stove is one of the building elements that regularly heats up and cools down, so the chosen plaster composition must be resistant to this phenomenon.
Mixtures for preparing plaster mortar are divided into two types:
- Simple compositions that include only two components, sand and clay.
- Complex formulations contain more than two ingredients.
Plastering a stove with clay and sand requires preliminary preparation and cleaning of the materials from various impurities. In particular, sand must be sifted through a fine sieve, clay should be rubbed through a fine mesh to remove roots and small stones.
It is recommended to make the plaster mixture using fatty types of clay, this promotes better adhesion of the solution to the surface. If the clay is too oily, the amount of sand used can be increased.
You need to know how to dilute clay for plastering a stove. To begin with, it should be soaked in a small amount of water and left for several hours, adding liquid in small portions if necessary. The process is repeated until a 10-15 cm layer of water remains above the clay. After mixing the finished clay mixture, the consistency of thick sour cream should be obtained.
In some cases, asbestos, finely chopped straw or fiberglass are added to the mixture for plastering the stove. These reinforcing components make it possible to obtain more durable materials.
When preparing plaster mixtures, special attention must be paid to the environmental side. During the heating process, the materials used should not emit substances that pose a danger to human health and life.
Separately, it should be said about salt; it is also sometimes added to the solution for plastering the stove. It should be noted that the opinion that salt makes it stronger can be considered erroneous. In fact, salt increases the hygroscopicity of clay, making it more flexible and resistant to cracking. Also, a plastering solution, to which a certain amount of salt is added, prevents the proliferation of various insects in masonry joints. For owners of private houses, this fact is of great importance.
Another component that can be added to the plaster mixture is gypsum powder. This material is used as a fixative. However, plaster must be used very carefully, as it hardens very quickly. The initial setting of the solution with the addition of gypsum powder occurs immediately after application, and after 10-15 minutes the surface hardens completely.
Adding lime along with gypsum makes the solution more durable and able to dry in a short time. But when choosing such mixtures, you should remember the properties of gypsum, so it is better to prepare a small portion immediately before plastering the stove. It is very important to understand that it is impossible to dilute the gypsum mixture with water.
Lime-based plasters - features where they are used
Lime plaster has a wide range of uses. The main task is to level the surface indoors. The material is not suitable for outdoor use because it does not tolerate high humidity and dampness.
The main advantage of lime mortars is their versatility: they fit well on any surface: drywall, brick, concrete, wood. In addition, the ready-made solution can be used for 2-3 hours, which is important for beginners in renovation.
Advantages and disadvantages of such coatings
Once the lime mortar for plaster has completely dried, the result is a fairly durable coating with many advantages.
- Lime has good thermal insulation properties, so a room with plastered walls does not require additional insulation.
- The finished coating allows air to pass through, which means that moisture will not accumulate under it and the walls will not become damp.
- Lime is an alkaline material, so it is resistant to bacteria that cause mold or mildew.
- Adding lime to the solution makes it plastic. This material is easier to apply and does not crack after drying, even under mechanical stress.
- The coating is fire resistant.
With all its advantages, lime plaster for interior work has its disadvantages.
- Lime mortar takes a long time to dry, and decorative finishing can be applied only after complete drying.
- To prepare this composition yourself, you will need slaked lime. The quenching process takes about two weeks.
- It is not recommended to fasten furniture or household appliances to the finished surface, as the fastening elements will crumble the lime wall.
Plastering with clay and cement. Where is the best place to plaster with clay?
The choice of clay as a finishing material is associated with its characteristics. As well as the possibilities of its use, if the inherent disadvantages of the material allow it.
In this context, it is advisable to consider the technical characteristics and features of clay plasters.
Advantages.
Clay plaster has several unique benefits.
The main one is ease of application. Do-it-yourself clay plaster is applied most successfully, because other binders are more “capricious”. But there are other attractive characteristics:
- Cheapness. An indisputable fact even for ready-made clay mixtures. And if you import directly from the quarry and prepare it yourself, you can get them almost free.
This also includes decorative clay plaster.
- Moisture capacity. The main technical, construction advantage.
Clay absorbs moisture from the air in relatively large quantities and, with changes in humidity in the room, maintains a microclimate that is comfortable for humans.
When the balance is restored, clay plaster gradually releases water molecules, smoothing out the sharpness of humidity changes.
- Thermal conductivity.
- Adsorption. Plastering with clay is healing, it interacts with active substances and binds them. In other words, clay plasters absorb harmful substances without “releasing” them back into the room.
This property has been adopted by allergy sufferers, who feel much better in a house with clay plaster.
- The elasticity of clay rocks allows them to plaster heated structures (stoves, fireplaces, heating panels, chimneys).
- Environmentally friendly. Natural sedimentary minerals do not contain harmful substances.
Clay is used for plastering damp (but not damp) rooms, as an environmentally friendly material and for laying and finishing stoves and fireplaces.