External plaster of the house - what you need to know about the construction of the wall.
The outer walls of the house not only perform a support-bearing function, but also do not allow heat to escape.
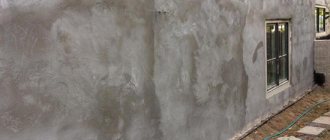
Their entire sandwich - interior decoration, masonry material, ordinary facade or exterior decorative plaster, cladding - are all obstacles to heat. But outside the building cools down, very much in winter, creating a high temperature contrast. At a certain moment, passing through the thickness of the structure, water vapor contained in the air comes into contact with the cold. Cooling sharply, they condense, turning into water. The wall gets wet and damp.
The temperature at which steam turns into water is called the dew point . It is important to achieve such a balance of insulation so that it is possible to displace the dew point as close to the street as possible.
Structurally, the problem can be solved by increasing the temperature and vapor permeability of the wall. From the point of view of external decoration of the facade, the problem is partly overcome by the use of vapor-permeable plaster, suitable for external use.
Applying plaster
To plaster the outer wall of a house, you need to learn certain steps:
- Spraying. To complete this stage of work, you will need to prepare a liquid solution into which liquid PVA glue is added. The resulting composition is sprayed onto the surface using a small ladle. The process should take place in a measured manner. The more roughness there is on the wall, the better the entire material will adhere. Before continuing work, you need to wait for it to dry;
- Applying the base layer. The finished composition should be like thick sour cream. Application occurs by applying between beacons. The layer should not exceed 5 mm. Having attached the narrow side of the rule to the beacons, move it from side to side, and then smoothly moving upward;
- The finished composition should be like thick sour cream. Application occurs by applying between beacons. The layer should not exceed 5 mm. Having attached the narrow side of the rule to the beacons, move it from side to side, and then smoothly moving upward;
- To finish grouting the coating, you must use a special grater, which will help smooth out small cracks. We move in a spiral from a small circle to a large one;
- Drying also needs to take a certain amount of time. It will take about 5 days to set;
- The plaster, which gives the wall texture, is not applied in a continuous layer of mortar, but at small intervals. They close by stretching the solution when it begins to dry out.
How to decorate the walls?
Passing through a solid wall, steam encounters a certain resistance associated with the density of the material. The less vapor-permeable elements of the sandwich are not able to transfer out all the vapor already in the wall. The steam cools here, moistening the structure and reducing its heat-shielding properties.
Decorative, insulating and ordinary plaster used for external walls can be such an obstacle if the previous layer allows more steam to pass through.
Therefore, certain solutions are suitable for a certain type of wall materials. And finishing in general.
- Concrete, reinforced concrete. This can include concrete and slag-filled, cinder block, expanded clay and sawdust block structures. Cement-sand plaster, which has a composition homogeneous with the wall material, is quite applicable. Less dense - even more so.
- Brickwork. Brick wall (26 cm thick) at -10 degrees. the outside will remain dry. But the layer of cement plaster is thick. 2cm will moisten it from the inside due to steam condensation. Therefore, it is important to have a clearer understanding of the dew point. A lime-sand finish is more appropriate here.
- Masonry. Depends on the density of the stone. For rubble stone, for example, external cement- or lime-sand “protection” will be useless. The house will become damp from the inside even with a 10-centimeter thickness of the external coating. The best option for stones is a sawdust-clay mixture laid 3-4 cm thick (with reinforcement or shingles). It is not difficult to prepare such a composition of plaster for external, insulating work with your own hands.
- Lightweight concrete walls (gas and foam concrete blocks). Neither lime nor cement is suitable for cellular concrete. The best inexpensive option is a gypsum-perlite mixture. But the most effective is the use of silicate mixtures.
- Wooden houses plastered with clay. Only clay, sawdust-clay coating.
- Open (unplastered) log houses. It is better to leave wood exposed; there is no plaster mixture through which steam passes better than through wood.
The feasibility of external plastering of facades is not always practical. In most cases, external decorative plaster is even contraindicated due to the too low density of the walls, their heat capacity and thickness. Here it is more rational to consider the installation of external insulation with ventilated facades.
Clay and gypsum-perlite layers require protection and are not used as independent exterior finishing.
Technique for applying facade plaster
Before applying facade plaster, initial preparation of the walls is required. It is necessary to remove the old cladding and clean the facade with a wire brush. Fill cracks and dents with putty, and sand rough edges and burrs on wooden walls. Check the verticality of the walls and level them if necessary.
Wooden walls are impregnated with antiseptic. Walls made of brick or stone must be embroidered - use a chisel to deepen the seams by 1 cm and clean them with a brush. This is done if masonry was not carried out with incomplete filling of the joints along the facade. It is necessary to make notches on the concrete wall with a hammer drill. This will achieve better adhesion of the plaster to the wall material.
It is also necessary to apply a primer. The choice depends on the material of the walls. The treated surface must dry for at least 24 hours.
When insulating walls with mineral wool or another type of material, a reinforcing mesh is installed. The guide beacons are fixed using a plaster mixture. The first layer of plaster is applied and leveled over the mesh. Using a notched trowel, apply grooves along the fresh layer. A day later, apply a second layer, repeating the application technique. This layer is approximately 5 mm thicker than the previous one. The last layer is also applied every other day. The plaster should be of creamy thickness, and the layer thickness should not be more than 2 - 4 mm. If the top layer is to be decorated, then this work is carried out on fresh plaster. If the top layer is to be painted, then after creating the texture and drying the plaster, a primer is applied, after which painting is carried out.
Also, the reinforcing mesh can be installed in another way. After the soil solution has completely dried, an initial layer of plaster is applied. In e. Wooden walls can be reinforced with shingles laid in a cross. Next, according to the same scheme, the remaining layers of plaster are applied.
It is worth remembering that during the application of the plaster and during its drying, the influence of precipitation should not be allowed. Taking breaks is also not allowed. All work must be clearly planned.
Compositions of mortars for plastering external walls.
There are two types of binders that make it possible to produce solutions for finishing facades: mineral and polymer. The former are cheaper, the latter are more effective. Their choice is directly related to the developer’s budget.
- Cement-sand. Popular and cheap type of finishing. The disadvantage of the composition is its relatively low vapor permeability, low plasticity and decent weight.
- Calcareous-sandy. Cheap and easy to apply mixtures. But they are not very reliable for external decoration.
- Gypsum plaster for exterior use is a common myth supported by unscrupulous manufacturers. Cannot be used for finishing facades without additional protection.
- Acrylic. Strong, vapor-permeable, easy to use and environmentally friendly. Used for plastering walls made of any materials. But roads are compared to mineral roads.
- Silicate. A mixture of potassium (liquid) glass with lime. It has the greatest ability to transmit water vapor. Applicable on any basis.
- Silicone is characterized by maximum elasticity, resistance to damage and high transmittance. They reject dust particles and belong to the class of self-cleaning finishes. They are more expensive than plasters made with other binders.
In addition to price, it is important to consider the composition of the surface. There are universal plasters that can be applied to most substrates. Others are only applicable in combination with certain wall materials.
The basic rule is not to lay stronger mortars on weak substrates (previous finishes). For example, a cement-sand mortar, shrinking when drying, will definitely tear off the plaster if it is placed on it.
Preparation of lime-based plaster
In some cases, cement can be replaced with slaked lime, but the quality of the plaster will not change. Slaked lime is required. If there is no such thing, then you can carry out the slaking process yourself in a large barrel, otherwise it is better to use traditional cement.
Plaster for walls is prepared in the following sequence:
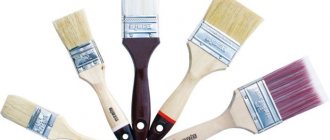
Tools for plastering: spatula, level, rule, trowel, trowel, float and others.
- First you need to grind the mass of lime and remove all lumps. This is done in a large container, for example, in a trough. You can add a little sand and water to the bottom. Lumps are eliminated by stirring the composition. This process continues until all the lumps are gone, leaving a homogeneous, workable mixture.
- After obtaining the lime paste, sand can be added. To do this, take 3 parts of sand per part of the dough. In addition to sand, water is used. It is added until the solution reaches a consistency similar to thick sour cream. This composition based on sand and lime can be used for one day, but no more, since the mass then hardens and becomes unsuitable for use.
- To obtain plaster with quick-hardening properties, experts advise adding gypsum. Then the plastered walls will begin to dry in just a couple of minutes. Such work is required when the time to process the facade is limited. After just 6 minutes the solution sets and after 30 minutes it hardens. In this case, it is necessary to take into account the production time; it is best to knead the mixture in small portions. To prepare the plaster, you need to dilute a kilogram of gypsum with 2-3 liters of lime dough prepared according to the specified recipe. You cannot make a liquid solution to prolong the drying time, as it will become friable and its strength will be extremely low.
Proportions of plaster solutions.
External plastering of the house with your own hands.
Having decided on the feasibility of plastering and choosing the appropriate composition, we begin to work. First, the façade should be examined to find out the amount and depth of surface damage, the presence of cracks and slopes.
Alignment by markers.
Plastering is done using special beacons, which are sections of metal profiles mounted on the wall and leveled. This approach greatly simplifies the work. This is especially important for beginners who decide to decorate the facade with their own hands.
Beacons are placed at a distance of 1.2-1.4 m, so that later it is a rule to rely on them.
Preparing the walls.
The old finish is completely removed - facing elements (slats, siding), poorly adhering plaster layers, paint residues, lime.
Before applying the solution, the surface is primed. The primer for external plaster work is applied with a roller, brush or spray.
For loose and cellular materials, a penetrating primer is preferred, which is applied in 2 layers with each layer drying completely.
If it is necessary to make a layer thicker than permissible (each binder has its own norm), the surface is reinforced.
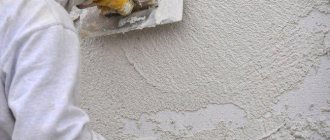
Applying external plaster.
The plaster mass is poured into the spaces between the beacons, covering the area from edge to edge, starting work from the bottom. The rule is to level the mass with upward movements.
Angles.
The slopes of openings and corners are plastered last. In this case, the dried outer plaster acts as a guide for the rule.
As the latter, two flat tools (for example, spatulas) are used, pressed to both mating planes. But it is more convenient to make a template from wooden slats, plywood or tin.
Polymer decorative plasters for external work in corners are most preferable because they do not wear out and are impact resistant.
Base.
Protruding and sinking plinths are plastered separately; flat plinths can be plastered in one piece with the wall. True, it is important that the waterproofing laid in the wall runs along the border of the wall and plinth plasters.
If the use of “weak” solutions is acceptable for the main part of the wall, then making a compromise when finishing the base is unacceptable . This is the wettest area of the entire house. The only thing “wetter” than the base is the roofing, so work is carried out exclusively with waterproof compounds .
Plastering problem areas
For those who have decided to learn all the information about how to plaster a wall on the street with their own hands, you need to learn about how the material is applied to the base and corners of the building.
The basement is one of the special areas of the house that require special protection. That is why it is coated only with moisture-resistant cement-based compounds. Also, at the boundary between the wall and the plinth, the installation of waterproofing materials will be required. If this area is solid, then it is plastered with the wall, which is not typical for a protruding one.
Work on the corners is left for later. To finish them, it is necessary to use polymer types of decorative plaster, which is characterized by a high degree of resistance to mechanical stress.
Preparation of mortar for external plaster.
The proportions of the mortar for plastering external walls with your own hands depend on the type of binder, the amount and type of additives, and the required thickness of the mortar.
Polymer exterior plasters are not made independently, therefore, when preparing such solutions, follow the manufacturer’s instructions.
Mineral plasters (cement-sand, lime-cement and lime-sand) are usually prepared on site.
- Cement-sand. The proportion of cement to sand is 1:4 (when using Portland cement M-500). For external plaster, the use of plasticizers is mandatory. For example, liquid soap.
- Combined outdoor. A mixture of cement and lime. A more flexible and water-resistant solution.
A bag of M-500 cement requires 280 kg of sand and 21 kg of lime.
- Calcareous-sandy. The components are mixed in a ratio of 1:4. Plastic, lightweight mortar for budget-friendly exterior plaster.
The plaster mixture is diluted in small quantities in a volume that can be sold before setting begins. This interval depends on the viability of the mixture.
Polymer plasters for exterior use are prepared according to the instructions. As a rule, it comes down to recommendations on the amount of water added.
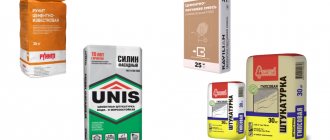
Types of plaster mixtures
In such a matter as exterior plastering of a house, it is not only the performance skill during installation that is important. Before plastering the walls, you need to select the right material designed for certain environmental conditions and surfaces. All plaster mixtures for the external walls of a house contain binders and special fillers. The most understandable and widespread classification is based on the composition of the connecting element:
- Cement is the main component of mineral mixtures. This is the most economical type of coating finishing. The cement base creates durable surfaces, and chemical additives increase moisture resistance. The color range is not rich, so additional coloring is used to give the facade an original shade. You can make a mineral solution yourself, just follow the specified proportions and do not deviate from the manufacturers’ recommendations.
- Liquid glass acts as the basis for silicate plasters. The material has excellent vapor permeability, provides waterproofing and is ideal for porous substrates. Such mixtures are very plastic, applied easily and evenly. The plastered surface is impervious to various contaminants, resistant to temperature changes and mechanical damage. Silicate compounds are sold in finished form. It must be used immediately; after opening the container, the solution cannot be stored.
- Silicone provides high temperature resistance to silicone solutions. This type of finish is considered universal. In addition to reliable protection from mechanical and climatic influences, the material has good dirt-repellent properties, eliminates the development of microorganisms and retains its appearance for a long time. The color palette is also varied; you can easily select or combine the desired shade for the facade.
- Acrylic resins are the main component of acrylic plasters for exterior use. They withstand the effects of high temperatures better than others and have good ductility. Such solutions bind well to any base. Various auxiliary elements are added to acrylic compositions, which affect the structure of the coating and visual perception. Solutions are sold in the form of ready-made masses, in which the proportions have already been met and the necessary components have been added.
Which type of plaster mixture is best suited for finishing the outside of a house, everyone decides for themselves. Despite the existing differences in composition, all types of decorative plasters for external walls are worthy of attention and have the necessary set of advantages that affect the quality of the facade.
| Type of mixture | Advantages | Flaws | Purpose |
| Cement | Strength; | Poor adhesion to smooth surfaces; | External and internal work, ideal for damp and wet areas |
| Durability; | Requires professionalism of the performer; | ||
| Slow maturation; | Application requires physical effort; | ||
| Moisture resistance; | Leaves a lot of dirt; | ||
| Low hygroscopicity; | Long ripening | ||
| Low price | |||
| Limestone | Plastic; | Low strength (without reinforcing additives); | For interior work in rooms with normal operating conditions |
| Environmental friendliness; | Long ripening; | ||
| Vapor permeability; | Personal protective equipment is required when working | ||
| Does not require physical effort during application | |||
| Lime-cement | Versatility; | Tendency to cracking; | External and internal works, plastering of wet rooms |
| Elasticity of solution; | Long ripening (up to 3 months); | ||
| Good adhesion; | Personal protective equipment is required when working | ||
| Antibacterial properties | |||
| Plaster | Fast ripening; | Low viability of the solution; | For interior work in rooms with normal operating conditions |
| Does not require puttying; | Low strength; | ||
| Elasticity; | High hygroscopicity | ||
| Possibility of application in 2 layers; | |||
| No shrinkage; | |||
| Good adhesion; | |||
| Low price | |||
| Adhesive | Fast ripening (2-3 days); | The severity of the finishing layer, difficulty in working | For external and internal work in insulation systems |
| Vapor permeability; | |||
| Low hygroscopicity; | |||
| Good adhesion; | |||
| Plastic | |||
| polymer cement | Same | High price | For external and internal work |
| Acrylic | Same, | Same | Same |
| It is possible to color in the mass and add texture; Does not require puttying | |||
| silicone | Same | Same | Same |
Simple DIY decoration.
Mineral homemade plaster mixtures are applied to the wall and leveled. The top is finished with a decorating layer of the same composition.
Alignment.
First coat of exterior plaster. Apply up to 1.5-2cm thick to give the wall perfect evenness. If you have to apply more significant layers, they must be reinforced.
Sometimes the exterior finish is applied in several thick layers, drying each one to avoid reinforcement. However, the reliability of layering is low: uneven thickness of the plaster is one of the main reasons for cracking of the exterior finish.
Decoration.
The second layer is textured. It is applied with various tools, depending on the desired relief, its nature, pattern and volume.
- Fur coats are obtained by working with a roller. To do this, the solution is made liquid and the preparation to be decorated is “painted” with this composition.
- Small coats are obtained by spraying the walls with a liquid solution using a brush. It is dipped in the composition and, directed to the desired section of the wall, passed along the pile with a hard object. The straightening fibers (line) of the brush “shoot” the plaster mixture.
- The stone texture is an imitation of the natural irregularities of natural minerals. It is applied as a second layer with a trowel or embossed material (a crumpled piece of fabric, fur, cellophane).
The layer is not laid completely, but partially, in small fragments between which gaps of the first layer remain. When the solution begins to set, it is “lubricated” with the tool.
The proportions of the solution for the decorative layer of plaster on external walls do not change. The array must be homogeneous.
It is not necessary to wait for the preparatory plaster to dry completely, just for it to set firmly. A dry wall needs to be moistened.
Imitation of stonework.
It is especially popular for finishing plinths, supports, pillars, and fences.
A simple way to decorate exterior plaster with your own hands is to apply an imprint. Special molds having the relief of the masonry are pressed into the fresh exterior plaster. After drying, it is painted, giving the “stones” a more natural look.
In order not to purchase prints, you can limit yourself to creating a relief by sampling it in wet plaster. Rows of masonry and individual shapeless or hewn stones in it are marked on the wall. Select the solution to the required depth with the corner of a spatula or other convenient tool. This technique requires a certain aptitude for fine art.
How to choose plaster for facade walls
When choosing facade plaster, you need to pay attention to the following characteristics:
• Compressive and bending strength. Indicators that determine the ability of a material to resist the appearance of cracks under the influence of loads and not collapse.
• Color. Many types of plaster mixtures are already produced in several color options. There are also pure white compositions suitable for tinting at the time of preparing the solution, and plaster mixtures for painting. If you have a choice, it is better to choose tinting the plaster rather than painting. This is due to the fact that the paint layer may deteriorate over time, while the coloring pigments in the plaster will retain their color.
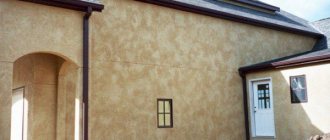
• Texture. Using various types of decorative plasters, you can create an imitation of many natural materials (stone, wood) or relief (fur coat, bark beetle, mosaic, etc.) on the surface of external walls. Usually the manufacturer indicates on the packaging what texture the mixture is intended to create.
• The basis of the plaster mixture. It can be mineral, acrylic, silicate, silicone, silicate-silicone. Below we will look at them in more detail.
• Drying time. For different types of mixtures it ranges from 24 to 72 hours.
• Minimum and maximum layer thickness. When finishing different surfaces (wood, brick, concrete, etc.), different thicknesses of the plaster layer are needed, which is provided by plaster mixtures of different compositions.
• Viability of the solution. This indicator is important for an inexperienced master. It indicates how long the prepared mixture in the container is suitable for application.
• Consumption. The amount of solution required to cover one square meter. m surfaces are taken into account when there is a choice between several options.
• Frost resistance. This parameter is expressed in the number of freezing-thawing cycles that the plaster can withstand without visible damage.
• Bond strength (adhesion). The higher this indicator, the better the plaster adheres to the base.
• For what application method is the mixture intended - manual or machine.
Now let's look at how finishing solutions differ in composition. All of the following types, except cement plaster, refer to ready-made decorative coatings.
Mineral plaster
Mineral plaster mixtures include marble or quartz chips. Advantages of mineral facade plaster:
- high vapor permeability;
- resistance to mold damage;
- frost and fire resistance;
- resistance to precipitation;
- the surface is easy to clean;
- ease of application.
The disadvantage of mineral plaster mixtures is the limited choice of colors, but this can be corrected by painting the plastered walls with paint. Overall, this is a good choice for outdoor walls.
Several brands of mineral plasters: Ceresit, Quick-mix, Weber-Vetonit.
Acrylic plaster
Produced on the basis of polymer acrylic resins. This type of finishing mixtures is not highly resistant, but has many advantages:
- plasticity, absence of cracks;
- good adhesion to mineral substrates;
- surface hydrophobization (repel water);
- ease of application;
- large selection of colors;
- service life up to 25 years.
Disadvantages of acrylic plasters:
- tendency to burn out;
- unsuitable for application to metal;
- attracts dust and gets dirty easily.
Another important property is low vapor permeability. Therefore, acrylic plasters cannot be applied to aerated concrete facades. This can lead to moisture accumulation in the pores and cracking of the walls.
Several brands of acrylic plaster mixtures: Ceresit CT60, Farbe Akryl, TERRACO TERRACOAT.
Silicate
The basis of silicate plasters is “liquid glass” - an aqueous solution of potassium and sodium silicates. Advantages of silicate plaster mixtures:
- suitable for finishing plasterboard, lime bases, concrete, etc.;
- no odor;
- high degree of vapor permeability;
- does not attract dust due to antistatic properties;
- suitable for application over polystyrene foam due to fire safety.
The disadvantage of these solutions is that they dry quickly. Use the open bucket immediately!
Several brands of silicate plaster mixtures:
Baumit SilikatTop Rille/Kratz - with different structures (rough, scratched), for interior and exterior use, for manual and machine application.
TM Green Line SilikatStone has a granular texture (in the form of densely laid pebbles)
ATLAS SILKAT N and R - ready-made decorative plaster with marble chips up to 1.5 and 2 mm thick
Silicone
The basis of silicone plaster is silicone resins, which impart self-leveling properties. Advantages of plaster mixtures:
- self-cleaning during rain;
- high vapor permeability;
- dust-repellent properties;
- strength;
- elasticity;
- moisture-resistant surface;
- tinted well;
- high degree of adhesion to all substrates to which it is applied.
The high price of silicone mixtures may determine the choice not in their favor.
Several popular brands: Weber Pas silikon, StoSilko MP, CAPAROL AMPHISILAN FASSADENPUTZ K15.
A separate group should include silicate-silicone plasters, which combine the advantages of silicate and silicone mixtures. Examples: Ceresit ST 175, Weber.Vetonit.
Cement
The simplest type of facade plasters is cement. They are used mainly for leveling walls and creating a base layer for decorative coatings. But they can also be used as a finishing touch. For example, cement plaster can be used to imitate rough masonry.
Advantages of this type of finishing:
- Low price due to its simple composition - a mixture of cement, sand and a small amount of additives.
- Possibility of self-cooking. The composition of the plaster will depend on the brand of cement and the quality of the sand. For example, for 1 part of cement grade 400-PTs II take 5 parts of sifted sand. To increase plasticity, lime is added to the solution.
- High strength;
This type of plaster mixture is not suitable for finishing walls made of aerated concrete due to its increased vapor permeability. The disadvantages are the need for finishing and the rapid drying of the finished solution.
Brands of cement plaster mixtures: Osnovit, Yunis, Knauf, Perfecta FrontPro.
Gypsum mixtures
White gypsum-based plaster is not used for façade finishing due to its low resistance to precipitation and mechanical damage. Gypsum mixtures can be chosen for interior decoration.
Finishing with ready-made plasters for exterior use.
Polymer exterior plasters are more reliable than mineral plasters. True, it's more expensive. Depending on the type of binder, they may have different mixing ratios with water.
Many compounds are sold in buckets, since they are already completely prepared for work. Some require only dilution with water to give the plaster mortar a more plastic, easy-to-work consistency.
They are applied according to the instructions, which depend on the composition of the mixture and the nature of the expected texture.
Types of compositions
Today, manufacturers offer a large selection of plaster compositions, of which options for exterior finishing differ in quality and visual indicators. Some mixtures intended for plastering facades can be prepared with your own hands.
From sand and cement
If you prepare the mixture yourself, then this finishing option becomes the most affordable. The material turns out to be so durable that they are allowed to plaster the basement of the building.
To prepare a solution for tiling a house, you will need:
- binder component – cement material M 350 and higher;
- medium-fraction sand, washed from impurities;
- additional ingredients that improve aesthetic performance.
We sift the sand through a sieve, pour two to three liters of water into a container of suitable size, add cement in portions, constantly stirring the contents, add sand and other components, mix everything thoroughly.
The ratio of cement material and sand is one to three. The consistency of the prepared solution can be changed in the desired direction by adjusting the amount of sand or water.
To improve plasticity, it is recommended to add thirty to fifty milliliters of dishwashing detergent per batch.
Ready cement composition
The façade walls are plastered using mixtures from the manufacturer, which are resistant to moisture and can withstand temperature changes. When choosing a material, you should take into account the time required for the plaster to dry completely - it requires more than for other types of solutions.
An important feature is the use of special additives in the manufacture that give the compositions different textures.
There are other materials used to decorate the exterior of a home. Their differences are the granularity of the structure and application methods, but in each result there is a relief that imitates a certain material. To achieve the desired result, you should use one of the following mixtures for facade work.
Mineral
Plaster composition containing natural stone chips is deservedly popular. Its basis is cement. Working with such a mixture is easy, but certain skills will be required. The color palette is limited, but this drawback is eliminated by painting.
Acrylic
A polymer material based on acrylic resins, characterized by excellent moisture-resistant characteristics and a long service life.
Unfortunately, the coating is exposed to ultraviolet light, attracts dust and quickly becomes dirty. They should not finish street walls built from aerated concrete material, because the plaster mixture does not have sufficient vapor permeability.
The composition is elastic and easy to work with.
Silicone
A good finishing material, but its cost is high, which limits the scope of use of plaster. It perfectly resists the effects of climatic precipitation and temperature changes without changing its quality indicators. Vapor permeability and the ability to seal small defective areas are considered important advantages. Houses plastered with this mixture always look attractive - the material cleans itself when it rains.
Silicate
“Liquid glass” is used to make the mixture. Silicate components added to the solution give it important characteristics - resistance to fire, absence of odors, and antistatic properties. The solution has good vapor permeability, so it is recommended for finishing the exterior walls of a house built from aerated concrete. The disadvantage is that it sets quickly, so the batch has to be prepared immediately.
The textures of plaster mixtures are distinguished by their own characteristics, they can imitate different finishing materials and can be painted with paints and varnishes. The most popular include:
- fur coat, terrazite or lamb;
- Venetian, imitating marble stone or onyx;
- bark beetle, craquelure, Marseilles wax;
- sea breeze or wet silk.
To obtain the desired texture, different tools are used.
What not to do when applying exterior plaster.
There are several common mistakes that can reduce the quality of exterior finishing.
- Proper preparation. The solution will never “stick” to flaky, dusty surfaces. They need to be cleaned, unstable bases removed, and primed.
- Selection of the correct finishing composition. For example, gypsum plaster is not for exterior use. Plaster is not water resistant enough to be used outdoors. It is also used indoors only in rooms with medium and low humidity.
- Not every solution can be prepared by yourself For example, granite colored plaster for exterior use is made only on the basis of synthetic resins, saturated with plasticizers and other additives. They cannot be replaced with cement.
- Compliance with the instructions indicated by the manufacturer. Violating them will lead to loss of money, because the finish will quickly deteriorate. The composition of the polymer mortar for plastering external walls is very durable and elastic. But it requires careful adherence to the rules. Main damage:
- Backlogs. The result of unscrupulous preparation of the wall, poor-quality primer.
- Bundles. Violations of the composition application technology.
It is especially important to pay attention to the compatibility of the plaster binder with the wall material.
If the instructions prohibit applying external plaster to certain walls, you should not rely on luck and take risks. If the chances were great, the manufacturer would include such material in the list of acceptable ones.
Plastering the facade of the house
Plaster applied to the facade of a house or building not only levels it, but also protects it from moisture and weathering, high and low temperatures. The finishing layer increases heat transfer resistance, reduces sound conductivity and breathability. A properly plastered façade is durable, pleasing to the eye and creates a good mood.
The best surface for plastering is considered to be a wall made of expanded clay concrete with a rough surface. Such work can also be performed on walls made of brick, light and ordinary concrete. Previously, arbolite slabs were used as a base; now they are used, laid out on top of masonry or secured to a wooden frame.
In wooden houses, the plaster is applied to insulating boards made of cellular plastic or mineral wool. Decorative plaster allows you to obtain a different surface structure: from smooth (finish plaster) to uneven (spray plaster), with different patterns. When treating with lime mortar, a thin layer of plaster is applied to a brick wall, through which the masonry appears or the bricks can even show through.
Plastering solutions
If you plan to paint the facade, plastering is done using conventional mortars: lime, lime-gypsum, cement-lime or cement. All solutions, with the exception of lime-gypsum, are used for plastering brick and concrete surfaces; wooden ones are treated with lime-gypsum. The plastered facade is painted with lime-cement paint. Using latex or synthetic paint may cause the plaster to peel off.
Lime mortar is moisture permeable, elastic, hardens more slowly, cement mortar is more durable. These solutions cannot be used together! Today, lime-cement plaster is more common - it combines the best qualities of both materials.
Decorative plasters contain already colored solutions with various additives. Marble, granite chips or red brick, and coarse sand are used as fillers.
Plastering and preparatory work
Plastering work requires special knowledge. It is very important to do everything correctly: select the right solution, mix the components thoroughly, pre-prepare the surfaces and complete the work quickly.
Before plastering, external waterproofing and roofing with details and connections are installed, all metal frames of architectural elements on building facades are installed and secured, fastening devices for drainpipes are installed, and the facade is cleaned of dirt, dust, dirt, bitumen, grease, and salt stains. On concrete surfaces, (if necessary) they are cut, notched, primed with a 7% solution of polyvinyl acetate emulsion, washed with a 10% solution of technical hydrochloric acid, and all defects are corrected.
Plastering is usually carried out along the beacons, and grouting is done by spreading, since when painting, traces of grouting in a circle can be noticeable. The base is plastered only with cement mortar in a ratio of 1:3 or 1:4, deepening the finishing layer into the ground below the sidewalk level by 5-6 cm.
The porous surface is reinforced with stainless mesh. The plaster is applied in several stages: first it is sprayed, then it is primed with a layer approximately 10 mm thick, after which a covering layer of up to 2 mm thick is made for the plaster coating and up to 7 mm for the decorative finishing layer. Grouting of the covering layer is carried out after 30-40 minutes.
Care and repair of plastered facade
Over time, cracks and peeling may appear on plastered facades, which worries homeowners a lot. Large sedimentary cracks, which usually appear diagonally, must be sealed because moisture penetrates into them, causing various damages. Shrinkage cracks (hairline cracks) can be left untouched; they do not cause problems.
The reasons for the peeling of plaster may be the penetration of moisture into it due to poorly carried out plastering work, leaks in the eaves of the roof, poor quality of metal cladding of window sills and other coatings, etc.
Small areas of peeling plaster can be repaired yourself, but if the entire layer is weak, a general repair of the facade is necessary using solutions that are compatible with the old plaster.
Plaster facade of a gas silicate house
Member of the “House and Dacha” forum dmitry0876 presented his report on the plastered facade of a house made of gas silicate blocks. The total area for plastering (without doors and windows) was 235 square meters. The choice fell on Ceresit.
The following materials were also purchased:
- ST24 plaster – 50 bags weighing 25 kg;
- primer ST17 – 10 buckets with a volume of 10 l;
- ST16 primer - the same amount;
- ST175 plaster – 35 buckets of 25 kg each, of which 21 buckets are yellow and 14 are red;
- for corners of the house and window slopes - corners with glued mesh - 110 m;
- tape and foam for slopes.
dmitry0876 warns that the tape adheres very poorly to ST175, but according to the plasterers, this problem should not exist with ST64.
After all the work, there were 2 buckets of ST17 left, the same amount of primer ST16, 9 bags of ST24 plaster and 4 buckets of ST175 plaster (equal parts yellow and red), about 20 meters of corner. The colors chosen for plastering were ARIZONA 3 and COLORADO 3. The forum member hopes to use the remaining materials next year for the porch and veranda. Problems arose with finding good specialists for plastering.
Pay attention to the correct arrangement of scaffolding and determining the locations of their attachments. Scaffolding should be secured in places that can be carefully repaired upon completion of the work.
Based on materials from participants of the “House and Dacha” forum