What to do if linoleum is torn
PVC floors and natural roll coverings have gained popularity due to their good decorative qualities and sufficient resistance to compressive and abrasive loads.
But if serious violations were made during installation, then during operation the likelihood of damage increases. Also, in most cases, the cause of negative situations with flooring is the wrong choice. In order to save money, buyers prefer inexpensive materials: household or semi-commercial linoleum of the 21-23 and 31 wear resistance classes. High resistance to abrasion is observed in natural linoleum and PVC linoleum. There are products that are resistant to sharp heels, pet claws or furniture wheels.
Damaged linoleum not only spoils the appearance of the floor, but also becomes a place for the development of pathogenic microorganisms
If, for example, linoleum of the wrong load class, designated 21, was purchased for the floor in the hallway or kitchen, then due to intensive use it will soon become unusable. Similar consequences will arise when using linoleum of 21-22 wear resistance classes in educational institutions. This is a household material and has a minimal protective coating. Here, for flooring, it is better to use linoleum of class 31 and higher.
Often, when linoleum is damaged, consumers blame roller manufacturers for the fact that their products are not of high quality. In addition to the correct choice of flooring material, it is also necessary to adhere to the technology of its installation.
Among the positive characteristics of linoleum, its partial repairability stands out. If there is a small defect in the form of a cut or swelling, you can use appropriate means to beautifully close the hole in the linoleum.
Important! If you do not carry out repair work to eliminate various types of damage to the linoleum, over time they will increase in size and become a place for debris and dirt to accumulate. In such conditions, fungi will begin to multiply rapidly, and it is unlikely that it will be possible to repair torn linoleum without visible consequences.
Reasons for the formation of defects on linoleum
Linoleum is a durable material, characterized by elasticity and softness, and the available range offers a choice for every taste. Preserving the integrity of far from cheap flooring is one of the main housing issues.
Long-term use causes scuffs and holes to appear on linoleum. More often this happens if the linoleum on the floor was laid incorrectly on an uneven surface, such as:
- at the site of small depressions, voids form that cannot be compensated even by the elasticity of the material, and it is enough to catch it in this place for holes to form;
- in places where there are protruding irregularities - tubercles - the linoleum wears out and cracks.
Damage to linoleum occurs from mechanical, thermal and chemical influences
Other reasons include:
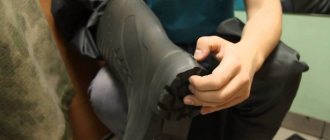
- claws of pets (a little prevention is enough here - generously lubricate the damaged piece with vinegar or bleach, and buy a special toy for your pet).
- inaccurate and frequent movement of pianos, furniture, construction equipment with sharp edges on linoleum floors - the coating is pressed down to the base;
- moving a cabinet, sideboard or chest of drawers jerkily and with force leads to tearing out a whole piece of material;
- insufficient or excessive thickness of the adhesive layer, damp base, unevenly applied mastic - the reasons for the formation of waves and folds, the surface of which wears out or becomes covered with cracks;
- insufficient rigidity or large thickness of the substrate - over time, this causes the formation of dents with traces from furniture legs;
- a coal of cigarette or hookah ash - a small or through hole immediately forms on the floor linoleum;
- walking in shoes with heels - as a result, dents, tears and scratches appear.
How and with what to seal a cut on linoleum at home
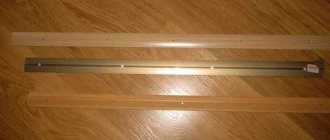
An even cut or seam divergence does not require a patch. The damaged area simply needs to be glued. To work you will need glue, a smooth board, longer than the cut. You will also need a weight, such as a kettlebell.
A slit or seam divergence can be sealed with glue
First prepare the problem area. We carefully bend the edges of the linoleum so as not to stretch it. The back side of the canvas and the subfloor area are cleaned with sandpaper to remove old glue. The dust is sucked up by a vacuum cleaner. To be sure, wipe with a damp cloth, then dry well with a hairdryer.
To close the cut in the linoleum, glue is injected under the canvas. The procedure is best done with a syringe. The edges of the linoleum are pressed to the floor. They can be peeled off and temporarily secured on top with electrical tape so that they do not come apart. Place a board on the cut and press it with a weight. After the glue hardens, the bandage is removed. If the tape was glued, remove it too. Carefully remove excess dried glue from the linoleum.
Eliminating blisters on linoleum
Often, swellings appear on the coating, which increase over time, interfere with walking, and then tear. This happens for various reasons, but such defects must be eliminated as early as possible so that the linoleum does not have to be replaced.
Removing bubbles is not difficult, the main thing is to know how
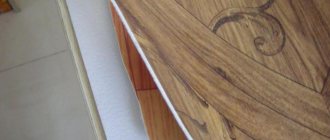
Small bubbles can be easily removed using heat. You can use a household hair dryer or a bag of hot sand, but it is more convenient to use an iron. To do this, cover the problem area with a clean rag or piece of parchment and smooth it with an iron in steam mode.
A bump on linoleum is ironed
Large swellings are eliminated differently. A cross-shaped incision is made in the center of the bubble, after which the resulting flaps are folded together and the excess is cut off at the edges. After making sure that all the parts fit together smoothly, they are bent outward and the base is cleaned of old glue and dust. Now all that remains is to apply fresh glue and press the flaps to the floor. You can put some weight on top so that the linoleum sticks better.
Repairing dents
If the linoleum was originally laid without glue, the swelling can be eliminated without cutting the fabric. First you need to loosen the baseboards on the wall closest to the bubble. Next, they begin to smooth the surface towards the wall, expelling air from under the linoleum. If necessary, the edge of the canvas can be trimmed to leave a temperature gap between the wall and the floor.
It is convenient to smooth out linoleum with a spatula
If the joining seams come apart
The seams of the cladding strips can be glued “hot” or “cold”.
Joints are “welded” hot and cold
Detailed instructions for cold joining seams:
- We fill the seam with PVC glue using a glue gun or a thin nozzle, after half an hour we peel off the tape and wait for the glue to completely harden.
- discard the cut strips, stick tape along the entire length to the seam and cut along the seam;
- We stretch the two strips so that there is an overlap of 2mm, and we put a metal strip under it for easy cutting. In the center of the overlap, cut both strips;
We hot glue the linoleum joints using a hair dryer with a special nozzle. To do this, you need to purchase a special cable in advance and expand the docking area to 5 mm.
In this case, we warm up the cord and quickly (until it cools down) insert it inside the seam. The ends are glued together by vulcanizing the joints, so that the strips form a single whole. This method is more reliable, but requires special skills in working with a hair dryer.
Sealed joints will be securely glued for a long time. You should not neglect repairs, as dirt and moisture will get trapped under the upholstery, which will lead to the formation of mold and an unpleasant odor in the room.
Joint repair
Loose joints are one of the most pressing problems for floors covered with linoleum.
Broken joints
Sometimes the edges of the canvases only slightly move away from the base, in other cases they swell noticeably and diverge to the sides, exposing the subfloor to view. This kind of problem cannot be left unchecked: debris accumulates in the seams, water gets in during cleaning, mold starts to grow, and the protruding edges become frayed and torn, making it difficult to walk around the room. Let's look at how to connect joints with the greatest efficiency.
Fast way
Step 1. The edges of the canvases are folded outward and all the dust is thoroughly cleaned from under the coating.
The edges of the canvases are folded outward
Step 2. Prime the floor using a small brush and leave until completely dry.
Step 3 . Double-sided tape is placed in the gap between the sheets so that the middle of the tape is located exactly along the seam.
Double-sided tape is placed in the gap between the sheets
Step 4. Remove the protective layer from the adhesive surface and press the edges to the floor.
Step 5. Carefully straighten the edges, press and smooth the seam with your hands. Next, it is advisable to roll this area with a roller to finally level the joint.
Smooth the seam
If the linoleum sheets have shifted during operation and the joint has separated by several millimeters, there is a simple and cheap way to eliminate the gap. To do this, you need to clean the seam from dust, degrease it, and dry it thoroughly. Next, you should take a wax candle, melt it and carefully pour the wax into the gap between the canvases. After this, the remaining wax is easily removed with a spatula blade or knife, and the surface of the seam is polished with a soft cloth.
Advice. This method is only suitable for dry rooms with low traffic, since under intense load the wax will come off the edge of the canvas and a gap will form again.
Cold welding of joints
For high-quality sealing of separated seams, it is best to use C-type cold welding. This glue has a thick consistency and perfectly fills seams up to 3 mm wide. In addition, it melts the sections of the canvas and forms a monolithic surface, impermeable to moisture and dust. But for new linoleum they use A-type glue, which is more liquid and reacts faster with PVC. Let's look at how to do this in detail.
Set of tools
Step 1. The coating strips are laid on the prepared floor, overlapping by 5-6 cm.
Step 2. Mark the cutting line exactly in the center of the overlap, measuring the required distance with a ruler. A line is drawn with a pencil along the entire length of the joint.
Step 3. Apply a ruler or metal strip to the marking and cut through both sheets with a sharp knife.
Making markings
Apply a meter ruler
Cuts right through two sheets in one motion
Step 4. Remove the cut strips to the side and align the edges of the canvases.
Excess pieces are removed
Step 5. Apply masking tape to the joint along its entire length. This is necessary so as not to stain the front surface of the coating with glue.
Painting tape is applied to the joint
Step 6 . Using the tip of a knife, carefully cut the tape along the joint line.
Cutting through the tape
Step 7. Take the glue, put a cap with a needle on the tube, and twist it tightly. Next, insert the tip of the needle into the gap and lightly press the tube until a spot of glue up to 4 mm wide forms on the tape. After this, you need to smoothly move the needle along the seam, evenly filling it with adhesive.
Put the cap on
Apply welding
Advice. The width of the adhesive strip during application should not exceed 3-4 mm. You will still have to wipe off the excess glue, and this will not make the seam stronger. But you shouldn’t save too much either: a lack of glue will make the seam less airtight and reliable.
Step 8. After 15 minutes, when the glue has set, the tape is carefully removed from the linoleum.
After 15 minutes, remove the tape
You can walk on the coating after the glue has completely cured. The manufacturer indicates the exact drying time in the instructions on the tube, so before work, carefully study all the information about the composition.
The seam after cold welding is invisible
Removing dents and holes
- Iron. Place a cloth moistened with water on the dent. You need to run a heated iron over the rag (it should work in steam mode). A large dent will need to be ironed for at least half an hour.
- Hair dryer. The dent is heated with a hairdryer until it disappears. On average, this takes at least an hour.
- Back. The dent is pierced exactly in the middle. Air will enter through the hole and the canvas will level out. Additionally, you can load the floor at the drilling point.
A leveling composition consisting of alcohol, rosin and castor oil in a ratio of 5: 25: 4 can be applied over the dent. The composition fills the dent, smoothes it and dries. After drying, it is sanded with sandpaper.
How to carry out repairs without a patch
Using a special composition
You don't have to fix a nick, scratch or small hole - you can fix them with a special putty or filler. It comes in the form of a paste or pencil and is sold in almost any hardware store. If you were unable to buy it, then do not despair - such a repair composition is easy to make with your own hands. This will require materials such as rosin, castor oil, coloring pigment and medical alcohol.
First, melt half a kilogram of rosin: put it in a porcelain bowl, which you have previously placed on a pan of boiling water. As soon as the substance dissolves, remove the container from the boiling water and allow to cool. Until the rosin freezes again, add 100 g of castor oil and 150 g of denatured alcohol.
The pigment, which is produced in powder form as an additive to paints and varnishes, must be selected in advance: its color should not differ much from the color of the canvas. It should be remembered that after drying, the homemade putty will become lighter.
Mix all three components, then cover the damaged area with the prepared mixture. After drying, sand the renewed surface with fine-grained sandpaper. As you can see, the described method will not be difficult even for an inexperienced master. Once you get the hang of it, you'll understand how to quickly fix a hole in linoleum without needing a patch.
How to fix a burn on linoleum: 3 effective ways
With glue
Damage in the form of torn pieces or cuts is no less easy to repair at home. If the problem area is a protruding “tongue,” first clean the underlying base from dirt and dust. Then fill the hole with a thin layer of floor adhesive. This can be universal PVA glue, silicone sealant or liquid nails.
Types of putties
It is necessary to select the material based on the type of rough foundation. In most cases it is concrete, or wood, or concrete leveled with plywood sheets. The joints between them will also have to be puttied. Apart from non-standard compositions that are intended for a particular type of floor, there are also multifunctional ones that can be used to work on both wood and concrete.
Wood putties
The compositions are used not only for leveling floors before laying linoleum, but also for restoring the old wood surface. They are also used for the beautiful appearance of floor boards. Wood putty can ideally seal cracks, seams, fallen knots and other imperfections on the surface of wood.
Specifications of the composition for interior work of residential premises:
- Plastic. This parameter is needed because wood can expand and contract depending on the temperature around it. If the putty is not elastic, it will soon simply fall off.
- High adhesion. The composition must adhere perfectly to the wood, otherwise the putty will quickly begin to peel off and fall out.
- Cleanliness in environmental terms. This parameter is important because the presence of harmful volatile substances in the composition can harm human health when dried.
- High disinfecting properties. For wooden floors covered with linoleum on top, it is especially important that mold does not settle on them and the process of decomposition does not begin in case of accidental water seepage through the final coating.
- Fire safety. An important but not important parameter.
Uniformity (smallest fraction). Do not use coarse-grained compounds on wood. When sanding, scratches are likely to appear, which will also have to be puttied.
Oil-based formulations
Oil putties include drying oil, fillers, water, coloring pigments, low molecular weight organic substances and other components. Such compositions are considered impeccable for wood, as they have real components. Good qualities of oil putties include:
- high elasticity;
- greater adhesion to wood surfaces;
- quiet consumption (no more than 1 kg/m2);
- ease of use;
- fairly quick drying;
- environmental safety;
- conditional inexpensive price.
Unlike other mixtures for putty work, leveling oil compositions go on sale already in a ready-made state. They do not require pre-mixing before application to the surface being treated.
Despite the many positive qualities, the material also has quite large disadvantages. Putty can quickly “fall out” of cracks and potholes if the floor is subject to intense stress. Oil-based compositions are susceptible to very high moisture and do not adhere well to absolutely any paint, except oil-based. Because of this, before working on plywood or wood floors, you will have to strip them of any fine finishes down to the wood itself.
Quick-drying compounds
Nitro putties are made from wood dust (flour), come in a wide variety of colors, and dry fairly quickly. Among the advantages:
- excellent adhesion to wood substrates;
- excellent correction of deficiencies;
- the ability to process wood surfaces (clean, sand);
- dry for a maximum of 10 minutes;
- Traditional acetone or nitro solvent is suitable as a solvent.
Polymer compositions
They are made on a gypsum or latex base. Gypsum-based putty for plywood under linoleum is perfect for sealing joints between sheets, and also for bringing wood floors into perfect condition, on which a similar final coating will then be laid.
Latex putties are an excellent, good option. It is exclusively necessary to be able to work with them. Once dry, it is practically impossible to do anything with the surface. Thanks to this, cracks and dents should be immediately filled very smoothly, without leaving any blemishes.
The advantages of latex over plaster are clear:
- does not crumble;
- will not crack, because it is elastic;
- Millimeter-sized cracks are likely to be sealed.
Among the bad qualities, we can highlight the price - it is hardly worth using latex-based putty linoleum
Adhesive and oil-adhesive compositions
In most cases, they are prepared on their own. It turns out economical and very high quality. Recipe for wood putty (it is also suitable for sealing plywood joints):
- 280 g linseed oil;
- 60 g of turpentine oil, or turpentine;
- 30 g of perlite sand in powder form;
- 20 g casein;
- 20 g edible gelatin;
- 12 g borax;
- 18 g of ammonia (18% solution);
- about 300 g of water.
Combine turpentine and linseed oil, add perlite powder. Mix everything, add water, add other ingredients and place in a water bath, heat to approximately +90° C. This will help achieve the most homogeneous consistency and obtain a thick paste. Remove it from the heat and cool. You can work with it for an hour, then its properties will deteriorate.
Types and characteristics of glue
The choice of adhesive depends on the surface to be laid and the type of coating itself. At the moment, linoleum adhesives are presented in dispersion and reaction compositions.
Dispersive
This type includes water-soluble compounds containing cellulose acid, acrylic, latex, rubber, and gypsum. They are the safest for health, do not emit odor, and have good elasticity. They are used to make natural linoleum and PVC on different bases: felt, fabric and foam rubber.
The presence of water in the composition causes some restrictions: dispersion adhesive can only be applied to an absorbent base, in dry rooms where the temperature does not fall below 15 ° C and the humidity does not exceed 60%. The adhesive layer must not be allowed to freeze, as this will cause the material to lose its elasticity and begin to crumble.
The group of dispersion adhesives includes:
- humillax - the base of the composition is a mixture of rubber and latex, thanks to which the adhesive is easy to apply, has high elasticity and adhesion to various types of surfaces. Used for natural and synthetic linoleum on felt and fabric bases.
- Bustilate is a water-soluble synthetic compound with latex, gypsum and cellulose thickener. It has high peel strength and elasticity, best suited for thick linoleum on a dense felt backing;
- acrylic glue - a mixture based on acrylic resin. It has high adhesion and viscosity, which ensures excellent adhesion of the coating to the floor. Can be used for homogeneous and non-uniform linoleum on jute and synthetic bases;
Blistering linoleum: what to do?
There are damages that cannot be repaired with patches or putty. Edema is one such defect.
- Swelling is the most unpleasant defect in terms of the appearance of linoleum, but eliminating it is quite simple - you need to pierce the swollen area and squeeze out all the air.
- Then you need to dilute the liquid glue, fill it with a syringe and use it to pour a sufficient amount of glue under the linoleum.
- After these operations are completed, the plywood is placed on top, as in the case of patches, on which something heavy is placed, after a few days it can be removed. There are times when the entire coating swells, in which case nothing can be done, you will have to completely rebuild the linoleum.
The most common cause of swelling is improper waterproofing and often if done incorrectly the entire linoleum will swell and need to be removed, re-waterproofed and restored.
Shrinkage
Another defect that may arise during the operation of the coating in question and which cannot be eliminated with patches is drying out.
- In this case, you can repair linoleum as follows. If the cracks are small, you can simply fill them with paraffin. Filling should be done so that a protruding seam is formed. After this seam has cooled, you need to take a dull knife (so as not to cut the surface of the linoleum) and clean the flooded area. After this, the area is wiped with a dry cloth.
How to fill a hole in linoleum floor
To repair a floor with large holes, you will need similar pieces of material of the appropriate size. When purchasing, consultants often advise buying linoleum for flooring at a premium. To secure a patch or hook scattered sheets, you need to prepare another double-sided or regular tape or glue.
Double-sided tape with fabric back for floor restoration
Special adhesives are used to repair roller coatings:
- Universal boxed. This adhesive is suitable for repairing damage to both fabric and PVC felt linoleum. You can work on it if the floor is wooden, concrete, or plywood.
- Vinyl glue. It is equally effective to use this composition to close holes in linoleum, regardless of the presence of a base. Also used for plank floors, screeds, chipboard sheets, fiber panels.
To quietly restore the floor covering from minor scratches, punctures, and burns, it is recommended to use a polymer version of putty based on artificial materials: latex and acrylic. Putty is also suitable for these purposes.
Advice! In order for the repair composition to match the color of the floor covering, you need to add small scraped particles from the linoleum. You can also purchase a finished product made from putty, a color component and a solvent for repairing a roller coating.
How can you seal torn linoleum?
Glue or tape will help fix the patch and joints of the separated linoleum. The latter can be either painting or ordinary. The flooring can be glued together using glue or cold welding.
- Bustilate is universal. PVC material is glued to a fabric or felt backing. They are used to glue canvases to wooden or concrete floors, plywood and other porous surfaces.
- PVA for linoleum. Canvases with or without a base are glued to any porous substrate, including chipboard, fiberboard, screed or plank flooring.
- Homakoll. Product for coverings with fabric, fluff or foam backing. Linoleum is laid on a concrete screed, wooden boards, plywood and fiberboard.
- AdesilexG. Reactive adhesive based on polyurethane. Can be glued to absorbent and non-absorbent materials. Can be used in damp areas.
- Homakoll S. Seams seams (joints), repairs minor damage such as punctures, small cuts with a smooth edge.
Scratches, burns and small punctures are repaired with mastic or polymer putty. To ensure that the adhesive seams match the color of the linoleum, fine crumbs scraped off from its remains are added to the glue.
There are repair kits that include mastic, solvent, and dye. With them, any minor defect will become almost invisible.
Masking major damage
Restoration begins with cutting out a patch, which can be of any geometric shape. But a square or rectangular patch will provide smoother seams.
It should be larger than the hole itself. Apply a patch to the damage. To prevent the part from moving, it can be temporarily glued with tape. Then, using a very sharp knife, cut out a piece of linoleum the size of the patch.
Next, apply the adhesive mass to the cut out part and apply it to the prepared area. We put a load on top, it should last at least a couple of days.
This technique will help you perfectly glue the desired part. The stickers will be almost invisible. To thoroughly study the technique, it is better to first watch a video of such work.
How to remove a dent on linoleum from heavy or sharp objects
One of the most common defects in linoleum during use is dents caused by heavy or sharp objects. If the linoleum structure is not destroyed, then such a dent can be removed.
To remove a dent on linoleum, you will need a regular household hair dryer and a hard lint-free roller.
Heat the dent with a hairdryer and smear it several times. The first time, of course, will not disappear, but will begin to decrease. If you repeat this simple operation 5-6 times, you can completely get rid of the dent if it is not too deep.
As you can see, the result is quite acceptable and without much effort.
Now you know how to fix linoleum to the floor without spending a lot of time on it.
It must be admitted that high-quality linoleum is less susceptible to various defects and damage. For information on how to choose high-quality and not too expensive linoleum, read the article
How to remove waves on linoleum after installation in an accessible way
And so, you laid new linoleum and discovered that your joy was darkened by the fact that waves appeared on it.
Why do waves appear on linoleum?
There may be several reasons.
The first common reason for the appearance of waves is that you purchased linoleum in advance, and it lay with you for quite a long time. In this case, the roll changes shape from cylindrical to elliptical.
Or perhaps you did not roll it tightly with a large roll diameter. Then the roll will sag and take the shape of an ellipse immediately or in a couple of days.
In this case, after laying linoleum, even glued to the floor, transverse waves will appear on the canvas.
It is possible to fight this phenomenon.
They usually do it in one of two ways.
The first method is to take a hair dryer and begin to gradually heat each wave from start to finish, while smoothing it out with a hard roller or spatula.
If you do not have your own hair dryer, then it is hardly worth purchasing one for one-time use. In this case, you need to either borrow a hairdryer from someone, or use a regular iron to repair linoleum.
To do this, you need to take a towel or rag made of natural, not synthetic, fabric, place it at the beginning of the wave and smooth the wave on the linoleum with smooth movements of the iron. In this case, the linoleum should warm up sufficiently, but not “float”.
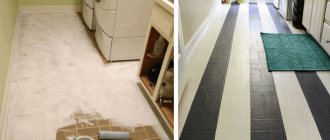
As a result, you will get approximately the same result as in the photo.
If barely noticeable waves still remain, then don’t be upset. The linoleum will sit for some time and the waves will disappear completely.
In another case, waves on the linoleum may appear along the walls. This is possible for two reasons.
The first is when linoleum is laid without a gap near the walls. As a result of heating and expansion, linoleum begins to rest against the wall and form a wave.
In this case, you need to remove the plinth, trim the linoleum correctly so that there is a gap of 5-10 mm from the wall, straighten the linoleum and install the plinth back. In this case, the wave on the linoleum will disappear.
The second reason for the appearance of waves on linoleum along the walls is the installation of the baseboard too tightly. If you pressed the plinth too hard against the linoleum, then when you fasten it, the plinth will turn inside the room and move the linoleum. As a result, a wave will be formed.
The method for removing the defect is obvious. It is necessary to reinstall the baseboards without pressing them too much to the floor.
And the last reason for the appearance of waves may be that you purchased cheap and not very high-quality linoleum that does not have a good backing. In this case, the structure of such linoleum is not stable enough and, as a result, waves appear in different directions of the canvas.
This case is the most difficult and it is not possible to guarantee a good result after repair. Especially if you laid linoleum without sizing. Such linoleum must be glued to the floor. This operation is not very complicated and you should not save on it. You can read in detail about laying linoleum in my article “Do I need to glue linoleum to the floor?”
In this case, you need to remove the baseboards, smooth out the linoleum, let it rest for at least a day, trim it at the walls as required and then glue it to the floor.
Restoration of linoleum with large torn holes
There are two repair methods, the choice of which depends on whether the linoleum is glued to the base.
First way
Used if the canvas is not glued to the base. First, you need to carefully remove the baseboard next to the damaged area and roll up the damaged area of linoleum, then cold weld a new piece of flooring to its base.
In order for the linoleum to flatten, you need to glue tape under the seams of the patch; you need to carefully lay a part of the linoleum on it. This must be done in such a way that the edges of the linoleum are glued to the tape. Next, like the bottom layer of tape, new layers should be applied. Then they are cut along the seam. When all the seams are cut and sealed with masking tape, this two-layer structure must be heated with a hair dryer. And cold welding is poured into the seams themselves. Wait 10 minutes and only then remove the tape. If the work is done correctly, there should be smooth linoleum at the tear site, and the seams remain almost invisible.
Second way
It is used when gluing the canvas to the base. So, before proceeding with restoration, it is necessary to prepare the damaged area for cladding. The area to be restored is cleared of linoleum, glue, debris, dust, and then primed. The spot around the patch and the patch itself are heated with a hair dryer to 40 degrees, after which the glue is applied to a new piece of linoleum (you must use special glue for linoleum) and applied to the cutout area, and then we roll up this area with a roller to level and eliminate bubbles.
Place a flat object, such as a piece of plywood, over the area to be repaired. Apply pressure to it and hold until it is completely dry. If after drying it turns out that the seams are very noticeable, this can be corrected with putty, which is used to repair minor damage to linoleum.
Repair of holes and tears in the canvas
This type of damage is the most serious, and therefore repairs will take longer. If a large hole has formed in the canvas, fix it with a patch.
Step 1. Select a piece of linoleum for the patch. It should perfectly match the color and pattern so that the repaired area does not stand out on the floor. The piece is laid over the hole on the covering and the lines of the pattern are aligned with the main fabric.
Selecting a piece of linoleum for a patch
The piece is laid over the hole
Step 2. The material is fixed with masking tape on all sides to avoid displacement. If the piece is small, it is enough to secure it with tape at the corners.
First fix the corners
Then apply tape around the perimeter
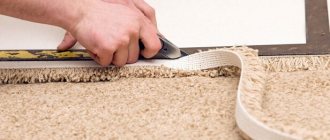
Step 3. Take a knife and very carefully cut both layers of linoleum along the lines of the pattern. It is advisable to cut the patch in the shape of a square or rectangle - this way it is more convenient to attach it and the joints will not be noticeable.
Cut right through linoleum
Step 4. Remove the tape, remove the linoleum scraps, and put the patch aside. Now you need to remove the damaged piece of linoleum: pry it up with a knife and open it from the base over the entire area. The remains of the adhesive layer are also cleaned up so that they do not interfere with the adhesion of the canvas to the base.
Remove the tape, patch and defective piece
Step 5. Next, take the glue and apply it in an even layer to the cleaned surface with a spatula. If the edges of the fabric around the cutout are not glued, you also need to coat the surface under them with glue - this will allow the edges to be secured more securely.
Apply glue
Wait a few minutes
Step 6. After waiting a few minutes, place a patch on the glue and smooth it thoroughly over the entire area so that there are no air bubbles left under the linoleum. Make sure the patch is laid correctly and all lines match.
Glue the patch on
Step 7. The glued piece is rolled with a roller for reliability, and then wiped with a clean damp cloth, removing excess adhesive mixture.
Remove excess glue
Step 8. Apply a thin strip of joint glue along the seams on each side of the patch, and remove the excess. After the glue has set, wipe the joints with a thick cloth or sponge.
Apply joint adhesive
Remove excess with a rag
Advice. During the day, mechanical impacts on the repaired area should be avoided until the glue has completely dried. After this, the coating is ready for full use.
If instead of a hole there is a partially torn flap on the linoleum, you can do without a patch. To do this, first straighten the flap (you can iron it through thick fabric), clean out dirt and dust from underneath it, and then apply a layer of glue to the base. After this, all that remains is to place the flap on the glue, align the edges and press with something heavy for a day.
Do-it-yourself ways to solve basic problems
There are many problems with linoleum, each of which has its own solution.
Went in waves
If a defect appears on the wall, you can suspect a lack of technical clearance during installation. To cope with the problem, it is recommended to remove the baseboard along 3 walls and cut the fabric. It should lie down for several hours - it all depends on the thickness of the material and temperature conditions. When the linoleum has straightened out, the skirting boards can be put back.
If a bubble appears in the center of the room, you should carefully make double-sided cuts along the bulge. Then it is recommended to release the air and seal it with tape. This prevents any adhesive residue from getting onto adjacent areas.
Glue is injected into the holes with a syringe and the edges of the coating are joined. Then tape is glued and a load is applied. Stretching of the lining sometimes leads to swelling. In such a situation, it is recommended to cut the canvas and remove excess. You need to repair linoleum in the same way as in other situations.
Joining seams
When fixing linoleum in large rooms and on thresholds, it is fixed using the cold welding method. There is a risk of seams coming apart during use. Anyone can glue such a coating on their own. It is recommended to stretch the canvas with an overlap of 5 millimeters. You should make a cut in the center of the cone and grab 2 edges. The procedure must be carried out using a plank. Then remove any excess trim and degrease the edges. Adjacent areas are cleaned with tape.
For work, it is recommended to use glue for PVC type C. To do this, you should process the edges, glue them and leave them under load. After the glue has hardened, its excess must be carefully trimmed with a knife, the glue removed and the welded area waxed.
Elimination of burns
The patch will help cope with such a breakdown. To do this, it is recommended to cut out the damaged area in the lining. It is better to give the hole the correct shape: round, square or rectangular. If after repairing the linoleum there is scrap left, this is considered an ideal option. Otherwise, you should choose a case of a suitable texture and color.
It is recommended to cut a patch from it that is the same size as the hole. You should try this. It is important that the model and size match. It is recommended to seal the edges of the hole with tape. Clear the floor of debris and prime with primer. Apply glue to the patch and stick it into the hole. To do this, you can use PVC or PVA glue. Oppression is placed at the repair site for 2 days.
Sealing torn holes
If the linoleum is torn, it can be fixed with a patch. It is also permissible to glue the torn surface back in place if the damage has smooth edges.
Modern substances help eliminate even large holes that occur during use.
Types of polymer putties
There are three types of polymer-based putties: acrylic, polymer-cement and latex.
Type 1. Acrylic material
Acrylic coating can be either initial or final.
Acrylic-based putty is the most versatile. There are three types of it.
- Start lighting. Used to smooth out unevenness, pits, and cracks.
- Polymer finishing putty. It is used to bring walls, ceilings and floors to perfect evenness for their subsequent finishing.
Using universal finishes as a starting point.
- Universal coverage. It combines the qualities of the original and finishing materials.
| Characteristic | Quantity |
| Mixture density | 1.40-1.8 kg/l |
| Layer thickness | 1-3 mm |
| Consumption at 1 mm thickness | 0.5–1.25 kg/m² |
| Dry residue | 70% |
| Temperature | + 10 / + 25 ° C |
| Drying period for sanding | 6 hours |
| Finish drying time | 24 hours |
| Toxicity | No |
Type 2. Polymer-cement composition
Cement composition reinforced with polymers.
Polymer cement mortar is used as a preparatory and leveling material for brick, concrete and plastered bases. The binder here is Portland cement, reinforced with polymer additives.
The photo shows work with polymer cement mortar - it can be applied in layers up to 2 cm.
This polymer-based putty is elastic and can be applied in layers up to 20 mm thick. This is the main advantage of polymer cement mortar. Thanks to this, it can be used for the initial leveling of bases.
| Characteristic | I mean |
| Mixture density | 1.45-1.9 kg/l 2 |
| Layer thickness | 2-20 mm |
| Membership | 3 MPa |
| Consumption at 1 mm thickness | 1.65–1.85 kg/m² |
| Frost resistance | 50 cycles ≥0.08 |
| Vapor permeability | 0.08 mg/(m ∙ h ∙ mPa) |
| Compressive strength | 9 MPa |
| Bending strength | 2 MPa |
| Toxicity | No |
Type 3. Latex putty
The latex mixture is durable and moisture resistant.
The mastic is made on the basis of acrylate (styrene) latex. Polymer finishing putty is used to apply the final layer of shaving.
The scope of its use is very wide. Latex putty can be used on wood, concrete, brick, drywall, etc.
| Characteristic | Quantity |
| Mixture density | 1.45-1.75 kg/liter |
| Layer thickness | 0.5-4 mm |
| Filling in uneven areas | up to 1 mm |
| Consumption at 1 mm thickness | 0.7-2.1 kg/m² |
| Drying time of the first layer | 3 hours |
| Maturation period of the second layer | 12 hours |
| Finish drying time | 24 hours |
| Toxicity | No |
You need to prepare the dry material in the bag yourself.
Putties with polymers are available in two forms:
Ready to use coating.
- a ready-made solution that does not need to be prepared by hand.
Plywood sheets are an excellent material for creating smooth floors
If the wooden floor in your home has noticeable unevenness or slope, the considered methods for leveling it will be ineffective. In such situations, it is better to use 10-mm thick sheets of plywood marked FK (for residential rooms) and FSF (for non-residential ones). For DIY work, polished products are more suitable (they do not need additional processing). But you can also use plywood without sanding. You will also need universal self-tapping screws or screws, a jigsaw, a building level, and a screwdriver.
Leveling the floor with plywood sheets
- Screw the screws into the floor base so that they are at the same height in relation to a flat plane. The distance between individual hardware is taken at 0.25 m.
- Cut sheets of plywood into squares of 0.6 x 0.6 m. Check the resulting blanks for delamination, chips, and clearly visible cracks. If there are any, the sheet must be discarded. Be sure to apply a high-quality antiseptic solution to the plywood.
- Make 4-cm wide support beams from plywood sheets. Fix them to the floor base using self-tapping screws (it is allowed to fix the supports with glue). The gap that may remain between the homemade beams and the floor must be filled with scraps (of suitable thickness) of plywood products. And in the space between the individual supports you install the heat-insulating material you have at hand.
- Install sheets of plywood - with an offset and indentation of 3.5–4 cm. In this case, the load on the leveling coating will be uniform over its entire area. Attach plywood products to the supports with self-tapping screws; the resulting gaps between the individual sheets should be treated with putty. It is recommended to screw self-tapping screws into pre-installed dowels (a hole should be drilled for them in advance).
After installing the plywood, the floor base will become truly flat. Additionally, it is recommended to sand it and varnish it. You can also put a heat-saving and sound-proof underlay on plywood sheets before laying linoleum. Leveling floors with plywood is an objectively labor-intensive process. But it’s possible to do it yourself with minimal costs for materials. Plywood sheets are inexpensive and are available at any hardware store.
Tools for repairing linoleum
To restore torn linoleum you will need the following set of tools and materials:
- Remaining fragments of flooring after laying on the floor. If they are not available, you will have to choose a material in the store that is suitable in color and structure. In specialized retail outlets there are small rolls - leftover food.
- A tool with a well-sharpened cutting element, a construction knife, or a cutter will do. In addition, the blade must be stiff enough, otherwise it will not be possible to cut the laminated material.
- To indicate a right angle - a metal or wooden square (structure).
- Adhesive composition in the form of bitumen mastic, mastic, liquid nails.
- Rubber spatula.
- Roller for painting work.
- Glue syringe.
- Construction of a hair dryer for floor insulation.
- A small piece of plywood or suitable material to level the surface.
- A heavy object for better gluing of torn linoleum (oppression).
How to repair torn linoleum
In order for repairing linoleum with a hole with your own hands to have a positive result, the damage remaining almost unnoticeable, it is necessary to select the appropriate approach to each type of defect. Depending on the type of damage, certain means and recovery technologies are used.
How to repair a small hole in linoleum
To glue torn linoleum at home, if the size of the spot does not exceed 1 square. See, then you need to use an adhesive mixture. Suitable for removing minor mechanical damage:
- Sealants designed for use on wooden surfaces. They can remove blemishes and minor scratches.
- Mastics. There is a huge range of shades on the market, so choosing the most similar option for a specific coating will not be difficult.
- Cold welding based on polyvinyl chloride. It can be safely used to remove tears up to 2mm thick.
- Nial Polish. Used as a finishing layer.
The algorithm for restoration work on linoleum involves the following actions:
- Clean the damaged area from debris and dust.
- Choose a color shade that is similar to the material. Add to repair composition and mix thoroughly until desired shade is achieved.
- We fill the damage on the linoleum with this mass, leveling and removing excess.
To seal small defects on the floor, a homemade mixture prepared according to the following scheme works effectively:
- Powdered rosin in an amount of 0.5 kg must first be dissolved in a porcelain container with steam.
- Then cool to 50 degrees and combine with alcohol (150 g) and castor oil (100 g).
- Add the appropriate pigment following the manufacturer's instructions. The shade should be as close as possible to the specific type of linoleum.
One thing to keep in mind when using this mixture is that once it dries completely, the color will become a little paler. If possible, try it on a similar medium before applying to the damaged area.
How to fix a hole in linoleum with a patch
If the linoleum is torn, it can be fixed with plaster. Pasted over the entire area or just around the perimeter.
The technology for carrying out repair work includes:
- Clean the surface of the coating from dirt and dust particles. Take a piece of linoleum cut to the size of the damaged area and lay it so that the pattern lines match.
- Secure the lid with adhesive tape.
- Set the patch aside and remove the damaged cut piece.
- Again, glue the patch to the repair area, making sure the seams are tight and compatible with the main pattern. Then apply the putty to the base using a fine-toothed trowel.
- Place the patch on the treated area and smooth it with your hands, pressing well to the edges. For the best effect, use a roller to roll it out in all directions.
- We fill the seams with cold welding.
Correction of minor defects
A small cut or crack must be repaired immediately after detection, otherwise dirt and dust will become clogged with it, which will lead to protruding edges and an enlargement of the hole.
Subtle defects on linoleum can be repaired using the following means.
- Mastic. It comes in paste or pencil form and in different colors.
- Cold welding. Any defects of any complexity are quickly eliminated. Dissolves the top layer of linoleum, after drying the damaged area will be invisible.
- Sealant. Wood sealant is used for PVC sheets.
Scuffs on linoleum can be easily corrected with special wax. Wax is rubbed into a small defect using the edge of any coin, and then the area is rubbed with a soft cloth until it has a glossy shine. Mastic or polish is suitable for covering up abrasions. Before repair work, the coating is cleared of debris and dirt, dried, and the desired area is degreased.
Cold welding is used to repair small through holes. It reliably seals holes with a diameter of no more than 0.3-0.4 cm. Masking tape is applied around the damage so that welding does not damage the rest of the coating. The glue is applied with a thin spout to the hole. Its edges melt, and the hole itself closes, becoming invisible. After the welding has dried, the tape is peeled off, and its excess is removed with a knife. Due to high toxicity, they work in a respirator and gloves, in a room with good ventilation.
Minor damage can be repaired with a homemade composition:
- 0.5 kg of powdered colophon resin is melted in a water bath;
- the mass is cooled to 50 °C;
- the composition contains 0.15 liters of alcohol, 0.1 kg of castor oil;
- the mixture is tinted with dye;
- the resulting glue is injected into the hole with a syringe without a needle;
- The area can only be loaded after the glue has hardened.
Repairing slits and unraveling seams
If, as a result of a cut, a hole has formed in the coating, that is, it has smooth edges, it will not be difficult to get rid of it without a trace. The same applies to loose seams between the canvases.
The seam of the canvases has come off
To work you will need double-sided tape, a roller and a primer.
Step 1. The edges of the canvas are slightly turned to the sides and accumulated dust and debris are removed.
Step 2. The rough base is primed and dried.
Step 3. Double-sided tape is placed in the gap and fixed to the base along the seam.
Gluing double-sided tape
Step 4. Remove the protective covering and press the edges of the linoleum, then smooth with a roller.
If the edges of the linoleum do not fit tightly and a gap of 1-2 mm remains, then the seam must be additionally treated with type A cold welding. After this, it is almost impossible to find a gap, and the coating will last more than a year.
Video - How to repair a dent in linoleum
Which glue to choose
Hot or cold welding can be used to repair many types of damage. But the hot type requires skills to work with it and a heat gun, which is expensive. It is optimal to use cold welding. For the old coating it is better to choose cold welding type-C, for the new type-A. Mastic will glue the material tightly, so it is usually used for minor defects.
Hot or cold welding can be used to repair many types of damage.
If the linoleum is torn, how to seal it unnoticed was described in the article. In this process, accuracy and slowness are important. And then it will be possible to do without replacing the entire linoleum.
Repair of the burnt area
The complexity of the restoration process is determined by the depth of the fire. Most often the first layer burns out, sometimes the second one suffers. Less commonly, the flame completely or significantly destroys the foundation. Each of these defects can be eliminated:
- If a hole has formed on the burned area, apply a band-aid.
- cold welding restoration is suitable for a fire-resistant decorative layer (pattern) and a PVC base. Once installed, glue the remaining piece of linoleum onto the area (otherwise, cut a piece from a point under the baseboard). Scrape off the crumbs, add glue and mix. Fill the hole with this composition, remove excess;
- to restore the burnt top layer (it looks like a transparent film), you need to clean the burnt edges, shade the edge of the defect (you can use a coin, placing it on the edge), then apply putty and a layer of manicure varnish;
Detailed instructions for installing the patch:
- Take a piece with an identical pattern. Remove the first two layers so that they are slightly wider than the damaged area.
- Clean and degrease the edges, remove dust from the surface to be repaired (with a vacuum cleaner).
- Lift the lid and glue the edge of the burnt area to the base.
- Apply cold welding adhesive to the patch, insert into the hole and press. Place a heavy weight on this place.
Large torn areas are repaired in a similar manner. A smooth edge can be used to join a joint, with torn edges a patch can be installed. Save the used waste in case of future damage to the linoleum.
- Through hole. It can be removed with a special plaster or glue. Attached to the hole by cold welding.
- Fired model and PVC layer. Glasses with darkened edges and white or yellow centers are cold sealed. For new linoleum, type A glue is used, the old coating is repaired with type C. It is enough to lubricate the burn and wait for it to melt.
- The top protective layer was burnt. The stain is removed from dirt and burnt particles. Putty is applied to the defect on the side surface of the coin and carefully polished.
Using Cold Welding
Cold welding
Cold welding is an adhesive composition with high plastic properties. There are several varieties of this glue. Let's look at them in more detail:
- Type T
- Type C;
- Enter;
The first version of the glue has a fairly liquid consistency. This is due to the fact that it contains a high percentage of solvent. This glue is used to join the sheets when laying a new coating. With its help you can eliminate a gap whose width does not exceed 2 mm. Type T is a professional adhesive that is also used to join seams.
Important! Type C is the most effective. This composition has a thick consistency and is used to seal small holes, scratches and other minor defects. The surface repaired with this glue is as beautiful as new.
Let's consider the process of restoring linoleum using the cold welding method. The first thing you need to do when fixing linoleum with glue is to add the necessary pigment to the composition. If you don’t have pigment on hand, you can use the part of the coating that remains after it was laid. Colored shavings are scraped off the surface of the linoleum and added to the repair composition. Next, you need to thoroughly mix the glue and apply it to the damaged area. A spatula is also used for this.
Repair tools and materials
The main tool when working with linoleum is a knife. It should be durable, very sharp, with a comfortable handle. Although linoleum is a fairly thin and flexible material, cutting it will require some effort, and you won’t be able to cut it quickly and accurately with a dull knife. Now on sale there are special knives for linoleum, which are very convenient to work with.
| Type of knife | Description |
Utility knife | This knife is intended for cutting fabric in a straight line. With its help, it is easy to trim frayed edges and cut out patches of the correct shape for large holes. Replaceable blades are highly durable; they do not bend or break. A special screw holds the blade tightly, preventing it from moving. This knife is perfect for multi-layered fabric and gives an absolutely even cut. |
Retractable reinforced knife | The knife is equipped with a strong blade that does not bend and a durable ergonomic handle. The tool easily cuts thick multi-layer linoleum, not only straight, but also at an angle. Well suited for cutting blades in hard-to-reach places, for example, under a heating radiator and around the outlet of communication pipes |
Disc knife | A very practical tool with a sharp round blade. Allows you to cut the blade straight and along curved markings. It is convenient to use when making patches of irregular shape, trimming coatings at thresholds, communication outlets, around protrusions and niches |
Month-shaped knife | The curved blade allows you to carefully remove dried glue from the surface, correct cuts, and remove burrs on the edges of the canvas. With the help of such a knife it is convenient to repair minor damage and smooth out loose seams on old linoleum |
In addition to the knife you will also need:
- spatula for applying glue;
- metal ruler or rod;
- marker;
- roller
To seal large holes, you will need patches made of linoleum of the same type that is laid on the floor. This is why it is recommended to purchase a new covering with a reserve: the cuttings of the canvas do not take up much space, and in case of damage they will help to patch holes unnoticed. It is difficult to find exactly the same material separately: the range of linoleum is constantly changing, and even if a similar pattern was found, the samples may not match in color.
You will need pieces of linoleum from which you can make patches
To fix patches and join separated panels, you will need tape (double-sided and regular masking tape) and glue.
Fabric-based double-sided tape
For such coatings there are special adhesives - water-dispersion, acrylic-based, two-component epoxy resin, as well as “cold welding” adhesives.
| Glue name | Purpose |
Bustilat Universal | Used for PVC linoleum on fabric and felt base. Suitable for gluing sheets to wood and concrete floors, plywood and other absorbent substrates |
PVA glue for linoleum | Used for PVC linoleum with or without a base, suitable for any absorbent base: plank floor, screed, chipboard or fiberboard |
Homakoll 208 | The composition is specially created for PVC coatings on various types of substrates - fabric, pile, foam. Suitable for absorbent substrates: concrete screed and fiberboard, wooden floors, plywood, fiberboard |
| ADESILEX G19 | This is a polyurethane reaction composition, which is intended for attaching PVC coatings to absorbent and non-absorbent substrates. Suitable for rooms with high humidity |
Cold welding Homakol | A transparent composition used for hermetically sealing PVC coating sheets. Can be used to seal minor damage to linoleum - punctures, small cuts with smooth edges |
To eliminate minor scratches, burns and punctures, use mastic or polymer putty. To ensure that the repair composition matches the color of the coating, fine crumbs scraped from a piece of linoleum are added to it. Special repair kits are also produced, consisting of mastic, solvent and colored pigment. Using these products, you can carefully repair small defects in linoleum so that no traces of damage remain.
Prices for Bustilat glue
Bustilat glue
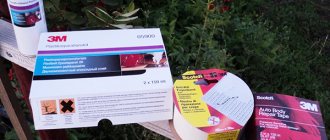
Repair kit
Restoration of small holes
Thanks to the availability of a large number of modern means, repairing minor breakdowns will not be difficult. These defects can be corrected using:
- Homemade sticker.
- PVC glue;
- Mastics;
- Sealant;
Before repair, the defect site is cleaned of dust and dirt. It is then filled with one of the funds.
Elimination of abrasions
Serious damage to the road surface
Putty is used to remove scratches, cuts and abrasions. If it is not possible to buy a ready-made mixture, you can prepare it yourself. It is prepared from rosin, turpentine and dry pigment. First you need to mix 4 parts of turpentine and one part of rosin, then add a dye of a certain shade. The resulting mixture is applied to the site of the coating defect. After the mass hardens, it is cleared of excess. The floor is polished and smoothed using putty after repairs.