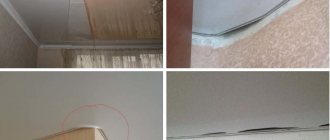
In any collision, be it an accident or bad parking, the bumper takes the blow. Gluing is used as one of the options for repairing cracks and holes. Glue for a car bumper requires a special, mechanically stable one. It should have good and fast adhesion, not spread when applied, fill and restore large damaged areas.
Top 7 adhesives for car bumper repair
Bonding is an alternative way to repair bumpers. Considering that the bumper has a protective function, it is important to restore it in such a way that it does not crack on the first bump and retains its ability to withstand impacts.
What kind of glue can be used to seal it:
- 3M 05900. Professional repair composition for automotive plastic parts (PP, PP/EPDM, PE, ABS, PC). It is a two-component mixture. After hardening, it corresponds to automotive plastic, remains plastic, and is easy to sand. A set of 2 tubes of 150 ml costs 4,500 rubles. and more.
- 3M Automix 55045. Glue for quick car restoration. Its composition is specially developed for simple and durable repairs of bumpers and other parts. The two-component mixture quickly hardens, becoming one with the plastic (suitable for all types). After hardening, the area can be drilled, sanded, or trimmed. Approximate price – 2500 rubles. for 50 ml.
- TEROSON Terokal-9225. Two-component polyurethane-based adhesive. Used for repairing car bumpers and other parts made of polymers (PP/EPDM, SMC, PC, PA, ABS, PUR). The composition quickly polymerizes, can be coated with varnishes, and can be sandblasted. At room temperature, after 5 hours, 85% hardening is observed. A glue gun is required for application. The approximate cost of 50 ml of glue is 1400 rubles.
- JetaPro 5594. Elastic two-component adhesive for repairing plastic body parts. Sets in 1 minute, completely hardens after 2 hours. The composition is well suited for repairing through damage, as well as for fixing car elements. Resistant to mechanical stress, aging, can be drilled and sanded. Glue color is black. Cost 50 ml – 450 rubles.
- Mannol SCT 9918 2K-PUR. Two-component polyurethane adhesive. It is used for structural as well as cosmetic repairs of plastic products. It retains elasticity for a long time, is resistant to aging, moisture, and does not settle. Complete hardening for mechanical processing occurs in 20–30 minutes. Approximate cost – 250 rubles. for a volume of 30 ml.
- Mannol 9904 Epoxi-Plastic. Two-component adhesive (epoxy-based polymer resin) is designed for ultra-strong and quick gluing of plastic parts: bumpers, spoilers, headlights. At room temperature, the mixture hardens in 5 minutes. Complete hardening occurs after 2 hours. The composition is suitable for cosmetic repairs (transparent, matte). Price per tube (30 g) – 240 rubles.
- Novol PLUS 710. Repair kit consisting of polyester resin, hardener and glass material. The fiberglass obtained from it has good strength, fills large holes, strengthens and fixes plastic and metal parts. After hardening, the surface can be sanded and coated with any polyester putty. The approximate cost of the set (250 g) is 370 rubles.
3M glue, as well as some other types of glue, require the use of an adhesion activator (primer). You will also need a special glue gun for application.
Rules for choosing an adhesive composition
It is necessary to begin repairs by choosing an adhesive composition, which, after hardening, should:
- form an integral structure with the bumper;
- do not burst in the cold;
- do not peel off under high temperatures;
- be resistant to the ingress of aggressive reagents, gasoline, oil.
To glue a plastic bumper on a car with your own hands, use the following compounds:
- Weicon Construction. The glue has high elasticity and strength. After hardening it does not crack. To strengthen the structure when repairing large cracks and faults, it is used with fiberglass.
- AKFIX. Spot bonding adhesive. Suitable if the crack or through dent is no more than 3 cm. When using, primer does not need to be applied.
- Power Plast. Firmly seals large cracks. The composition is resistant to aggressive reagents and water. One-component adhesive is toxic; it is necessary to work with gloves and a respirator.
Thermoplastic and thermoactive adhesives are used if the bumper will be painted immediately after repair, in which case the composition will fix the crack as reliably as possible.
How to properly seal the bumper?
The technique for gluing the bumper may vary depending on the adhesive composition chosen. As a rule, these changes are minor and are reflected in the instructions.
To glue a car bumper, you need:
- Wash the part thoroughly and, if necessary, level the surface.
- Degrease the damaged surface on both sides. Wait until dry.
- Clean the edges of the crack, creating a recess for the glue. Then grind an area within a radius of 5–7 cm around the perimeter of the crack (breakdown). Clean both sides.
- Remove dust and degrease the surface again.
- Apply film to the front side of the bumper. It will prevent the composition from leaking.
- Fill the crack with glue from the inside, spread it with a spatula and put a reinforcing mesh on top. The edges of the hole must be overlapped by at least 5 cm.
- Apply adhesive to the mesh.
- After 5 minutes, remove the film from the front side. Fill the crack with glue and spread it in a layer around the perimeter 5 cm from the damage site.
- After 20–30 minutes, sand the surface.
- Carry out further repairs.
How to seal a plastic bumper tightly is shown in the video:
Bonding technology
Repair consists of several mandatory steps that cannot be skipped or swapped.
- Removing the bumper. If the plastic cover is cracked in several places, before removing it, you need to secure it with tape from the outside (so that the part does not fall apart).
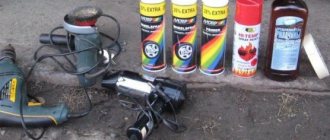
- Preparatory work includes choosing an adhesive composition, selecting tools, cleaning the bumper, and preparing the surface. All work is carried out in a warm, well-ventilated area.
- Gluing process.
- Grinding.
- Painting.
Glued bumper
If it is necessary to repair a small crack, chip or deep scratch, after preparing the bumper, glue is applied from the outside, filling the gap with the composition, and lightly pressing the plastic. If the crack is significant and crosses the edge of the lining, use epoxy glue and fiberglass.
Preparation
Preparing the bumper before gluing it with epoxy glue and fiberglass in steps (if there is a significant crack):
- Wash the bumper and dry it.
- Sand the damaged area with coarse sandpaper, this will increase adhesion, and degrease with white spirit.
- Correct the fracture site.
Coat all cracks on the outside with hot glue (use a gun) or plasticine. This will prevent the epoxy from leaking out during drying and seal the future seam. Seal the outside with tape over hot glue. This will additionally maintain the shape of the bumper during the repair process.
Materials and tools
If there is a large gap, the bumper on the car must be sealed with two-part epoxy glue, which is diluted before the main work. The assorted two-component compounds “Khimkontakt-Epoxy” and the one-component “Nowax STEEL EPOXY ADHESIVE (steel 30 g)” earned good reviews from drivers.
What you will need for work:
- epoxy - 300 g;
- fiberglass - 2 m;
- brush;
- automotive primer, degreaser, auto enamel;
- sandpaper, scissors.
All work is carried out at a temperature of 18-20 degrees. The epoxy glue hardens for up to 36 hours; during this time, the bumper cannot be turned over and the adhesion strength must be checked. If the adhesion of materials is disrupted, in winter the inside of the glued patch may crack.
Repair process
Measure the required amount of fiberglass to cover the entire fracture area and cut it off. Craftsmen recommend using fiberglass rather than fiberglass to glue the bumper to the car. The material will increase the density of the seam and its strength.
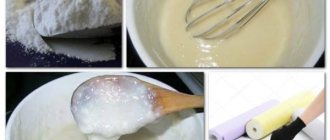
Dilute epoxy glue if using a two-component composition. Take 10-12 parts of resin, 1 part of hardener, mix thoroughly. Leave for 5 minutes in a warm place (20-23 degrees).
Repair process step by step:
- Coat the inside of the body kit generously with glue.
- Apply fiberglass fabric, press it to the bumper, soak it with glue, make sure that no air remains.
- Apply glue and glue the fabric in 2-3 layers.
- Apply the last layer of glue.
- Place the bumper in a warm place for 24 hours, preferably in such a way as to reduce the stress on the crack, but not on its side, since the resin will drain as it hardens.
Bumper painting after repair
The final stage is putty and painting. After the glue has dried on the outside of the bumper, the bumper is sanded and primer is applied, and after drying it is painted.
Questions and answers
How reliable is bumper repair using the gluing method?
Soldering plastic parts is considered the most reliable type of repair. However, this is not always possible. A bumper made of thermosetting plastic does not burn together, as it does not melt, but darkens and crumbles. The cracks on it are glued together. If you use professional glue and follow the technology, the reliability will be high.
What is the best bumper adhesive?
Among auto repairmen, 3M adhesives are the most popular. With their help, you can glue holes, as well as recreate missing fragments. The only negative is the high cost and the need to purchase an activator and a glue gun. At home, adhesive compositions of the middle price segment are more often used - JetaPro and Mannol.
So, the most reliable way to fix cracks on a bumper is soldering. However, it is impossible to produce it yourself: you will need expensive equipment. In addition, some types of plastic do not melt at all. At home, gluing a plastic bumper is most often used. Special two-component adhesives or a set of polyester resin and glass mat will help to seal the crack efficiently and reliably. Prices for material start from 240 rubles. and ends with 4500 rubles. If the application technology is followed, all of the listed types do an excellent job.
How to restore the shine and uniformity of paintwork at the site of a crack
Sanding and priming are the last stage of work before painting. The difficulty of local painting is that it is almost impossible to choose the original color. Even if you choose auto enamel of the original marking, class and type, the color will still not match. The reason is simple - the paintwork color of the body kit changed during use.
Completely painting the bumper is the easiest way to update the part. After painting, the part is polished with soft circles and a colorless acrylic varnish is applied, which preserves the gloss of the paintwork for a long time and evens out the discrepancy in tone if it was not possible to choose the original shade.
How to glue a damaged bumper
Naturally, the quality of the fastener directly depends on the composition of the selected brand of glue for the job. To eliminate damage to plastic surfaces, the building materials market offers a sufficient selection of specialized glue for car repairs, namely for the bumper. As an example:
- glue moment;
- AKFIX;
- Weicon;
- Power Plast.
Types of adhesives: “Moment” and “88” (click to enlarge)
They are versatile and suitable for gluing any type of plastic, and after hardening they transform into a full-fledged monolithic layer. After the preparation, for hot drying of the glued part, it is worth using special types of hot-melt adhesive, so as not to provoke further deterioration of the condition of the seam, or its re-breakage. Also, thermoplastic adhesives are used on the condition that the bumper is to be painted in the future, so it is reasonable to carry out repairs and painting at the same time.
To check the adhesive ability of the mixture individually for a given item, you must first check it and conduct a test gluing.
