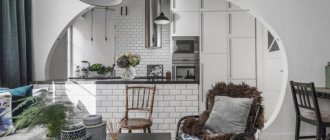
Various arched structures have continued to be the most trendy direction in interior design for decades. Thanks to these architectural elements, you can not only add a touch of sophistication and uniqueness to any interior, but also visually increase the area of the room, combine several rooms or, conversely, divide the common space into zones.
Arches are relevant in almost any interior design
There is an unlimited number of shapes, designs and finishing options for arched openings, and one of the most popular solutions is interior arches made of MDF, which are an excellent alternative to products made from natural wood, not inferior to them in their decorative and performance qualities.[contents]
Where is the best place to install arches?
The arch makes the room brighter. This is due to the lack of doors, which even in the open position take up space. If the rooms between which there is a passage are dark, the arch is made with lighting from spotlights or LED strip.
The passage in a designer style is designed by:
- Between the corridor and the living room. The arch has standard doorway dimensions or is wide - decorated in a style that emphasizes the interior of the room.
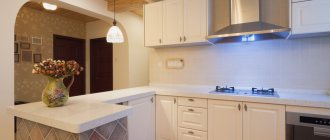
- Between the hallway or living room and the kitchen. The structure is mounted with lighting, which acts as additional lighting in the evening.
- Arch in a studio apartment. The room where all the functional spaces are located is separated from the kitchen by a bar counter and an arched passage.
- Private country house. Here arched passages are placed not only from the living room to the kitchen, but also between rooms.
- Decorative arch. Installed to highlight the design. This is a niche designed in an arched shape, a small delimitation of space into zones in one room. They also install semi-arches, which, on one side, have a vertical column, and at the top are connected to the ceiling into a single sheet.
Attention! Arched openings are not made between the living room and the recreation room, as well as into the children's room.
Do-it-yourself MDF arch - transforming the room
Various arched structures have continued to be the most trendy direction in interior design for decades. Thanks to these architectural elements, you can not only add a touch of sophistication and uniqueness to any interior, but also visually increase the area of the room, combine several rooms or, conversely, divide the common space into zones.
Arches are relevant in almost any interior design
There is an unlimited number of shapes, designs and finishing options for arched openings, and one of the most popular solutions is interior arches made of MDF, which are an excellent alternative to products made from natural wood, not inferior to them in their decorative and performance qualities.[contents]
- Arched MDF structures: beautiful, fast, profitable
- Options for decorative finishing of MDF arches
- Features of typical arches
- How to solve the corner problem?
- Installation of an arched structure
- Preparatory work
- Installation of the vault
- Installation of columns
How to make an arch with your own hands - practical instructions
The most common and easily processed material today is plasterboard, and it is from this that we will construct the arched structure. It is most convenient to do this in the gap between two walls, where the opening is completely absent, that is, the entire clearance from floor to ceiling is available. As a last resort, before making an arch in the wall with your own hands, in a house or apartment you can hollow out the wall above the opening, at the same time expanding it as much as possible. The thing is that we need space for mounting aluminum profiles. Having determined the scope of work, we make an arch with our own hands in order to improve the passage between the rooms.
Installation of an arched structure
To install the arch, you need to prepare the following materials and tools:
- hacksaw with fine teeth;
- building level;
- roulette;
- 4 clamps;
- carpenter's hammer (mallet);
- PVA glue;
- polyurethane foam.
Preparatory work
First of all, it is necessary to dismantle the old door frame (if present), then we assess the condition of the walls and opening.
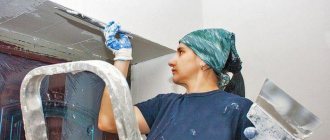
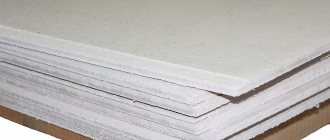
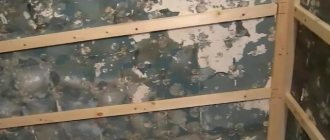
In order for the finished arched structure to look solid and aesthetically pleasing, the opening must have the same thickness and the walls must be smooth and without flaws. If there are minor defects, they must be eliminated using plaster, but serious irregularities and inconsistencies can most easily be corrected by installing plasterboard sheets.
In this case, the unevenness of the wall was leveled with plasterboard.
These measures will help to avoid unsightly gaps in the places where the platbands adjoin the wall surface.
Installation of the vault
- Do-it-yourself arch installation begins with fitting and gluing the arch. The panel sheet must be sawed down in accordance with the dimensions of the opening. If upper decorative locks are provided, another 7 mm is added to the sheet size - this is how much it should protrude beyond the ends of the arcs.
- The arched arch is placed face down on the floor (it is recommended to first lay a soft cloth to avoid damage). The arc groove is coated with PVA glue and one side of the arch panel is inserted into it, lightly tapping it with a mallet. A similar procedure is carried out on the other side and the structure is left for some time for the glue to dry.
- The required amount of mounting foam is applied to the inside of the assembled arched vault for better fixation in the opening and installed in place. To ensure a perfect fit, the structure is crimped with clamps.
Installation of columns
- The columns consist of panels, platbands and decorative locks. According to the dimensions, the platbands and panels are cut in length and width.
- The column panels are installed in place, checking the correct location with a level, and carefully foamed along the edges.
- Glue is applied to the grooves of the platbands and inserted into the panels.
- Having installed both columns, install the lower decorative locks.
- Clamps are removed from the arch and the column elements are secured with them.
This completes the installation of the arched structure. The time for complete drying of foam and glue is on average one day.
In addition, we suggest that you familiarize yourself with the video instructions on the technique of installing an MDF arch:
Types of arches
The arched opening is designed taking into account the interior of the room, and is also guided by the height and width of the doorway. There are many stylistic solutions, such as modern, that highlight the types of arched openings. They come in different finishes and sizes.
When choosing an arched structure, you need to take into account the height of the ceiling, the width of the opening, and the construction of the room. Sometimes, removing the doorway weakens the emphasis on the ceiling, so you need to install an additional column.
Arch made of PVC and MDF
The main types of arches made of MDF and fiberboard are:
- veneered arches;
- laminated arches - panel.
The MDF board used as a base is easy to process - it allows you to assemble arches with various types of milled patterns.
PVC arches are used because they can be made according to a given template in any shade. The advantage is affordable prices. The door arch is installed using liquid nails or polyurethane foam.
Wooden arch
The characteristics of wood make it possible to create carved ornaments on it. Such arches reflect the wealth and status of the owners of the house. LEDs can be installed in wooden structures.
Brick arch
Installing interior brick arches is a complex process that requires special skills. The structure is made during construction. During major renovations, this installation method is not used due to the complexity and time required. To install the structure, craftsmen use their skills and certain tools.
Plasterboard arch
To create an arched structure from gypsum plasterboard, you need sheets with a thickness of 9.5 or 6.5 mm. Before fastening the curved, cut sheets, a frame lathing made of metal profiles is installed. Drywall used is moisture-resistant - green, regular - gray.
Arched MDF structures: beautiful, fast, profitable
MDF arches have, indeed, rightfully received universal recognition, because... These designs have a lot of advantages compared to other types of opening openings. These include:
- aesthetic appeal;
- variety of configurations, colors and textures;
Just a few of the most common types of arches - affordable price;
- simplicity and speed of installation (do-it-yourself installation is quite possible);
- design versatility;
- the ability to select standard models and order non-standard options;
- environmental friendliness and high wear resistance.
Selection of materials
After determining the type of opening, you need to select the appropriate material. At the same time, it is worth taking into account the decoration of the walls of adjacent rooms. The most common options:
- Drywall . Available option for self-installation. Resistant to steam, moisture and sunlight. The sheets bend perfectly, due to which you can give them the most simple shape using liquid. A completely dry product maintains its desired shape. Installed on a previously assembled galvanized profile frame. The joint is puttied and primed, after which the finishing can be applied.
- Natural wood . Ready-made options are not distinguished by their pretentious design and richness of colors; their maximum is relief carving on the surface. However, a wooden arch can be made on your own. At the same time, it can be done in the desired form, having previously decided on the decorative finish.
- Brick . Creates a feeling of massiveness, in no way inferior to the previous version. It can be erected at the time of installation of the internal partition or load-bearing wall.
- Chipboard and fibreboard . Budget materials that become a good option for an arch in an apartment. The raw materials are flexible, bend well, undergo manual correction of the form factor and do not lose their attractiveness after several years of use.
Drywall
The most popular option is the construction of an interior plasterboard arch. It can be created either as an independent element or as part of a complex composition inside a plasterboard partition. This material allows you to create any design, and therefore there is no need to limit yourself to standard options. Not only asymmetrical vaults are available here, but also their smooth transition into another wall design element.
Drywall bends easily, so it can be given any shape. To do this, you need to moisten the material and make cuts on one side along the cardboard.
Installation of plasterboard arches is carried out using an aluminum frame made of different types of profiles. This includes guides and posts, as well as various connectors and adapters. For curved arched vaults, a special profile is used or its alternative is a self-cut post.
Stages of installation of a simple arched plasterboard structure
In order to install a plasterboard arch with your own hands, you need to secure the guide profiles in the opening and screw the rack elements to them with self-tapping screws. Sheets of plasterboard of the appropriate shape and size are screwed onto self-tapping screws on top of the frame. The inner part of the arch in the opening is formed from a bent thin sheet of plasterboard. Next, all joints are puttied and the interior partition is finished, including the opening.
Additionally, you can frame the arch opening with platbands if we are talking about a standard form. Otherwise, you can supplement the structure with lighting, and all the wires can be hidden inside the structure.
It is difficult to say which option is better to choose, since each person has his own taste and priorities. Be sure to consider all options before you begin installing the arch.
DIY arch installation
The article shows a concrete example of installing an interior arch with your own hands with detailed photos. Thanks to the article, you will gain theoretical knowledge on how to install a factory-made arch yourself and can easily bring it to life. All you need for this is desire and a little skill as a home craftsman.
Installation of an interior arch
Introduction
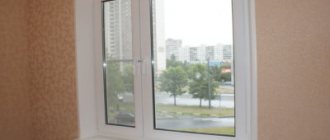
Installing an interior arch in a doorway instead of a door is an excellent option to free up the space in the room needed to open the door.
Arch instead of a door
Speaking about interior arches, I will immediately note that two options for arch construction are practiced. The first option is to buy a ready-made arch, for example a ready-made MDF arch with natural wood veneer from the door factory https://rumaks.ru/ and install it in the opening.
The second option is to make an arch from plasterboard. Then putty it together with the walls and paint it in the desired color or use any other finish.
If the first version of the finished arch does not require repair work. The finished arch can be installed in a renovated room by carefully removing the door. Then the second option, a plasterboard arch, will require painting work and is done during the general renovation of the room.
Installation of a finished arch in an opening
Typically, ready-made arches are available in three sizes:
- Arch 70 cm. Designed for installation in an opening 700 – 860 mm wide;
- At 80 cm, milking the arches 800 - 960 mm;
- An 80 cm arch can be equipped with a vault expander (50 cm), which will allow it to be expanded to an opening of 1260 mm.
To install the finished arch in the doorway, it must be free and clean. Finishing work on the walls of the opening must be completed.
- The arch is supplied disassembled. Installation of the arch begins with the installation of its upper corner elements (1). They are screwed to the wall on one side of the opening. The corner elements are connected to each other using a dowel.
A furniture dowel is a short wooden cylinder with a diameter of 10 mm.
- Decorative elements (3) are attached to the upper corner part with dowels.
- Next, the side trims (4) are installed. It also serves as a fastening for the internal filling plates of the arch. For these purposes they have a groove.
- When installing side trims, the groove must remain free. The side trims are fastened with liquid nails or self-tapping screws.
- The internal filling plates are cut to a width 12 mm greater than the width of the opening. The length of the plates is measured locally.
- After cutting, the inner plates are inserted into the groove of the side trims and the top element.
- Similarly, but in the reverse order, the second side of the arch is assembled. Now the side trims are inserted with grooves into the inner plates.
- The heads of the screws, as when assembling furniture, are closed with plugs in the color of the veneer of the arch.
What types of arches are there?
Arches differ in both shape and dimensions. You should rely on the interior style that is celebrated in the apartment or house. Most often this is a classic, but variations may vary.
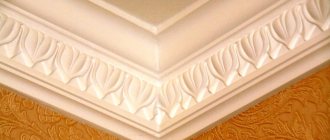
Translated from Latin, the word “arch” means bend, and this is how we present the classic version of this structure
Types of arches:
- Classic – semicircle without corners;
- Modern - something between a portal and a classic, an unsmooth transition, usually used in rooms with low ceilings;
- The portal is no longer quite an arch, but an alternative frame for rectangular interior openings;
- Trapezoid - the name is telling; it is not suitable for narrow openings;
- Romance - Such arches have only rounded corners; this type is used in wide openings.
The elliptical arch is very similar to the modern style, only with smooth transitions. And the semi-arch on one side is made like a portal, and on the other it is of an arbitrary shape. All that remains is to choose the appropriate option that will harmonize with the interior.
How to decorate and decorate an arch in a doorway: original design ideas
The idea of not installing doors in interior openings is not so new. It can be successfully implemented in any room interior, and the advantages of such a solution are well known. Mostly, owners are interested in the question of how to decorate an arch in an apartment or private building, and not in the order of its arrangement. There are many options, and therefore you will have to choose an acceptable method and materials yourself, taking into account a number of specific points.
It should be assumed that decorating the arch is the final stage of the entire work. This means you need to analyze the following:
- What aspect of finishing should we focus on – is it just its decorative component or also its protective function? For conditions of high humidity (for example, if there is an opening into the kitchen) it is very important.
- Construction type. A rectangular arch and a hemisphere are finished differently.
- What is the purpose of designing the opening? It’s just natural to fit it into the interior or design it in an original way, so that it stands out against the general background.
- What is the arch made of, that is, the materials of its structural elements. This also influences the choice of surface finishing technology.
Installation of a prefabricated arch vault in a doorway
The first step is to put level and height marks. If height alignment is not important, then it is enough to mark the horizontal. a door nearby , so you have to start from it. Take the highest point of the door casing and mark the maximum height of the arch.
After this, we measure the height of the arch (it varies and depends on the size of the arches: 700, 800, 900, etc.). We measure from the maximum height of the arch and place a mark, which we transfer, using a level, to the other wall of the opening. Now we measure the distance from the marks to the floor and file the racks. The racks must be assembled with imposts, otherwise there is a high probability of errors in size.
Installation of the vault
Arch installation
Tools and materials
Before you begin installing the arch, you should prepare the following tools and materials that will be needed during the work process:
- tape measure for taking measurements;
- a hacksaw for metal or a hacksaw for wood with fine teeth;
- four clamps;
- PVA glue;
- carpenter's hammer;
- level.
If an arch is installed without corner fillers, then you will need more tools and materials to create an arch in the doorway. Below I will tell you in more detail how this is done.
Arch installation
Assembly
First, let's look at how to assemble an MDF arch with corner fillings. This work can be roughly divided into several main stages:
Main stages of arch assembly
So, the work is done as follows:
- you need to start with an accurate measurement of the doorway . Moreover, measurements must be taken in several places;
- After unpacking the arch kit, you need to glue the arches together . To do this, the tongues are coated with glue, then inserted into the holes of one of the parts, and after that the second part is joined. For reliability, you can coat the ends of the parts with glue. It should be noted that if necessary, the arch can be expanded. For this purpose, the kit includes special additional decorative elements that are installed between the two halves of each vault;
- Next, you need to glue the cornices to the arches using the same principle.;
- then you need to adjust the filling plates to the depth of the opening, i.e. wall thickness . It should be taken into account that the thickness of the plates should be 10-12 mm greater than the depth of the opening so that they can fit into the grooves of the arches and platbands. To cut the plates, you need to mark each of them in the form of points along which a straight line is drawn. You need to carefully cut the plates using a hacksaw. You can use one of the plates as a guide, which should be fixed on the part to be cut with clamps. In this case, the cutting line will be smooth, and, accordingly, you will not spoil the filling;
In the photo - inserting infill into the vault
- The shortest plate from the set, which serves as a filler between the arches, must be cut to length . Moreover, you need to mark it so that it fits into the eaves to the middle. To mark the plate, it must be inserted into one of the arches. Trimming should be done according to the scheme described above;
- after this it is necessary to assemble the vaults and the plate between them into a single structure . To do this, you need to coat the grooves of one of the arches with glue. Then the prepared plate is inserted into the grooves, and it is centered so that its edges enter the cornices to the same depth. Next, using the same principle, the plate is connected to the second arch. The result is an arch assembly. It must be said that assembly can be done directly at the assembly site, as shown in the photo above, however, this is less convenient;
- Now the finished arch needs to be installed in the doorway . You can attach it with “liquid nails” glue. To do this, the back side of the arches must be coated with glue, after which the arch should be aligned horizontally and pressed against the walls, tightening the arches with clamps. You can also use self-tapping screws. In this case, the arch is first leveled, then fixed with clamps, and after that the screws are screwed in;
Marking the cornice extension
- Next you need to install cornice extensions . They should first be cut so that the length strictly corresponds to the depth of the opening. The ends of the planks must be coated with glue, and then the ends of the cornices, between which the extensions are located, must be tightened with clamps;
- After this, you need to cut the platbands to length . It is more convenient to carry out the markings in place, the only thing is that the casing must first be turned over so that the sawn-off end is located at the bottom;
- then you need to cut the panels to length, which will be located between the trims . Their length should be slightly longer than the length of the platbands so that they can extend to the middle of the upper eaves;
- after this you need to install one of the platbands , connecting it to the upper cornice using tongues and glue;
- Next, you need to coat the groove on the back side of the casing with glue and insert the panel into it;
- on the other side of the wall, a second platband is installed using the same principle and connected to the filling . Both platbands need to be tightened with clamps;
- the second pair of trim and filling are installed in the same way;
- To complete the work, you need to install the lower decorative locks.
Advice ! If you are not sure that you can install the arch correctly, it is better to entrust this work to specialists. The price of such a service is about 1,500 rubles.
This completes the arch assembly process. If the structure is finished, then no additional work is needed. An unpainted MDF arch requires more painting.
Unpainted MDF arch
It must be said that painting MDF is a rather complex procedure - several layers of a special paint coating are applied to the surface. Moreover, after applying the first layers, the surface is sanded, as a result of which the raised wood fibers are rubbed away.
As for installing an arch without corner fillings, the procedure is performed in exactly the same way. The only thing, as mentioned above, is that you first need to prepare the window opening.
You can do this in two ways:
- carefully cut the upper part of the partition into the shape of an arch, and then plaster it;
- build an arch using a frame and drywall.
After this, the entire wall must be puttied and finished. On our portal you can find detailed information about how drywall is installed and walls are finished.
Here, in fact, are all the instructions for installing an MDF arch, which I wanted to share with you.
Conclusion
The process of installing MDF arches is generally quite simple and does not take much time, especially for structures with corner fillings. The only thing is that you must follow a certain sequence of actions, and also perform the work very carefully and carefully. Otherwise, the parts may be damaged during the cutting process, or the structure will look untidy after assembly.
See the video in this article for more information. If you have any difficulties in the process of assembling the arch or some points are not completely clear, ask questions in the comments, and I will be happy to answer you.
Source: chudoogorod.ru
Interior door arches made of MDF: beautiful and affordable
MDF cannot be called a very cheap material, but given its naturalness, it is quite possible to characterize it that way. This is a fairly universal “tool” that can be used in a variety of ways. If we consider the material as a finishing material for arranging arches, then it has its own advantages, which will be discussed further.
We will also consider how you can finish MDF arches with your own hands: what is needed for this and how the procedure is performed.
Features of typical arches
Standard arch models are quite universal, and their choice is so wide that ordering an individual version for standard openings simply does not make sense. Their installation is easy to do with your own hands using a basic set of tools.
Ready-made arches have a modular design consisting of several elements, which allows them to be installed in any standard opening. The standard kit usually includes:
- two arched arcs;
- four platbands;
- two or four locks;
- vault panels;
- two side panels.
Standard arch kit set
As additional elements that allow you to adjust the depth of the arched opening (the thickness of the wall panels and the vault), manufacturers offer special arch expanders and intermediate plates of the same color range as the main structure.
Mandatory parameters for the correct selection and subsequent trouble-free installation of the arch with your own hands are the height, width and depth of the opening.
Necessary tools and materials for installation
To create an arched passage you need not only material, but also a tool:
- metal scissors;
- construction knife, set of blades;
- screwdriver;
- jigsaw;
- level, plumb line, tape measure, pencil.
The materials are:
- plasterboard (9.5 mm) or arched KNAUF;
- MDF;
- PVC plates, polystyrene foam.
The most common type for creating a passage is gypsum board. For it you need to assemble a metal base from profiles.
Installation
Let's look at how to install ready-made interior structures in the form of MDF arches.
Preparation
You should start by taking measurements and purchasing a set that matches the parameters. In addition to the arched set, you will need to buy:
- polyurethane foam;
- PVA glue.
You should immediately prepare the tools you will need:
- clamps - four pieces;
- hacksaw for cutting elements;
- construction level;
- measuring tool.
Then you will need to start preparing the opening, you must:
- remove the door and disassemble the frame;
- inspect the opening to identify defects.
It is important that the walls have equal thickness along the entire perimeter of the opening. Subtle deviations can be eliminated using putty; if the irregularities are significant, it is better to use plasterboard structures.
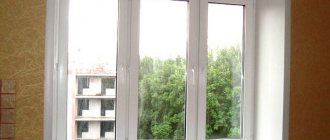
Ceiling made of plastic panels
Ceiling made of plastic panels
at the end of the renovation, money generally became tight)))) I calculated that a rack “superchrome” for the ceiling of my bathroom would cost about 4000 re, and just from plastic panels 1.5 thousand. The difference is noticeable, after all)) But the ceiling is not a warm floor - it can be replaced later. My point is that I don't really like these panels at all. So, actually, the question is: I’m going to make a frame from PPN and PP, just like for gypsum boards. Only water for panels: WHAT AND WITH WHAT STEP.
Source: homemasters.ru
Preparation
We start by preparing the opening. We remove the old door along with the frame. Next, we clean the surface of the opening from dust and dirt. It is not necessary to level the opening, but more on that later.
After this, you can take measurements, based on which we cut the MDF panel using a hacksaw. Corners should be cut after installation of the main products.
Installation procedure
Before doing the work, we determine the height and width of the future arch (usually the height of the arch is determined by the height of the doors in the apartment, and the width is determined by the thickness of the opening wall). We clear the doorway from old door blocks and other structures (if any).
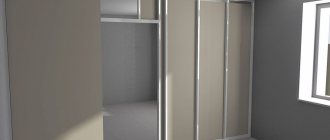
We prepare the doorway for the installation of the future arch
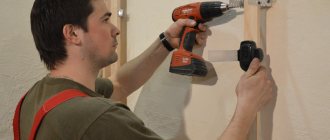
To do this, we mount wooden blocks (or a metal profile) on the sides of the opening using dowel nails to the walls and a transverse (horizontal) block that determines the height of the future arch.
The width of these bars should be equal to the internal width of the arch with a margin of a few millimeters. We mount the cross beam in such a way that it is 5 cm lower than the planned height of the arch. This is done so that the arc of the arch overlaps it, which gives rigidity to the structure. We sew up the unnecessary space on both sides of the opening with fiberboard - fiberboard.
Preparing the vault
Based on practice, the width of the arch usually does not exceed 150 mm, and the width of the fiberboard strips included with the arch is on average 200 mm. Therefore, in accordance with the width of the future arch, we mark and cut the supplied painted fiberboard (if necessary).
We insert the fiberboard strip cut to width into the groove of one of the arch arches.
We measure the cutting line with a pencil, so that there is a margin of 10-15 mm.
We take out the fiberboard from the arc of the arch and cut it along the intended line.
Next, having coated the groove in the arc with glue (can be applied pointwise in several places), we glue the fiberboard, leaving a margin of 5-7mm on each side. For these operations, it is advisable to use transparent glue, so as not to spoil the appearance in places where the glue may protrude.
Glue in the second half of the arch in the same way.
Arch arch installation
To fix the vault of the arch in the opening to its inner side, we screw a small piece of wooden slats or a metal plate onto a self-tapping screw (the thickness of the wooden slats can be a lot), and with its help we fasten the arch.
Preparing the side parts
Using a tape measure, measure the distance from the edge of the arch to the floor on one side of the arch.
In accordance with these measurements, we saw off the two side panels of the arch and the strip to length.
We saw off the fiberboard to the same 5-7 mm less for which we left a margin in the paragraph above. This is done for rigidity and maximum symmetry of the structure, so that the upper part of the installed arch docks with the lower one.
Apply glue to the grooves of the sawn and prepared panels.
We glue the fiberboard, aligning it along the bottom edge (the necessary margin remains in the upper part).
We mount the second panel in the same way and get a finished side post for the interior arch.
Mounting the interior arch post
To do this, we apply “liquid nails” to the inner sides of the rack and glue it to the vertical bar.
One of the installed side racks.
In this case, it is advisable to press it for several minutes until the glue sets. We make the second arch pillar in the same way.
The final moment of installation
All that remains is to cover the junction of the upper and lower parts of the arch with decorative molding.
To do this, apply small drops of glue to the side elements of the molding.
And glue them to the joint of the arch.
Having measured the distance between the side parts of the decorative overlays, we cut off the middle element to the required length. The cut should be as even as possible to form a tight joint with the side elements of the molding and glue it in. We glue the moldings on the other side in the same way.
At this point, the installation of an interior arch with your own hands is completed and you can enjoy the work done.
Watch the tutorial video.