When renovating a toilet, the question of choosing a material for finishing the walls always arises. The most common option is laying ceramic tiles. But this solution is not always the best choice. Tile is one of the most expensive finishing materials; its high-quality installation can only be done by a specialist who will charge the appropriate price for his work. In addition, tiling work includes dust from the tiles being cut and dirt from the adhesive solution.
Plastic panels do not have these disadvantages and are one of the most convenient and economical finishing materials for bathrooms and toilets. Even expensive plastic is cheaper than tiles. Plastic panels are easy to install, requiring a minimum of special knowledge from the installer. When installing the panels, a minimum of debris is generated. If working with tiles requires a special tool for cutting them, then plastic can be installed with only the tool that every owner has at home.
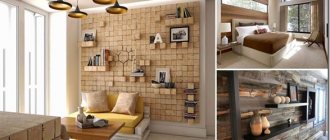
In construction stores you can purchase plastic panels suitable for any design solutions. We sell plastic that imitates all natural materials: marble, granite, wood and much more. There are panels half a meter wide - it is convenient to make various boxes from them. Plain panels of soft colors are usually used to make suspended ceilings.
Choosing panels for the toilet
Main manufacturers of PVC panels:
- Venta is a Belgian company, one of the European leaders in the production of decorative panels. Buyers value the company's products for quality and durability.
- Forte is an Italian manufacturer. Offers new designs and exclusive solutions.
- Grin Line is a Russian company. Works only on European raw materials. Known for the good quality of its products at reasonable prices.
- AnV-plast is a large company from Krasnodar, operating since 2001. It produces panels from domestic raw materials, which allows it to sell products at low prices.
- Pareti is a young Volgograd company that has already proven itself well in the PVC panels market.
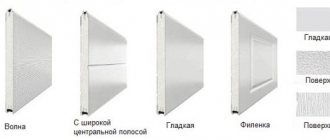
Panels are divided into seamless and suture. The difference lies in appearance - suture ones have a recess at the junction of the panels. They usually have a small width (10-14 cm) and are often used to imitate wooden lining. Panels produced using seamless technology are slightly more expensive, can be of any width and are the best choice for toilet walls: due to their smooth surface, they are easier to clean.
The width of the panels is an aesthetic factor; it has little effect on the quality of the final finish and the time required for their installation. The only thing to consider when choosing the width of the panels is the size of the room. If you buy wide panels for a small toilet, you may lose too much material in cutting.
For walls, panels are produced with a thickness of 8-10 mm, and for ceilings, manufacturers have reduced the thickness to 6 mm or less. Wall panels can be safely used for the ceiling, but it is better not to use ceiling panels for walls. The overall thickness of the panel is not the main factor; the most important thing is that the thickness of the front plate in the panel is at least 2 mm, and preferably 2.5 mm. This indicator directly affects the strength of the surface and its durability.
When calculating the number of panels we need, it is necessary to take into account that the excess length will go to waste. Choose the length of the panels as close as possible to the height of your room, this will allow you to save a lot.
When purchasing panels, press the edge with your finger and release: the dent should disappear without a trace. Bend the screwed edge and twist it with your fingers. It must be plastic; a brittle edge indicates low quality plastic and will create problems during installation.
Types of PVC panels
The panel covering is a set of lightweight plastic boards with a porous internal structure fixed on a prepared base. The surface is smooth and even, with a matte or glossy surface. The design on the front side can be applied using color printing or by gluing polymer films. Pasting technology is often used to imitate natural materials or produce a composite photographic image.
Overall dimensions accepted by most manufacturers of plastic panels for toilets and combined bathrooms:
- width 100-300 mm;
- length from 2 to 6 meters;
- thickness 8-12 mm.
A separate group should include sheet panels, the width of which can range from 800 to 2000 mm, and the length - from 1 to 4 meters. This type of cladding is used for finishing large areas, as well as long and high walls.
Preparing the premises
One of the important advantages of finishing materials mounted on a frame is that they do not require special surface preparation. But some preparatory work needs to be done. First of all, you need to remove all loose areas of old plaster or tile using a hammer drill or chisel. Otherwise, they will fall off behind the wall over time, which can damage the panels or frame. It is also necessary to knock down all strongly protruding parts of the wall, making it as flat as possible. This will reduce the distance that the frame will “steal” from the room.
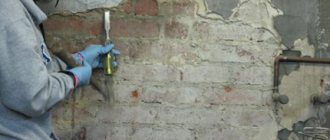
After cleaning the walls, they need to be treated with a bactericidal primer. It will prevent mold from appearing and prevent the formation of debris and dust in the space behind the panels. Before starting work, it is advisable to seal the door frame and the door itself with masking tape and wrap it with plastic film. The primer is made with glue, and stains from it can remain forever.
Preparing the surface for finishing
The purpose of this stage is to prevent the development of mold and mildew on surfaces hidden under the cladding.
Here's what to do:
- Previous finishes that may pose a potential hazard are removed. This concept refers to any wallpaper, areas of painted surfaces on which the paint has peeled off. If the wallpaper is still holding tightly, you need to soak it in warm water (this is convenient to do with a roller), after which it will be quite easy to remove it.
- Next, an antiseptic primer is applied to the surface with a roller.
Plastic panels for the bathroom have become popular not so long ago. Bathroom panels for tiles - photos of finishes and basic information about the material.
Read about the features and options for installing wall panels in the bathroom in this material.
Assembling the wall frame
At this stage you will need the following tool:
- impact drill or hammer drill;
- electric jigsaw or hacksaw;
- roulette;
- slotted bits PH2;
- level or plumb line;
- 90 degree square;
- metal scissors.
The frame for the panels is assembled from wooden beams or galvanized profiles. The timber is used as an economical solution, in addition, in some cases, it saves space. The profile is much more reliable and durable; there will be no problems with it in rooms with high humidity, but the price of the frame will be higher and installation will be more difficult. All other things being equal, a profile frame is preferable to wooden sheathing.
Useful tips
It is recommended to use wooden sheathing in the toilet.
When selecting lathing, you should take into account the degree of humidity in the room. It is better to place wooden blocks in the toilet. For the bathroom, experts advise using plastic, because the wood may eventually become unusable due to constant moisture under the panels.
When installing PVC panels with your own hands, craftsmen recommend:
- Do not sheath with large profiles. The plastic holds well on a frame 1.5-2 cm thick. This way you can save space, and the panel will not break under mechanical stress.
- To prevent water from leaking between the joints when installing above a bathtub, the joint area is thoroughly lubricated with sealant.
- The optimal distance between the heated towel rail and the panels is 3-4 cm .
- To speed up the installation process, a construction stapler with staples is used to fasten the panels.
- When constructing a communications box, one panel should be easily removable .
- To ensure that the finishing coating does not lose the beauty of its appearance, it is recommended to wash it once a month with a soap solution or gel composition . However, you should not use a hard sponge, as it will leave noticeable scratches, which will subsequently accumulate dirt and water.
If you do not have the skills to install plastic panels, it is better to use the help of a specialist. If the installation process is not carried out correctly, moisture can enter through the seams, which inevitably leads to mold and unpleasant odors.
Timber frame
To install the panels, we take a beam measuring 20x40 mm, cut it to the length of the wall and cover it with protective impregnation. We process the ends of the timber especially carefully. You need to understand that even the best impregnation over the years will no longer protect the tree from moisture, under the influence of which the timber can change its shape.
If we have a room with smooth, level walls, then the timber can be attached directly to the wall with 6x60 mm dowel nails, driving them into the wall every 80 cm. It is recommended to make a distance of 50 cm or a little more between the timbers, depending on the thickness of the panels . In a room with broken wall geometry, it is necessary to make a frame on direct hangers. Below it will be described in more detail, using metal profiles as an example, but with timber the technology is similar.
Selecting a cladding method
If the decision has been made, first you need to understand which method of attaching the panels to the walls to use. There are two possible ways: using a metal profile and using foam. Which method should you personally choose? If the toilet in the apartment is quite spacious, there are even brick or concrete walls, there is no point in attaching profiles. Plastic panels are best attached to liquid nails.
Don't forget - you will have to be patient while working, the PVC will not stick after a few seconds. Additionally, you will have to hold the panels in place yourself or install washers between the walls. Gluing panels to liquid nails - there is nothing complicated in this work.
Profile frame
Material calculation
For work we will need the following materials:
- rack profile 27x60 mm - CD according to Knauf markings;
- guide profile 27x28 mm - UD according to the Knauf catalog;
- self-tapping screws with press washer 4.2x12mm;
- dowel-nail 6x60 for a plastered wall and 6x40 for clean brick or concrete;
- straight suspension;
- drills for concrete with a diameter of 6 mm.
To accurately calculate the material we need, we need to know not only the area of the room, but also the number of windows, doors, frames and much more. But we can roughly estimate the number of required profiles using the example of a bathroom measuring 2x3 meters with a height of 3 meters. The minimum number of guide profiles is equal to twice the perimeter - 20 m. Rack profiles need 5 pieces along the perimeter - 50 meters. The pendants go every 80 cm, divide 50 by 0.8 and we get 63 pieces. 166 dowels are needed - for hangers and a guide profile. Self-tapping screws can be calculated very approximately based on 18 pieces per square meter - 540 pieces.
How to finish a toilet ceiling
The second stage of renovation work in this room is aimed at the ceiling. Everyone knows that the toilet is a place where you need to carry out wet cleaning regularly. This means that a moisture-resistant ceiling is ideal. Today, stretch ceilings are often chosen; this material is very attractive.
This is a big plus for small rooms - the fact is that light is reflected from lighting fixtures on shiny surfaces, so the space can be optically enlarged. An alternative solution that will tell you how to finish a toilet is to plan the ceiling using decorative foam boards. However, you can simply paint the surface a nice color. Shelves in the toilet made of PVC panels are a really good, practical solution.
Let's start installation
First, check the horizontality of the wall with a level or plumb line. If the wall slopes outward or is horizontal, then we fasten the lower UD profile using dowel nails at a minimum distance from the wall. If the slope of the wall goes inside the room, then the guide profile should be additionally moved back by the amount of this slope. Using a level or plumb line, transfer the marks of the outer edge of the lower UD profile to the ceiling.
A plumb line, when used correctly, provides absolute accuracy. The building level may be defective or knocked down as a result of a fall. To check the level, measure the slope of the same surface twice, rotating the level 180 degrees between measurements. If the results are the same, the level is working correctly.
We attach the guide profile to the ceiling opposite the lower profile. Divide the height of the room by 50 cm for panels 8 mm thick, or by 60 cm for thicker panels. This parameter can be slightly modified: to bypass electrical wiring, greater structural strength, due to plumbing fixtures.
Place wall frame elements at the level of an adult's knees, hips and shoulders. This will further strengthen the panels in places where they are most likely to be damaged.
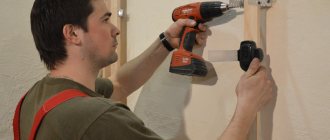
At the height marks we have obtained, every 70 - 90 cm we vertically attach straight hangers - with at least two dowel-nails each. We insert the profile CD into the hangers bent by the bracket. Align the profile using a level or rule. They should all lie in a horizontal plane between the upper and lower UD profiles. We screw the hangers to them using a PH2 bit installed in a drill or screwdriver, using two self-tapping screws with a press washer - top and bottom, and bend the interfering edges of the hanger. We repeat these operations on each wall of the room.
MDF finishing panels (lining)
We have described in detail how to decorate a toilet with panels, now a few words about MDF panels. These are very thin, light panels, the top layer of which imitates expensive wood. Often this design option is chosen for large toilets or in cases where you want to decorate the room in a classic style.
The panels are resistant to moisture, perfectly resistant to the action of various microorganisms and harmful fungi - thanks to this, MDF panels can be called hygienic and safe for home use. Yes, this renovation option will cost more, but compared to natural wood there are significant savings. In general, the walls in the toilet can be anything - the main thing is that they are waterproof and smooth.
If we consider a toilet with wall decoration, we can say that this is the cheapest and fastest way to decorate the room. The main condition for such work is smooth walls. But there is one drawback - many wallpapers are very susceptible to a wet wall. If you choose wallpaper to decorate the toilet, it must be resistant to moisture.
Pipe boxes
In a bathroom, there is often a need to cover sewer or water pipes that are far from the wall with panels. I don’t want to move the entire wall that distance, and I don’t need it. You can make a horizontal or vertical box. In the case of a box, we use a guide profile as a corner, and tie it to the walls using pieces of rack profiles.
A separate case of a box is a vertical niche with pipes and a water meter in an apartment building. It is usually located behind the toilet. You should not cover it with a solid wall of panels, because the management company may decide to change the riser pipes at any time. Therefore, it is better to assemble a small independent frame for this niche, which can be disassembled without breaking the entire wall. In some cases, the riser is covered with loose panels that are easy to remove. It's convenient, but not very aesthetically pleasing.
Frame cladding process
Once the sheathing is completely ready, you should make sure that there are no bends or problems in it. After this, the fastening of the direct lamellas begins. How to cover a toilet with plastic panels with your own hands? To do this, perform the following steps:
- the procedure begins with the corners in which the starting profiles are fixed;
- they must be correctly aligned, for which a level is used;
- The panels are usually fixed to the sheathing with self-tapping screws or special brackets;
- then the remaining elements are fixed, which are connected to each other and attached to the frame;
- along the perimeter of the entire room, a ceiling profile is fixed on top, designed to connect the ceiling and wall coverings;
- The panels need to be fastened with a small gap at the top to create an expansion joint;
- the elements are connected to each other using special tenons and grooves;
- a box designed to hide a sewer riser or other similar elements is sheathed in the same way;
- skirting boards are installed below to hide the lower part of the covering;
- A ceiling plinth is mounted on top.
If you figure out how to properly line a toilet with plastic panels, the procedure does not take much time and does not require significant effort.
Installation of plastic panels
To work, in addition to the panels themselves, we will need:
- plastic L-profile - suitable for the thickness of the panels;
- self-tapping screws with press washer 4.2x12mm;
- boxes for sockets;
- floor plinth;
- ceiling plinth;
- sanitary sealant;
- glue for baseboards.
Before installing the panels, it is necessary to lay new, or, if necessary, extend old electrical wiring - the length of the wires must be sufficient so that sockets and switches can be connected to them.
We start installation from any angle. We cut the panels using a hacksaw or an electric jigsaw to the height of the room. We install the first panel strictly vertically. The distance between the corner of the frame and the edge of the panel surface should be less than its thickness. We screw the panel with self-tapping screws to each profile and insert the next panel into the groove. Usually it goes in with some difficulty, but then it snaps into place and stays securely in place. Having reached the end of the wall, it is necessary to cut off the excess width of the panel with a sharp construction knife or hacksaw. We clamp the last panel using an L-profile, into which we will insert the first panel of the next wall.
Panels from different batches may vary slightly in shade. This is impossible to notice until the pack is printed, but it is too clearly visible after installation, when the panels are side by side. Always compare panels before installation. If they have a different shade, but it is no longer possible to change some of the panels for suitable ones, use them on different walls; the difference in light at the corner will make the difference invisible.
In a similar way, we cover all the walls in the bathroom with panels. In places where there should be sockets, we make holes of the required diameter with wood crowns. If they are not there, then you can, very carefully, cut them out with a knife or jigsaw. We do the same with holes for water and sewer pipes. The last panel in a room is always a bit of a challenge, but if cut exactly to size it should fit easily into place. To make the last panel, we attach an L-profile in the unclosed corner and cut the last panel 5-7 mm wider than the distance from the profile to the sewn surface. We insert it with the cut edge into the L-profile, guide the ridge of the loose panel into the groove of the fixed one, and then begin to carefully remove the panel from the profile using a spatula. The panel should click into the groove with light force.
After installing all the panels, we begin installing the sockets. We install them in special electrical boxes for walls made of plastic panels. We finish the work with the walls by installing the floor plinth. We screw it with self-tapping screws through the panels to the lower guide profile. If we still have an old ceiling in our room, then we close the joint between the new walls and the ceiling by gluing a ceiling plinth into the corner. But usually they make a new panel ceiling right away.
Color variety of panels
If a plain cladding seems boring to you, you can add additional shades to the interior. They can be either close and differ only in saturation and depth of color, or contrasting. Combinations of representatives of a bright palette with calm shades of a neutral range - white, gray, sand, black, beige - always look advantageous. Silver or mirror inclusions look great.
The latter also have purely practical benefits. A skillful combination of colors allows you to visually adjust the shape and size of the room. Narrow walls will look wider if plastic is laid in contrasting horizontal stripes; dark walls decorated with white accessories will visually “step back” and add volume to the bathroom. At the same time, light shades will visually enlarge the room.
The technique of combining shades can be used not only to decorate walls, but also to highlight individual zones. You can select an area with a toilet, sink or hygienic shower.
Combinations of shades are appropriate in any style. The main thing is to choose the right colors that are destined to become companions. For example, these:
- blue color - looks great next to white, black, blue, turquoise - this design will be ideal for a Mediterranean-style toilet;
- brown - combines well with yellow, sand, beige - these colors are typical for classic decoration;
- red shades can be emphasized with white, black or cream paints. Such combinations are suitable for modern styles - hi-tech, pop art;
- metallic - a shade of gray in combination with any shades will fit perfectly into minimalism and loft;
- green - in combination with golden and brown tones, suitable for styles that gravitate towards nature.
A combination of several shades can be arranged in a checkerboard pattern, outline geometric shapes, diagonals - the possibilities for experimentation are extremely wide. Design options for bathrooms using panels of different colors are presented in the photo.
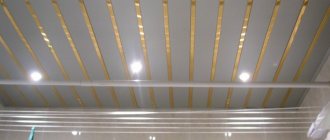
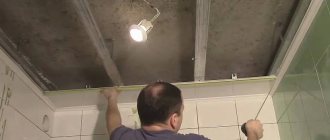
Installation of panels on the ceiling
When assembling a ceiling frame, it is highly undesirable to use a wooden beam; it can, over time, bend under its own weight. Therefore, for a high-quality ceiling, you need to use a metal profile.
In a small toilet, you can install the frame using a regular bubble level. You need to find the lowest point of the ceiling and move down 40 mm from it. This will be the highest possible level of the new ceiling. But, usually, high ceilings are not required in bathrooms, but built-in lamps are very necessary. Therefore, if you plan to install ceiling lights, you need to lower it not by 40 mm, but by 100 - 120 mm from the lowest point. Then, using a level, draw a horizontal line from the desired point along the perimeter of the entire toilet.
We attach the UD profile along this line. We cut the CD profile to size and insert it into the UD profile, across the planned direction of the panels. Rack profiles should be located at a distance of 50 cm from each other. Additionally, the profile is attached to the ceiling with direct hangers, every 70 cm. We lay the wiring for the lamps on top of the frame. We fasten a plastic ceiling profile with self-tapping screws around the entire perimeter.
We insert the first panel into the profile and attach it to the UD and CD profiles using self-tapping screws with a press washer. We fill the last panel in the same way as on the wall. We make holes for the ceiling lamps using wood crowns and install them. The ceiling is ready.
Matching style and design
When choosing a material for finishing a bathroom, you must take into account the general style direction of the house or apartment. In classic interiors, plastic will look alien. The same can be said about country, art deco and Provence. In these styles, it is better to use plaster, natural wood or tiles. But in modern styles - minimalism, modern, high-tech, plastic is quite acceptable and is used very actively.
The design of the lamellas - a wide color palette, various patterns and images, including 3D, imitation of tiles, stone, natural wood, mosaics - provides an extensive field for bringing the most creative design ideas to life. Modern manufacturers are trying to take into account all the latest trends in interior art.
Finishing touches
Despite the fact that the plastic panels fit tightly together, in corners and places with difficult installation there are small gaps through which water can get behind the panels and provoke rotting processes there. Therefore, it is necessary to cover all such places with the help of a sanitary sealant for bathrooms. If everything is done carefully, the sealant will be invisible and the cracks will disappear. After this, the bathroom will retain its beauty for many years.
What materials and tools will be needed?
Before lining a toilet with plastic, you should prepare in advance the necessary materials and tools for this. These include:
- directly PVC panels, which must be of high quality, identical and homogeneous;
- if finishing is done using glue, then you need plaster to level the walls, as well as special glue for plastic panels;
- if installation involves the use of a frame, then metal profiles or wood slats are prepared;
- for an attractive finish, it is important to prepare decorative fittings for attaching the panels;
- edging profile;
- self-tapping screws equipped with a wide head;
- an electric drill, which greatly simplifies and speeds up the process of attaching elements;
- a knife specially designed for cutting PVC panels;
- construction level, allowing finishing to be completed efficiently and quickly.
When done correctly, the result is a truly beautiful finish. Therefore, many people prefer to sheathe the toilet step by step with plastic panels. Photos of the resulting finish can be viewed below.
Wall and ceiling finishing options
Plastic panels are widely used in the decoration of many rooms, and they are especially suitable for decorating toilets. Designers recommend not covering only one wall with them. You can use interesting ideas where plastic is combined with wallpaper or ceramic tiles.
In a Khrushchev building, where the toilet is small, it is necessary to cover only the walls with panels, since after their installation the room will be reduced. If the family budget allows, then the ceiling in this case is best designed in the form of a tension structure. The glossy ceiling covering and PVC panels will visually elongate the space and create an interesting combination. In addition, in Khrushchev-era buildings, a toilet lined with plastic panels can visually expand if a plain material in a light color scheme is used in the decoration.
In the case where the toilet is combined with a bathroom and has large dimensions, then light shades can be replaced with more contrasting and dark ones, which will visually narrow the space and give it originality. In such rooms, the walls are usually covered with panels with patterns. The design looks good when finished with plastic panels, on the surface of which images of geometric shapes or abstractions are applied. A stylish solution is also considered to be lining the bathroom with materials that imitate stone, marble and wood, which gives the room a special chic and elegance.
PVC panels can be installed around the entire perimeter of the room, or designed as separate inserts, combining them with wallpaper or painting. To hide all communications from prying eyes, you should additionally install plumbing shutters. They go well with decorative finishes and provide free access to pipes in case of emergency.
Despite the fact that the most popular color of wall panels among the population is white, it should be remembered that it will be difficult to maintain a toilet in a state of perfect cleanliness with such a finish, since any dirt will be visible on it. Snow-white panels are usually used to cover the walls in the toilet, where the design has a classic style. To make the design unusual, the room is decorated with stylish accessories, lamps and paintings. As for the ceiling, in this case a suspended structure is well suited.
A good option would be to decorate the bathroom with plastic panels in light green or light green. They can be either plain or with a pattern. Green has a positive effect on a person’s psychological state, gives confidence and calms. If the room is small, then only the walls need to be covered with panels and the ceiling should be covered with plaster. For spacious rooms, a design in which both the ceiling and walls are covered with panels will be suitable, resulting in a single interior image.
Fans of bright contrasting colors can give preference to materials in yellow, red and orange colors. When decorating the walls, it is worth using panels of different shades or decorating them in dark colors, and the ceiling in light colors. It is not necessary to cover the entire surface of the room from floor to ceiling with plastic.
Nowadays, such stylistic trends as hi-tech and loft are in fashion. Decorating walls and ceilings with metallized and snow-white plastic panels is ideal for them. The main emphasis in this design should be on the cladding of the central wall, which can be decorated with brickwork. Thanks to this combination of materials, you will get a stylish room.
PVC panels in light colors with patterns will also be a good choice for toilet trim. But it is not recommended to choose a large print for small rooms, as it can visually make the area even smaller. Alternatively, only the walls can be covered with such panels. As for the ceiling, it is best to make it snow-white. If a beige color is chosen for the walls, then the ceiling can be decorated with panels of a milky shade.
Finishing the floor in the toilet
Many people start finishing the floor at the last stage of renovation in the toilet. Of course, the best suggestion is to finish the floor with tiles. This method looks great and is very easy to clean as long as you use cleaning products. On the floor, tiles are selected taking into account certain requirements, for example, they must match well with the covering on the walls.
A carefully chosen design for laying tiles on the floor surface will make the toilet more visible. The floor in the toilet is often subject to changes in temperature, as well as high humidity. In the toilet (compared to the bathroom) you can only do waterproofing - it is usually applied not only to the floor, but also to the surface of the walls - at least 20 cm. The ideal solution is tiles in the toilet, both for the floor and for the walls. But there are also more economical, practical options, for example, linoleum .
No special skills are required to install this material; these floors are easy to clean. At the end of the floor installation, baseboards are installed. Interestingly, a toilet usually has various connections: sewerage, water supply, etc., so it is important to complete the renovation in such a way that all these elements are hidden.
But there should always be access to them - if necessary, special doors are installed so that you can quickly get to one or another communication center. Often these boxes are made of plasterboard and plastic - many people usually choose the same material as for wall coverings. This is the only way to achieve the ultimate goal - a practical, convenient and comfortable toilet in the apartment.