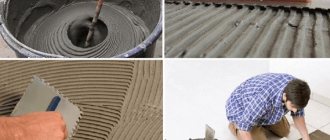
The question of laying tiles on uneven wall surfaces worries almost everyone who is faced with renovating a bathroom or kitchen in their home. Often, concrete sagging, bumps, and depressions remain on the walls, and the cause of such defects is chipping of the base material or the presence of old mortar on the surface. Let's figure out what to do in this case.
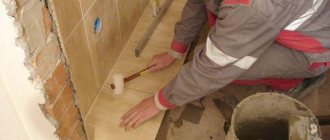
Laying tiles requires preliminary preparation of the base
Why shouldn't you lay tiles on an uneven wall?
Laying tiles on an uneven wall is not the best solution. Why? As you know, tiles are laid on a layer of glue, if applying an even layer of glue to a flat wall is not a problem, after which all that remains is to apply the tiles and that’s it, then with an uneven wall everything is much more complicated. It is necessary for each tile to select its own thickness of the adhesive layer and additionally level the tile, frequently removing excess. All these actions take a lot of time and effort. Therefore, you can lay tiles on an uneven wall efficiently only by investing all your patience and accuracy into it.
If you still decide to lay tiles on an uneven wall, then read on, where I will give some valuable tips on how to make your life easier when laying tiles on an uneven surface.
How to lay cut tiles?
When the floors are not too level and have not yet been tiled, it is necessary to fix the guides horizontally at a short distance from the floor level and lay the initial row from this mark. After the glue has dried, when the tiles will stick on their own, the guides need to be removed and the first row laid, cutting the tiles to the required height.
In the place where you need to lay the cut tiles, they should not be immediately fixed with adhesive. First, the tile is simply applied to the required location and, having been adjusted to the required size, glue is applied and fixed to the wall.
Scheme for laying tiles with an undercut.
During cladding, be sure to check the plane and horizontality, using a level for this purpose.
It is necessary to lay ceramic tiles from the farthest or more visible corner, since it is possible that at the end of the row they will have to be shortened. If it is necessary to disguise the cut edges of the tiles in the corner, this can be done using special bookmarks that are designed to join the cut tiles. But the consequences of such manipulation can be too noticeable, especially in an open corner.
If you do not want to use corners to level ceramic tiles, then after one wall is completely tiled, continue laying tiles on the next wall. You need to start from the whole tile on the finished surface in the opposite direction. This will allow the entire corner tile to cover the cut edges of the tiles on the other wall.
Technology for laying on an uneven wall
The order of laying the tiles does not change, regardless of whether the wall is flat or not. Only the technology of laying tiles changes.
Preliminary wall measurement
The first difference is that before you begin installation, you need to measure the entire wall. For what? Since our wall is uneven, and the tiles must lie flat, therefore, the wall and tiles will be leveled using the thickness of the adhesive layer. Accordingly, somewhere the layer of glue will be large, and somewhere small. This circumstance can lead to several very unpleasant moments that will completely ruin the entire wall cladding.
- It may happen that in some places the thickness of the glue will be so great that laying the tiles will become practically impossible.
- The opposite situation may also occur, that in some places there will be no room left for glue at all.
- At the same time, it may turn out that in the corner the first tile stands with a large gap, and at the top of the row the tile does not fit into the space allotted for it, as a result of which you will have to install part of the tile, which spoils the appearance.
All these points will lead to very bad consequences, both during installation and during further operation. Therefore, measuring the wall is a very important step when laying tiles on an uneven wall. As a result of the measurement, the following should be determined.
- Evenness of wall corners. If the corners are uneven, then you should choose the position of the tile so that when it mates with the adjacent wall, it gives the correct angle.
- It is necessary to determine the places with the greatest convexity and greatest concavity of the walls. The place where the wall sticks out the most will be the place where the first tiles will be installed. Moreover, it should be noted that it is under this tile that there will be a minimum allowable amount of glue.
- If such places are found not in the area of the first row of tiles, then an adjustment should be made to the position of the tiles of the first row.
It is convenient to measure the wall using a plumb line. Simply apply a plumb line to the ceiling and observe the size of the gap.
Before you start laying tiles, you need to measure uneven walls. The purpose of the measurements is to determine the location of the greatest protrusion of the wall. In this place, the thickness of the glue layer will be minimal. The first row of tiles is laid either from the place of the greatest protrusion of the wall, or from the second row, but making allowances for unevenness and determining the required thickness of the tile adhesive layer. The wall can be measured using a long level or a plumb line.
Stages of laying tiles on the wall
After all measurements have been taken and all the listed features have been taken into account, you can begin laying the tiles. Installation is carried out in the traditional way, with the exception of applying glue. When laying tiles on a flat wall, the adhesive is applied with a special notched trowel. In the case of an uneven wall, this method does not work at all. Therefore, we should do things differently.
Do-it-yourself surface priming and tiling
Before tiling, the floor and walls are primed to remove dust and improve adhesion. This need not be done if the tiles are laid on a concrete base or durable plaster using a special adhesive mixture. For a bathhouse, it is necessary to use adhesives and a primer with moisture-resistant qualities, since the construction mixture must correspond to the nature of the room.
Wall cladding from the lower level begins only if the floors are without slopes and are already covered with tiles. If everything is ready, then the bathtub is installed and the seams at the points of contact with the walls are filled with a sealant based on silicone rubber. Then a plastic corner is glued along the entire length of the joint and the tiles are laid, pressing on the corner and pressing it against the bathtub.
Layout of ceramic tiles in the bathroom, when laying which no small pieces remain.
The gap between the wall and the bathtub designed in this way has a neat appearance, since the plastic corner covers a layer of sealant, and the tiles laid on top prevent the bathtub from rising.
There is an opinion that the first step is to cover the walls with tiles, then the floor, and then install the bathtub. But in this situation, it is not clear what to do with the resulting gap between the bathroom and the wall. Waterproofing in this case is solved with the help of sealant, but the aesthetics of the appearance remains in question.
When installing a shower corner, the tiles are laid on top of the tray, and the joints of the tiles and the tray are covered with high-quality silicone-based sealant.
To ensure a good seam, scraps of dense material are placed along the perimeter of the pallet along the wall. For this purpose, you can use perforated cardboard.
Tips for laying tiles
There are subtleties that need to be taken into account when installing tiles with your own hands:
- If possible, you should first level the surface; this will greatly facilitate and speed up further work. The wall is leveled using purchased or homemade beacons.
- If there is no time and money for complete leveling, you can partially level it. Apply tile adhesive to the wall and stretch it over the surface, taking into account differences in the plane. We wait a day for the glue to dry and shrink before the tiles are laid.
- The thinner the tile layer is, the less its shrinkage will be, this prevents the appearance of steps between rows laid at different times.
- On an uneven surface, you need to lay the tiles in one go so that the glue dries simultaneously on the entire surface. If you glued one row, it has already dried, subsequent rows need to be glued so that they protrude slightly forward in relation to the previous row. The size of the protrusion can be determined by installing a beacon, which will show how many mm the tiles shrink.
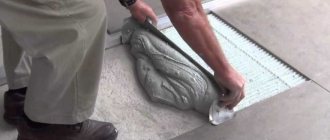
- The tile primer is done as follows: apply a thin layer of glue, spread it evenly over the surface, and run a trowel with a large tooth along the surface to form grooves. This facilitates the release of air and the uniform distribution of glue over its surface.
- We apply the adhesive composition to a slightly larger area than one tile occupies.
- We fix the same distance using plastic spacer crosses.
There is a system for leveling tiles on a plane, designed to make the work of tilers easier.
System for leveling tiles in plane
It consists of spacer wedges that regulate the position of the tile relative to neighboring elements. The elements are secured using special clamps, this helps eliminate differences in height.
- a flat surface with identical seams at the junctions of elements;
- prevents tiles from sagging;
- uniform distribution of glue.
- additional costs for purchasing the system;
- time is spent on installing fixing elements;
- It becomes difficult to clean the seams. For more information on leveling tiles, watch this video:
Whether there is a need to use such a device is up to everyone to decide. Once the finishing is completed, it will be impossible to correct the defects.
Emerging defects
Let's look at the table for masonry defects and the reasons for their occurrence:
| № | Type of defect | Cause of occurrence |
| 1 | Cracks | The tile experiences a tensile load when laid on an uneven surface. |
| 2 | Lagging of elements from the wall | Occurs due to the formation of voids due to uneven distribution of the solution, especially if it is applied in a thick layer. |
| 3 | Uneven seam spacing | If the elements are laid by eye without using spacer crosses. |
| 4 | Soaks of mortar on the seams | The layer is too thick and the tile is pressed deeply into it. Can be partially eliminated by grouting. |
| 5 | Protruding or sinking corners of tiles | They are formed due to level differences on the plane. |
To avoid such defects, you must first level the surface of the wall.
Installation on an uneven wall
When doing the cladding yourself, the first step is to carefully measure the wall, taking into account all differences in level. We apply a plumb line to the ceiling, lower it to the floor and determine the desired value.
We measure the wall
When taking measurements you need to pay attention to:
- How even are the corners, if their surface has a difference in level, you need to choose such a position of the tile so that at the intersection with the corner it gives an angle of 90 degrees. If the corner on the first row is straight, and then there is a curvature, you need to calculate the masonry adjusted for the position of the tiles in the previous rows;
- We determine the most convex and concave areas. We hope that we apply a minimum amount of adhesive to the convex area. We align the remaining elements along this row;
- We measure the height and width of the wall, determine the number of rows and tiles in them. We take into account that it is better to lay the scraps of material to the floor or in an inconspicuous corner.
If you do not measure the wall, an unpleasant moment may arise when it turns out that to install an element you need to put an unacceptably thick layer of mortar, or, conversely, an incorrect calculation will lead to the fact that there will be no room at all for the adhesive composition.
If you do not determine the number of squares in advance, the trimmings may end up near the ceiling or window opening. This will ruin the overall appearance of the bath or room.
Preparing the surface
Before starting work, you need to tap the wall. Where there is a dull sound, we remove all flaking materials down to the concrete base. If you leave them, they will fall off along with the tiles during use. We seal the crumbled area with cement mortar. How to lay tiles on a concrete base or painted walls - read other articles on our website.
We pre-upholster the wooden walls with roofing felt, attach a steel mesh to it, and apply a 15 mm thick layer of plaster on top. For more information on laying tiles on uneven walls, watch this useful video:
To remove dust from the surface and improve the adhesion of materials, the walls need to be primed in two layers.
Laying tiles
Let's consider how to lay tiles on a surface that has differences in level.
If the walls are curved, we carry out installation according to the same scheme as for a flat surface, except for the technique of applying glue.
- Apply a thin layer of adhesive to an area of the wall slightly larger than the size of the tile. Distribute evenly over the surface.
- First apply tile adhesive to the tiles in a thin layer and rub it over the surface. Then, if necessary (if installation is carried out in a sinking area), apply a second thick layer to the material. To prevent the mortar from protruding at the seams, do not spread the edges of the tiles. Using a serrated trowel, make grooves.
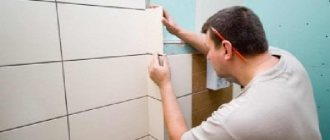
- We press the element against the wall, adjust it vertically and horizontally. If necessary, tap with a rubber hammer. For more information about the process, watch this video:
The maximum layer thickness is indicated on the glue package. To ensure that the material holds tightly, the indicators specified in the instructions must not be violated.
Before carrying out facing work, remove all defects on the walls. If a similar task becomes the main task for painting or wallpapering, tiles are laid without careful preparation. Of course, this will worsen the final result, but will save time and building materials.
Sometimes it is impossible to level the walls due to limited space, since drywall and plaster significantly “eat up” the space.
But even with this method of laying tiles, carry out at least minimal work on leveling the walls. They do this in one of the following ways:
- Plaster. Apply to problem areas. Additionally, work the wall with a thin layer of the mixture.
- Drywall. Used in eliminating serious depressions. Here a frame is not needed; only a piece of material of a suitable size is cut out and glued to the wall. The edges are slightly smoothed, and the joint is covered with plaster.
- Bulgarian. It is used in the opposite problem - eliminating convex areas; with its help, concrete sagging is removed. It is not advisable to touch the fittings.
- Net. It is pre-attached to the wall with nails or self-tapping screws. Fixes glue and tiles in problem areas.
How to lay tiles on a wooden floor?
The work is carried out on logs - these are wooden cross members, which are characterized by a large cross-section. They serve as supports for the whole object or some structural elements. Wooden flooring is also in most cases mounted on top of the joists. If tiling is to be done, a rough base must be prepared. The condition of the floor may vary:
- The floorboards are completely dismantled due to their poor condition: extensive rot, cracks, and rot have appeared. If the flooring is damaged, you will need to remove all or only some of the covering elements. Having removed them, check the condition of the lags. If they are not damaged, installation work can continue. In the case where the logs are also exposed to negative factors, these elements are replaced or restoration is carried out: the crossbars are only partially replaced and treated with special compounds.
- Sometimes logs are covered with cheaper materials - chipboard, OSB, plywood. The next step is laying the cladding.
- If the joists are seen to be in good condition, the decking base is left in its original condition, but the floor structure is checked for damage. In this case, the tree has just been laid, or the base was installed not so long ago and has not had time to wear out. In both cases, the flooring is not replaced, but additional leveling may be required.
For each option, a different cladding technology is selected, since the process of preparing the base is different.
First method: dry leveling
To lay the tiles, prepare the base. To prevent the cladding from deforming during operation, its installation is carried out on slabs/sheets used to level the floor on the joists. Materials that can be used for this purpose:
- drywall, characterized by moisture resistance;
- gypsum fiber sheet;
- cement bonded particle boards;
- moisture-resistant plywood.
All these varieties are laid in 1 or 2 layers. The slabs can be fastened with self-tapping screws, and the installation step of the fastening elements should be small, otherwise the coating will “play” when walking. To make the rough base more durable, it is recommended to process the end sections using a special glue that is designed to work with the material.
If a wooden floor is installed in a bathroom, kitchen or other room where humidity regularly rises and there is a high probability of contact with water, the joints of the slabs are covered with membrane-type polymer waterproofing. It is important to protect the corner areas where the wall meets the floor. Here the waterproofing is applied with a slight overlap on the wall (up to 5 cm).
The preparation of the wooden floor for tiles is carried out before installing the cladding. For this purpose, a primer composition is used. They process the resulting coating. At the next stage, the painting mesh is laid. It is recommended to repeat the priming procedure on top. This measure will improve the adhesion of the adhesive and the base. An important point is the need to lay the subfloor slabs so that the joint joint falls in the middle of the wooden crossbar (joist).
Cement bonded particle boards should be laid on top of the plasterboard/plywood. They are the main structural element of a floor installed using dry leveling technology. This is due to the sufficient strength of such products and their durability. During the installation of the base, its surface is constantly checked for quality, for which a level is used. You cannot lay tiles on uneven floors.
Advantages of the dry leveling method:
- you can add a layer of insulation to the subfloor structure;
- due to the low weight of the floor, the level of load on the joists is reduced;
- high installation speed, because in this case there is no need to work with cement screed.
So that the process does not have to be interrupted, the necessary materials are first calculated: the number of slabs, fastening elements, and cladding is determined. This method also has disadvantages. For example, installing a multi-layer floor structure, which is also raised on joists, will help reduce the height of the ceilings. This means that dry leveling technology is not suitable for all objects.
Second method: wet screed
You can lay tiles on a wooden floor by first using the traditional leveling method using a cement screed, but in a lightweight version. By itself, a wooden frame (joists, flooring made of boards) will not be able to provide a sufficient level of strength. Its load-bearing capacity is low, so the tile covering will not last long.
It is recommended to use installation technology based on the floating floor principle. Here the screed will not have direct contact with the wooden frame and walls. It is separated from other structural elements of the object using a sufficiently dense waterproofing material. To level the floor, a polymer leveler or a cement-based mixture is often used.
The screed layer can be 10-30 mm. If the thickness exceeds 10 mm, a polymer mesh is used to strengthen the structure. Sequencing:
Features of the materials used and the subtleties of installation
First of all, when working with an uneven surface, the format of the tile itself is important. To make differences minimally noticeable, choosing medium-sized tiles would be optimal.
Regarding the adhesive solution, give preference to plastic store-bought mixtures. Homemade sand composition crumbles if applied too thickly.
It is also recommended to use SVP. This device will facilitate the process of adjusting adjacent elements, the glue will be distributed more or less evenly and the result will be a smooth surface without differences.
Let's consider the technique of laying tiles on an unprepared, uneven wall. First, walk over the surface with a level and mark any defects identified. Then minimize the differences found. Only after this prime the walls and proceed directly to installation.
When covering uneven surfaces, it is recommended to use medium format tiles and SVP
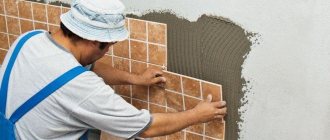
Apply the adhesive both to the wall and to the tile itself with a notched trowel. To level, tap the tiles with a mallet and press with your hand. Control every step with a level. After identifying defects, you have 10 minutes to fix them before the glue sets. Otherwise, you will have to clean off the solution and start all over again. The seams are secured with crosses or wedges. Work in small sections so that the bottom rows have time to dry and do not move.
Leveling and strengthening walls
Before cladding, the surface of the wall must be tapped to check its strength. If a dull sound is heard in any place, then this layer is removed to the concrete or brick base. The crumbling surface is strengthened with specially designed means or cleaned off.
Marking diagram for laying tiles in the bathroom.
Wooden walls must first be covered with a metal mesh, the cell size of which is 10 mm or 15 mm. Before fixing the mesh, wooden blocks 30-40 mm wide and 20-25 mm thick are fixed to the walls. Roofing felt or roofing felt is placed between them, and then a steel mesh is nailed to the bars. Cement mortar mixed with grade 6 or 7 asbestos is applied to the chain-link. After this, the surface is plastered with a mixture of sand and cement with a ratio of 3:1. The plaster must be applied in a layer of at least 15 mm. When preparing walls for laying tiles, the plaster layer is not smoothed or grouted.
Just like walls, before facing work, wooden floors are covered with a metal mesh, and concrete is applied on top with a layer of 2-3 cm. Then another chain-link and a second layer of concrete of a similar thickness are applied. The finished surface is leveled and notches are made on it so that the tiles laid on the mortar adhere better. After 3-5 days, the concrete will set and you can begin covering the floor.
Possible consequences
If you lay tiles on a completely unprepared, uneven wall, problems will be unavoidable in the future. Of course, a lot depends on the degree of curvature, but in general the consequences can be divided into the following categories:
- Protruding corners. The most common problem. Due to level differences on the wall surface, namely sagging and pits, it is difficult to lay tiles evenly. When adjusting, the corners protrude above the adjacent elements on one side and sink into the solution on the opposite side. This is noticeable with large tiles.
- Wave-like surface. It is also difficult to adjust the level for mosaics and small parts, which is why wave-like changes appear on the surface being tiled.
- Uneven joints. When adjusting tiles, wide seams are formed between the elements, and sagging is possible, which is even more undesirable. This defect can be partially eliminated by grouting.
- Weakening the tenacity of the solution. As the layer of adhesive increases, its properties deteriorate; the mixture slips or crumbles over time. In addition, this increases the cost of glue.
- Formation of voids. When applying a thick layer of mortar, it becomes more difficult to completely remove all the depressions underneath, which leads to weakening of the masonry.
- Destruction of tiles. If the tile is subjected to stress due to an uneven surface, it will eventually burst under pressure.
When facing an unprepared surface, masonry defects are inevitable.
To avoid such problems, it is recommended to carry out at least minimal work on leveling the surface in advance. If the situation with the walls is not so critical, in the case of floor coverings, unevenness is unacceptable.
If it is impossible to make the walls perfect, use the methods described. It is advisable not to abuse them, as this will inevitably affect your repair in the future.