Damage to wallpaper can occur for various reasons: during rearrangement, furniture was carelessly moved and caught on the wall, a pet sharpened its claws, recommendations for wallpapering during repairs were not followed, and much more. The nature of the damage can also be different, ranging from minor scratches to the appearance of a bubble in the middle of the wallpaper.
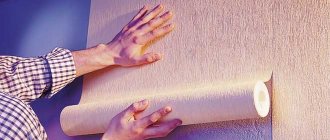
Photo: you can do everything yourself
There are many reasons, but you need to somehow correct the detected defects, which can be done with your own hands. Correcting each such damage requires its own approach.
Preparation
You need to assess the condition of the room. Look at the walls and decide what doesn't suit you . You can eliminate flaws and shortcomings yourself without resorting to full repairs. Even in the most difficult cases, in particular in the kitchen, you can get by without re-gluing them:
- Stains appeared on the walls.
- Bubbles appeared (read about why bubbles appear and how to glue wallpaper without swollen areas).
- Scuffs, the canvas is bent or frayed.
- The canvas comes off in several places (what to do if the wallpaper comes off?).
- Mechanical damage.
If the problem is only in the corners or edges of the strips peeling off, it will be enough to correct them (what and how can you glue old wallpaper that has come off the walls?). You need special glue or regular PVA. Usually the canvas comes off in the area of the joints (how to repair wallpaper and joints if they come apart?).
Attention
In order for the adhesive mixture to be distributed evenly, you will need to make several punctures.
Minor defects
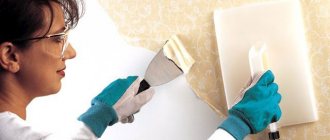
The simplest case would be a small scratch on the coating, the edges of which were not too damaged. Such damage can be repaired using only glue and a brush. The damaged area is cleaned of dust and debris, and then the damaged area is thoroughly lubricated with glue using a brush. Press down on the area with a dry, clean rag to remove excess glue. All that remains is to “roll” the restored area with a roller to remove air bubbles.
Important: let the glue soften the surface and only after a while begin to remove any air trapped inside.
There is enough material left on the edges of the scratch to completely disguise it. If the defect is still visible after such restoration, a more complex method will have to be used.
Do-it-yourself restoration of an old canvas
How to update the appearance of wallpaper without repairs? Restoration depends entirely on its texture and quality of material. You can put any old wallpaper in order without changing it, the main thing is to do it wisely and carefully. Coverages are updated in the following ways :
- Use special products to clean the surface.
- Perform periodic mechanical cleaning.
- In critical cases, do a classic retouch.
- Carefully paint it in the desired color.
- Renew damaged areas by re-gluing them in those places where guests most often come face to face with old wallpaper (how to protect wallpaper from damage?).
Elimination of defects on walls
There are times when wallpaper comes off not at the edges, but in the middle. Because of this, bubbles form on the surface. If the bubble is small, it can be eliminated without re-gluing :
- They pierce it with a needle and suck out the air.
- Then they begin to inject glue from the top with a syringe.
We talked about how to remove bubbles from wallpaper in a separate article.
If the coating has partially come off or scratches have appeared, then it is better to remove the defects as follows :
- Fold back the edges of the fabric and coat with glue. For convenience, use a toothpick or match.
- Place the damaged areas in their place and smooth them with a roller. Excess glue is removed with a cloth.
- If PVA glue was used, then it needs to be heated with a hairdryer, then press down on the damaged area.
Sometimes a defective area cannot be restored (if part of the canvas is torn off). You need to glue a new piece.
- Outline the damaged area of the coating and cut it out with a utility knife.
- Then comes the preparation of the wall - putty and primer.
- Cut the sheet to the desired size, making sure that the design or pattern matches the adjacent areas.
- Coat a new piece with glue and apply it to the damaged area. Don't forget to level it with a roller.
For painting without repair
Paintable wallpaper is the easiest way to transform and update your interior. This material can be repainted several times, completely changing the appearance of the room. If you have special wallpaper in your apartment, you don’t have to remove it, but simply paint it a different color. But before painting, the canvas must be cleaned of dirt and dust with a vacuum cleaner.
Important
At least four layers of paint are applied to paper or non-woven wallpaper.
Buy acrylic or latex paint in the store, and if desired, add color to dilute the color. During painting, the material is carefully leveled over the entire surface with smooth up/down movements. If after the first layer it was not possible to paint over greasy stains or abrasions, then you need to apply the next layer.
How to disguise peeled wallpaper
Sometimes the problem occurs gradually. Small cracks appear on the wallpaper, the edges begin to move away from the wall, and joints become visible. It is obvious that the repairs were carried out incorrectly, in a hurry, with the hope that the wallpaper would hang normally, but it did not work out.
We advise you to pay attention to the little things when working with wallpaper. Control the process. It is better to correct all the defects at once than to re-do repairs and figure out how to disguise the defects.
But the beloved Barsik is difficult to control. The wall is torn, the cat likes it, but you don’t really like it. What to do? To remove scratches on wallpaper, you will need:
- PVA glue or special glue depending on the type of wallpaper;
- small brush;
- any rags that do not leave fibers;
- rubber pressure roller (optional);
- hair dryer.
Pets can tear even the most durable wallpaper with their claws
Repairing damaged wallpaper occurs as follows:
- We inspect the scratched wall and decide whether it will be possible to carefully disguise the defect.
- Using a brush, apply a moderate amount of glue to the peeled wall.
- We press the peeled wallpaper against the wall using a clean rag.
- Remove any remaining glue.
- If necessary, warm up the area to be repaired with a hairdryer, apply pressure and wait for it to cool.
If the scratch is large, the damaged area must be carefully separated from the wall, coated with glue, and the glue must be applied to the wall as deeply as possible. Cotton swabs are ideal for this. The technology is also suitable for situations where you need to glue the edges of wallpaper. If the detached edge fits clearly on the old place on the wall, then everything is simple.
If the loose edges are torn, a patch may be needed, so always save any remaining finishing materials after repairs.
The patch requires strict alignment of the pattern. Make it with slightly larger sizes to accurately align the old panels and the new piece. The required fragment is cut out very carefully using sharp scissors.
Liquid and paper webs
Liquid wallpaper is a material with amazing properties and an interesting method of application (you can learn more about what liquid wallpaper is, how to properly dilute and apply it here). But over time, such a canvas can become damaged, which means it needs restoration. They can be quickly restored and repaired with your own hands. You need to stock up on a basic set of tools and a new composition for the job in advance.
- To restore the coating, it is necessary to dilute the mixture and leave it to infuse for some time.
- When the mixture is wet, carefully cover the gaps in the walls with a trowel in small portions.
Before updating, you need to make sure that the coating is resistant to abrasion and wet cleaning. It is important to keep in mind here that the paper web will have to be varnished, otherwise the coating will quickly deteriorate.
If stains appear on the paper, it will be difficult to get rid of them, but it’s worth a try:
- It is necessary to attach a white napkin and iron it.
- If this does not help, cut out the contaminated area and replace it with a new one.
Patch
To restore a wall that has lost its attractiveness in this way, you will need a piece of coating that matches the color. It can be taken from scraps usually left over when performing basic repairs. If there are no scraps, you will have to buy a suitable piece in the store. This will be a little expensive, however, there is no other way to make a suitable type of patch.
A piece is measured from the trimming or new piece, slightly larger in size than the area of damage. It is enough that it exceeds the repaired area by a couple of centimeters on each side. The patch is applied to the damaged area and cut through, along with the existing wallpaper on the wall. You need to step back one centimeter from the edge of the patch. After this, the cut out fragment is removed, and the old covering is removed from the wall at the location of the slot. All that remains is to glue the patch into place in the usual way.
For canvases with a large or pronounced pattern, it is better to repair by cutting out a patch along the edge of the pattern, repeating all its curves. This way the glued area will be completely invisible after the surface is restored.
Update Methods
How and with what to update the canvas without repair:
- Decorative stickers . They will help transform the entire wall. Sold in any stores to choose from: themed or one color (how to decorate wallpaper with your own hands?).
- Wallpaper painting . It's easy to do. You need a special stencil and paints, then you can start creating.
- Full wall painting . Even ordinary water-based emulsion will do.
- Applications . Original option: make drawings from old rolls, colored paper or other material.
Mechanical cleaning and washing
A simple way to update is regular cleaning with a washing vacuum cleaner. This is a fairly effective way to renew a dirty canvas. You need a special nozzle that glides easily over the corrugated surface. If the canvas has no protrusions, you should use light moistening with water and a hand sprayer. The main thing is to do everything carefully so that no dust stains remain.
Attention
Be sure to thoroughly rinse the vacuum cleaner attachments. The devices need to be washed frequently and wiped dry every 7 square meters. m of processed area.
If the canvas has a relief pattern, then in this case a clothes brush with soft bristles (or a paint brush) is used. Once cleaning is complete, you will need to wipe it down with a dry cotton cloth.
How to replace some wallpaper on a wall
If the wallpaper is damaged over a large area, you will have to completely remove it in that area and apply a patch. Replacing some of the wallpaper will require a lot more effort. The main emphasis is on accuracy.
Attention! To remove is not just to rip it off. In our case, we need to carefully cut out an even figure on the wall, this will make it easier for us to fit the patch, and replacing part of the wallpaper will be perfect.
If the damaged area does not peel off well from the wall, you can wet it with water or apply a special wallpaper remover.
Do-it-yourself wallpaper restoration occurs in the following sequence:
- We cut out a patch from the panels remaining after the repair. If there are none left or you didn’t do the repairs, you can go to hardware stores with a sample. Maybe they still produce exactly this type and luck will smile on you.
- The patch pattern is made several cm larger than the old fragment.
- We apply wallpaper glue, suitable specifically for your type of rolls, to the wallpaper and to the wall.
- Apply and smooth the patch, getting rid of unnecessary air. We try to combine the drawing.
For all the details on how to apply a patch to wallpaper correctly, watch the video:
The glued patch is several centimeters larger, so it overlaps. We remove it with a sharp knife, cutting along the joint between the patch and the old panels. This creates a perfect connection that will be almost invisible after drying.
Types of finishing damage
As a rule, all the reasons why there is a need for wall decoration boils down to the following points:
- Peeling off wallpaper;
- Mechanical damage to the canvas;
- Contamination of the finish.
Most often, all these shortcomings can be eliminated without renovating the entire room.
Advice! If the walls are covered with paintable wallpaper, then the easiest way to update them is to apply a new coat of paint.
The wallpaper is damp and swollen
Wallpaper, a syringe and glue in it are the solution to the problem with bloating.
If the well-known pink tablets help us with bloating, then a completely different “medicine” will help us with bloated wallpaper. We just need to dry them well, and then use a regular syringe and needle to pierce the ugly swollen bubble, fill it with glue and smooth it out thoroughly. Voila - the defect is fixed! There is no need to cut the wallpaper - you will only ruin its appearance. But using a syringe is a simple method that will not cause difficulties even for a child.
Updating your wallpaper in radical ways
There are situations in which it is simply impossible to clean or update wallpaper using standard methods. But this does not mean that you should despair. There are several methods by which you can update your wallpaper.
Painting with water-based paint
This is a fairly radical, but at the same time simple way to refresh the room and interior. Absolutely any wallpaper is suitable for painting, regardless of pattern, relief, material or texture. Despite the fact that the water-based paint mixture is the most universal, some rules should still be followed.
- If you have doubts about the advisability of painting, then test it on a small area that is not noticeable.
- The layer must be thin, otherwise the wallpaper will get wet and completely deteriorate.
- Before painting, the surface must be prepared by removing dirt and loose pieces.
Important! When painting embossed textures, you need to use a roller with long pile.
Partial replacement
To do this, you need to apply masking tape around the entire perimeter of the area that needs to be replaced. Using a painting or stationery knife, you need to cut out a piece of old wallpaper canvas. Remove it. Paste on the new canvas.
Important! To make the new area look harmonious, use decorative overlays or strips from old wallpaper.
Various applications
This is a very original and irreplaceable thing for refreshing the interior and updating the wall decoration. Applications can be made from wallpaper, colored paper and even fabric. The most important thing is to always remember and take into account the combination of colors and various patterns depicted on a given decorative element and the wallpaper itself.
Repairing a plasterboard wall
The procedure for repair work for a plasterboard wall is completely different. If a defect appears in such a wall, then you need to carefully cut out the damaged area and prepare the same scrap from drywall. After that, the resulting hole is carefully sealed with a new part using ordinary PVA glue and masking tape.
Before you start cleaning the wall, you need to take all measures that will protect you from dust. Therefore, stock up on goggles, gloves, closed clothing, a respirator and put something on your head.
All cleaning work is carried out manually using an abrasive mesh on a bar, which measures approximately five hundred by one hundred millimeters. If you use a drill with a cord brush, unevenness may appear on the wall. The plaster and old paint are removed from the wall without any residue.
Remember that if, after cleaning, irregularities appear on the wall, the depth of which is more than three millimeters, then it is best to replaster. If you still need to replaster the wall, then sprinkle it generously with water and let it stand indoors all day.
Then remove the remains in layers or with a metal spatula. Here you need to clean the walls down to concrete or brick.
Masking seams
The wallpaper joints are glued as follows:
Gluing wallpaper joints
- Using a thin brush, carefully coat the folded joints of the wallpaper.
- Then, using a roller, they are re-rolled onto the wall.
- Let the canvas soak.
Radical method. If, after diligently smoothing the wallpaper, seams have formed at the joints, then they can be successfully disguised. To do this you will need a thin brush and paint to match the color of the wallpaper. The edges of the wallpaper should be carefully pulled away from the wall, if possible. Then paint the wall at the joint and let it dry.
You can also play it safe if the preparation of the wall is not good enough, at the joints, glue paper tape (the usual one for cash registers will do) this procedure is good to carry out at the time of wallpapering the walls.
Video:
We dry, degrease and plaster the walls
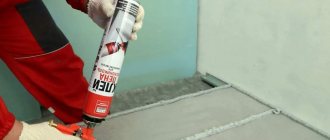
Dry the walls using a hair dryer. After this, the wall is impregnated with a primer that contains biocidal additives. If there are seams between the slabs and bricks, they need to be foamed.
Then you need to start plastering, using plaster markers that are installed vertically on the wall. The beacons should be located from each other along the width of the spatula, and their presence is mandatory in each corner. The first stage of plastering is carried out with a cement-based mixture. She plasters the spaces between the beacons from top to bottom.
Painting a wall after renovation
They are leveled along the beacons using a spatula. The corners are also leveled with a spatula, holding it up to 90 degrees. By the way, there are also special corner spatulas on sale. When this one dries, you need to apply the plaster again only on the basis of gypsum, it is white in color. This layer should be 1 millimeter.
This method can be used in any room, whether you are repairing walls in the toilet, living room or bedroom. Everywhere the walls must be smooth and perfect.
This is the final stage at which the repair can be completed; painting is done, if necessary, after the plaster has completely dried. The walls can be left white or you can come up with a special design. Examples in the photo.
Moreover, there are now many ways to cover walls. The most standard is wallpaper; in addition, they use cladding and decoration of walls using mosaics, decorative stone or wet wallpaper. All these are stylish and modern solutions that will make your premises completely new.