Wallpaper is the most popular material for interior decoration. They are easy to stick on walls; there is no need to resort to the services of specialists, which reduces the cost of repair work. Also, modern technologies have made it possible to create a variety of wallpaper options that create different effects on the surface. And this is an opportunity to easily choose the right option for yourself so that the interior looks beautiful. To do the finishing yourself, you need to know the repair rules and where to start gluing wallpaper in the room. This will be discussed further below.
Choosing a starting point: why is it so important?
During the Soviet era, wallpaper was glued from the window. The canvases were glued overlapping because the material was thin. To make the joints invisible, work began from the window opening. Today, the range of wallpapers made from various materials is huge - from non-woven to balsa wood. Why is it so important to choose the right place to start gluing?
- Wallpaper indoors is glued in a circle - from point to point. The place to start work in this case is the very first canvas. However, if you act in this way, in the absence of experience, it is easy to make inaccuracies, and the last piece may not coincide with the first.
- The last strip of wallpaper often does not fit entirely, which means the pattern may not match. Therefore, it is better to choose the starting point for gluing in an inconspicuous place.
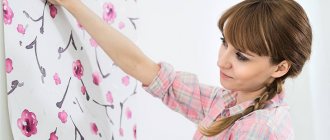
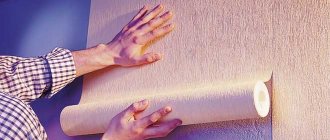
To hang the wallpaper neatly and evenly, you will have to carefully work with the first sheet. If it is glued somehow, the remaining strips will also lie crooked. You need an even vertical for the first strip of wallpaper, since when gluing the next strips it will become a guide.
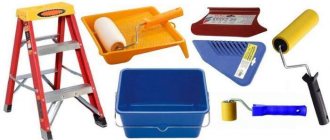
Tools used to determine the evenness of the desired landmark:
- The building level is a simple and affordable device. The longer it is, the better the performance.
- Plumb line – suitable for vertical lines.
- A laser level is an expensive, but most accurate and convenient tool.
Methods of gluing
Depending on the condition of the walls and the wallpaper base, 2 gluing options are used - overlapping and butt. They allow the joints to be left as invisible as possible.
Overlapping
In this case, you need to try to make the overlap less noticeable, for which the panels begin to be glued from a light source, that is, from a window. The edges of 2 adjacent strips are overlapped, pressed, rolled with a roller or smoothed with a spatula. Due to the fact that obstacles to the rays do not create shadows, changes in the thickness of the finish are almost invisible visually.
Butt-butt
This method is good if the walls are smooth, without bumps or blockages. The panels are cut according to the height of the room with a margin of 5 cm and glued from the marked vertical. Each subsequent strip is closely adjacent to the previous one.
Do not move the edges too close, otherwise they may creep on each other, and the joint will become noticeable.
If the strips are connected end-to-end, the question of the visibility of thick, overlapping edges disappears by itself. When carefully glued, they are almost invisible, especially if the pattern does not have a direction or large repeats that need to be combined.
With edges cut in place
Wallpaper on a fabric basis, as well as when finishing curved walls, where it is very difficult (and sometimes impossible) to align the joints, it is recommended to stick panels with the edges cut in place. If you pull the material too tightly, after drying it will wrinkle, and fragile wallpaper may tear.
In such a situation, it is more advisable to glue the strips on top of each other with a slight overlap of 0.4-1 cm, and then, after the glue has dried, cut through both layers with a sharp knife. The edges will match perfectly, which is what is required.
You need to do the cutting carefully - damp wallpaper quickly tears, and if you press too hard, it is easy to damage the underlying putty. The cut strips are removed - first the top one is removed, and then the bottom one is pulled out from under the panel. The joints are additionally coated and rolled with a roller, excess glue is wiped off with a rag.
From the window
The old Soviet method is still used, often, despite the ability of modern wallpaper to create a seamless finish. The method is popular because people are used to working this way, and the older generation advises the younger generation to do so.
The second reason: Soviet windows were smooth, unlike doorways or corners, the curvature of which is sometimes visible to the naked eye. Another advantage of this method: the window opening, as a rule, is deformed very slightly and is quite suitable for reference.
And one more argument in favor of the window opening. When gluing from another point, when it comes to the window, the solid canvas will most likely not fit near the opening and you will have to cut off a strip of the required width.
In addition, gluing wallpaper under the window is usually very difficult, since heating radiators are usually located there. If work starts from the window, these problems can be avoided.
Room design with wallpaper: rules for choosing products for different rooms and combining them
When choosing wallpaper for a room, you must not only be guided by price and appearance, but also take into account their physical characteristics.
On a note! Finishing on a non-woven basis will not shrink after drying, and will also perfectly hide small unevenness. Another advantage of non-woven wallpaper is the ease of gluing, since according to the technology, the glue is applied only to the wall.
The walls of a bedroom or nursery should “breathe”, so the ideal option is paper wallpaper. Their main disadvantage is their short service life. An alternative to paper covering can be textile wallpaper, but they are much more expensive.
A good option for the living room is silk-screen printing. Its shiny surface will give the room respectability. The color should be chosen in accordance with the furniture; large patterns and bright colors are inappropriate here. It is better to choose calm shades.
A good option for the living room is silk-screen printing; its shiny surface will give the room respectability.
Vinyl wallpaper on a non-woven basis has increased strength and, as a rule, a water-repellent effect, so they are resistant to mechanical damage and all kinds of dirt. They can be cleaned and washed, making these products ideal for kitchens and hallways.
When creating a modern interior design, different wallpapers are often used in the room. Combining different coatings not only in color, but also in texture will help create a unique decor on the walls. By using different wallpapers, you can divide the room into different zones. Vertical or horizontal delimitation using companion wallpaper is also quite popular. The photos show the original version of their use in the form of inserts.
From the door
Currently, builders, as a rule, strictly monitor the verticality of doors and corners. Unpleasant exceptions do occur, although they are rare. It is convenient to glue wallpaper from the door for the following reasons:
- the first and last strips do not have to be joined together;
- in areas such as a hallway or hallway, the doorway is often the only suitable landmark.
- if there is an unevenness somewhere, the door will cover it. This option is optimal when the pattern on the stripes must converge exactly.
It should be noted that even a very smooth-looking doorway will not hurt to check it once again with a good building level or plumb line.
How to glue wallpaper behind pipes
Working with pipes also requires patience; there are many obstacles in this area. You should start gluing the wallpaper in the standard way, from the part where there are no obstacles, when you approach a part of the pipe, carefully bring the wallpaper to it, and use a utility knife to make a cut under the interfering element. This applies throughout the entire area.
Working with pipes also requires patience; there are many obstacles in this area.
From the corner
The angle as a guide is unreliable, since it is rarely perfectly level. Therefore, wallpaper is glued from the corner infrequently, in cases where the room has no windows or when the doorway is very skewed.
Sometimes they work with a corner like this: they don’t start directly from it, but retreat a distance equal to the width of the roll minus 2–3 cm. Draw a vertical line, which will be the starting point. This approach allows you to smoothly and beautifully join the wallpaper in the corner.
What else to pay attention to
To avoid additional problems, you need to consider the following points:
- The relationship between adjacent corners and the door.
- The location of window openings relative to each other, the entrance to the balcony.
- Placement of heating elements: pipes, radiators, etc.
- Arrangement of furniture.
- Availability of other important interior details.
If the room has a stationary cabinet that is not planned to be moved to another place in the future, you can start gluing from it, so that the junction of the strips is hidden behind it. The same applies to the furniture in the kitchen.
Maintaining verticality in uneven corners
This is especially important if the wallpaper has a geometric pattern that must match. There is a proven method for maintaining verticality. When wallpapering, you should mark a new vertical line on each wall using the method described above. In this case, the last strip of wallpaper on one wall will overlap the first fragment on the second by several centimeters.
Useful tips
Recommendations to help simplify the gluing process:
- It is better to paste wallpaper behind radiators and vertical heating pipes right away, while you have fresh energy, so as not to suffer later.
- Before work, you need to turn off the power to the apartment, remove the covers from the sockets in order to glue the canvas directly onto them. After the wallpaper has dried, the holes are carefully cut out and the socket housings are put back in place.
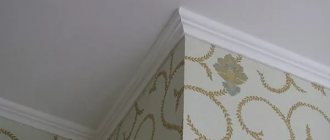
- You can seal uneven joints near the ceiling using borders.
- When working with external corners, it is good to use a special plastic corner that matches the color of the trim.
USEFUL INFORMATION: How to properly glue wallpaper in corners: join the pattern
Choosing the right “reference point” and strictly vertical orientation of the stripes are the key conditions for an accurate and high-quality finish.
How to glue wallpaper behind radiators
To work with batteries, you can choose two methods of gluing the material. Remove the radiator itself and apply wallpaper using the standard method, including surface preparation and leveling. Here, you need to take into account that removing the radiator is not an easy process, it is advisable that it be carried out by a professional. If done independently, the water is turned off and completely drained from the radiator.
The second option is to glue pieces of wallpaper behind this area, first a small piece on one side, then on the other. It will be difficult to match the drawing.
Removing a radiator is not an easy process and it is advisable to have it done by a professional.