Wallpaper is the most popular finishing material: easy to use, with a wide range, a rich palette of shades, colors, patterns, different thicknesses and properties. How to glue wallpaper, end-to-end or overlapping, is determined based on the specific situation and the selected type of material.
But even such a simple pasting of walls with roll products requires care and precision in calculations. The reliability of the coating, its durability, and overall appearance depend on correct joining.
Tools
To hang wallpaper without seams or visible joints, the first thing you need to do is take care of the adhesive that matches the type of wallpaper and suitable tools.
To work you will need:
- pencil, tape measure, plumb line or level;
- container and wooden stick for mixing glue;
- spatulas - metal and plastic wallpaper, scissors, sharp knife;
- brushes, rollers, rags.
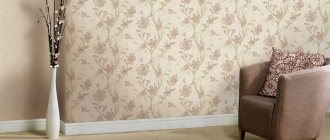
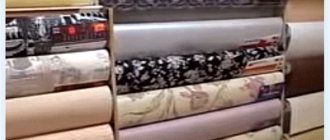
Which wallpaper should you choose?
Assortment of wallpaper in the store
It is recommended to choose thick, durable materials, especially non-woven ones. It is not very difficult to glue vinyl wallpaper yourself. The assortment of these particular categories of wallpaper in construction markets is characterized by maximum diversity. At the same time, non-woven wallpaper has an important advantage - in terms of environmental friendliness, it is comparable to paper, and in terms of durability and ease of application, it is superior to vinyl coatings. Cork and fiberglass wall coverings also help to increase the level of environmental friendliness of the finishing of any room.
You can also decorate the walls - the basis of the interior, without seams and cracks - with such types of wallpaper as cork, fiberglass, textile, photo wallpaper. The principle of pasting walls end-to-end is similar to the methods of working with non-woven and vinyl materials.
Preparing the walls
The secret to success when wallpapering lies in preparing the wall.
- You need to start by completely removing the previous coatings.
- The next stage is plastering with a gypsum compound, which copes with most irregularities and crevices.
- Next is putty to remove roughness.
- The final operation is a primer, which increases the density and moisture resistance of the putty.
All stages of preparing walls for wallpaper are described in this article.
Step-by-step instructions for treating plasterboard surfaces before gluing are here.
If the walls have gained shine, it means that everything has been done correctly, the glue will lie on them evenly and the wallpaper will adhere well.
Advice. To check if the walls are ready, attach a piece of cellophane to the surface with masking tape. If after a day the inside becomes foggy, you should wait a while with gluing. If the film remains unchanged, you can start working.
Requirements and technology
About surface parameters
Beacons for plaster (putty)
- For high-quality work, you need a flat surface, since you can glue vinyl wallpaper jointly (paper, acrylic, non-woven) only on a flat base, where the difference in plane does not exceed 1-2 mm per square meter . This means that the rough base on which the installation will be carried out needs to be pulled out level, which is what lighthouse profiles for plaster or putty are used for. In the same way, leveling the surface with plasterboard, which is created specifically for this purpose, serves this purpose.
- If you are making repairs in a new building, then do not hope that the walls there are perfectly smooth - in almost all cases (99% of 100%) this is not the case - there will always be errors even in block houses . Even if you have one wall that is level, and the other has a slope or differences, then an accurate joining will not work, since the discrepancy between the sheets will increase exponentially depending on the slope of the base. Of course, the price of repairs when leveling the base increases, but its quality also increases in the same way.
Installation nuances. Docking
Note. We will not consider how to glue wallpaper into a joint, starting with surface preparation. Let's assume that the wall has already been cleaned and primed, and all we have to do is stick the sheets correctly.
So, we are now looking at how to properly glue vinyl wallpaper at the joint (paper, acrylic, non-woven), and we need to start by marking the wall, for which we will need a long building level and a simple pencil.
Depending on the width of the sheet (standard width 0.53 m and 1.06 m), we retreat from the corner so that the sheet is wrapped a few centimeters on the adjacent wall, that is, if it is 53 cm, then we retreat from the corner by about 45-47 cm, and if 106 cm, then 98-100 cm, respectively.
At this distance under the level, draw a strict vertical line with a pencil, along which we will orient the edge of the sheet (you can step back 1 mm to make the line more noticeable).
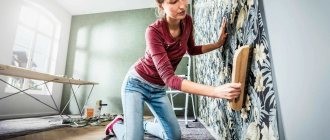
Using a rubber roller
Now you need to carefully press the edge of the sheet, since you can seal the joints on the wallpaper only if they adhere tightly to the base and a rubber roller will be the most effective tool for this.
If you have to work with patterns or designs, then after gluing the first strip you need to make an adjustment - to do this, unroll the roll to the height of the room and apply the sheet to the wall so that the pattern or design matches - this will make the transition unnoticeable. Leave a few centimeters of margin on the ceiling and floor sides, which you will cut off after gluing the strip to the main area.
If there is no pattern on the wallpaper, then the task is somewhat simplified - there is no need to adjust it to the pattern - just cut a strip of the required length with a margin of 5-10 cm and glue it to the surface, tightly connecting the edges. In such a situation, the price of the material will decrease somewhat, since when adjusting to a pattern, a lot of waste is produced, which will never happen on wallpaper for painting or just one tone.
Note. If you are gluing paper-based wallpaper, then the instructions require that you apply glue to both the wall and the sheet so that the paper gets wet. If the substrate or the entire sheet consists of non-woven material, then it should not be smeared - it is enough to apply glue only to the wall.
Here we show you how to glue wallpaper without joints
Where to start
If preference is given to wallpaper made of non-woven fabric, vinyl or cork, the beginning border does not matter, because the joining makes the seams invisible. But still, one of the following options is usually chosen:
- From the window - according to a long-standing tradition.
- From the door, which is convenient to use as a vertical line.
- From the corner, if it has the correct shape, although such places are rarely even. But using a plumb line or level, you can mark a perpendicular next to it, retreating a distance identical to the width of the wallpaper, and start gluing from there, returning to the corner itself later.
- From a major landmark. When there are many passages and windows in a room, it is worth starting with the largest object.
- From several lines. The method is used when there is a large window, and pasting is carried out from it in different directions.
USEFUL INFORMATION: Comparison of vinyl and non-woven wallpaper: which is better?
Preparation for the procedure and pasting corners
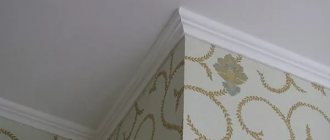
In order for the wallpaper to lay well and stay on the walls for a long time, you need to carefully select the tool, carefully read the instructions for the materials used, choose the right glue for the canvas, and adhere to the working technology. The corners should be well glued, since this part of the finishing is the most time-consuming and complex.
Algorithm for gluing corners:
- Measure the distance between the nearest strip of wallpaper and the window or doorway. Increase this result by approximately 5 cm.
- It is good to saturate the corner and wall with glue.
- Place the provided reserve on the other side of the corner.
- In the corner and on the wall, carefully align the pasted strip with a rag or rubber roller.
- Since the angle in the vertical direction is not always perfectly straight, determine the narrowest place and make a notch at a distance of + 1 cm from it. Make a marking vertically from it to use it as a marking for the next piece of roll.
- Trim the seam with a wallpaper knife, using a ruler and a paint spatula. Trim the excess from the other canvas to match the pattern.
- Remove excess areas from the bottom and top of the canvas using the same method as the sides.
Wallpaper cutting
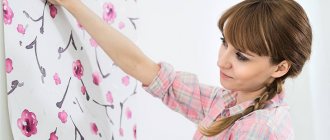
The roll is rolled out on the floor and cut into the required lengths with sharp office scissors, taking into account the margin and matching of the pattern. Wallpaper with a large or embossed pattern is cut out with particular care.
When cutting, it is important to consider the size of the repeat - the height of the pattern repeated on the wallpaper.
Simple calculations are carried out. For example, the size of the repeat is 50 cm, the height of the wall being pasted is 280 cm. The number of repeats that will be placed at this height, rounded to the nearest whole number, is determined.
280 : 50 = 5,6
We round up to a higher value, we get 6 - the number of incomplete rapports that fits in a strip from the ceiling to the floor.
50 × 6 = 300 cm – the required length of the glued sheet.
We stack the cut sheets.
Advice. Marks made on the back of each sheet and showing the top of the canvas will help you avoid confusion during the gluing process.
How to glue wallpaper correctly - where to start
It makes no difference which room you plan to wallpaper; there are a number of rules that must be followed:
- Remove the old covering. It must be removed carefully so as not to damage the wall, otherwise you will have to putty it - this will take additional time and will also require money spent on materials.
- If the old covering is made of wallpaper, and it is difficult to come off, it needs to be wetted and left for some time at rest for swelling. It will be easier and faster to remove them. However, you cannot use this method if the walls are covered with washable materials. Here you will have to work with a spatula.
- When the old coating is removed, you will need to take a good look at the entire surface of the base - if there are areas with unreliable plaster, it is removed and a new one is applied.
- To keep the walls dust-free and wallpapering easier, the base will need to be primed in several layers. This way the surface of the base will become very smooth and it will be easier, faster and better to glue wallpaper on it.
Advice! To save money on buying primer, you can make it yourself. To do this, you only need a couple of glasses of PVA glue and 10 liters of water. Mix everything well and apply to the walls.
After the preparatory work, you can begin cutting the strips. Measuring the length can be done using a tape measure, measuring the distance from the ceiling to the floor, or by applying a roll of wallpaper directly to the wall, unwinding the required amount and cutting it off. It is important not to forget about allowances.
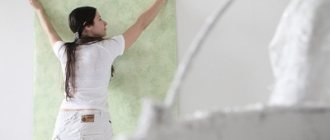
Further, according to the instructions. The adhesive mixture is being prepared. Begin gluing by spreading the adhesive mixture on the surface of the base (wall) and the strips themselves, if the wallpaper is not non-woven. Fold them for impregnation, as shown in the photo.
Before you start gluing, you should decide and decide where you will start gluing the wallpaper from the window or from the door, and prepare the necessary tools. In fact, there are several methods and from them you can choose the one that you think is the most suitable.
Necessary tools for wallpapering
- A plumb line or laser level to control the evenness of the wallpaper in a vertical position
- Regular pencil or marker
- Roller for applying glue to counters
- Brush for hard-to-reach places (corners, radiators)
- Tray, glue bucket
- Bucket with clean water
- A soft sponge or rag made from old unwanted items
- Plastic spatula for sealing corners in hard-to-reach places
- Regular trowel for floors and ceilings
- Kitchen or stationery knife for wallpaper
How to glue paper wallpaper and paper-backed vinyl end to end?
For paper wallpaper:
- We select and prepare glue from starch with an antifungal additive according to the manufacturer’s instructions.
- Lubricate the first strip evenly and leave it in the folded state for 3-7 minutes to soak.
- We glue the canvases to the wall with a neat and very tight alignment of the edges. The joints can be additionally glued with PVA.
Note! When wet, paper wallpaper stretches, so it is important that the same time interval is maintained for each panel from coating with glue to gluing it to the wall. After drying, they shrink, so the edges of the sheets need to be adjusted as tightly as possible so that gaps do not form between the sheets in the future.
The conditions for gluing vinyl wallpaper with a paper base are similar to the rules applied to canvases made entirely of paper. They are also pre-coated with the glue intended for them, given time for impregnation, and then glued to the surface.
USEFUL INFORMATION: How to glue wallpaper under a suspended ceiling (video)
How to get a result without gaps and discrepancies?
To get the desired result, follow the rules:
- To begin work, select a door or window opening or corner.
- The adhesive composition must be selected in accordance with the roll material, its type and size. It is necessary to adhere to the instructions for diluting the glue, the rules for applying it to canvas or to the wall.
- It is better to refuse joining in a corner, regardless of its internal or external location, since in such places overlapping gluing is required.
- To prevent future peeling at the edges of the canvases, a more resistant adhesive composition is selected and additional processing of these areas is carried out.
- It is necessary to smooth the seams only a few times, otherwise they will stand out against the main background.
If all the recommendations are followed, then the desired decorative effect when covering walls with wallpaper is easily achieved.
If the joints do come apart, read about how to save the situation in a separate article.
Features of butt gluing of vinyl wallpaper on non-woven and non-woven
These coatings, which have many advantages, differ for the better in their gluing technology. They do not need to be coated - just apply glue to the wall. Everything is done much faster, the problem of wallpaper getting wet disappears, they do not shrink when drying.
- Using a roller, the wall is covered with an even and homogeneous layer of glue. A brush is used in hard-to-reach places.
- You should wait until the glue is absorbed into the wall and dries. Then the glue is reapplied to the area that will occupy one piece of wallpaper.
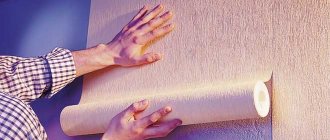
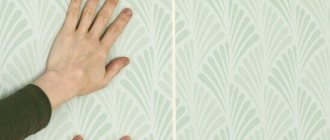
- The first canvas is applied to the wall without pressure, making sure that the side edge does not move from the vertical line. After making sure that everything is in order, the wallpaper is pressed against the wall and, constantly smoothing, they begin to stick. It is convenient to do this using a wallpaper spatula or rubber roller. Air bubbles are removed using the same smoothing movements.
- The next canvas is glued like the first, but the edge of the already pasted wallpaper is taken as a guide. The joints are carefully smoothed.
How to effectively hide the joints between wallpaper
This is another way to avoid crooked gluing and problems with joints.
Most often, the following problems arise with joints:
- The divergence of the canvases, which causes a gap to appear between them. This problem can be eliminated by painting the wallpaper. A more budget-friendly method would be to use tile grout in the joint area, to which a suitable color is added. You can fill in the gap with a marker or pencil. A more complicated method is to add crumbs removed from the wallpaper to PVA glue and apply this solution to the crack. If the wallpaper has come apart slightly, you can soak the edges of the strips with warm water and try to pull them together.
If the gap between the wallpaper joints is wide, it is sealed with special decorative strips - Glue gets on the front side of the wallpaper. Before drying, you can wipe it with a clean white cloth or napkin. On paper wallpaper, this should be done carefully, simply blotting the area. On dark panels, traces of glue are well masked with a retouching pencil.
The procedure is performed carefully and slowly - Curling and lifting the edge of the wallpaper. This drawback can be easily eliminated with wallpaper glue. The edges of the strips are put back in place; for reliability, it is better to roll the seams with a rubber roller.
The rubber roller not only smoothes the wallpaper when gluing, but also carefully removes excess glue and air bubbles
Features of the work
Before you start wallpapering, you should take into account some points, without which the quality of the work may suffer significantly. Pay close attention to the following points :
- Carefully inspect the walls that currently contain old wallpaper. If there is serious damage, then the best way out of the situation is to simply tear off the old wallpaper and leave bare walls. Working with bare walls is much easier.
- The wall on which you plan to glue wallpaper must be perfectly flat. There should be no major defects that could interfere with operation.
There are 2 types of defects:- Explicit. These include: tears and peeling off of some parts of the wallpaper, abrasions and changes in plane.
Hidden. These include: cracks and voids in the walls. They can be easily detected by simply knocking on the walls with a hammer.
- If you still decide to glue new wallpaper on top of the old ones, then you should glue the lagging seams on the old wallpaper. Gaps and cracks should be sealed with primer and putty.
- Also, if you glue wallpaper on a bare wall, you need to apply a primer to it. This does not require much effort, but you need to have enough time left. You need to apply 1-2 layers of primer to the wall. Important: Do not rush to glue the wallpaper right away; let the primer dry.
Possible problems when joining wallpaper
The possibility of divergence of the canvases at the joints cannot be ruled out. This is the most common problem that can appear after the decorative coating has dried. There may be several reasons:
- uneven wall surface;
- when gluing the wallpaper under pressure, it “stretched”, and when it dried, it “shrunk”, the seam came apart;
- poor-quality cleaning of the wall from dust and previous coatings. Sometimes the lack of primer also leads to the edges of the canvases peeling off;
- the surface of the wall or the edge of the wallpaper is poorly coated with glue.
Some shortcomings appear immediately, they can be corrected during the process of gluing the strip (not enough glue). But sometimes unpleasant moments appear after the canvases dry. If a flaw appears at the bottom of the wall and is covered by furniture or appliances, then the owners can “turn a blind eye” to the flaw.
But it often happens that the problem needs to be solved radically. There are a couple of options for how to join the canvases:
- If the edges of the wallpaper have simply peeled off, then fixing the defect is very simple. Using a thin brush, carefully smear the edges of the canvases, press them well against the wall using a rubber roller, and you can lightly dry the joint area being repaired with a hairdryer;
- If a narrow gap appears between the canvases (the wallpaper has come apart), the problem is eliminated with “cosmetic” means. If the wallpaper is bright, then select a sealant of a similar color. When working with white wallpaper, you can use putty. Naturally, the seam will be noticeable upon close and careful examination. This is due to the different structures of materials (sealant, wallpaper, putty);
- Large enough gaps simply cannot be masked. The best option for eliminating the defect is gluing it with a thin strip of wallpaper. This technique requires accuracy and patience, because the work is almost like jewelry. But if you don’t rush, you can make the joints of the wallpaper with the ribbon almost invisible.
If there are several “serious” cracks in different places on the wall, designers advise using an original technique to eliminate the defect - attaching decorative strips (cord, border, special sticker for joints).
Pasting walls is not a difficult task, even beginners can do it. It is recommended to start renovations from a small off-central room.