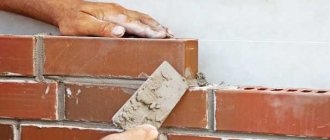
How to properly prepare and mark the surface to create a semicircle
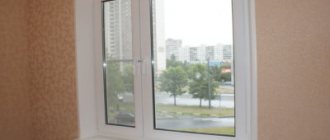
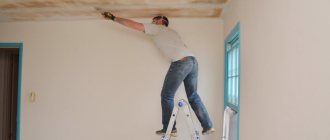
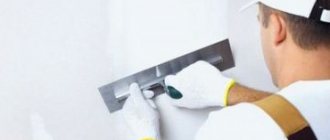
It is important to pay attention to proper preparation of the work area. Using a spatula, thoroughly clean the ceiling surface from old wallpaper or tiles, and then prime it.
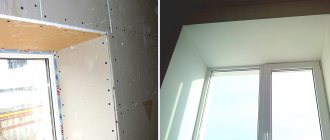
Preparing the work surface
Next, dismantle the chandelier and do the electrical wiring, and then start marking.
To perform it, take a rope and a pencil, which is tied to it. The length of the rope is equal to the radius of the full circle of the desired “installation”. Then everything depends on the location of the suspended ceiling. If it is corner, then the second end of the rope is held in the corner of the wall and then a semicircle is drawn. If it is located in the center of the ceiling, then the other end of the rope is held near one of the points of the circle. Then draw two semicircles, one of which is larger in diameter and the other is smaller. Make markings of the places where the frame is attached. It is better to separate the transverse ribs at a distance of 1 m, and fasten the longitudinal ribs 50-60 cm from each other.
Semicircle diagram
In addition, there are other options for applying markings. On thick cardboard or thin plywood, draw a semicircle in natural size, and then cut it out with a jigsaw.
Installation procedure
Having completed the markings, proceed to install the structure. To begin, mount the frame, for which you need:
- Guide profile 27 x 28 mm, attached to the wall;
- Ceiling profile 60 x 27 mm;
- Special “rivets” – crabs;
- Straight (or U-shaped) suspensions or strings. Direct hangers are used if the distance from the main ceiling to the suspended structure is no more than 11 cm, and string hangers are used when this distance is exceeded.
Materials required for the frame
Now cut the UD profile to a length slightly larger than the circumference. It is necessary that there are two such parts - for the floor and the ceiling. Using dowels, mount guides through the holes in them approximately 10 cm from the ceiling. If there are no such holes, make them yourself with a distance of 50-60 cm. Then vertical guides from the profile are installed between them, which are fastened with crabs at the joints of the profiles. The distance between them is one meter. Be sure to secure the crabs with self-tapping screws on all sides. Pay attention to the rigidity of the suspended structure.
Ready frame
The last thing to do is distribute the wiring inside the frame. After this, proceed to installing the gypsum board on the horizontal surface of the ceiling structure.
Semicircular plasterboard wall
Category: Drywall We begin the master class by creating a partition. To do this, we use profiles with rounded corners such as CW75 and UW75.
We mark the floor and only then transfer it to the ceiling.
We start marking from a right angle, after which we begin to draw a square whose side size should be equal to the outer radius of the rounding. Then we draw a radius from the corner of the square.
Using the formula l=3.14xd, in which d is the diameter of the circle, and l is its length, we calculate the length of the profile required for rounding.
We proceed to marking the UW profile using a 50 mm square, while the side flange of the CW profile should have a width of 50 mm. Then we take a grinder and cut through one side and bottom flange of our profile. For clarity, see the figure.
Now you need to align the cut profile along a pre-marked radius. To attach the profile to the ceiling we use self-tapping screws, and to the floor - dowels.
A semicircle of plasterboard on the ceiling - an unusual DIY ceiling covering
Let us immediately note that you need to carefully secure each element, without missing anything.
Now we attach the rest of the profile around the entire perimeter. In this case, CW profiles need to be attached to the pillars, and UW is used for the perimeter.
Then we take the pillar profiles and insert them into all fifty-millimeter pieces. We lay timber in the pillar profiles that limit the doorway.
Installation of drywall and bending methods
Now the structure is carefully sheathed with plasterboard sheets of appropriate sizes, using a drill and self-tapping screws. When performing work, pay attention to the following:
- To prevent the installation joints of the sheets from being noticeable, install the gypsum board along the window;
- Hide the screw heads in the material; it is unacceptable for them to be visible on the surface.
Next, bend the gypsum board into a semicircle.
You can see in detail how to make a semicircle on the ceiling yourself using the following video as an example:
You can bend drywall into a semicircle using one of two methods of bending gypsum board sheets: dry or wet. But remember that you need to work carefully, as there is a danger of damaging the material.
The dry method is suitable for structures with large radii. One side of the sheet is attached to a pre-made frame, and the other is pressed against it. This gives the sheet the required shape. Finally, the sheet is fixed to the frame.
To bend a sheet using a wet method, take a roller (or brush) and an awl. GCR is pierced in several places, but only the top cardboard covering. Then, using a roller, the material is moistened with warm water until moisture stops being absorbed into the sheet. Thus, drywall saturated with moisture bends well.
When the structure is completely covered with plasterboard, cover with putty all the places where screws are screwed in and joints, and finally prime with a deep penetration primer and paint the ceiling. The work is finished.
Selection of materials and tools
Let's consider what materials need to be purchased and what work needs to be done first.
We will step by step analyze what materials you need to buy before installing a plasterboard semicircle on the ceiling:
- a set of tools - a hammer drill, metal scissors, a level, wire, a pencil, a saw for cutting plasterboard (plasterboard sheets) or a special knife;
- GKL - it is better to purchase this material with a reserve, since it is very difficult to accurately calculate the required number of sheets for such a complex structure;
- metal profile - needed for installing a rigid frame;
- screws and self-tapping screws.
Installation work
When the first level of the plasterboard ceiling frame has been installed according to the standard scheme, you can begin attaching the oval or circle. First of all, you need to make a metal frame of the required shape:
- first you need to draw the attachment points;
- Next, we install hangers on which we will subsequently attach all supporting structures;
- then we take the profile guides and give them the required shape. To do this, use metal scissors. We make equal sections on one side of the profile and bend it in the desired direction. At the same time, we do not touch the second side;
- we attach them to pre-marked lines using dowels and screws;
Note! If during the installation process you have sections of the profile that stand out from the figure, then they can be removed using a grinder.
- We cut the profiles into pieces of the required size and install longitudinal ribs. For them, the fastening step is about 50-60 cm;
- after this we can begin attaching the transverse ribs. We fasten them with crabs. The distance between them is one meter;
Assembled frame
Note! The entire ceiling structure must be rigid and strong. In addition to this method of assembly and installation, there is another one. According to it, the entire structure can be mounted on the floor, and only then screwed to the ceiling. However, this method is only suitable for small elements, since installing powerful frames in this way is extremely inconvenient. The installation of a semicircular structure is carried out according to a slightly different scheme. To make a semicircle on the ceiling, you need to do the following:
- we completely install the first level of the ceiling;
- we cut the profiles and give them a semicircular configuration in the corners of the room;
- the profile here is also attached to dowels and screws.
Semicircle frame
- cut the drywall into pieces of the required size;
- we attach them to the frame. If necessary, we adjust their size to fit your figure;
- We fasten the drywall with self-tapping screws.
Finished design
If a circle or oval will be placed in close proximity to the window, then the sheets of drywall should be fastened so that they run along the window. This way the lines of their connections will be less noticeable. Things are somewhat more complicated with the cladding of a semicircular structure. Here drywall can be attached in two different ways:
Wet method
- wet method. Using a knife, we cut out a vertical element that should be bent. We go over it with a spiked roller and moisten it well with water. When the inner part of the sheet softens, we begin to attach it to the frame, bending it as necessary. It is best to do this when the frame has not yet been attached to the ceiling;
- method using cuts. We make vertical cuts along the entire length of the piece to be bent. They go at regular intervals.
Cuts on the sheet
Note! You only need to saw through the part of the sheet that will be the front. There is no need to saw through. At the time of attachment to the frame, we bend the piece along the cuts made. This method will require more putty in the final finishing.
Work production technology
It consists of performing the following actions:
The base of the frame is made from a U-profile, cutting it and bending it to the desired diameter.
- A line is drawn on the floor along which the wall will be made. To do this you need a rope and a marker (pencil). One end of the cord (the starting point) is pressed to the floor, and the other is pulled to a length equal to the radius of the future structure. At this point, fix the marker and, holding the rope taut, draw a semicircle along the floor.
- For the next operation you need a metal U-profile from the kit for installing drywall. Cuts are made in it using metal scissors. Many types of these profiles have cutouts made by the manufacturer, so they can be extended to the desired level.
- The finished element must be secured to the floor using long screws or metal dowels.
- Now we need to make a projection of the starting point onto the ceiling. To do this, use a plumb line or a long, even rod. Having marked the obtained coordinate with a marker, draw a semicircle on the ceiling using a rope and a pencil (as in the first point).
- To install vertical supports, another type of metal profile for plasterboard is used, namely its C-modification, which must be connected to the U-rail laid on the floor with screws. To check the correct position of the vertical stand, use a plumb line or a 90-degree metal square.
- Prepare the U-profile for the ceiling by cutting it in the right places. It is attached with screws to a vertical stand, but is not fixed to the ceiling, connecting its other end with a wedge. Using a similar scheme, you need to secure another U-rail in the middle of the vertical post.
- Drill a hole in the semicircular profile on the ceiling and screw it to it with a metal dowel.
- Using C-profiles, you need to mount the vertical posts in a semicircle. The pitch is selected within 18-25 cm. They are connected with screws to all U-shaped planks on the floor, ceiling and in the middle of the structure.
- The resulting frame is used as a basis for attaching sheets of material. The work must be done from the convex side of the semicircle. The screw screw pitch should be within 12-16 cm.
- After this, the sheets can be attached to the wall from the inside. If it is necessary that it does not conduct noise, then mineral wool or any other sound absorber can be fixed between the layers of material on the profiles. When installing the inner part, work begins from the center of the semicircle to its edges.
- All protruding parts are cut and sanded.
- The end part of the structure is sealed with gypsum board strips.
- The joints on the sheathing must be taped with a special mesh tape.
- Putty is applied to all corner parts of the structure and a perforated corner is installed. After this, everything is leveled with an angle spatula. The same work is done under the ceiling, at the junction. The putty composition is applied to the constructed wall, and after it dries, everything is sanded with zero-grade sandpaper.
- The last stage is to prime the surface of the structure and paint it in the desired color.
Finishing work
When the semicircle, circle or oval has been completely covered with plasterboard, you can begin the final finishing. This stage involves the following procedures:
- processing the joints of sheets with a special tape (serpyanka);
- covering with putty all joints and places where screws are screwed in. Ideally, you should get a flat surface. If there are any unevenness, simply sand the surface;
- Prime the entire structure with a deep penetration primer.
All that remains is to paint the ceiling and the renovation is complete.
Final finishing
Creating round structures on a plasterboard ceiling is quite simple. You just need to follow the instructions given and you will definitely succeed!
Video: Making a circle of plasterboard on the ceiling
In terms of demand and versatility, plasterboard will outperform many other building materials. And they make structures from it that are sometimes of the highest complexity. Including, this often requires bending drywall. So how to do it right?
The first thing to consider is the thickness of the gypsum board. It is easy to bend slabs 12 mm thick; no special tools are needed for this. But if you want, for example, to bend a plasterboard sheet to a radius of up to 130 cm, then it is better to take a sheet 9 mm thick.
In fact, any type of drywall can be bent. But some are more predisposed to this.
Types of drywall:
- Ceiling. It is used to correct the height of the base ceiling surface, to hide communications, and to change the shape of the ceiling. Has increased moisture resistance.
- Wall. It is used for leveling and covering walls indoors, and for installing interior partitions.
- Arched. Used in the installation of arched room openings. The composition of the plasterboard sheet is improved with the addition of fiberglass, this gives flexibility to the material. This type of drywall is characterized by increased strength.
- Moisture resistant. And it is usually used in rooms with humidity above 80%; elements that do not absorb liquid are added to the composition of this material. Long-term protection against fungus is limited. Drywall is green.
As you can see, there is plenty to choose from. Drywall is lightweight, inexpensive, and is an environmentally friendly material. But its strength in comparison with other materials will be modest. But it can be bent.
Before making a round wall, let's find out what it will give
First of all, perhaps, we should summarize the information about such convenient, but not particularly durable drywall. This composite material is also known as dry plaster, and is actively used for wall decoration, even in rooms with high levels of humidity or fire hazard, using especially resistant sheets. However, unlike decorative coatings, which are applied a few millimeters thick and immediately represent the finishing option, sheets of two layers of cardboard, between which a hardened layer of gypsum is enclosed, require finishing.
But if you do not pay attention to the decorative component, drywall is a very valuable development, because you can make a round wall from it quite quickly, just by slightly moistening it. Today, sheets with a thickness of 6, 8, and 9.5 millimeters are produced (the most popular dimensions, but there are also thicker ones), which bend relatively easily, especially the first type, called arched. More massive modifications are necessary in cases where a solid base is needed, for example, so that plasterboard niches have more than just decorative value.
From here we conclude that practically no other material can be used, say, for curved walls or for suspended ceilings in the form of complex shapes (especially in the latter case). Neither plywood nor plastic have the necessary margin of flexibility and durability. Brick is especially not suitable for light structures. As for the roundness of plasterboard walls, it is needed, first of all, in cases where it is necessary to slightly increase the area of one room by removing a protrusion in it, by reducing the area in the adjacent room, where there will be no corner. In addition, protruding parts of the layout are damaged more often than rounded ones.
"Wet" method of bending drywall
And this method can be considered the most common. Most of all, this method is good for the construction of arches, as well as built-in niches. It is based on taking into account the natural characteristics of the material. So gypsum is porous, and if moisture gets on the drywall, it will become soft.
When completely dry, the plasterboard sheet will retain its curvilinear shape for many years.
Let's take a closer look at how to implement this with your own hands.
How to bend drywall using the “wet” method:
- The frame is made from OSB (i.e. particle board);
- Using water at room temperature, moisten the leaf until a so-called water surface forms on its surface;
- The sheet should be soaked for about 10 minutes;
- To ensure that the drywall is evenly moistened, it is most suitable to use a needle roller (if there is none, then punctures are made on the sheet with an awl or even a regular fork);
- At the same time, remember - the sheet should not get wet through, only the gypsum core needs to be saturated with water;
- Bend the wet sheet in the same way as described in the dry method and secure it with tape to the template;
- Leave the drywall until completely dry.
Don't worry - contact with liquid will not change the properties of drywall. Water just makes it more elastic and flexible. And when the material dries, its properties return to it in full. That is, the plaster becomes hard again.
Round corners - pros and cons
Before you start designing round corners, you need to become more familiar with their features. They have the following advantages:
- Protect weak points if plasterboards are installed.
- Allows you to create an unusual design.
- They are distinguished by ease of finishing.
If plasterboard sheets are installed on the walls, then the corners require special treatment, because during operation these parts become very vulnerable and can collapse.
If the wall has been puttied, you also need to remember to strengthen the corners. If you apply paint or wallpaper to an unprotected surface, the corner may soon collapse, because it will be subject to mechanical stress.
In addition to protective functions, you can create an unusual design indoors. The corners of the room, connected to the walls at an angle of 90 degrees, look very simple. But if you show your imagination and make some kind of rounding, then such an idea will become a striking element of the room.
At first glance, it seems that it will be difficult to round the wall. But if you understand this process, then any novice master can do this work.
Advantages and disadvantages of plasterboard wall structures
To begin with, it probably makes sense to briefly highlight the positive and negative aspects of a wall frame structure made of plasterboard. Having understood them, it will be possible to competently decide whether such a partition is suitable for a particular case or not.
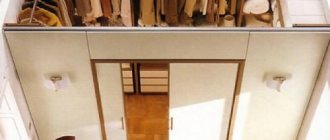
After finishing work, the plasterboard structure will look like a full wall.
So, the advantages of plasterboard partition structures include the following points:
- The materials used for the construction of such walls are quite light, so they will not weigh down the interfloor floors. Consequently, the mounted structure will be absolutely safe for the building.
- Walls and partitions made of plasterboard are not permanent, so their construction does not require obtaining a permit, the obtaining of which involves the loss of a considerable amount of time, money, effort and nerves.
- Drywall is produced in several versions - these are simple sheets (GKL), moisture-resistant (GKLV), fire-resistant (GKLO). Lightweight sheets are produced for ceiling structures. Therefore, walls and partitions can be erected from this material in any of the rooms, including in the bathroom or near the stove or fireplace.
- The affordable cost of both the drywall itself and the components for building the frame allows a family to purchase them for repairs, even with a modest budget.
- It is quite possible to design and install plasterboard walls that have complex decorative and useful shapes, such as arched doorways or functional niches and cabinets, allowing you to avoid purchasing furniture accessories.
- When leveling walls with this material, you will not need to remove the old plaster.
- The construction of walls made of plasterboard (or when leveling walls with plasterboard using a frame method) allows for immediate insulation and sound insulation work.
- You can hide electrical wiring in the frame of the wall being built.
- There is a complete opportunity to do without the involvement of a team of builders, since all the work can be done independently or with one assistant.
- The material is “breathable” and environmentally friendly, which is important for furnishing residential premises.
- A wall or partition erected using this method turns out perfectly smooth, suitable for any facing material, be it wallpaper, paint or ceramic tiles.
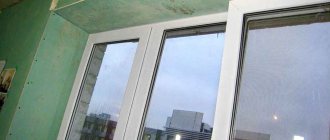
Moisture-resistant plasterboard sheets are used to level or line the walls in the bathroom.
Is it possible drywall in the bathroom? Yes, sure!
With proper installation and special preparation of surfaces, gypsum board sheets will not be afraid of the specific conditions of a bathroom or combined bathroom. And perfectly smooth walls are an excellent opportunity to tile them. Instructions for such finishing are contained in a special publication on our portal “Tiles on drywall in the bathroom” .
Drywall prices
Now, for the objectivity of the picture, it is necessary to consider the negative aspects of the plasterboard structure. It is advisable to know about them in advance, so that later, when using the rooms, you do not encounter some unexpected inconveniences. :
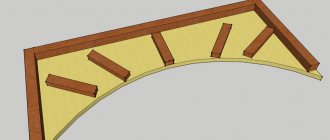
Wooden bookmarks in a metal frame of a plasterboard structure
- A wall made of this material will not be able to withstand hanging any heavy objects directly onto the plasterboard, since the sheets are quite thin (12.5 mm), fragile, and the gypsum itself is not particularly strong. Therefore, if in the future there is a plan to hang, for example, a TV or sconce on the wall, then their location must be determined at the design planning stage, and additional jumpers made of a metal profile with wooden bookmarks must be provided for fastening.
- The wall structure will have a minimum thickness of about 80 mm, and often much more. This reduces the area of the room somewhat. But think about it, what if you use other materials for the partition? Almost any other will give even greater thickness. Therefore, this drawback can be called very doubtful.
As you can see, these shortcomings are completely solvable problems. From which we can conclude that a plasterboard wall for an apartment is the best option if it is necessary to divide the room into separate zones or even isolated rooms.
Primer and preparation for finishing
The next step is preparing the corner for finishing. But before that, you need to check the evenness of the felling again. To check you need to do the following:
- Place the template on the top of the corner.
- Make a mark on the wall where the perpendicular part of the template touches.
- Move the template to the middle of the corner and make the same mark.
- Make a mark at the bottom of the corner.
- Draw a vertical line along the marks.
- Screw the metal profile along this line.
This profile will help you move the template up or down without moving. Therefore, this is how you can protect yourself from crooked plaster application.
Then you need to draw the template around the entire corner, focusing on the profile. The template should not cling to the corner. If this happens, then the excess part needs to be cut off with a grinder.
After this, the surface is primed with a brush. The product should penetrate into all crevices. Then the plaster solution is diluted and applied to the corner with a spatula. It must be applied not only to the rounded part, but also to adjacent walls. After this, take a wooden template, which needs to be drawn from top to bottom. The excess portion of the mixture is removed, and the corner is left with a smooth surface and an evenly distributed mixture.
You can watch this video to learn how to properly apply putty to a rounded corner. The technology for applying and leveling the mixture is presented.
The final stage is sanding the surface to make it smooth. Then the corner can be primed and finishing work can be done.
Creating semicircular corners using drywall
If you need to make a small bend radius, you can use the method described above. But for the construction of half-columns there is a method using plasterboard. It consists of the following stages:
- Marking and chiseling corners.
- Primers.
- Installation of metal profiles.
- Drywall fastenings.
- Finishes with putty.
Marking and chiseling of the corner is carried out using the technology described above. After this, the surface must be re-primed. Then the metal profiles are attached. First, the guides are mounted (top and bottom), and the rack rails are screwed to them.
In order to bend the guide profiles, cuts are made in them. For this purpose, metal scissors are used.
The profiles are then screwed to the floor and ceiling. Rack profiles are attached to them. Then you need to attach drywall to the finished frame. Several methods can be used:
- Attach narrow strips of plasterboard.
- Attach one large strip of drywall, first bending it.
- Purchase ready-made curved drywall.
The latter option will make the work much easier, because curved drywall can simply be screwed on without burdening yourself with unnecessary work. But such material is more expensive than usual, so in order to save money, you can use other methods.
To bend drywall, use ordinary water, with which the top layer of the material is slightly moistened.
In this case, you need to lightly begin to bend the material. When the drywall has acquired the desired shape, it must be fixed in this position and left until completely dry, then screwed to the profiles.
You can also attach several long narrow strips of drywall. In this case, rack profiles should be located more often. When all parts are screwed, the sheets are covered with putty, with which the surface can be smoothed and the corner can be given a semicircular shape.
To further strengthen the corners, professionals advise:
- Use reinforcing mesh during plastering, which must be secured with screws.
- Plastering is carried out in 2 stages: applying the starting and finishing mixture. The latter should be applied in a thin layer with the addition of a small amount of sand.
- When sanding, use felt to ensure the smoothest possible surface.
With consistent and leisurely rounding of corners in a room, you can achieve the desired result. If you follow all the rules, even a beginner can get a high-quality result. Rounded corners will help create an unusual design and comfort in your home.
How to make a semicircle out of drywall? In the process of selecting the design of a room, many people ask this question if they do the renovation themselves. Despite their appearance, drywall sheets can be bent to almost any degree without damaging the integrity of the building material. The main thing is to follow some recommendations from experts. In addition, there is now a special arched drywall, which is initially designed to be subject to deformation, and therefore it bends easily.
To create an arch from plasterboard, you need to know how to bend it correctly.
How to bend drywall?
Each of us, when carrying out renovation work at home, had various ideas for the original decorative design of one or another part of the room. Most of them seemed absolutely impossible to us, due to the emergence of such a problem as bending drywall.
The ability to work correctly with drywall makes it possible to use such design solutions as installing various arches, columns, and figured ceilings . In the absence of proper skills, a false impression is created that this type of work can only be performed by a professional. However, this is far from the case and our article will help you see this.
Methods for bending drywall
If you decide to make an arch or column in your apartment, then plasterboard will be the best material for its manufacture. Its installation does not require special tools or skills. The best type of gypsum board that the construction market offers is arched plasterboard with a thickness of 6.5 mm. But, due to its high cost, its use is not always advisable. There is no need to be upset. Ordinary sheets of drywall can also be bent, the main thing is to do it correctly.
There are several ways to bend gypsum boards:
- dry method without cuts;
- dry method using cuts;
- wet.
If a small bending radius is required, then the easiest way is to use the dry method without cutting the sheet material. Drywall cut to size is applied to the pre-prepared frame of a column, arch or other. It is secured at one edge with self-tapping screws and slowly begins to bend to the shape of the profile frame. The sheet will gradually begin to deform without destruction. When the radius of the bending angle coincides with the frame, the plasterboard is fixed.
To avoid breaking the sheet, it is worth knowing: the smaller the bending radius, the thinner the drywall used should be.
The dry bending method with notches is used if the surface being modeled has a “steep” bend.
In order to make a semicircle from drywall, you need to use a utility knife with a thin blade. With its help, deep cuts are made at the place where the sheet is bent, along the entire length of the sheet. The width of the step between cuts can vary from 1 to 5 cm. The step depends on how much it is necessary to bend the sheet. The greater the bend, the smaller the distance between cuts. They are made from the side of the sheet that will be convex. If it is an arch, then cut the back side; if it is a convex wall (column), cut the front side. You need to cut the canvas almost completely, leaving 2-3 mm to the cardboard base. The grooves from the cuts that are formed during bending are sealed with gypsum putty.
The wet bending method will allow you to bend the gypsum board smoothly. In addition, the surface of the sheet will not be deformed by the cuts, which eliminates one of the stages of work - sealing the cuts.
Before making a semicircle, it is necessary to perforate the side of the drywall that will be convex. To do this, use a special roller with metal needles. They treat the entire surface of the sheet, and then, using a regular roller or brush, moisten it with warm water. Through the puncture sites, water will penetrate to the gypsum core and soften it. The soaking process occurs within 15-20 minutes. It is worth considering that only one layer of cardboard and plaster should be wet, the other side should be dry. As soon as the drywall becomes plastic, it must be given the desired shape and secured with self-tapping screws. The process of complete drying occurs within a day, after which the gypsum board returns all its original properties.
With the advent of plasterboard sheets on the construction market, designers were able to create any complex shapes, including arched walls. However, before making a semicircular wall from plasterboard, you need to study in more detail the properties of this material and the sequence of work.
How to make a semicircle on the ceiling from plasterboard
- Metal scissors
- Pliers
- Hammer
- Painting knife with replaceable blades
- Roulette
- Pencil
- Chop cord
- Two meter rule
- Spatulas
- Brushes
- Rollers
During installation, the screws must be buried half a millimeter relative to the plane of the sheet. Otherwise, during puttying, there is a possibility of removing the protective layer from the self-tapping screw, which in turn leads to rust on the painted surface. There are 2 ways to bend a sheet: dry and wet.
The dry method consists of cutting the cardboard from the desired side of the sheet into equal strips 2 to 5 centimeters wide and further breaking the gypsum core to obtain a curved blank of the required radius.
- Hammer for profile installation
- Small grinder - for cutting profiles
- Screwdriver for assembling the structure
- Jigsaw - for cutting arc shapes from plasterboard sheets
This list of tools and materials includes the main items and in practice will be an order of magnitude larger, since it directly depends on the capabilities of the customer and the professionalism of the work performer.
The process of creating a rounded corner using a wireframe
Before installing such an arched structure, you need to learn the basic rules for working with drywall:
- Rounded surfaces can only be created using a frame made of a steel profile; in this case, it is better not to use wooden blocks
- Plasterboard sheet is not characterized by high strength, so it is better to bend according to a pre-made template
- To create a large bend, the material must be wetted; in this form, small radius bends can be created.
- The size of the sheet should match the height of the wall being rounded, this will make the installation process a little easier
To avoid any unforeseen situations in the process of creating a semicircular plasterboard partition, you should prepare the necessary material in advance:
- Plasterboard sheets
- Metal profile of several types
- Self-tapping screws and dowels
In addition, any construction or finishing process is performed using a specific set of tools:
- Screwdriver or electric drill with attachment
- Metal cutting scissors
- Plumb or building level
- Ruler and tape measure
- Rope or construction cord
- Marker or pencil
Work on creating a rounded corner from plasterboard is carried out in a certain sequence:
Data-lazy-type=»image» data-src=»https://remontcap.ru/wp-content/uploads/2017/09/stena-iz-gipcokartona3-250×166.jpg» alt=»how to make a semicircular plasterboard wall" width="250″ height="166″>
Jpg" alt="how to make a semicircular wall from plasterboard" width="670″ height="225″ srcset="" data-srcset="https://remontcap.ru/wp-content/uploads/2017/09/163 ..jpg 300w" sizes="(max-width: 670px) 100vw, 670px">
When round plasterboard partitions are made
If at the time of manufacturing the curved wall only single sheets were laid on the rest of the frame, after the round plasterboard partitions are covered with it in two layers, you can continue covering the structure. Upon completion, all that remains is to coat with putty all the joints of the sheets and the places where they are fixed with screws
. Then you should think about finishing the constructed wall. In addition, there is almost certainly more than one wire outlet along the length of the partition, so you will also have to deal with installing power points.
Subsequently, when the finishing work is completed, the drywall will be hidden under a layer of decorative plaster or wallpaper. Particular attention will need to be paid to the skirting boards, which must have an appropriate radius. Having coped with this task, you will receive something that you can be justifiably proud of - a spectacular result of your work. After all, through simple actions and with a minimum of materials, it was possible to make a rather elegant turn of the wall, not at an angle of 90 degrees, but in a beautiful bend.
Fastening drywall to a pre-rounded partition
To correctly answer the question of how to make a semicircular partition from plasterboard, you should understand that the quality of the process performed depends on the correct preparation of the wall and the plasterboard sheet.
Before gluing drywall, the wall must first be rounded. If the wall is made of brick, then knock down the outer corner with a hammer drill and level it well. With a concrete wall, proceed in the same way, but it should be taken into account that concrete is much stronger and there are reinforcing elements in it.
To prepare the plasterboard sheet, you need to bend it. To do this, you need to make a template in accordance with the shape of the wall and choose one of the bending methods.
Dry bending
On one side of the plasterboard sheet, cut the cardboard, trying to draw the strips parallel to each other. The material is laid on the template, and the space created by bending between the parts of the sheet is filled with putty. The edges of the sheet can be pressed with bars to maintain its shape. The workpiece is left for 24-48 hours until dry. After this time, the material can be used for its intended purpose.
Jpg" alt="how to make a semicircular wall from plasterboard" width="500″ height="415″ srcset="" data-srcset="https://remontcap.ru/wp-content/uploads/2017/09/13e9e16fbce8992ec94da8c864de25e0 ..jpg 300w" sizes="(max-width: 500px) 100vw, 500px">
Wet bending
With this method, one side of the sheet is rolled with a needle roller so that water can get to the core of the material. Then the sheet is moistened with water and left for 15-20 minutes to soften the gypsum in the middle layer. The workpiece is placed on the template, the edges are fixed and left to dry completely. This takes approximately 24 hours.
The use of this method has a limitation: the minimum bending radius is 30 cm. Therefore, to create more round shapes, it is better to use the dry method.
Jpg" alt="how to make a semicircular wall from plasterboard" width="502″ height="458″ srcset="" data-srcset="https://remontcap.ru/wp-content/uploads/2017/09/fda7642e655f4682e99b0ab1e95f1dcb ..jpg 300w" sizes="(max-width: 502px) 100vw, 502px">
To glue the bent sheet, the rounded plasterboard wall must be coated with a primer and dried. Then you need to apply mounting adhesive to the wall in separate strokes, attach the workpiece to it and gently press it.
In the process of gluing the wall, you need to make gaps between the floor and the material of about 1 cm. This will allow air to circulate freely, creating optimal conditions for the glue to dry.
Using drywall, even a simple home craftsman can make a rounded wall with his own hands. This is possible if you follow the installation technology, as well as with the correct application of the tips and recommendations of experienced craftsmen.
Correct markup
Round plasterboard ceilings belong to the category of structures of complex configuration, as they can have several levels and planes. Before starting any work related to the installation of a suspended multi-level ceiling, it is necessary to develop its design in detail, create a scale drawing indicating the sizes of the circles and their locations. The need to first create a sketch also applies to any other curved figure, but now we will talk about how to make a circle of plasterboard on the ceiling. So:
- Once the drawing is ready, it needs to be transferred to the ceiling. What you end up with will depend on how correctly the marking is done. First of all, you need to draw axes on the ceiling, the intersection of which will mark the center of the room. At each ceiling-wall junction, find the middle, screw a self-tapping screw into it, and tie a dye thread to one of them.
- Pull the cord to the screw on the opposite side - the imprint of the thread will be the axis. Do the same in the transverse direction. If the circle should be located in the center of the ceiling, from the intersection point, mark the radius of the circle along the axes.
Small circles are drawn with a compass, a semicircle is also drawn
- Further actions are carried out depending on the size and number of circles. There are several options for the development of events. Small circles can be drawn using a homemade compass. An improvised compass is constructed from a piece of profile or twine, the length of which corresponds to the radius of the circle.
- One end of it is fixed to a self-tapping screw, screwed into a point marking the center of the circle, and a pencil is fixed to the other end. Then everything is simple: turning the compass around its axis, you get a circle. But how to make a round plasterboard ceiling if you need to draw a circle of large diameter? It is inconvenient to do this with a compass.
The ceiling is round from plasterboard, we make a circle and a semicircle
Markup process
- In this case, it is easier to first draw a square or an equilateral triangle, and then inscribe a circle in it, connecting certain points with arcs. A small instruction, presented in the form of a table, will help you refresh your memory of the school geometry course.
| Drawing for marking | How to fit a circle |
| Divergent circles inscribed in one square | Two circles with a common center can be inscribed in one square. In this case, the radius of the smaller circle will be equal to the distance from the axis to the middle of the side of the square. A large circle passes through its corners. Marking according to this principle can be done if you make a ceiling of the same shape as in the example above. |
| Circle inscribed in an equilateral rhombus | In a more complex version of the ceiling design, a rhombus can be inscribed in the circle. The circle, accordingly, fits into the square. |
| By connecting the corners of an equilateral triangle with arcs, you get a circle. It may be necessary to fit a triangle into a circle if there are, for example, petals or another three-dimensional figure inside. |
Similar markings will have to be made not only on the base surface of the ceiling, but also on the first level, lined with plasterboard.
Surface marking is a critical step
Making a circle of plasterboard on the ceiling yourself, especially when you have no experience working with rounded elements of ceiling structures, can only be done after making the correct markings.
They start with an analysis of the room. If the ceiling and wall meet with a small curve that imitates a cornice, it is removed with a hammer drill.
Only in this case will it be possible to fix the UD profile as close to the ceiling surface as possible.
At the next stage, the contours of the frame of the first level of the structure are outlined. This must be done, taking into account that a circle or semicircle of plasterboard will be attached at the second level. Start from marking the lowest point of the ceiling covering. Having dropped 25 mm from it, place a mark on the surface of the wall, repeating the steps in each corner of the room (you will need a level to control the measurements).
The marked points are connected by a line (chockline). They are guided by it when attaching the UD profile.
The next stage is marking the ceiling surface directly. Taking into account the direction of installation of plasterboard sheets, marks are placed on opposite walls in increments of 50 cm. Lines are drawn between the marks on the ceiling using a chockline.