9467 0 0
Icer March 13, 2017 Specialization: master in the construction of plasterboard structures, finishing work and laying floor coverings. Installation of door and window units, finishing of facades, installation of electrical, plumbing and heating - I can give detailed advice on all types of work.
When gluing wallpaper on arches, the most important thing is the accuracy of the junction of the wall and the opening.
When I glued wallpaper in a room with an arch for the first time, the result of the work was far from ideal. Careless joints, folds, peeling areas - all this worsened the appearance. But with practice comes experience, and now I can say that following the technology will allow you to achieve an excellent result, even if you have never glued wallpaper to an arch.
The technology discussed in the article is suitable for gluing arches of any shape
How to apply?
Attention
Arched structures can be home-made or “factory-made”. At the same time, it is pointless to list their advantages and disadvantages, since each specific owner of a residential premises chooses an arch according to his wishes and capabilities.
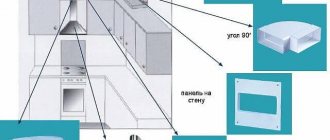
Design a similar design element using:
- paints;
- wallpaper;
- plasters;
- other finishing materials (tiles, stone, etc.).
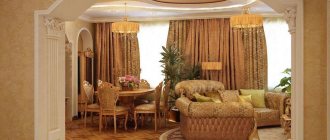
For example, a design covered with wallpaper or lined with mirror tiles will best fit into a classic design.
In a “loft”, an arch decorated with plaster or wood-like finishing material would look most appropriate. And the “modern” style will be complemented by an arched element, painted or decorated with wallpaper with a geometric print.
It is better to start gluing wallpaper from the side of the window .
If there is no such opening in the room or it is located far away, then the finishing materials are glued to the arch from left to right.
Arch preparation
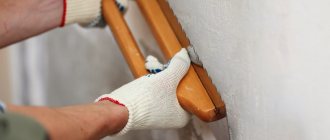
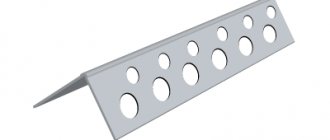
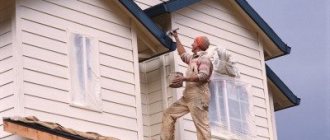
To minimize the likelihood of wallpaper peeling off from the base and destruction of the edges of the opening, it is necessary to perform a number of basic manipulations. The modern construction market offers customers a huge range of high-quality corners that can be glued to the base and also screwed with self-tapping screws. First, the master will have to clean the structure from dust and other contaminants. The surface is thoroughly plastered. If a polyvinyl chloride corner is used, it is covered with glue and fixed.
Important! Experts say that it is not at all necessary to wait for the plaster to dry completely before attaching the plastic corner to the arch.
Metal parts can only be fixed with self-tapping screws, since they are quite heavy and ordinary glue simply will not support them. There is no need to tighten the fasteners too much. Otherwise, it is possible that waves will form, which can only be removed with a thick layer of plaster. At the final stage, the corners must be coated with a finishing compound and left to dry. You can clean the structure using sandpaper. Cover the top with drying oil.
Preparatory manipulations
What finishing materials should I choose to add to my apartment?
Construction stores offer several types of moisture-resistant and non-moisture-resistant wallpaper materials:
- paper;
- vinyl (what are the features of gluing vinyl wallpaper?);
- non-woven (how to glue wallpaper on a non-woven basis?);
- textile;
- liquid (how to properly apply liquid wallpaper and care for it?);
- exclusive (metalized, cork, etc.).
To choose the right wallpaper for an arch, you should not pay attention only to the price of such rolls. After all, the color, texture and technical characteristics of the finishing material are more important (read about how to distinguish different types of wall coverings and determine which is better here).
- The first guideline is color and texture .
Wallpaper for an arched structure must completely match the shade and pattern with the previously pasted materials. The texture of the new coatings should also match the texture of the old ones. If you do not fit the arch into the existing interior, and the goal is to make it an independent design element, then it is better to choose materials that are noticeably different in color and texture from the previously pasted canvases. - The second guideline is the “ability” of wallpaper to resist moisture . If the arch is near the bathroom or kitchen, then this feature will be very useful.
- The last but not least important point is wear resistance . If canvases are used to cover an arched structure that is subject to physical impact, then it is still better to choose “stronger” finishing materials.
How to wallpaper an arch
This way, the corner of the arch will look good and you will protect the wallpaper from mechanical damage. The corners will not be damaged or peel off. And you will make your work much easier.
The shape of the arch is such that it is impossible to match the pattern on its front and side sides. Therefore, if you want to decorate the entire arch with the same wallpaper, choose canvases without a pattern (plain color), or with an abstract or small pattern that does not require alignment. The second method is to trim the wallpaper at the corners of the arch so that the arched painting corner is visible. This is a corner that is glued to the arch during the puttying process.
Here is a photo: To make the result pleasing, before starting work you should prepare tools and materials, as well as prepare the walls and arched opening. You will need: You will understand what we are talking about when you read these instructions. We will also briefly describe it, because in the case of smooth paper wallpaper it can well be used.
Tools for work
Important
In order for the selected construction and finishing materials to beautifully frame the arched structure, you need to carefully select them, but also use the right tool when gluing.
To work with paper, vinyl, textile and exclusive fabrics you need:
- wallpaper glue for gluing a specific type of material (read how to weld, use, where to store the paste here);
- several brushes of different sizes;
- a roller for smoothing out air bubbles (read about why bubbles appear and how to glue wallpaper without swollen areas);
- scissors;
- pencil;
- tape measure or long ruler.
If the arched structure will be decorated with liquid wallpaper, then you will need:
- spatulas made from different materials;
- trowels;
- rollers.
You will need to worry in advance about the “container” in which the silk plaster will be diluted.
Choice of quality finishes
It is necessary to select wallpaper as responsibly as possible. They must be not only durable, but also able to withstand constant loads and abrasion. If you need to perform original finishing, then for these purposes it is better to choose the following types:
- Washable. They compare favorably with all analogues in their practicality. The user can remove dirt and dust without fear of damaging the coating. They are presented in a wide range of colors and patterns, so each consumer can choose the most suitable option. Decorative corners can be glued to the joints of the canvases.
- Paper. The base can be smooth, structured, embossed. They themselves are quite durable and lightweight, making them quite easy to work with.
- Double layer. Can be made from bamboo, vinyl and textiles. They have a long service life and aesthetic appeal, which is especially important for finishing classic arches. But it is necessary to use such material in an apartment with extreme caution, since all items must have a common note of the selected interior.
- Liquid wallpaper. It is convenient to work with this material, as it has all the properties of decorative plaster. There are not many common characteristics with classic wallpaper. There simply cannot be any joints or mismatched finishes.
The difficulty in choosing a suitable finish is that the materials involved must be combined with each other. For finishing, experts recommend using plain stripes. Otherwise, it will be extremely difficult for the master to match the material according to the pattern with the wall covering.
Decorating the arch
Instructions for beginners: how to properly finish an arched structure?
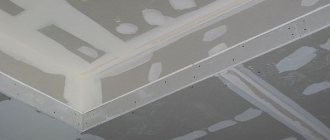
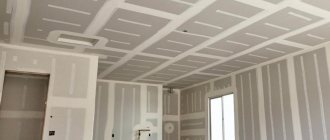
The arched structure is most often made of plasterboard , but wooden models are also available on sale.
But since wood products usually do not require additional design, we will take plasterboard design elements as a basis.
Advice
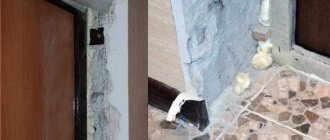
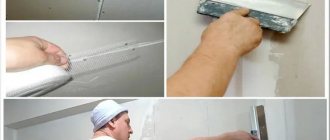
Before you start gluing them, you need to prime and putty the inner and outer surfaces of such an arch.
Why to putty plasterboard under wallpaper and how to do it yourself we described in this article.
This is done not so much for aesthetics, but to level the walls and prepare a good “base” for further work.
In addition, if the arch will be covered with dense canvases that do not take shape well, then it is recommended to paint the corners of the structure in advance with paint, the tone of which completely matches the color of the base material. This will help hide minor “flaws” in the pasting and make the picture more complete.
How to paste over:
- the first wallpaper sheet, measured in length, is glued next to the material previously glued to the wall - end-to-end or overlapping (how to join wallpaper correctly?);
- the second canvas, cut along the arch with a margin of 5-10 cm, is glued next to the first;
- the third and subsequent strips of wallpaper are glued in the same way.
It is difficult to give freshly glued construction and finishing materials the desired shape, because glue-impregnated canvases tear when interacting with scissors. Therefore, first the glue is allowed to dry, and only then the excess is cut off from the wallpaper .
Then the excess is cut off from each wallpaper sheet, but a margin of 2-3 centimeters remains. This allowance along the entire length is cut with short, vertical lines, which are separated by a distance of 4-5 cm.
This is done so that any wallpaper sheets can be easily glued to the inside of the arch.
The next stage is the design of the interior of the arched structure . For this:
- a strip of wallpaper is cut along the width of the structure;
- the material is glued to the design element.
Such a strip can be cut into two parts, then joined at the highest part of the arch.
Attention
If the corners are pre-painted, then you can cut the wallpaper fragment exactly to the size of the structure, without any margin.
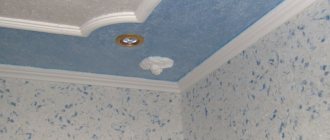
Decorative plaster
Another equally popular finishing material is decorative plaster. It differs from ordinary putty in that it allows you to create relief textures.
Advantages
- Relatively easy to apply. Due to this, many people prefer to perform this operation with their own hands. This allows you to save some money.
- Economical. If we compare this material in the price-service life ratio, then it has the most optimal indicator.
Flaws
- Difficulty of restoration. If any area is damaged, it will be extremely difficult to repair it, giving the surface a uniform appearance. The new layer will stand out noticeably.
- Difficult to care for. If necessary, decorative plaster will be extremely difficult to clean. Firstly, it is “afraid of moisture”, and secondly, it has a relief structure.
Application Tips
If this finishing method was chosen, then all operations will take place in the following sequence:
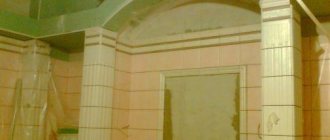
- The first step is to plaster the arched opening. This is necessary so that in the future the seams between the massive part of the opening and the gypsum board sheets do not appear. In addition, this measure allows you to make the final surface as smooth as possible.
By showing your imagination, you can create a truly unique texture.
- Decorative plaster does not require careful leveling of the surface. Therefore, when using it, it is enough to just get rid of significant irregularities using putty.
- Having applied the putty evenly over the entire area of the arch, it is necessary to treat it with a primer. This measure ensures stable adhesion of the surface to the plaster.
- After the primer has polymerized (depending on the specific sample, it can take from 4 to 20 hours), it is time to apply the plaster itself. Using a sponge or grater, it is necessary to form a decorative relief on the freshly applied material.
- Only when the plaster is completely dry can it be subjected to finishing treatment, that is, painting.
Wallpapering: a simple option
To make the arch arch neat, you need to follow the following sequence of steps:
- Wallpaper is glued to the wall without taking into account the arch.
- Without waiting for the glue to dry, cut out an opening with a margin of 3-3.5 cm.
- Next, the remaining free area is cut into petals, so that they do not reach the arch line. The cuts are placed at such a distance from each other that when folded they form a beautiful radius of the arch. This will have to be determined experimentally, since the radius of the upper edge of the arch varies.
- Next, the “petals” are smeared with glue, carefully applied to the arch and pressed.
- After drying, cut a strip along the length of the opening and a couple of millimeters less wide on each side. If it is not possible to make such a long one, then the strips are arranged so that they are connected in the middle of the arch, from above.
- Glue a strip from the floor, around the circumference of the arch, with a transition to the opposite side of the opening.
Decoration nuances
The standard adhesive composition is not able to withstand the weight of a strip of wallpaper. Experts prefer to cook it themselves. To do this, take 1 part of PVA glue and twice as much wallpaper product. The composition is thoroughly mixed and applied to the strip. You need to start gluing the canvases from the window, but in such a way that the last strip does not reach the opening by at least 23 cm.
Important! It is forbidden to try to cut out an arch from wallpaper in advance, since in 99% of all cases it is impossible to guess the size.
The prepared material is glued to the wall and the outline is gradually formed using sharp scissors. All edges are fixed in the inside and coated generously with glue. The second side of the structure is decorated in a similar way, but only after pasting the surface above the door.
Decorating the arch vault
First of all, carefully cut out a strip that is optimal for the width of the arch, but 7 mm smaller than the actual size. To avoid common mistakes, you must follow a certain algorithm of actions:
- All internal sides of the structure and the prepared section are coated with glue. You should wait at least 15 minutes for the surfaces to become saturated with the product.
- The piece is fastened on one side from below and gradually glued higher along the arch. The final stage is to fall on the bottom from the opposite side.
To avoid unwanted bevel, it is worth dividing the strip into 2 parts. First of all, glue one side, and only then the other, in order to connect them as harmoniously as possible in the middle.
High quality and affordable option
Expensive and beautiful
Photo wallpapers are often used for arches. But the price of such repairs can be quite high, because the wallpaper is made to order, taking into account the size of the arch. The quality of the finish should not be ignored either. If the opening has the shape of an arch, then this area will be subject to load during operation. The coating must be resistant to mechanical stress and can withstand washing, as it will constantly get touched when walking.
Due to this, you will have to periodically wash the walls in this area. For this reason, paper sheets may not be the best solution here. A much more profitable option would be glass wallpaper, bamboo, non-woven or vinyl sheets, which can be wiped or washed with a sponge and a mild soap solution.