Drawing for children aged 3-4 years is a real creative experiment. After all, it is from this age that creative impulses appear.
The child sees the world around him and tries to convey it in the picture, even if it is formless.
And the main task for parents is not only to start teaching their child to draw and use art sets, but also to instill in the child a love for this creativity.
But how can parents organize activities correctly and organize a place for the creative process? After all, the children’s future desire to draw depends on this.
Here, what is important for every child is not the technique of depiction, but joint creative play. And when drawing with their children, it is important for parents to take this into account.
Therefore, joint lessons, from getting to know creative materials and tools, to drawing various pictures, should always be interesting.
Organizing a space for a children's art workshop
To attract a child’s attention to such a creative process as drawing, you should first of all organize a place for artistic experiments at home.
Such an art workshop will become an indispensable assistant for parents and an excellent creative place for children.
They can visit it any time they feel the need to express themselves.
But how to organize this drawing corner? And what should it be filled with? - these are the points that are important for every parent to take seriously.
At the same time, it is worth knowing that a children's drawing workshop does not have to be cluttered with a huge number of objects. Sometimes a small art set is enough for children to start painting.
But there are still several necessary items that should be in the children's corner:
- A table with a chair or desk suitable for the height of the baby;
- Paper, both plain white and colored;
- Open shelves or containers, such as buckets or drawers, where materials and tools for drawing will be stored in the public domain;
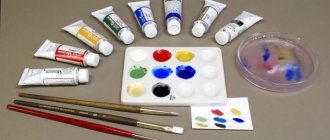
- Paints, brushes, pencils and markers.
This minimum set, of course, can be expanded with other things that the child will use.
From additions to the main set, you can also add such interesting and useful items as:
- Glue and scissors – needed to create artistic appliqué with the help of parents;
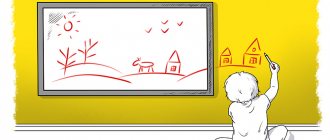
- Chalk board or chalk wall - for children's self-expression instead of wallpaper;
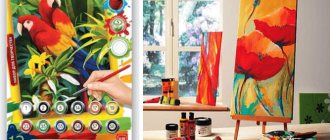
- An easel with replaceable paper for using paints or a separate paper sheet;
- A universal board for drawing with felt-tip pens;
- A place for the exhibition of created children's paintings.
In addition, an important point in organizing a children's workshop, in addition to its content, is the choice of the place where it will be located.
You can choose from the following location options:
- A bright place in the nursery by the window;
- Illuminated part of the living room or kitchen.
Well, then slightly zone the corner so that the child feels more comfortable in it.
And when the corner for children's creativity is ready, parents can begin to involve their child in the art of drawing.
How to invite a child to a children's drawing corner?
Children aged 3-4 years are very restless and active, so they need to be interested in everything new. And drawing is no exception.
In order for the child to begin this creative process, parents will still have to show that it is really interesting.
And you should start by inviting your baby to a children's corner, where everything should be freely accessible. A child can feel, touch, and try to draw everything there.
However, the child is not always interested, and to avoid this you should use the following tips:
- The invitation must be designed beautifully, i.e. use bright colors and objects. For example, put not white, but yellow paper, markers or pencils of bright colors, put a tablecloth on the table for drawing with the child’s favorite characters;
- Decorate the children's interior around it so that the child wants to play there. For example, decorate boxes for storing art supplies in the shape of the child’s favorite things - cars, rockets or animals;
- Use simple materials so that the child does not get confused when he comes into contact with them for the first time. The simplest ones at this age will be soft pencils or felt-tip pens, paints and crayons;
- Start drawing by working with one type of tools and materials. It is worth remembering that the child is just beginning his acquaintance with drawing and it is difficult for him to switch from one type of object to another. Therefore, if the first acquaintance is with pencils, then several weeks of classes should be spent with this instrument;
- Never rush and show your child how to use objects for drawing when everything is prepared in advance for the lesson;
- Allow the child to take independent steps and enter his workshop any time he feels like it.
And following these tips, it is actually not difficult to invite your child to such an artistic activity.
It turns out to be much more difficult to create interesting activities in order not only to instill a love for the drawing process, but also to lay the foundations for using tools and materials.
And you can easily teach a child to draw at this age with the help of a brush, pencils and felt-tip pens. But the main thing is to properly introduce children to these subjects.
Drawing conditions
The first prerequisite is a small motivating story.
Once upon a time there lived a machine (a toy animal, a doll...). One day she wanted to go for a walk. I went outside from the garage (house, mink...), and there was a swamp everywhere. Let's draw a path for her?
The second prerequisite is to play with what is drawn. You can only play with dried drawings. Dry them with a hairdryer if the baby is not afraid of its “buzzing”.
Typical lesson time: 10 minutes. Like in kindergarten. After about this time, Mishenka says: “I’m tired.” He gets up and leaves. It is useless to force a child of this age to work extra. So we try to fit everything planned in the lesson into 10 minutes.
Getting to know the brush
If at the first stage of tactile drawing with children parents use edible materials, for example, finger paints, then at the age of 3-4 years you can start using standard paints. As a rule, this is watercolor or gouache, which is used to paint with a brush.
But how to creatively lead a child to use such a tool as a brush? After all, you can’t teach how to hold this instrument correctly with three fingers right away, and you don’t need to. First of all, you need the following:
- Show that you can bring paint to life with a magic brush. To do this, prepare several jars with a small amount of water. Then dip the tip of the brush into water, wet the paint and drop it into the water. When the water is colored, the paint comes to life, and then the child experiments on his own;
- Show that you can iron any surface with a brush. To do this, you first need to show an imitation of how a mother strokes the baby’s hair on her head. And also the brush will stroke the paper or the edge of the jar to squeeze out water;
- Teach a brush to dye your hair. If the paint on the brush dries out, then you need a little water and new paint so that the hairs become colored again;
- Introduce your child to the fact that a brush teaches paints to be friends. To do this, show that paints can be mixed with each other both in water and on paper or a palette. In this case, the resulting color is not important;
- Play with a magic wand that creates different patterns. The child needs to be shown that with a brush you can put blots and dots, make strokes and lines, and in general apply any fantasy pattern.
And most importantly, it’s not at all scary if extra splashes when working with a brush get on your work or fly around. After all, what is important is the pleasure that the child receives from his creative experiment.
But how to conduct art classes with paints and brushes at such an early age is still worth figuring out. Parents should carefully select what to invite their child to draw if they conduct joint classes.
How to teach a child to draw
To begin with, the child must be given freedom to be creative. Let the child choose what and where he will draw. If a small child draws on paper, it is best to prepare a large piece of wallpaper.
In terms of neatness, kids vary: some are afraid of getting dirty, others are ready to get into the paint. Parents should respond adequately to such manifestations of the baby. Otherwise, the child may become afraid of this type of creativity.
Always praise your child. It doesn’t matter how beautiful the little artist’s painting turned out. After all, when drawing a baby, the main thing is not the result, but the process.
There is no need to require the child to accurately convey any image or object. The baby may have his own vision. In childhood, fantasy is very multifaceted, and your task is to develop the child’s creative abilities. You can offer to draw your child an apple. And then compare with your drawing. Try to find the differences, talk out loud to your baby what you see. Say that an apple can be drawn like this, or like that, and in other different ways. But under no circumstances pay attention to what the child has drawn incorrectly.
Creative experiments with paints
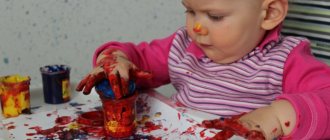
Starting from a very early age, children find it easiest to use paints when creating. At first, finger painting always begins, but from the age of 3-4 years it is time to use a brush.
And if parents correctly introduce their children to this creative instrument, then classes with it will be fruitful. But still, some artistic experiments have the best effect on the development of children's abilities:
- An activity in the form of a child’s favorite toy. When the toy speaks in a child’s voice and asks to draw it or some plot, the child will quickly become involved in the creative process and show all his artistic imagination on paper;
- Completing the handprint. Children are already familiar with drawing with their hands, so they easily leave colored traces from their palm on paper, but at the same time they can finish drawing something with a brush at the prompting of their parents or on their own initiative. For example, thanks to a brush, a green palm can turn into a carrot or a frog, and a yellow one into a tiger cub or lion cub;
- Finishing the blots. Children at this age often make inkblots. And the task of parents in the lesson becomes to teach how to turn blots into interesting objects. A blot can turn into a butterfly, flower or even a car. Nothing is impossible, the main thing is that the baby finds it interesting. Similarly, you can captivate a child with the help of colored splashes;
- An activity in the form of drawing with dots. Children really like to apply dots with a brush when first getting to know it, and it is very logical for parents to take advantage of this. After all, with the help of such a funny application of paint you can paint, for example, rain, sand and even small bugs and ants;
- Painting with a semi-dry brush. One of the most interesting experiments with gouache is when a child revives a drawn base-contour, for example, a bunny or a bear, by poking with a semi-dry brush. The baby is always interested in this process, and it doesn’t matter how well the animal is painted, the main thing is the baby’s involvement.
In addition, parents can experiment further, inviting their child to combine painting with a brush with the addition of appliqué elements and more. In addition to a brush, you can also use non-traditional methods of applying paint such as cotton wool, cotton swabs, a fork, a rubber ball, a sponge and others.
Well, you can see some interesting techniques for painting with paint in the following video lesson:
Painting lessons for children 3–4 years old
Elena Burakova
Painting lessons for children 3–4 years old
Painting lessons for children 3-4 years old.
Before we talk about a set of basic activities that smoothly introduce kids to the world of classical painting, we present original drawing methods for the little ones : Drawing with potatoes!
PEBBLES. Cut the potato in half. Run the tines of a fork several times, creating a relief on the cut. Dip the potato in paint and make a print.
FISH. Use the pad of your thumb to stamp the body, and the tip of your index finger to stamp the tail. Using a felt-tip pen, draw in the eyes and mouth.
BUBBLES. Stamp with the end of a plastic straw.
PLANTS. Cut the onion and make an imprint.
Blotography. The point is to teach children how to make blots (black and multi-colored)
.
Then a 3-year-old child can look at them and see images, objects or individual details. “What does your or my blot look like?”, “Who or what does it remind you of?” - these questions are very useful, because they develop thinking and imagination. After this, without forcing the child, but by showing him, we recommend moving on to the next stage - tracing or finishing the blots . The result can be a whole plot. So, bend a sheet of white paper and straighten it in half. Together with your baby, place 2-3 multi-colored spots of gouache (ink)
.
Fold the sheet in half and with the magic words “crex, fex, pex”, run your finger from the center to the edges. Open the leaf and get a butterfly or flower! After drying, use a felt-tip pen to add small details. Nitography Bend and straighten a sheet of white cardboard about 20x20 cm. Take a thick woolen thread about 30 cm long and dip its end 8-10 cm into thick paint and place it between the two halves of the sheet. Lightly press the sheet and move the thread. Say the magic words and see what happens. The result is a chaotic image, which is examined, outlined and completed by adults and children . It is extremely useful to give titles to the resulting images. This complex mental and verbal work, combined with visual work, will contribute to the intellectual development preschool
children Drawing on wet Moisten the paper with water and immediately start drawing . When it dries, wet it again and continue painting. The result is a smoky image with blurry outlines and smooth transitions.
Magic candle Wax candle (or a piece of laundry soap)
Secretly from the child, draw a Christmas tree or a house on thick paper.
Then, using foam rubber, begin to apply paint . Since a house drawn with a candle will be bold, the paint will not stick to it , and the drawing will suddenly appear in front of the child.
The same effect can be achieved by first drawing with stationery glue. Old gold With older children, you can make a picture by drawing with PVA glue, which leaves a convex line. Then this design needs to be covered with gold paint and lightly rubbed with black shoe polish, creating the effect of “old gold”. paints of two colors with water to a very liquid state . Pour both colors close to each other onto a sheet of thick paper. We lower the cocktail straw into the center and, pointing it in different directions, begin to blow strongly. Multi-colored branched shoots are obtained. If you create a “face” in the middle of the drawing using a wet cloth in a circular motion, and after drying, apply eyes, mouth, nose and ears to it, you will get a cheerful little man.
Watercolor with salt If you sprinkle salt on a watercolor painting that has not yet dried, the salt will stick to the paint and create a grainy effect when it dries. Cracked wax A simple drawing can be turned into a canvas by an artist of past centuries. To do this, you need to draw with wax pencils. The main thing is to press firmly on the pencil and cover the entire surface of the paper with the design and background, leaving no gaps. Then carefully crumple the pattern, starting from the edges. Unfold and repeat again to create more cracks. We take dark liquid paint and pour it into all the cracks, and then rinse the design on both sides under the tap and let it dry. If your painting turns out to be too wrinkled, you can iron it by placing it between two sheets of newspaper.
Dot Drawing Try to draw with a felt-tip pen or pencil, making many dots, quickly hitting a sheet of paper with the tool. And the best thing to do is dot drawings with paints . You can use a hard brush, or you can use a match, cleared of sulfur and tightly wrapped with a small piece of cotton wool. They dip it in paint and start creating .
Photocopy without a copier To develop fine motor skills of the hands, drawing blindly through a sheet of copy paper is very useful. Place it with the ink side on a sheet of paper and start drawing directly on the carbon paper with your fingers , a pencil or a blunt stick. When the drawing is finished, put away the carbon paper and look with your child to see if there are any details that you forgot to depict.
Collage There are always unnecessary postcards, photographs, and color clippings from magazines in the house that can be combined into a large collage. Once you have created your canvas using glue and scissors, you can tint the background or parts of the painting with paint . This should turn out to be something very interesting.
English teacher-researcher Anna Rogovin recommends using everything that is at hand for drawing : drawing with a rag , a paper napkin (folded many times)
;
draw with dirty water , old tea leaves, coffee grounds, berry juice. It is also useful to color cans and bottles, spools and boxes, etc.
Introduction to pencils
Every child can hold a pencil in his hand as well as a brush. But working creatively with this tool is a little more difficult.
And since pencils differ in volume and density, it is worth choosing thin pencils with a soft lead for drawing with children. Such a tool will be easy to draw on paper, and it will not be difficult for the child to hold it.
However, when introducing children to this drawing tool, parents, unlike introducing a brush, will need to highlight several important points:
- Motivate your child to use a pencil, because using it is more difficult than using a brush. To do this, you need to imagine this instrument as a magic ship, the fingers as five sailors, and the baby himself as a captain who can control them;
- Show, using the example of adults, how to use a magic object. Dad becomes a wizard, and mom becomes a sorceress, and they bring the drawing to life with simple movements;
- Show that a pencil, like a brush, can create beautiful dashes, lines, dots, and circles. You can also invite your child to dream up and try to draw what he wants using a magic object;
- Introduce your child to the correct position of a pencil in his hand. After all, it is more difficult to draw instruments in the palm of your hand than in three fingers. To do this, among the sailors it is worth highlighting the boatswain and two assistants who help to properly operate the ship;
- If your child gets tired while drawing with a pencil, do some fun finger exercises. And after a short rest, if the child wants to draw again, give him this opportunity.
These points will help your child quickly master simple drawing with pencils. And if the instrument suddenly stops drawing because the lead is broken, then parents need to show that it can be easily revived with the help of a magic sharpener in the form of some kind of toy or animal.
Well, having learned to use a pencil lightly, parents can offer their children interesting but simple creative activities.
Creative experiments with pencils
Pencils wonderfully develop fine motor skills, which in turn has a great effect on children's creative abilities. Therefore, the more often the child chooses a pencil for drawing, the better he will draw.
However, due to the low difficulty of mastering this tool, parents should conduct creative experiments in a lively form, getting the child interested in working with a pencil as often as possible.
A child can learn to draw from scratch with this slate instrument after the following suggested classes with parents, such as:
- Depict a fairy tale. First, the parent reads or shows a live fairy tale, and then invites the child to draw any character. It doesn’t matter how shapeless the image is, for example, a bun or a little mouse, the main thing is the child’s desire to convey what he heard or saw;
- Play hide and seek. Children love the game of hide and seek, so this idea works for drawing too. You can hide mushrooms in the grass, animals behind the fence and butterflies among flowers;
- To get lost in the forest. The whole family can first play like a child lost in the forest and tell who he could meet there, and then offer to transfer it all to paper;
- Show how it rains. A very simple idea to depict raindrops using short line strokes. And to make it more interesting for the child to read a poem about Agnia Barto’s wet bunny and ask him to portray the little bunny in the rain;
- Depict the family on a walk or in an interesting place, sometimes even imaginary. Children's curiosity helps them, albeit shapelessly, transfer what they see onto paper, which contributes to the development of artistic abilities.
You can come up with many other subjects for artistic experiments, the main thing is to present them to the kids in a playful way.
Among the plots that can be depicted with pencils, the following tips can be found in the video:
First drawing lessons. Where to begin
Little children first learn to draw simple shapes: lines, circles, squares, dots, rectangles, polygons, and so on. You can draw while playing. For example, by drawing a wavy line, say that it is a snake and it is hissing. Help your child hold the drawing tool correctly. Take his pen in yours and draw a circle. At the same time, you can tell a fairy tale. For example, the well-known fairy tale “Kolobok” is perfect. Draw a circle (bun), a straight line (road) and tell a story. Ask your child to repeat after you. At an early age, children happily copy various actions. Draw circles while still telling a fairy tale or poem. Invite your child to draw the same thing. Children who have learned to draw simple figures can be asked to look at some simple drawing, then draw what they saw from memory. This technique perfectly develops not only creativity, but also memory. When the child has already mastered the first drawing skills, introduce him to the eraser. If your child draws with a pencil, show him how to remove unnecessary lines.
We draw with children step by step. What to draw with your child
On the Internet you can find a huge number of step-by-step drawings. Start with simple ones, gradually increasing the complexity of the image.
Here are some examples of the simplest drawings:
Introduction to felt-tip pens
Felt pens, like pencils, are important in the first stages of children's creative learning to draw. But at the same time, these tools are easier to learn for any child.
And most importantly, felt-tip pens are the most loved by children in children's drawing, because they are incredibly easy to use.
But still they have distinctive features, among which the following stand out:
- The paper for drawing felt-tip pens should be thick and smooth;
- For children, it is advisable to choose water-based tools rather than alcohol-based ones, and those options that are easy to clean;
- It is worth choosing felt-tip pens with different rods, thin, medium and thick. Particularly relevant are double-sided instruments, where on one side there is a thinner rod and on the other, a thicker rod;
- The colors of the markers are difficult to mix with each other, but children at this age do not need to learn this;
- With felt-tip pens you can easily not only draw, but also color pictures.
But still, as for getting to know felt-tip pens, it is similar to pencils. You can use a story with a ship, captain and sailors, or you can come up with a story about a wizard and his students or another legend.
In any case, learning to work with felt-tip pens is faster, because the child does not need to make any effort to use them.
Parents figure out how to play with markers so that images appear on paper. And joint creative experiments benefit the development of children's drawing.
