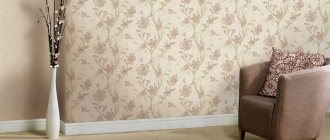
Everything flows and changes, including the world of wallpaper. Recently, along with traditional ones, rolls called meter rolls have appeared on sale. For their manufacture, different materials are used: non-woven fabric, paper, fabric, bamboo. Having undoubted advantages, they have not yet found the scale of application that they deserve. People are accustomed to the standard 53-centimeter width. Or maybe it’s worth moving away from stereotypes and learning how to hang meter-long wallpaper correctly and beautifully?
Advantages and disadvantages
The term “meter-long wallpaper” is conventional: under this name you can find 90-centimeter rolls and tubes much wider than a meter. Belgian manufacturers, for example, produce canvases reaching a width of 1.4 m.
Meter wallpaper came to us from abroad, where their advantages have long been appreciated:
- They make the pasting better, reducing the number of joints on the walls by at least half.
- They save effort and time: it’s easier to cut and stick 5 strips of meter-long wallpaper instead of 9–10 standard sizes.
- They are cheaper than traditional material: the price of one wide tube is less than the cost of two standard ones.
Flaws:
- Can only be placed on a flat surface: if there are defects, good joining of the wallpaper panels cannot be achieved.
- Consumption, compared to standard ones, may increase: due to a strip of several centimeters, you will have to buy an additional wide roll.
- It is difficult, sometimes completely unrealistic, to paste meter-long wallpaper alone.
Calculation of the required amount of wallpaper
Particular attention should be paid to counting rolls. Excessive consumption of material only threatens material costs, but the excess can be useful later for decorating or for cosmetic repairs. But if there is a shortage of wallpaper, you will have to buy additional rolls, and it is not a fact that they will match those already pasted - even from the same manufacturer, batches may differ in color or pattern.
Calculation algorithm: 1. Calculate the perimeter of the room using a simple formula: (length + width)*2. For example, for a room with walls of 4 and 5 meters, the perimeter will be 18 m. But if the layout is non-standard or there are various niches, projections, bay windows, it is worth measuring each wall along the bottom edge and adding up the result.
2. Multiply the perimeter of the room by the height and get the area of the room. With a standard ceiling height of 2.65 m, the area of the room in our example will be 47.7 m2. Ideally, the size of door and window openings should be subtracted from this figure, but if this is not done nothing terrible will happen - remember that excess is always better than shortage. Resist the temptation to save money on wall surfaces hidden by furniture - if you suddenly want to update the decor, the renovation will have to be done all over again (the only exception may be built-in wardrobes). To roughly calculate the number of rolls, the area of the room is divided by the area of the wallpaper, but this result will not be entirely correct - it does not take into account trimming. Therefore, we count further.
3. Determine the required number of sheets: divide the perimeter of the room by the width of the roll indicated on the label. Standard meter wallpaper has a width of 106 cm and a length of 10.05 m. For our example: 18 m2: 1.06 = 17 pieces (rounded up).
4. We calculate the number of whole canvases by dividing the length of the roll by the height of the room, taking into account the allowance (the standard margin is 10 cm, but if there is a repeat to match the pattern, you need to add its value to the allowance). For example: 10.05 m: (2.65 m + 0.10 m) = 3 pcs. Here we round down to take into account the trimmings.
5. Now we have two calculated values - the total number of canvases needed and how many whole canvases will come out of one roll measuring 1.06 * 10.05 m. It remains to correlate these two values, and we will find out how many rolls will need to be purchased. In our example: 17 pcs: 3 pcs = 6 rolls + 1 spare (note that craftsmen always recommend taking at least 1 extra).
Although the calculation algorithm is simple, you can always check yourself using online calculators or a table for calculating the amount of wallpaper (the roll parameters in this example are standard - 1.06 * 10.05 m).
Tools and materials
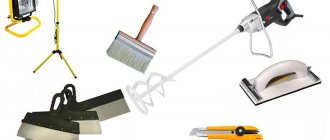
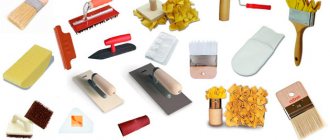
To work you will need:
- pencil;
- plumb line;
- tape measure or measuring tape;
- roller or spatula;
- masking tape;
- wide brush;
- knife;
- clean rag or sponge.
If there are significant flaws in the surfaces to be pasted, you will need putty, primer, and sandpaper.
You need to take care of the wallpaper glue in advance. When choosing it, do not forget that different types of wallpaper (non-woven for painting, paper, vinyl and others) require their own type of adhesive.
Choosing wallpaper: what to look for
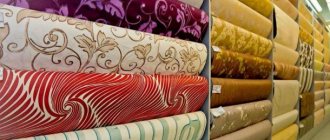
Experts recommend buying wide wallpaper in large specialized stores, where pasted samples are presented on stands. The fact is that the pattern on the roll and after pasting the wall often has a difference, the desired effect is lost.
When evaluating the presented samples, you should remember about marketing tricks - less popular and more expensive offers are placed at eye level. Therefore, it is recommended to start studying the assortment from the bottom or top row, and only then get acquainted with the samples located in the center.
When planning a complex design using several colors and textures, choose all components from one collection, including fabrics and borders.
When purchasing wallpaper, you should carefully study the instructions and choose the recommended adhesive specifically for this type of wallpaper. In addition to non-woven ones, there are paper ones on sale, light and heavy, which require a certain adhesive composition when working with them.
Preliminary preparation of walls
The base for meter-long wallpaper should be perfectly flat. The operations themselves are traditional, but they must be carried out with special care so that insoluble problems with joining the wallpaper do not arise later.
- Nails, screws, self-tapping screws are removed from the walls, switches and sockets are removed, and the holes are sealed with masking tape.
- The old coating is removed: wallpaper, plaster, paint, etc. How to do this correctly is described in this article.
- The next stage is cleaning the walls with sandpaper.
- For serious unevenness, you will have to use putty.
- The surface is covered with 1–2 layers of primer. This way it will not absorb wallpaper glue, and the adhesion of the canvas to the wall will improve.
- If you plan to glue non-woven wallpaper, which tends to show through, apply a white primer or paint last.
USEFUL INFORMATION: Different types of wall painting
Advice: you can start applying glue to the base only after the primer has become completely dry.
Features and types
Pasting wide wallpaper has its advantages and disadvantages.
Pros:
- simplified installation;
- the seams are almost invisible;
- creating the illusion of a solid canvas;
- careful execution of joints.
Minuses:
- difficulties in gluing;
- you will need to buy 1-2 extra rolls;
- careful surface preparation is required.
Types of coatings
Wide wallpapers are represented by the following types:
- Paper on a non-woven basis. They do not get wet, keep their shape well, and fit perfectly on any surface. They are easily removed and can serve as the basis for a new layer of coating.
- Vinyl on non-woven fabric. The base is covered with dense foam vinyl or silk-screen printing. Pros: long service life, easy to maintain and wide range of applications. Disadvantages: unnatural and non-ecological materials, air tightness, formation of mold and mildew on surfaces.
- Fiberglass. Pros: do not accumulate electrostatic charges, are environmentally safe for health, do not cause allergenic reactions. Fiberglass is vapor-tight and fireproof, hides wall unevenness well, and is easy to clean and paint.
- Silkscreen printing. These multilayer coatings have smooth, shiny surfaces and are highly elastic and dense.
Marking walls and cutting canvases
Wide wallpaper is glued end-to-end, so work can begin from any convenient place.
- To ensure that the first strip lies on the wall as evenly as possible, a vertical line is drawn using a plumb line and a pencil. This will become the starting point for the sticker.
- Before cutting begins, it would be a good idea to measure the length of the wall and determine the number of strips that will fit on it.
- When cutting, you need to leave a margin of 10 cm at the top and bottom of each wallpaper. Don't forget about the allowance for matching the pattern. Excess can be easily removed with a sharp knife after the glue has dried.
- The rolls are rolled out on a dry, clean surface face down and the required length is measured. Having made a notch, bend and cut along the resulting seam.
Important! High humidity in the room where wallpaper is being applied is undesirable. A draft is completely unacceptable; extreme coolness is also contraindicated. It is best to glue at a temperature of 15–25˚С.
Meet Wide Wallpaper
Recently, on the shelves of construction hypermarkets and in the virtual windows of specialized online stores, you can increasingly see wide meter-long wallpaper for sale. They differ from rolls of standard sizes by almost 2 times, having a width of 1 meter, or more precisely, 106 cm.
What are their main advantages when compared with their usual analogues and how to choose them correctly? And most importantly, how to properly glue wide wallpaper? After all, over the years, many of us have become accustomed to gluing standard rolls half a meter wide. So let's move on to look at these interesting questions.
Unlike standard ones, it is better to glue wide wallpaper together
Sticker process
Depending on the type, meter-long wallpaper is attached in different ways:
- Paper canvases. The material is first coated with glue, then the sticker is applied to a dry base.
- Varieties on non-woven base. The technology is exactly the opposite: the wall is covered with glue, the strips are applied to it dry.
- Heavy vinyl wallpaper. Both the wallpaper and the wall are coated with the adhesive.
Baguettes should be placed before gluing begins. Read more about why they should not be installed over the topcoat.
To work with meter-long wallpaper, a partner is needed: the first person holds one edge of the strip, the second holds it on the opposite side. It is convenient to use two stepladders at once - this makes leveling wallpaper on the walls much easier and faster.
Sequencing:
- Glue is applied to the back side of paper and vinyl wallpaper with a paper base. Non-woven fabrics are left without it. Paper ones are applied to a dry base. For the rest, the glue is applied with a roller to the wall along the width of the wallpaper with an additional grip of approximately 20 cm.
- The joints and corners are carefully coated with a brush. The glue is applied especially well on the top of the wall.
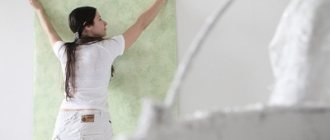
- Begin gluing the cut from the top, aligning it along the intended vertical. To do this, you need to hold the panel by the upper edge, climb the stepladder and attach it strictly to the junction of the ceiling and wall. The partner controls the coincidence with the intended vertical.
- After checking, the strip is leveled with a plastic spatula or rubber roller. The choice of device depends on the type of wallpaper: a hard tool can damage the textured canvas. You should start from the middle of the band, expanding the range of movements: from the center - to the sides, up and down.
- To get rid of air bubbles, carefully smooth the wallpaper from the center to the edges. By pressing with the tip of a spatula, additionally work out the corners and joints of the wallpaper with the baguette and the baseboard.
- A second glue line is applied with the same 20 cm margin. This is necessary so that during further actions the glue does not get on the wallpaper. The next section is glued and joined to the first one.
- After smoothing, you need to go over the joint with a rubber roller.
- All subsequent canvases are glued in a similar manner.
USEFUL INFORMATION: Wall preparation: how to remove old plaster
Advice: you need to put up new wallpaper before the start of the heating season, as the hot air near the radiators wrinkles the wallpaper.
Useful tips for beginners
Below are useful tips for beginners from professional builders that will help them learn how to glue meter-long non-woven wallpaper correctly and reliably:
- Before gluing, prepare the walls as thoroughly as possible. It is impossible to overdo it in this regard - the more ideal the surface, the greater the likelihood that the wallpaper will stick more evenly and beautifully.
- To improve the stability of the adhesive composition, it is recommended to prime the surface.
- It is extremely important to create suitable temperature conditions in the room to ensure even drying of the glue. Otherwise, the wallpaper sheets may become deformed and the pattern at the joints will move.
- During gluing and until completely dry, do not allow drafts to form.
- The humidity in the room should be minimal, otherwise the glue will take a long time to dry, and the quality of work will leave much to be desired. In the worst case, high humidity can cause fungi and mold to appear under the wallpaper.
- It is recommended to glue meter-long vinyl wallpaper in the summer (before the start of the heating season).
- It should be taken into account that the wallpaper behind the radiators will be exposed to high temperatures for a long time, so they may shrink and move away from the wall.
- In order to understand the process of gluing wide wallpaper, it is enough to make markings only for the first section. But if you are not sure, it is better to play it safe and mark out the entire room, immediately counting and cutting the roll into the required number of sheets.
- Inexperienced builders who want to cope on their own are better off starting their acquaintance with the world of wide formats with non-woven wallpaper, since they do not need to be coated with glue (only the wall), and they are easier to handle than other types.
- If you bought non-woven wallpaper, purchase glue designed specifically for it and recommended by the manufacturer.
- It is very convenient to use two stepladders to ensure uniform leveling of the canvas on both sides.
- Many inexperienced builders do not know how much time must pass after gluing before they can open the windows and ventilate the room. You should take into account the drying rate of the adhesive and the type of wallpaper, since for some a day will be enough, while for others it will take 3-4 days to dry. Information about this can be read on the packaging of the adhesive.
- And the most important rule is to avoid drafts while working, otherwise, rest assured that you will have to redo everything all over again.
Meter wallpaper is gradually ceasing to be an outlandish novelty, and they can be found in almost any apartment. Another question is, will you do the repairs yourself or would you prefer to pay a construction company? We hope that after reading this article, you will not have any difficulties with hanging wide wallpaper yourself.
Angles
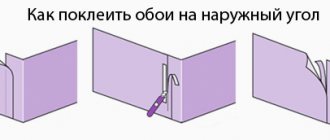
An attempt to decorate a corner with a single piece is guaranteed to lead to failure: it will be skewed, folds without trimming, which will not have the best effect on the appearance of the wallpaper, will be impossible to eliminate. But if this does not happen, the curvature of the angle will certainly disrupt the perpendicularity of the canvas, and then the number of defects will only increase.
Correct actions:
- A strip is cut out 5 cm larger than the width from the corner to the glued wallpaper.
- The wall and corner are carefully coated with glue.
- Wallpaper is glued, placing a 5-centimeter margin on the adjacent side of the corner.
- The narrowest place of the overlap is determined, where a mark is placed at a distance of 1 cm from the edge of the wallpaper, through which a vertical line is drawn.
- With the orientation towards it, the next sheet is glued with an overlap.
- The seam is trimmed using a spatula, ruler, or stationery knife.
Batteries
The wallpaper under the window sill is glued last. The work will require patience and accuracy, bordering on virtuosity.
- The wallpaper sheet is cut to the size of the radiator niche.
- Vertical cuts are made in areas coinciding with the battery mounts.
- The glue-coated section is carefully inserted behind the pipes.
- The next task is to straighten the folds formed on the sheet and press it against the wall. Due to the tightness, it is impossible to use a paint roller, so smooth it out using a rag.
- Excess overlap is applied to the edge of already pasted wallpaper.
- Pressing both layers firmly with a spatula, make a vertical cut.
- The joint remaining after removing the cut strips will become invisible when dry.
USEFUL INFORMATION: Is it necessary to prime the walls before puttying?
If such an operation was not possible, cut the wallpaper into smaller pieces and continue pasting the hard-to-reach area.
Sockets and switches
Wallpaper is glued directly onto the holes remaining after removing switches and sockets, the outlines of which will be visible. Then in these places the panel is cut crosswise with a wallpaper knife. The cut sections of wallpaper are tucked inside. For round rosettes, the cuts are made star-shaped.
Some switches cannot be removed without dismantling the entire mechanism. In this case, trimming is carried out without removing the protective panel.
- The wallpaper strip is pasted only up to the switch; with a sharp knife, punctures are made in the corners of its frame, serving as a guide for the cross-shaped cut.
- After cutting, press the edges tightly with a spatula, remove excess, carefully roll the edges to the wall and continue gluing the rest of the panel.
Openings
Wallpaper on doorways is cut off. On arches and windows, they are also cut to the size of the opening, not forgetting to carefully ensure that the pattern is aligned.
Trimming in a window opening
Final trimming
What if you have to glue alone?
Sometimes you can do without an assistant when attaching meter-long wallpaper - non-woven varieties of material will help out, because in this case the glue is applied only to the wall. Non-woven fabric will help you easily join seams even in corners. There are no particular difficulties with aligning the stripes. If it is not possible to glue the sheet correctly right away, the panel is removed and the operation is repeated again - non-woven fabric allows this. But meter-long wallpaper made from other materials will not allow this; a partner is necessary in such cases.
A lesson on gluing wide canvases is in the video below.
