New options for wall decoration are appearing, but wallpaper does not lose its position, because it has such a diverse range, and not only in the form of different patterns, but also wallpaper materials. Therefore, you can always choose an excellent option for any design idea. It is especially important to prepare walls for wallpapering. Step-by-step instructions for preparing walls for wallpapering will be described in the article.
Why do you need to prepare walls before wallpapering?
People who underestimated the importance of the preparatory process before wallpapering are likely to end up with a poor-quality surface; the wallpaper will not last for a long time, will peel off in places, joints and other decorative problems will be visible. Now a description will be given of what an unprepared surface can lead to and what the consequences will be:
- Pasted wallpaper will not stick well. An unprepared wall has pores, so voids appear under the wallpaper; as a result, they stick only 50%. It is easy to clearly see this; when removing the old coating, they are easily removed. It also leads to seams coming apart on some strips of wallpaper, which occurs already during the 1st month of use;
- Uneven walls. Such a surface is visible to the naked eye, the high density of the wallpaper will not help, and darkening such areas using the correct location of lighting will not help either, because daylight will reveal all the errors immediately, while the smallest irregularities will be visible;
- The appearance of fungi and mold. This negative consequence especially applies to walls that have direct contact with the street; if there are any cracks on such a surface, then they must be closed, because they will inevitably lead to the penetration of moisture and cold, which is a favorable environment for biological effects.
An unprepared wall has pores, so voids appear under the wallpaper; as a result, they stick only 50%.
Surface primer
Primer is a special composition that improves the adhesion of the material to the wall surface and reduces the consumption of adhesive. In addition, there are antiseptic compounds on sale that prevent the appearance of fungus or mold. It doesn’t matter whether the walls are made of concrete, brick, plaster or drywall. Primer is always applied; without it, preparation is not complete. The composition even prevents the formation of cracks.
What composition should I use to treat the walls? There are these types of primers:
- Acrylic primer.
- Alkyd.
- Mineral based.
- Deep penetration compositions.
- Products with coloring powder.
- With antiseptic additives.
A store consultant can advise which option is best to choose for a particular surface. In addition, the manufacturer indicates on the box what the product is intended for.
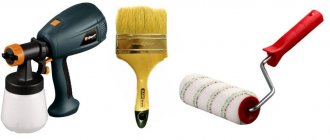
How is preparatory priming carried out? To work, you will need the composition itself, a paintbrush and a roller. It is easy to work with a brush on hard-to-reach areas, and with a roller on open areas. There should be no gaps. Before application, the wall is cleaned and dust and dirt are removed. After the first layer has dried, it is recommended to apply another one.
The first stage of wall preparation
Preparatory work with walls made of different materials differs. Therefore, the stages of action for each type of surface will be analyzed separately.
Preparing walls in a new building
Just because a house has just been built does not guarantee that the walls will be perfect. Therefore, new residents should be prepared that they will have to work hard to create a flat surface. To obtain the desired condition of the coating, it is necessary to get rid of all defects and imperfections that interfere with a good repair.
In a new building, work begins with rough finishing of the walls, including step-by-step actions:
- Applying spray plaster with a layer thickness of 3-9 millimeters. The consistency should be able to cover all the smallest cracks and holes. The wall is prepared for plastering by first moistening the surface with water.
- Next comes the primer layers, which promote adhesion to the surface, and they also protect the surface from the appearance of mold and mildew.
- The finishing layer of plaster mortar is 2-4 millimeters.
- The work is completed by leveling with sandpaper.
To obtain the desired condition of the coating, it is necessary to get rid of all defects and imperfections that interfere with a good repair.
Preparing plasterboard walls
It is easiest to prepare walls from this material; this work includes a minimum set of actions. Before preparing the walls for wallpapering, the drywall is inspected. To visually identify all the defects and irregularities that need to be worked on. They identify the joints of the slabs that require trimming, check that all the screws are well buried, and if they find any shortcomings, they are corrected.
Next, you need to seal the joints between the sheets of drywall, cover them with putty solution, and cover the top of the putty with reinforcing tape. Next comes the primer layer, the finishing layer, and again the primer.
It is necessary to glue wallpaper onto drywall so that the butt seams of the wall materials do not coincide with the border of the wallpaper sheets.
It is necessary to seal the joints between the sheets of drywall; they are covered with putty solution.
Preparing wooden walls
Walls in wooden houses are usually covered with clapboards, panels or block houses. Because the owners of such houses want to preserve the atmosphere of a wooden house. But of course, if you want to decorate the surface with wallpaper, then this can also be done.
In order to be able to cover a wall with wallpaper, it is necessary to either carry out puttying and plastering work, or cover the room with plasterboard or other sheet material. In the case of a frame house, the 2nd option is usually chosen.
Walls in wooden houses are usually covered with clapboards, panels or block houses.
Preparation of concrete walls
How to prepare concrete walls. If the concrete surface has precise geometry, then finishing work can be done without using plaster. They begin work by widening the cracks that exist in the concrete base. They get rid of all poorly holding parts, as well as protruding elements, and then close the recesses with a cement mixture. After the cement has completely dried, putty is applied in two layers (starting and finishing), the surface is polished, and priming work completes the preparation of the wall.
Since the concrete base has high thermal conductivity and sound permeability, a common solution is to finish the surface with plasterboard, along with insulation and soundproofing properties.
Since the concrete base has high thermal conductivity and sound permeability, a common solution is to finish the surface with plasterboard.
Preparing walls with old coating
If the renovation is carried out in a room that has already been covered with another finish, then preparation begins with the dismantling of this finish. You can leave old wallpaper only in a number of cases:
- Pasted onto a well-prepared wall base;
- There are no stains, traces of dampness or moldy areas on the surface;
- Holds well, no bubbles or peeling places;
- Paper;
- Painting is reliable;
- Not visible under new ones.
If the old surface meets this requirement, then it is better to glue a small piece of new material in the corner to check how it will hold up for 24 hours. If after a while everything is fine, it is permissible not to remove the previous material. Priming work is carried out in 2 layers, the time interval between layers is 2 hours. If the surface quality does not meet these requirements, the previous coating will have to be removed.
Removing the paper type wallpaper consists of soaking it with warm water, using a sponge or fur roller, wetting the part, and after 15 minutes removing it, helping with a spatula.
If the renovation is carried out in a room that has already been covered with another finish, then preparation begins with the dismantling of this finish.
If the previous coating is waterproof, then before soaking the surface, you need to remove the waterproof layer, you can make notches, or use a needle roller. The main thing is not to harm the putty layer. The soaked coating can be easily removed. To remove the bottom base, use steam methods (steam iron, steam generator), or products that are designed to dissolve paper.
Removal from drywall occurs by applying thinly diluted wallpaper glue to the surface, apply it in a thick layer, and wait until they swell, after which you can remove them with a spatula.
Liquid wallpaper is removed using an industrial hair dryer, or by soaking it with liquid and a primer solution, adding only a little of it to water, then using a scraper to get rid of them.
Liquid wallpaper is removed using an industrial hair dryer, or by soaking it with liquid and a primer solution.
If the surface has been painted, the paint can be removed using one of several methods:
- Use a grinder or electric drill with a steel brush attachment. It is necessary to wear a respirator;
- Use a construction hairdryer to heat the paint, and after it swells, remove it with a spatula. In this process, it is important that there is good ventilation in the room; heated paint releases harmful substances;
- If the work is carried out over large areas, it is advisable not to use a solvent; it is not environmentally friendly and expensive.
If an oil-based coloring agent was used, and the wall does not cause any complaints, then you can leave this coating only by treating it with sandpaper.
It is important that there is good ventilation in the room; heated paint releases harmful substances.
How to remove old paint
In the recent past, walls in kitchens were most often painted with oil-based paint, but modern roll materials, for example, vinyl wallpaper, are not inferior in strength and water resistance to paint coatings, so you should consider installing wallpaper in rooms where the surface of the walls was previously painted.
It is impossible to glue wallpaper onto a painted surface (or rather, it is possible, but with preliminary preparation, which will be discussed in a separate article on our website) - there is no adhesion. Therefore, before proceeding with the installation of roll materials, you should get rid of the paint and varnish coating.
Removing the old coating is not easy; for this process you will need the following tools:
- for mechanical paint removal: a machine with a cutting wheel and various attachments, scraping tools (knife, chisel, axe, spatula);
- for removal using chemical reagents: solvent for a specific type of paint, brush;
- for thermal paint removal: blowtorch, hair dryer, spatula;
- protective equipment: respirator, safety glasses and overalls.
Removing paintwork mechanically is a labor-intensive task, but it is safer for health than other methods. The impact on the painted surface is done using a power tool with various attachments or an axe; bubbling paint can be easily removed with a spatula; in hard-to-reach places you will have to use a chisel or knife.
To remove paint using chemicals, you will need to purchase special removers or solvents. The substances are sprayed or brushed onto the surface, wait, according to the instructions, for a certain period of time, and then remove the paint using a spatula.
The disadvantages of this method include the following factors:
- high cost of chemicals;
- Each layer of paint will require a new portion of solvent;
- the unpleasant smell of solvent lingers in the room for a long time even with active ventilation;
- All work must be carried out in special protective equipment.
Using traditional methods, you can inexpensively prepare walls for wallpapering. Step-by-step instructions for preparing and using the washing solution at home :
- Take 250 ml of ammonia, 1000 ml of water and stir.
- 2000 grams of construction chalk are poured into the prepared solution and stirred.
- Apply the finished mixture to the surface and wait two hours.
- The paint is removed along with the dried layer of the mixture using a spatula.
When the paint is exposed to heat, the surface layer of paint softens, after which it can be easily removed with a spatula. This method is associated with increased release of caustic fumes into the air, so the use of a respirator and protective mask is mandatory.
If you don’t have a blowtorch or a hair dryer at hand, you can use a regular iron on the painted surface, heating the wall through a paper pad or foil.
Priming the walls before wallpapering
Before starting this work, the primer solution must be prepared for work; the preparation technology depends on the type of solution purchased:
- The finished solution just needs to be mixed well. But experts often dilute the solution with water if an acrylic primer, or white-spirit, is used for an alkyd mixture;
- Concentrates are prepared according to the recommendations indicated on the label;
- To prepare a primer from a dry composition, take a container where the solution, water or white-spirit will be diluted, add the mixture to the water in the amount that is written in the instructions, mix everything thoroughly until smooth. And it is advisable to use a mixer to get a completely homogeneous mixture; doing this with your hands will be very difficult and time-consuming.
The finished solution just needs to be mixed well.
The procedure for priming is as follows:
- The floor is covered with film or other material to protect it from contamination;
- The solution is poured into a special container for working with the roller;
- The roller is lowered into the container, completely soaking it with the solution, and rolled along the ribbed surface of the container to get rid of excess;
- The primer is applied from bottom to top;
- Apply in a thin layer, make sure that there are no drips; if they form, you need to go over them again with a roller;
- Corners and other hard-to-reach places are treated with a brush;
- Move on to the 2nd layer after the first has completely dried.
Apply in a thin layer, making sure there are no drips.
Priming before wallpaper
To properly and efficiently prepare walls for gluing with your own hands, it is imperative to treat the surface with a primer. The primer ensures higher adhesion of the adhesive to the wall and wallpaper, and also serves as an additional means for leveling the surface, removing fine dust and smoothing out porosity.
A primer is available for each type of surface: concrete, wood, plasterboard, cement-based or gypsum-based plaster. The procedure for using the primer depends on the material being processed, but the following step-by-step algorithm is usually used:
- The base is cleaned of small fractions of dirt and dust;
- Begin treatment with a primer solution diluted with water. The more liquid composition is rough and provides preliminary impregnation of the base;
- The finishing layer is prepared at normal consistency and applied after the first layer has completely dried, which is completely absorbed quite quickly, in 3-4 hours;
- On large surfaces the primer is applied with a roller, and in the corners of the wall it is treated with a brush 150 mm wide.
Puttying walls before wallpapering
Puttying is carried out on all surfaces, except for drywall; only joints and screws are puttied on it. Stages of this work:
- Preparing the mixture: pour water into a container, add the mixture (the number of components can be found according to the instructions on the label), mix everything thoroughly with a mixer. Gypsum putty should not be prepared in large quantities; it hardens too quickly;
- When working with drywall, screws and joints are closed, and when the surface is completely dry, it is cleaned with a spatula to obtain a smooth surface. Next, get rid of the resulting dust and prime with a roller;
- Working with walls: apply the solution onto a wide spatula using a narrow spatula, run the tool along the wall, move gently and quickly, monitoring the pressure and angle of inclination to obtain an even layer of putty. Thus, they work on all the walls. For corners, use a corner spatula.
Puttying is carried out on all surfaces, except for drywall; only joints and screws are puttied on it.
Preparation of materials and tools
Today, there are several types of materials used to prepare walls for wallpaper, these are:
- Starting putty or gypsum plaster necessary to level the surface of the walls, this product is applied as a base onto which other layers will be distributed in the future.
- The finishing layer of putty, distributed immediately over the starting layer, allows you to make the walls even smoother.
- A layer of primer, it is best to use a universal one, as it can penetrate deep into the pores.
All materials have an explanation and description of how to use them, which you should familiarize yourself with in advance; you can also study the material on the Internet, look at a photo or video that describes the stages of preparing walls for wallpaper.
After the materials have been prepared, you should stock up on the necessary tools:
- Protective film to cover the table;
- Stationery knife;
- Scotch;
- Container for mixing the solution (bucket);
- Roller;
- Brush;
- Spatulas of different sizes;
- Drill with a mixing attachment for stirring putty.
Final preparation of walls before wallpapering
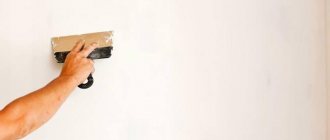
The final job involves sanding the wall. Using a grater or a special mesh, any unevenness that still remains is removed, and the walls are wiped clean of dust. Next, you need to apply a primer layer, which is necessary to improve the adhesion of the wallpaper to the surface, promote uniform distribution of the adhesive composition, and reduce its consumption. You can proceed to gluing once the wall has completely dried.
The final job involves sanding the wall.
How to line the walls in an apartment with wallpaper: using drywall
Using plasterboard sheets (GKL) you can level almost any wall. This is due to a number of advantages of this universal material, among which are:
Using plasterboard sheets you can level almost any wall
- relative strength;
- ease of cutting and use;
- flexibility of the material, implying its effective use.
Depending on the type of material, the use of drywall will help not only to hide small unevenness on the wall, but also to build a full-fledged partition in the room. This kind of work can be done by anyone, even not the most experienced craftsman - just select the optimal option for installing gypsum boards and decide on the final shape. There are only three main ways to attach sheets:
- fixing drywall to the frame;
- fastening sheets directly to the wall;
- a combination of the two previous options. This method is used at the junctions of walls and ceilings, as well as at the junction of plasterboard walls and surfaces covered with plasterboard.
The frame method is the simplest and most affordable. To implement it, a special profile for drywall is used. This is done using a level, connecting the frame parts at bends. Next, cut the gypsum boards to the required size and attach them to the frame using screws. This method has a certain drawback, since the end result is that the cladding is relatively thick, concealing the usable area of the rooms by a couple of square meters.
Drywall is not puttied under the wallpaper, only the seams are sealed.
Before leveling the walls for wallpaper, it is necessary to carry out preparatory work, which involves cleaning them from the old coating to the base. It is advisable to prime the wall and be sure to treat it with an antiseptic.
Insulation and soundproofing of walls in an apartment under wallpaper
Drywall is used not only for leveling walls, but also for sound insulation, and also as insulation for walls under wallpaper. In this case, the option of gluing sheets to the wall is most often used. This method is also effective for partial repairs of walls or if it is necessary to construct window slopes and arches. This is possible thanks to the easy transformation of gypsum boards using a hammer drill.
Important! Plasterboard sheets are a universal material, since they can be used to easily and quickly level, insulate surfaces and soundproof walls. GKL are ideally suited for wallpaper, as they are easier to glue on a flat surface, and the canvases adhere perfectly to a gypsum base with cardboard.
The wall is first cleaned and primed, then markings are made. Gaps of half a centimeter are left under the ceiling and above the floor for better drying of the glue and holes are drilled for the dowels. The screws are screwed in so that the heads are flush with the wall surface. Special quick-drying mixtures are used as glue, which are applied to the back wall of the sheet in longitudinal strips and along its edges. After attaching the drywall to the wall using glue and screws, you need to allow time for the glue to dry.
Drywall is used not only for leveling walls, but also for sound insulation
Before you putty the plasterboard walls under the wallpaper, the seams between the slabs are sealed with a special mesh and covered with starting putty, creating a single, flat surface. Only after this, a thin layer of finishing putty is applied, but not necessarily over the entire wall, but where there were seams and holes from screws. When using drywall, the result is a perfectly flat and smooth wall. The price of preparing walls for wallpapering in this way will also pleasantly surprise you.
The nuances of preparing walls for different types of wallpaper
There is a large assortment of different types of wallpaper on the market; they differ in weight, material and a number of other features, so the preparation for gluing them will be somewhat different.
Liquid wallpaper tolerates the presence of minor unevenness, but various stains are clearly visible through them; if the surface is dark, they will look grayish, for this reason you can do without the putty stage, replacing it with whitewash, painting with white water-based paint, especially if we are talking about light shades of wallpaper.
Liquid wallpaper tolerates the presence of minor irregularities, but various stains are clearly visible through them.
Non-woven sheets can be glued onto the old coating, which makes the work process easier. But you should definitely check how well the previous coating is holding up, and whether the bright elements of the previous coating stand out through the new one.
Non-woven sheets can be glued onto the old coating, which makes the work process easier.
Photo wallpaper can highlight any type of unevenness; in addition, unevenness will distort the design itself. Therefore, the use of putty and its subsequent sanding will be mandatory here.
Photo wallpaper can highlight any type of unevenness; in addition, unevenness will distort the design itself.
The order of work performed
Install level construction beacons on the pre-primed wall. Follow the manufacturer's instructions - the packaging indicates the minimum and maximum layer thickness and complete drying time.
- Use a trowel to spread the plaster mixture between adjacent beacons.
- Using smooth movements from bottom to top, and from left to right, using the rule, stretch the plaster.
- Add the mixture to the resulting voids, and remove the excess with a spatula.
- After the walls have dried, remove the beacons and plaster the places where they are installed. It is impossible to leave beacons in the thickness of the plaster; over time they will rust and stains will appear on the wallpaper.
If smoothing and glossing were not carried out during the plastering process, the surface will be grainy and uneven; wallpaper cannot be glued to such walls.
Read more: Is it possible to glue photo wallpaper onto wallpaper?
The technology for preparing walls before wallpapering depends only on their initial condition and the material that will be attached to them. This procedure can be divided into several successive steps:
- General preparation. This may include preliminary cleaning of the walls from dirt or old protective materials. This process can vary dramatically depending on what was previously applied to the wall. If it's just regular old wallpaper, then you should just remove it. Preparation of painted surfaces is considered more difficult. Today, many argue that such walls are perfect for gluing. You just need to make a few cuts on the paint in several places, which will increase the adhesion between the glue and the wall. But it is best to completely remove the paint from the surface. This can be done either mechanically using a grinder and a grinding wheel, or with special chemical liquid solutions.
- Pre-primer. Impregnating the wall will degrease it and slightly strengthen the adhesion between the remaining components. For such purposes, various types of mixtures are used, which can be purchased at construction stores.
- Puttying. This process is complex and also depends on the condition of the surface. If the walls or ceiling were leveled earlier, then preparing them for gluing involves removing small irregularities and sealing cracks with putty. Newly plastered surfaces, which have already been processed without the use of putty, are also susceptible to minimal impact. A more common case is when the geometry of the walls in the room is not respected. Therefore, it is important to properly prepare such planes for the application of materials. The procedure begins with aligning the corners, which must meet strictly at an angle of 90 degrees. This will allow you to get smooth joints without cracks and differences. After this, they begin to level the walls themselves. To do this, a thin layer of plaster is applied to them in places where there are significant differences.
- Padding. Finishing with primer mixtures is always carried out before gluing almost all types of wallpaper.
Wallpaper today can be applied not only inside apartment buildings where the walls are made of concrete or plastered. Similar materials are perfect for other substrates.
Therefore, it is important to prepare them correctly depending on the type of surface:
- Concrete walls. Wallpaper is not glued to this material, as it absorbs moisture well, which will affect the operation of the sheets. Therefore, experts recommend that concrete be finished. This procedure begins by cleaning the surface with fine sandpaper. It is important to remove all dust after this and coat the wall with primer. To prepare the concrete, the wall should be completely covered with putty. This will not only level the surface, but also minimize moisture absorption. A similar algorithm can be used for brick walls that require additional plastering.
- Drywall. Walls made of this material are an ideal basis for applying wallpaper. When preparing them, you should pay attention to the joints between the sheets, where cracks form. Many experts recommend covering drywall with a thin screed, which will hide all defects and make them invisible after gluing. After this procedure, the material must be primed to increase adhesion.
- Plywood, chipboard and other wood boards. These substances are also very common as wall surfaces. Theoretically, you can fix wallpaper on them without preparation. But this approach is not always optimal, since wood quickly swells and fails. To improve adhesion, experts recommend completely filling the slabs or additionally covering them with special paper, which will act as an intermediate layer.
- Clay. Clay walls are not so common, since this material is used as a building material only by lovers of environmentally friendly technologies. If the clay walls are fairly smooth, then they do not need additional preparation. But this does not exclude priming them, since this step is necessary for all types of bases.
What kind of wallpaper do we put up?
The type of wallpaper also affects the algorithm for preparing the surface for attaching it.
It is important to take into account a few simple nuances:
- Paper ones are thin, so even small irregularities will show through. Therefore, the walls underneath them must be perfectly smooth.
- Treatment of the base should be carried out only with the use of reinforcing mesh. This applies to those areas of the house where there is a risk of cracks that will lead to rupture of the material.
- The surface under vinyl wallpaper or non-woven materials may have small irregularities that they will hide. The peculiarity of these types is that they do not allow air into the wall structure (non-woven only after painting). This, in turn, can lead to the development of fungus. To exclude this, the bases must be impregnated with special antiseptics.
- Liquid wallpaper is a certain layer of decorative plaster that allows you to hide significant irregularities. But it is still recommended to level the walls for them, since when replacing them with other types, this will allow them to be applied faster and with better quality.
Electrics
The electrical network is often located directly on the surface of the walls or inside them. If your cable is simply nailed on top, then it is advisable to place it in special grooves, which are small channels.
The process of preparing walls for wallpaper also includes several operations with electrical appliances:
- Dismantling external elements. Before applying primer or putty, remove the switch and sockets. At the same time, their insides should be carefully protected from dirt and foreign materials.
- Replacing the cable. Almost all wiring today is hidden under wallpaper, which does not allow its repair to be carried out efficiently and in a timely manner. Therefore, if your network is quite old and cannot withstand the load, replacing the wallpaper is an opportunity to completely replace all the wiring with new one. This operation is optional and depends only on the state of the electrical network.
The peculiarity of any wallpaper is that it consists of several layers. This, in turn, can affect not only the strength, but also the transmission of the color of the base. Today, after hanging many types of wallpaper, a dark base or various types of stains appear through them. This feature applies only to thin sheets, as well as liquid materials. To exclude this, you should glue them to walls of light shades.
Before wallpapering, it is recommended to paint the base in light colors using lime or special primers. A similar approach is required for concrete and clay surfaces, which have significant contrast.
Please note that if you use thick wallpaper, stains will not show through. They can only be noticeable if the wallpaper has a transparent structure, which allows you to see the darkening under the main layer of wall covering.
The stages of wall preparation have already been discussed, however, now it is necessary to determine in more detail the sequence of preparatory work before pasting. Preparing the base for gluing is as important as preparing it for painting.
Remove the switch
When working on wall preparation, it is recommended to remove the housings of electrical outlets and switches. There are different types of electrical network devices; therefore, it is not always possible to clearly determine how to properly remove the switch. The network can be connected via circuit breakers. In this case, you will have to disable all protection.
There are two types of switches. They differ in the types of fastening. The switch can be attached to the wall using screws. There is also a hidden type switch, the box of which is located under the wall.
The modern switch has a smooth surface and the mount is hidden. The first step is to remove the fastening keys. If this cannot be done manually, then you should use a screwdriver. After the switch lock is removed, check that there is no voltage on the wires. Next you need to disconnect the wires.
Read more: Textured wall painting or textured plaster
To avoid electric shock, all internal parts of sockets and electrical switches that are left without external protection must be covered with tape or other similar material.
Treatment
If, after removing the wallpaper, unevenness is found on the wall, you should resort to plastering work. Plaster mortar can be easily made with your own hands using sand and cement. The mixture is slowly stirred and water is gradually added to it.
The plaster is applied in three layers. The first layer should be no thicker than three millimeters. The second layer is aimed at leveling the plane of the wall and cannot be more than six millimeters.
What to do if the wall surface is uneven
Uneven walls require plastering, unlike smooth ones; for this, any gypsum solution is used. The cracks are filled with a solution no thicker than 10 millimeters. Afterwards, wait for the plaster solution to dry completely on the surface and grind it. Then you can proceed to puttying the surface, according to the instructions indicated above.
Such a defect will help to hide the use of a certain class of wallpaper: non-woven and vinyl. You should choose them because they have a high density, special embossing, and multi-layering helps hide a visually uneven coating.
Regarding the design, it is worth saying that it is necessary to choose chaotic options, without clear geometric images, but all wallpapers will not be able to completely cover such a defect.
Uneven walls require plastering, unlike smooth ones; for this, any gypsum solution is used.
Tips and tricks for preparing walls for wallpapering
There are several useful recommendations that will help you carry out the preparatory steps efficiently. So:
- It is better to do puttying from above, and apply several layers;
- When deciding which material to take, you need to look at their purpose (what surfaces are suitable for);
- The walls should be leveled as best as possible.
It is better to do puttying from above, and apply several layers.
Even novice craftsmen can cope with carrying out high-quality work before wallpapering. It is necessary to take into account the type of surface, its condition and follow the instructions given. And repairs done correctly will delight you for a long time.