Is it possible to apply decorative plaster to an unprepared wall?
Today, a variety of decorative plasters are on sale - textured, structural, Venetian, flock, with the effect of stone chips. In addition to the different effect created on the surface, they can differ in their composition - mineral, silicate, silicone and acrylic.
Regardless of the choice of variety, surface preparation for decorative plaster must be carried out without fail.
This manipulation is needed in order to:
- Improve adhesion - adhesion between the wall plane and the applied material.
- Increase service life. Lack of quality preparation can lead to the composition starting to fall off over time.
- Eliminate possible defects that may appear after a certain period of time. This includes - the appearance of rust from the reinforcement that is located inside the wall; fungal growth if the walls have high humidity.
Pros and cons of decorative putty: which is better
Putty has gained popularity and widespread use not only due to its range, but also due to a lot of advantages:
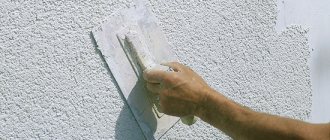
- The material is easy to install. The difficulty when working lies only in the high-quality preparation of the surface on which it will be applied. The wall must be smooth, without flaws or defects, primed and dried so that the plaster adheres well.
- With a properly prepared surface, the putty will retain and not allow heat to pass through.
- Gives an aesthetic appearance to the room.
- Wide range of textures and designs.
- Durability.
- It does not require special care.
The disadvantages include the high cost, but this justifies a lot of advantages. The material is difficult to remove the next time the interior is renovated, and if applied incorrectly, its integrity and service life are compromised.
How to prepare walls for decorative plaster - main steps
The preparation of walls before applying the composition must comply with the established technology. The steps followed depend on the building base material. But, in the vast majority of cases, they include the following basic actions:
- Removing old coating.
- Cleaning the surface from dust, dirt, grease stains, and rust.
- Leveling the wall from the point of view of eliminating cracks and potholes, as well as bringing them to a plane.
- After this, the base is coated with special compounds in order to eliminate possible negative manifestations. Most often, adhesive mixtures and antiseptics are applied to the surface. Fire retardants are used less frequently.
Features of working with cellular concrete
Cellular concrete blocks also have a smooth surface, to which the solution does not adhere well. That's why:
- The surface is sanded: it becomes rough, adhesion improves.
- The base is cleaned of dust and dirt.
- The wall is primed with a special deep penetration compound for cellular building materials, for example “Acrylit-06” for bases with increased water absorption.
- Reinforcement is performed using a mesh that is resistant to alkalis.
- Before applying the first layer of plaster, the wall is sprayed with water.
Cellular concrete requires special preparation before plastering
Tools and materials required for preparation
To prepare walls for applying decorative plaster professionally, you will need not only experience, certain skills and knowledge, but also special tools. Here's what the professionals use:
- To prepare the solution you will need a large plastic bucket or a corresponding container with a volume of at least 5 liters.
- A smaller container to prepare the composition.
- Drill with a specific attachment for easy stirring.
- Graters and graters – choose from different materials.
- You will need several spatulas. They should be of different sizes so that different layers of putty can be applied.
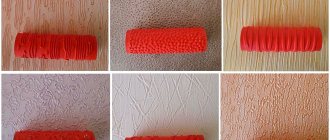
- A roller with a pattern on the surface for the possibility of applying relief.
- Flat brushes with stiff bristles.
- Sponges have different structures.
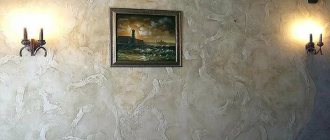
Examples of decorative coatings in the interior: successful finishing design
It is better to use this finish in the living room, kitchen or bedroom. Avoid bathrooms, where there is high humidity. Despite the quality of the plaster, this affects the performance properties.
Panels made of decorative plaster look presentable in the interior. It is better to install it on the central wall to properly focus attention.
A Venetian is suitable for the bedroom; with its help you can create unique paintings. Choose nude shades; they promote relaxation and add tenderness to the interior.
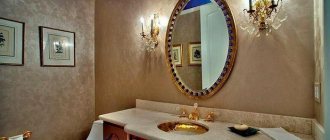
For the bathroom, choose textures with maximum water-repellent properties: silicate or silicone plaster.
An excellent option for the kitchen is decorating the dining area or work area with a decorative composition. Because it is easy to clean and looks original.
How to prepare a wall - removing old coating
Since the first step before applying decorative plaster is cleaning the walls, it is worth understanding how such manipulation is performed for different finishing materials.
Old plaster, tiles
The wall on which plaster is applied is the basis for any finishing option. But only on the condition that it is strong enough and sits well on concrete, aerated concrete, wooden beams or other surfaces.
Therefore, the old plaster layer always requires checking in terms of integrity and preservation of its strength characteristics.
If it is dilapidated, then it will have to be cleaned. The update work is carried out as follows:
- Tap the entire surface of the wall to identify lagging areas.
- Then, where a dull sound was heard, you should run the sharp edge of the spatula along the wall. The composition will begin to crumble and peel off.
- You need to insert a spatula into the furrow and pick off the loose layer. This is repeated in all places where the composition has departed. Sometimes it is necessary to remove 2-3 mm of plaster, and if there is severe deterioration, deeper exfoliation will be required.
- After this, all dust must be removed. This can be done in different ways - put the vacuum cleaner on the blowing mode and blow off all the small particles or sweep it with a brush. But at the finishing stage you will still have to use a damp cloth to remove the smallest particles.
- After letting the wall dry, you can begin to level it with the starting compound. It should be applied thinly, in several layers, each of which is dried before applying the next one.
- The final layer is applied with finishing putty. When the composition is completely dry, the wall is treated with fine sandpaper, achieving uniformity and smoothness.
It is better to replace the old coating
When it is necessary to remove old ceramic tile cladding, the sequence of actions will be as follows:
- First, use a chisel and a hammer to knock down the tiles.
- Then he performs the same sequence of actions as when removing the plaster. That is, the putty is applied as a starting layer and then as a finishing layer.
Removing old paint
There are several ways to remove paint:
- If it is not too thick, then you can do this manually. Using a spatula or chisel, the layer is simply scraped off the wall.
- It will be more effective to use the burning method. You can use a gas burner where paint is applied directly to a concrete wall or materials that are non-flammable. After the material darkens, it is cleaned with a scraper or wire brush.
- You can use a hair dryer, which also heats the surface. But since the temperature in this case will not be as high, the process will take longer.
- There are also special chemicals. They corrode the paint layer, resulting in a kind of solvent effect. When working with such substances, safety precautions must be observed to protect the eyes, mucous surfaces and respiratory tract.
Old paint can be removed with a hair dryer and spatula
After removing the paint layer, the wall will most likely have to be puttied to achieve a smooth surface.
Removing old wallpaper
Removing wallpaper is quite easy. To make this process go faster, it is necessary to moisten the entire surface with water, spraying it through a fine spray bottle. It is advisable to let the wallpaper stand in this wet state and then repeat the procedure again so that all layers of paper or vinyl have time to become saturated.
After this, use putty or a knife with a rounded edge to remove the wallpaper, removing all layers of paper and leaving no small pieces on the wall.
Where the plaster has come off along with the paper, a leveling layer is applied. Finishing putty is used for this.
Whitewash cleaning
If decorative plaster is applied to a ceiling that has been previously whitewashed, then in this case, preliminary preparation of the surface will be required. Moreover, the cladding is washed off down to the putty layer, which provides the required level of adhesion.
Whitewash removal is carried out using the following manipulations:
- Thinly applied whitewash can be washed off simply with warm water, wetting the sponge and working the surface in a circular motion.
- A thick layer can be removed using a liquid-welded paste. It is applied to the ceiling and left to act for 20 minutes. After this, the paste is removed with a spatula. This method is good because by cleaning in this way, it is possible to avoid the formation of a large amount of dust.
- You can use the preparation of a special solution - for 10 liters of water take 200 g of soda + 1 piece of laundry soap, which is planed with a knife or rubbed on a fine grater. After this, everything is stirred and the composition is applied to the whitened surface. In this case, no additional cleaning is required.
The whitewash can be removed with a spatula after moistening it with water from a spray bottle.
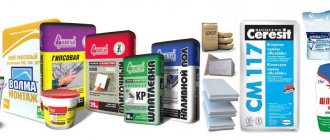
Mixture selection
For relief plastering of walls, compositions specially produced for this purpose are used. They are different, depending on the texture we want to make. They may also contain stone chips, which cannot be used for other designs.
Therefore, we need to select a mixture specifically for our design and idea.
It is packaged immediately in finished form, most often in plastic buckets, which makes it easier to store leftovers if there are any after work. Relief plaster is sold in all construction stores.
Surface repair
The surface preparation work does not end only with the removal of the old layer. It is important to ensure that the walls and ceiling are perfectly smooth. Experts call this condition “like an eggshell.”
To obtain such a surface, you first need to repair it. To do this, perform the following actions:
- Wet the required surface, including the edges.
- Plastering in several layers. Each one is dried.
- If it is necessary to treat cracks, they are first widened slightly to prevent cracking of the edges. After this, they are filled with gypsum mortar with a lime mixture. It is not recommended to use pure plaster, as it will stand out in a brighter color during the finishing process due to intense absorption of pigment.
Chips and cracks are repaired with gypsum plaster
After repairs, be sure to re-grout the surface. In this way, a homogeneous surface is achieved, avoiding differences between the repaired areas and those where such manipulation was not carried out.
Application technology - 7 ways
The method of plastering walls under travertine will largely depend on the specifics of the rooms and the type of material used. Experts distinguish partial or complete plastering of surfaces. Additionally, it is possible to create vertical or horizontal patterns. The technological processes of these wall finishing options are different and have their own characteristics.
Method 1. Continuous application
The technique is the usual distribution of a pre-prepared mixture over the surface. The solution is applied to the wall, then smoothed to obtain a 2 mm layer. Using a stiff brush, pores are created in the plaster that imitate natural stone. At the final stage, the treated surface should be smoothed with a damp trowel.
Continuous application is the usual distribution of the finished solution over the surface
Method 2. Partial application
The wall will need to be treated with primer with quartz filler. After it dries, the working mixture is applied. The latter does not need to be distributed over the entire surface (only into individual areas). The solution is distributed using the “touch” method. As soon as it dries, the plaster is smoothed with a trowel. As a result, an even texture is given to the wall using sandpaper and a sander.
When applied partially, the plaster is not completely applied
Method 3. Horizontal drawing
It is formed with a spatula “to tear through”. First, the base coat is applied to the dried, primed surface. After some time, after it has dried, the plaster is laid. As soon as it dries, a construction level is applied to the wall. A sharp angle of the tool is passed along it to remove strips of plaster mortar. The mixture removed with a spatula is suitable for re-application on the wall.
While the treated area dries, you can move on to the next one. After 15 minutes, the area with holes is compacted with a thoroughly cleaned trowel. As a result of 3 times smoothing, the wall surface becomes smooth. Sanding is not used. The grains of sand remaining in some places are removed with a brush.
The drawing is made with a spatula “to tear through”
Method 4. Vertical drawing
The principle of creating a vertical travertine pattern is the same as a horizontal one. The only difference is that the ruler or level must be applied vertically. Then, in a similar way, corresponding strips are formed on the wall.
The drawing is applied similarly to horizontal, but in the direction from top to bottom
Method 5: Creating masonry
To create an attractive facade decor, it is recommended to use stone masonry. The easiest way to create such a pattern is to scratch the lines with a chisel or the tip of a trowel. Using a ruler, you need to remove part of the applied mortar from the wall. The resulting image will resemble a laying of stones.
If desired, strips of tape can be glued to the surface in advance, placing them vertically or horizontally. After application and drying of the plaster, the strips are removed. This way, a pattern imitating masonry will remain on the wall.
To imitate masonry, scratch lines using a chisel or the sharp edge of a trowel.
Method 6. Multicolor technique
It is assumed that the plastered surface will be divided into separate zones. In this case, light and darker areas are deliberately highlighted, the surface is artificially aged, and a noticeable gloss is imparted. This type of wall processing is considered difficult and can only be done by experienced craftsmen. The result is a multi-colored travertine that exhibits subtle color contrast. He looks unusual, quite attractive.
To obtain multi-colored traverine, you can use artificial aging of surfaces
Method 7. “Torn”
When creating a unique decorative coating, the following technique is used: plaster layers of different shades are laid randomly. Moreover, the final one is smoothed with a trowel. When applying the material in this way, a unique image is obtained. Using a similar technique, it is possible to achieve the creation of an original textured base.
As a result of using the “torn” method, a disordered pattern is obtained
Alignment of walls
Preparing walls for decorative plaster with your own hands includes another, rather complex process. This is the leveling of a surface until it is flat.
For this use:
- Puttying. Performed with two spatulas of different sizes. The small ones apply the mixture onto the large ones and then level them along the wall. If it is necessary to apply 2 layers, the first one must dry completely. This method is good only if the deviation from the plane is small.
- For significant differences, plastering is used. In this case, beacons are set to know how much to apply the mixture. If it is necessary to level differences of more than 20 cm in height, a plaster mesh should be used. It will not allow the layers to crumble later during the operation of the premises. This manipulation is carried out by throwing the plaster mixture onto the wall. Then it is leveled using a falcon and a trowel. Putty is thinly applied on top.
It is important that the walls turn out perfectly smooth, since after applying decorative plaster all the irregularities will be visible
How to plaster wood
Plaster can only be applied to a clean wooden surface, without grease, oil stains or traces of bitumen.
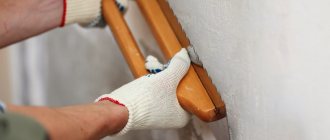
- Using notches and cuts, they improve the adhesion of plaster and wood.
- To ensure that the finish holds well, shingles are nailed to the wall in two layers, crossing the strips and securing their ends with nails.
- When building up, a gap of at least 5 mm is left between the shingles. If, after applying the plaster, the wooden planks swell, the plastered layer will not suffer from this.
- The plaster is applied using the spray method - with a spatula or ladle. The second primer layer is laid after the first has dried, 5–7 mm thick.
- The final stage is painting or decorative plaster.
When plastering wooden walls, shingles are often used
Wall priming and its importance
It is necessary to apply special mixtures, so-called primers, to the prepared layer of plaster and putty. This is done because even a putty layer does not guarantee the required level of adhesion. The primer is capable of:
- Increase the reliability of adhesion of the plastered wall to the decorative finishing material.
- Prevent the development of fungus.
- Increase the service life of finishing materials.
There are different types of compositions:
- Concrete contact is used on concrete surfaces. It has an acrylic, water-dispersion or epoxy composition.
- For a plastered wall, water-dispersion or acrylic compositions are chosen.
But, regardless of what mixture will be applied, all dust must be removed from the walls before doing this. Otherwise, part of the desired effect will be lost.
How to renew and care for the surface
The surface exposed with decorative plaster does not require careful maintenance: you need to wash it in time and remove dirt and dust.
If you need to update it a little, you can repaint it. When changing the full coating, remove it to the base and replace it, or putty on top and apply new material.
By choosing decorative plaster for wall decoration, you can create an absolutely unique design. Following the tips and recommendations, the work will go quickly.
Application process
Not everyone knows how to remove decorative plaster from walls - this question may come to mind several years after the renovation, when the desire to change the interior arises. This is not an easy task, because the material, as a rule, “sits” firmly on the base, so you can’t do without a knife, spatula and grinder. In addition, you will have to putty the wall again later.
Therefore, before using this type of finishing material for walls and ceilings, think about whether you will want to replace it after years? Maybe it’s much easier to use the usual wallpaper?
If necessary, you can remove the decorative plaster with a hammer drill.
Distinctive features
Decorative plaster, intended for do-it-yourself interior wall decoration, contains additional components that distinguish the material from ordinary plaster mortar. These are stone chips or wood fibers. In addition, manufacturers add pigments to the base, so additional coloring is not required.
This finishing material, intended for wall decoration, has some advantages. For example, it is used to perform the main and finishing layers, hide uneven sections of walls, and seal cracks.
The technology for applying decorative material has no restrictions. It goes well with stone, brick, concrete and drywall. There is one feature - the solution must be securely held on the wall surface.
The plaster layer does not absorb odors, is perfect for finishing the kitchen, and has excellent soundproofing qualities.
Another positive point is the unique external data. The final result always looks unique.
Most often, covering walls with decorative plaster is done indoors. The finishing material allows air flow to pass through, does not allow mold and bacteria to develop, and can be used for a long period.
Using unusual ideas, when working with decorative plaster, beautiful patterns are formed that give the walls originality and style.
Do-it-yourself decorative plaster contains components of natural origin that are not harmful to living organisms.
The technique of applying finishing material has certain features. By following them, you can avoid mistakes and get high-quality coverage.
When choosing a material, study the offered range, consult the seller, look at ready-made samples and only then make your choice.
If the wall does not have significant defects, it is allowed not to be leveled - figured plaster will reliably hide all the defects. If there is serious damage, the wall is first repaired with mortar and putty, which will save on plaster material.
Before applying the mixture, the surface is coated with a primer to increase adhesion. After installation is completed, a wax layer is applied.
Preparing the base
When purchasing finishing material, everyone wants to get the result as in the samples presented or in the gallery on the website. To do this, you need to pay special attention to surface preparation. Many people believe that decorative plaster can be applied to uneven walls, but this is not true. Leveling and finishing compounds have different structures and performance properties.
In order for the decorative coating to retain its color and strength for many years, it is necessary to carefully prepare the base. At this stage the following work is carried out:
- plastering walls according to beacons,
- puttying,
- sandpaper processing,
- padding.
If necessary, make a substrate before applying the decorative coating.