by Alexey | Tools | Wednesday, June 30, 2021
| Follow Make-Self.net on Facebook and be the first to read our articles. |
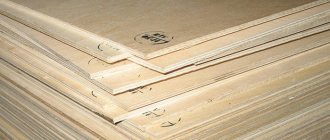
We're big fans of plywood, but it has its strengths and weaknesses, its quirks and advantages. But before you dive into your next project, check out our recommendations. We've compiled our best tips and tricks for working with plywood to help make your next project more successful!
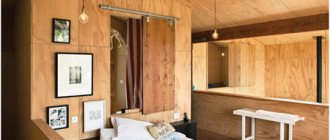
Now plywood is not a panacea for all projects, it is quite versatile and reliable for use in the construction of furniture such as benches, dressers, nightstands and shelves. You can even use plywood as a budget-friendly flooring option!
Cutting Plywood: Tips for a Clean Edge
Now, don't cancel all your projects because you don't have a table saw—you won't need one! Although it is easier to work with, if you need to make a lot of long cuts, you can create great plywood projects without a table saw. Most hardware stores will cut a sheet of plywood for you - some at no extra cost, some for a nominal fee.
You can also make all the cuts you need with a portable circular saw. A small portable circular saw will work well for smaller cuts or smaller projects, but a larger saw is more versatile for other projects as it can handle thick plywood.
Now some terminology:
- A rip cut is when the saw moves along the grain of the wood. I cut through, as a rule, with fewer chips.
- A crosscut is a cut that follows the grain of the wood, and is where you are most likely to get chips and other problems with your plywood veneer.
Photography – make-self
To protect the veneer and ensure you have a nice, clean edge, apply masking tape along the cut.
When you use a hand-held circular saw, the blade cuts upward, so the plywood should be face down. The table saw cuts downwards, so the face of the plywood should be on top.
The most difficult part of using a circular saw is how to secure the wood and saw to get a straight cut. It is easier and safer to cut on the floor using wooden beams or a sheet of polyurethane foam insulation. Simply set the saw blade so that its edge extends 3mm below the thickness of the plywood and lay it on top of the insulation sheet or timber beams. Make sure it is stable and then when you cut the saw will barely cut into the insulation or timbers.
Photography – familyhandyman
For an even cut length you will need a guide secured with clamps.
Photography – familyhandyman
Or consider creating a rack like the one shown in the photo.
Photography - google
For curved cuts or circles, you can use an electric jigsaw.
Homemade guide ruler
The device ( see figure and photo ) is a wide base to which a ruler is attached with glue and screws. To cut the base to size, a hand-held circular saw is run along one edge of the ruler, and a router is run along the other. (Note: A ø10mm straight bit was used for this guide.)
When the base is trimmed, a auxiliary ruler is obtained that will show exactly where the cut should be made. Simply press the ruler into place and align its edge with the marking line,
If you need to mill a groove wider than the diameter of the cutter used to cut plywood, you cannot simply replace the cutter - you will have to change the position of the auxiliary ruler. Instead, make a second identical guide straight edge and mill the groove in two passes ( Fig. 4 ).
Sanding and finishing plywood
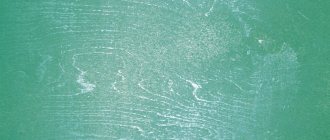
Due to the structure of plywood, you must be very careful when sanding. It is very easy to sand off the top layer of veneer and cause what is called a “burn” where the second darker layer reveals itself. On the other hand, you can achieve some interesting effects by creatively “burning” the plywood and sanding through multiple layers. Plywood is layered with alternating layers and usually alternating tones, so aggressive sanding can give you a more creative finish, as shown in the photo below.
Photography – make-self
However, if you want an even finish without discoloration, make a few pencil marks to act as beacons.
If you will have open end edges, make them slightly rounded. The plywood flakes on the cutting edge, and sanding helps ensure a clean, neat edge.
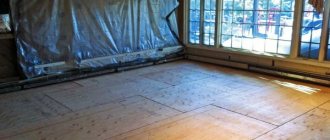
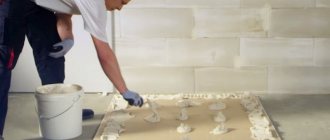
Installation
Fastening plywood sheets can be done using nails, staples, glue, screws, bolts or rivets. When starting installation with your own hands, you need to prepare the slab, that is, you should decide how to treat the plywood from moisture in order to prevent possible expansion and contraction of the material (this will be discussed below).
Experts recommend leaving a gap of 2 mm at joints (for example, between a steel frame and a plywood sheet), for which elastic filler is used.
Advice! For heated structures, reliable ventilation of plywood boards should be ensured.
Types of connections
The most important elements of plywood structures are joints and joints. Today, there are many types of fastening of plywood sheets: tongue-and-groove, tenon, bolt, etc.
We nail the sheet.
The most sensitive part of such structures are the ends, and therefore they should be processed, especially if the material is planned to be used outdoors.
Let's look at the most popular types of connections:
- We use nails.
- For wall, ceiling and floor panels, it is advisable to use threaded nails or special screws. In this case, it is desirable that the cap be depressed or hidden.
- For hidden nailing, wire nails are an excellent choice.
- Acid-resistant nails are recommended for exterior cladding as they offer better rust resistance.
- Nails should be selected so that their length is 2.5-3 times the thickness of the panel.
- Nails can be driven close to the edge (beyond 12-15 mm).
- Screw connections.
The screw type of connection is the most common.
In some cases, plywood panels are fastened using screws.
Instructions for using screw connections include the following recommendations:
- The head of the screw screwed into the panel should not cut into the front veneer.
- When using domed nails, washers should be used.
- When attaching sheathing sheets to metal structural elements, you can use special screws to secure the plywood on the back side so as not to damage the front side.
- If the panels are used as floor coverings for trailers and containers, they should be secured to the metal chassis using self-tapping threaded screws. For example, to securely fasten a 27 mm thick plate, M6x40 mm screws should be used. The screw must first penetrate the body of the plate and then cut a thread in the metal.
- Using threaded bolts, it is very easy to fasten thin plywood panels to metal structures, which is actively used in transport engineering. The bolt hole should be 2 mm larger than its diameter. To protect the plywood, nuts and washers are placed under the bolt heads.
Advice! Do not over-tighten the bolt to avoid damaging the plywood board. If plywood products are used outdoors, then an overtightened bolt, pressing into the surface of the slab, will cause it to swell from moisture, which will cause cracks to appear in the material around the bolt.
- All kinds of hinges, shelves and locks can be easily attached to the surface of the plywood board at either end. If you want to place screws from the edges of the panels, use clamps and pre-drill holes for them.
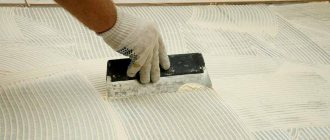
- Gluing.
Application of adhesive composition.
Unfaced plywood sheets are easily glued together using any wood glue. The choice of adhesive depends on the method of work, the moisture content in the environment of use and the required strength.
The most common adhesives for such work are: PVA, epoxy resin, phenol, polyurethane, etc. PVA is excellent for indoor use, as it does not have a strong odor and is characterized by excellent gluing properties that can withstand various adverse conditions.
For gluing plywood to metal coatings, it is recommended to use epoxy-type adhesives.
Advice! It is not recommended to glue laminated plywood, since this material is incapable of long-term gluing.
Processing agents
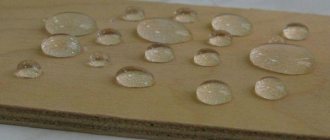
Various products are used as water-repellent impregnations for plywood. Their main task is to create a thin waterproof film on the surface. The latter is most often transparent, since the structure of the tree is quite beautiful - it is usually preserved.
Drying oil
The most affordable way to process plywood is to coat it with drying oil. This is a mixture of natural oils that are absorbed quite well by wood.
To process plywood, drying oil is heated to a temperature of 55°C. Apply the liquid with a paint brush, making sure to cover the ends.
The protective layer can be dried with a hairdryer or left to dry naturally.
If the material is used in damp rooms or outdoors, it is recommended to coat the plywood with drying oil twice.
Fiberglass
A more technically complex technique. The sheet is covered with a layer of varnish , and after partial drying - after about 2 hours - fiberglass is applied to the surface . This is a very light reinforcing fabric , completely insensitive to moisture. Thanks to its structure, it easily adheres to the varnish layer. The top of the fiberglass is coated with a second layer of varnish . You can use paint to give the plywood a more attractive look.
The same can be done using calico or calico , as well as nitro paint . In this case, the plywood is first coated with drying oil, and then with a layer of liquid paint as a primer. After drying, apply a layer of nitro putty, and then apply a cloth and press tightly to the surface. The last step is to apply another layer of liquid nitro paint.
Nitropaint
cellulose nitrate based
paint . The composition forms a thin glossy shiny layer on the surface, which dries in a few tens of minutes. The composition is used for finishing inside the home, as it is not too resistant to high humidity and temperature changes.
When painting, it is recommended to dilute nitro enamel with a solvent to obtain a really thin layer. One layer is enough to protect the material.
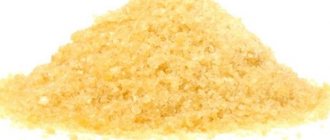
Wax
Wax is a viscous substance, sometimes even hard . It is rubbed into a thin layer on the surface of the material, forming a waterproof film with a beautiful silky shine. This coating needs to be updated periodically. Wax is used only inside the home, as it is easily washed off.
Sometimes oil waxes . This mixture does not so much form a film as it impregnates the top layer of plywood. It is more stable and durable, but also needs updating.
PVA
A method that requires a lot of time. PVA glue is applied to the surface of the sheet with a brush or roller. The edges and ends of the slab are also coated. After the layer has completely dried, the glue is reapplied. To achieve truly high moisture resistance, the treatment is repeated until glue stains begin to appear on the back of the sheet.
After this, the plywood is turned over and processed on the reverse side. The work is carried out in a dry, warm room, since water-repellent impregnation for plywood is impossible at low temperatures.
Epoxy glue can be used for impregnation. In this case, each applied layer must be heated and dried with a hairdryer.
How to choose impregnation
Impregnation is selected taking into account the operating conditions.
Glue, paint or varnish is selected taking into account the conditions of use of the material being processed.
- For interior work, odorless, quick-drying compounds are suitable. At the same time, water resistance may not be too high, such as acrylic paint, varnish, and stain. For residential premises, this level of protection is sufficient.
- For rooms with high humidity, more powerful means of protection are used: impregnation with PVA glue, oil paints, hot drying oil.
- For external work , oil paints and special facade coatings are used, as they are most resistant to water.
Waterproof mixtures do not increase the fire safety of the material. For this you need fire-resistant paints.
Features of the structure
The basis of the plywood production process is gluing thin sheets of wood together so that the natural fibers are directed strictly along or across the long side. The number of layers is most often odd, the minimum is 3 sheets.
Bonding is carried out by various means, of which effective water resistance is provided by certain bakelite compositions: varnishes and alcohol-soluble adhesives. The use of water-soluble modifications of Bakelite and all other types of adhesives leads to the fact that the products cannot withstand the action of water vapor. Low water resistance is especially noticeable when using plywood outdoors. In this regard, it is necessary to treat the material with protective compounds.