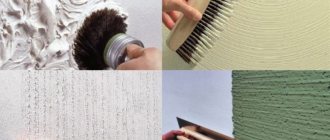
Structural plasters emerged from the desire to diversify the texture of the resulting surfaces. A smooth finish is very different from a grainy finish. In structural finishes, namely roller plaster, the texture formed due to the peculiarities of the laying technique is supplemented by the texture formed due to the protrusion of filler grains.
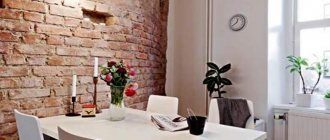
Roller plaster, which appeared not so long ago, quickly became popular due to its ease of application, as well as other advantages. From a distance it looks like a smooth monolithic coating without seams. But as you approach, patterns formed by numerous grooves begin to appear. Most often, this type of finishing is used for facades and large premises. It is rarely used in small rooms, as it visually hides the space in them.
However, designers have found an “outlet”; they use it in interiors to create small plaster panels.
Roller mixture and its features
How is this plaster different from other types? First of all, the peculiarities of the composition of the mixture, namely, the filler. It is not for nothing that it is labeled as decorative with a bark beetle effect. Its filler is quartz sand and rounded marble chips.
They produce three types, differing in the size of marble chips:
- coarse - grain size 2-2.5 mm;
- medium - grain size 1.5-2 mm;
- fine-grained - grain size 1-1.5 mm.
Coarse-grained mixtures are used for finishing facades, walls of halls, offices, and hallways. Fine-grained ones are used to decorate the walls of medium-sized and small-sized rooms.
Only two types of bases are used for it: acrylic and gypsum.
The acrylic resin base has great elasticity. Thanks to special additives, it can be used both inside and outside the house. Acrylic resins are flammable substances, therefore it is advisable not to place compositions, even with fire retardants, near places where fire is used. Vapor permeability is not very good, so it is not suitable for bedrooms and living rooms. Easy to clean. Tolerates temperature changes and heavy precipitation well. Frost-resistant. Mixtures can be produced in buckets of various capacities. It is possible to purchase a ready-made composition already tinted. However, its color selection is still small.
Gypsum roller decorative plaster contains gypsum as a binder. Sold only as a dry mixture. The gypsum-based composition is more sensitive to various types of vibrations, therefore it is not recommended to use it in areas with troubled seismic activity or near railway lines, as well as in new buildings until the house settles. Gypsum plaster is best suited for interior spaces. It goes well with walls made of aerated blocks, “breathes” better, and this contributes to an optimal microclimate. Lightweight, non-flammable. Not recommended for unheated and damp rooms, as well as for facades.
One of the features of this type of coating is its low weight, good noise and heat insulation. The guaranteed service life is the same as other latex and mineral finishes - 10 years. A significant disadvantage is the impossibility of local repair or restoration. All trim will have to be cleaned off.
VGT GALLERY / VGT ROLLER decorative plaster with bark beetle effect
Textured material with coarse-grained natural filler to obtain a relief coating. Available in 3 types: fine-grained (grain size – 1-1.5mm), medium-grained (grain size – 1.5-2mm) and coarse-grained (grain size – 2-2.5mm).
- high adhesion to concrete, plasterboard, brick, plastered and other mineral surfaces;
- when rubbed with a trowel (grater), it forms a characteristic textured coating with “labyrinthine” channels;
- has high water resistance and strength;
- for external and internal work;
- forms a “breathable” coating.
PROPERTIES AND FEATURES
Plaster is a viscous homogeneous mass with a relief-forming filler. The material has high adhesion to mineral surfaces, water resistance and high strength.
APPLICATION AREA
Designed for decorative finishing of surfaces indoors and outdoors in all types of buildings and structures (A-B), incl. for which a wet disinfection mode is provided. When applied and rubbed with a trowel (grater), it forms a characteristic textured coating with “labyrinthine” channels.
COMPOUND
Acrylic binder, modifying additives, marble chips, water, titanium dioxide.
- Tinting:
Can be tinted with our company’s tinting paints or painted on top. - Coating care:
Full strength and resistance to wet cleaning is achieved after 2 weeks. - Surface preparation:
The surface must be dry and free of contamination. Peeling old coatings must be removed. Before applying the material, it is recommended to prime the surface with a deep penetration primer, if the surface is dusty, with an “adhesive” primer or “concrete contact” from our company. The use of an “adhesive” primer or “concrete contact” will provide a durable surface with a slight roughness, which will facilitate the application of decorative material to the base. - Consumption:
2-3 kg/m² with a single application. - Method of application:
Roller decorative plaster is applied with a wide spatula or stainless steel trowel with a thickness of at least 3-5 mm. After application, the plaster is rubbed with a plastic trowel. Depending on the time, intensity and trajectory of movement of the plastic trowel, various labyrinthine channels can be obtained: circular, horizontal, vertical, cross-shaped, etc. It is necessary to pay attention to some specifics when working with roller plaster. During the process of applying and grinding the plaster, an excess liquid mass of material is formed on the tool, which must be periodically removed with a spatula. This makes it easier to create the required drawing. The operating principle of roller plaster is quite simple. It contains a small amount of large rounded marble fraction. These small balls begin to roll under the influence of your trowel, creating an irregular pattern. Depending on the size of this coarse fraction, different furrow sizes can be obtained. We produce medium-grain roller plaster with a groove depth of approximately 3 mm. When working with roller plaster, joint problems also arise, so you should not leave the work on a flat wall, you need to bring it to the corner. - Thinner:
Water, no more than 5%. - Drying time:
Completely dry after 48 hours under normal conditions. - Dry residue:
Not less than 80%. - Density:
1.75-1.85 g/cm³ - Storage:
store in a tightly closed container at a temperature from +0°C to +40°C. Withstands freezing down to -25°C, but no more than five freeze-thaw cycles. The plaster is thawed at a temperature of (20±5)°C and thoroughly stirred until a homogeneous mass is obtained. Do not expose to direct sunlight. Do not store near operating heating elements. Shelf life 24 months from the date of manufacture. - Not recommended:
Painting external surfaces in rainy weather, high humidity and temperatures below +7°C. - Specifications:
2316-009-32998388-2011s amended. 1.2
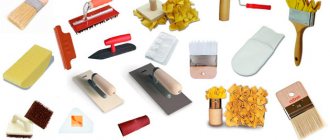
Required Tool
Roller plaster does not require a large number of tools or any special equipment for its application.
To apply it use:
- trowel,
- wide spatula,
- To form patterns you need a plastic grater.
Painting tools are also common:
- brush,
- roller,
- sponge.
You will need containers, masking tape, and clean rags. To prepare and tint the solution, you need a mixer.
Preparing the walls
Although roller plaster can hide some minor imperfections in the base, wall preparation includes both repairing cracks and smoothing out the wall surface. If the previous wall coating is oil paint, the paint coating must be removed to ensure proper adhesion.
Sequence of base preparation:
- the wall surface is inspected,
- is cleared of the remains of the old coating,
- oil stains are removed,
- moldy areas or areas of fungal infection are disinfected,
- checking the evenness of the wall and its verticality,
- if necessary, cracks and large gouges are repaired, and the wall is leveled with sand-cement mortar,
- primed in two layers - a primer suitable for deep penetration wall material (first layer) and a primer with quartz sand (second layer).
After complete drying, the wall is ready. Roller plaster, like decorative plaster with a particularly thin layer in the grooves, may require adding color to the primer to achieve the desired color effect.
Roller plaster installation
Treat the leveled walls with a primer with quartz filler.
The composition is applied to the prepared surface. If repairs are being made, first the wall is cleared of old finishing material.
Any topcoat that is replaced must be removed. Even if it is a firmly constructed cement-sand mortar, it must be completely removed.
Next, a primer with quartz filler is applied to the wall. This composition will make the surface more receptive to the new material, and will also improve the adhesion of the roller plaster to the wall.
The composition itself is applied to the wall in a thin layer, so the surface must be perfectly flat. Bark beetle plaster is not a leveling material. This is a finishing coat only. If during repairs after removing the old material the wall has unevenness, they are eliminated with gypsum-based leveling mixtures. This is the only way to effectively consume materials, since a large consumption of roller plaster will lead to unreasonable expenses.
A characteristic texture appears when the plaster is rubbed
The bark beetle plaster applied in a thin layer is rubbed off. It is at this moment of work that characteristic grooves appear on the wall, because of which the material received its popular name. When grouting, a trowel is used.
When the tool moves in a vertical plane, grooves are obtained in the direction of the grout. The same thing happens with horizontal movements. The grooves are parallel to each other and follow the direction of movement.
Combined options are also possible, when vertical grooves are made first, and then horizontal, forming a pattern of grooves intersecting at right angles.
Application technology
Everyone notes that this finish is easy to apply. Even someone who has never done plastering work, not to mention decorative plastering delights, can handle it.
As with any new task, it is advisable to practice on drywall.
The work is carried out in two stages:
- applying the composition in an even layer,
- applying a pattern.
Since both types of compositions - gypsum and acrylic - set quite quickly, with a large coverage area it is better to do the work together: one person applies the plaster layer, the second follows and applies the design.
It must be remembered that correcting the flaws of this type of coating is not easy. The damaged surface will have to be cleaned of the entire layer. Therefore, it is especially important to carry out all work (preparation, dilution of the solution, application of coating) in accordance with the technology.
Work outside can only be done in dry weather at a temperature not lower than 5°C and not higher than 35. The wall being treated must be protected from direct rays of the sun, and after application, also protected from possible rain.
To prepare a gypsum-based solution, pour water into a clean container in the amount specified in the instructions. The water should be warmer than 12°C. The dry mixture is poured into a container, color is added and stirred. If the mixture is thick, add a little water and mix again. After stirring with a mixer, the solution is left to stand for 10 minutes, after which it is stirred again. The finished acrylic solution is also colored, if necessary, and stirred before use.
First, an even layer of decorative mortar is applied. This is done with a trowel. The layer is made equal to the diameter of the grains. The layer is allowed to set a little.
Roller plaster is familiar to many with the method of applying a pattern such as bark beetle. It is obtained by rolling large round grains, moving a plastic grater along the base. Rolling grains leave marks-grooves in the stuck mortar, which are no longer completely covered by the mortar mass. To apply a pattern, a plastic trowel is placed with the working surface on the layer and moved in the desired direction. There is no need to press the trowel, otherwise the coating may be damaged.
Strictly speaking, the bark beetle pattern is part of the patterns that can be obtained by rolling grains into a roller structure. The popularity of the effect has led to the fact that roller plaster is popularly called bark beetle plaster rather than roller plaster. In fact, these are chaotic arcing or winding grooves, reminiscent of passages gnawed by beetle larvae. The remaining patterns - rug, rain, concentric circles are not related to this type. They are applied in a similar way - by rolling a trowel, but the direction of movement has an order.
- The rain is obtained by parallel straight trowel wires vertically or at an angle.
- Rug - with alternating short cross-shaped movements.
- To apply concentric circles ( lamb ) the trowel is rotated around the center of its working surface. Strictly speaking, these are not exactly circles, but their semblance.
After applying the pattern, the solution is allowed to stand for half an hour and a stainless steel trowel moistened with a clean surface smoothes the pattern. The dried coating is processed with sandpaper to remove sharp protrusions. Dust is then removed from the surface.
Revealing secrets
Compound
The mixture is usually packaged in buckets
- This solution consists of acrylic putty, to which a small amount of rounded marble screenings of one or another faction has been added - the choice depends on your desire or the designer’s idea . The screening fraction can be small, medium and large, so the first contains screenings from 1 mm to 1.5 mm in diameter, medium - from 1.5 mm to 2.0 mm and large - from 2.0 mm to 2.5 mm.
- The solution, thanks to acrylic binder components, has very high adhesion , but, nevertheless, it cannot be applied to a dusty surface and therefore the rough base must be treated with a primer.
- But for the base, this is perhaps the only technical requirement, since it does not need to be carefully leveled , as for other types of putties, and roller plaster can be applied to concrete, stone, brick, fiber cement and plasterboard surfaces. The main disadvantage of this finish is its high price, but you always have to pay for quality.
Note. You can buy roller plaster in construction stores - it is packaged in buckets of different capacities, which can be 9 kg, 18 kg and 50 kg. The mixture can be applied to the surface at a temperature not lower than 10⁰ C, and it should be stored in a cool place for no more than 18 months from the date of release.
Preparation
Cleaning the wall from wallpaper
Actually, as for any other finish, the instructions in this case provide for the presence of a clean rough base, on which no previous facing materials remain. Such excess may be wallpaper, any paints and varnishes, lime, grease stains or old falling off plaster (it is recommended to remove the lime-cement mortar even in situations where it does not fall off).
Recommendation. You may have to deal with the fact that the cement-sand mortar is covered with oil paint - in fact, this is a serious problem for cleaning, since such a coating literally “eats” into the wall and is extremely difficult to remove. However, this must be done and in such cases the paint is knocked off with a hatchet, centimeter by centimeter - there is no other way out.
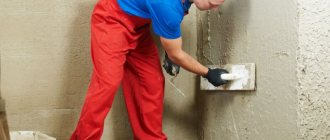
Primer the surface with a maklavica
To prime the surface with your own hands, you will need either a paint roller or a large brush (maklavitsa). The roller is excellent for drywall or smoothly plastered walls, but if you have brick or masonry in front of you, then it is better to use a roller - its bristles penetrate into all the seams and crevices, creating a crust, which, in turn, will contribute to the formation of adhesion.
Plaster
Applying the mixture to the wall with a metal spatula
By and large, the methods for applying roller plaster are not very diverse - everything happens with the help of a stainless spatula or trowel, exactly the same as for conventional puttying of surfaces. To do this, mix the mixture in a bucket and apply a small spatula to a large one, the one with which the solution will be applied to the wall. Try to apply the putty so that the thickness of the layer is the same, in any case, constantly adjust this value.
It should be noted that the thickness of the layer can be adjusted by tilting the spatula - the greater the tilt (the tool is located closer to the surface), the thicker the overlay is. At the same time, do not try to even out the mixture, since now you will give the texture the desired pattern.
Circular grout
To give direction to the grooves that the small marble stones make, you need to rub the surface in a specific direction, as shown in the photo above. But these movements do not have to be circular at all - you can change them vertically and horizontally, obtaining a certain pattern, that is, creating a surface texture.
Surface tinting
The final pattern for roller plaster is created by tinting the surface and for this you may need a foam sponge, a paint roller (foam, wool, mohair) and/or a brush, perhaps even a brush. You can see in the photo above how a tinting layer is applied using a foam paint roller - the grooves remain unpainted, thus emphasizing the texture of the finish.
To apply a continuous layer of paint, you will need a brush or sponge so you can get the paint into the recesses.
But after a solid tinting layer, when the entire wall is painted the same color, you can apply another layer on top with a roller to leave the grooves unpainted. In this way, you can no longer get a blue-white wall, but, for example, a yellow-blue one or apply any other color on top.
Coloring
If the mixture was not painted before work, the coating must be painted (read more about painting decorative plaster). Roller plaster is often used as decorative with a bark beetle effect. It looks especially advantageous when two contrasting colors are used for painting. This can be a contrasting pattern, in which the grooves are painted lighter than the main background, or they are darker.
It is best if the paint and plaster were from the same manufacturer. If this does not work, then water-dispersion paint (precipitation-resistant) or acrylic-based paint is used for outdoor surfaces. For interiors, acrylic and water-based paints are used. Facades are usually painted one color.
For painting work with a large coverage area, as a rule, spray guns (and similar mechanization) are used. Indoors, brushes, rollers, and a sponge are used for painting in two colors. The painting method is similar to painting plaster with a bark beetle effect. When painting with a roller, use a long-nap roller for the first layer. Painting is carried out by rolling the paint vertically and horizontally. The main thing is that all grooves are painted over. For the second layer, a roller is taken with velor (short pile), and painting is carried out only in one direction (either vertically or horizontally).
After the paint has dried, the surface can be varnished.