Material characteristics
The strength and durability of the plywood substrate directly depends on the thickness of the sheets, strength indicators, number of layers and type of processing. Therefore, when choosing plywood, you should pay special attention not to the appearance, but to the technical characteristics of the material.
Plywood thickness
The choice of plywood thickness depends on the type of rough base and the method of laying the sheets. If you plan to lay plywood on a concrete screed, a thickness of 15 mm is sufficient; for a plank floor it is better to take a little more - 18 mm. In both cases, the sheets are laid in one layer. When installing on joists, it is recommended to attach plywood in two layers to avoid sagging of the material and to give the base maximum rigidity. Here you can take sheets 15 mm thick or make the bottom layer thicker, for example, 21 mm, and the top layer thinner (12-15 mm). The wider the distance between the joists, the thicker the flooring should be.
Table of characteristics of the main brands of plywood
The thickness of plywood is determined by the number of layers of veneer it consists of. The thickness of each layer varies within 1-1.5 mm, so different manufacturers of plywood of the same thickness may differ in the number of layers and vice versa. It should be noted that sheets with the maximum number of layers have the greatest rigidity, and not thicker ones.
Sheet sizes
Based on size, plywood is divided into format and large format. The first type includes sheets with maximum dimensions of 1525x1525 mm, the second - from 1830x1525 to 3000x1500 mm. It is more convenient to work with smaller plywood, but at the same time, a large number of joints reduces the rigidity of the coating. When choosing the size of sheets, you must take into account the size and configuration of the room so that you have to trim the material as little as possible.
Plywood. The layers are clearly visible at the ends
Material of manufacture
Based on the material used, plywood can be birch or coniferous. This means that in the first type the upper layers are made of birch veneer, in the second - from pine, spruce or larch veneer, as well as other conifers. The inner layers are usually made from cheap wood, both hardwood and softwood. Visually distinguishing the material is quite simple: birch plywood is lighter and has a weakly expressed texture, while coniferous plywood has a richer color and a beautiful pattern on the surface.
Birch plywood
The bending strength of birch plywood is 10-12% higher, so it is used where the floor is subject to increased loads. It is denser and heavier than coniferous, which is not always convenient during installation, and is also more expensive. Coniferous plywood is more practical: it is cheaper, lighter in weight and resistant to rot, fungi, and mold. This type is more suitable for installing a subfloor in a residential building, because there are no intense loads on the base, and moisture is often high.
Softwood plywood
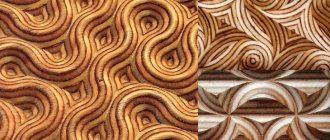
Combined plywood is also produced, the structure of which includes both birch and coniferous veneer. This material combines good quality, strength, attractive texture and affordable cost, and it is most often used in furniture production and interior decoration.
What does combined plywood look like?
Prices for plywood for flooring
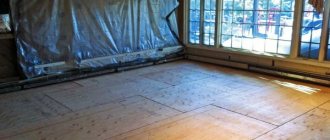
plywood for floor
Optimal distance between joists for laying plywood on the floor
The frame is the main element that is created during renovation. Logs are wooden beams, the length of which is 2 meters, and the cross-section is 40 by 70 mm. When forming the frame, you need to make sure that there are no serious defects on the joists. Otherwise, the durability and reliability of the floor will suffer.
The interval between wooden joists depends on the size of the veneers. Optimal - 30-40 cm.
In practice, it has been proven that floors installed with veneer sheets are more reliable and durable. This is not the cheapest type of subfloor, but it has good heat and sound insulation properties. Therefore, the final floor covering may vary.
Plywood is always a multi-layer material made from natural wood veneer. During its production, the veneer layers are positioned perpendicular to each other and glued together under pressure. Usually an odd number of layers is used, at least three. Therefore, this material is often called three-layer, five-layer or multi-layer plywood.
READ MORE: Pouring a garage floor with concrete - how to do the work correctly
Plywood can be classified according to different characteristics. For example, according to the species taken for making wood, there is a difference between coniferous and hardwood plywood for the floor in a wooden house. For outer layers of plywood, veneer is obtained from:
- ate;
- pine trees;
- larches;
- fir;
- cedar pine.
The inner layers are often made from hardwood. There is also pure birch plywood, which costs slightly more than coniferous plywood, so it is less often used in construction for leveling floors.
Plywood can be classified according to its resistance to moisture, which makes it resistant to different impregnations to varying degrees:
- FC is a material in which veneer is glued together with urea glue. This plywood has low moisture resistance, so it is only suitable for the production of furniture or interior decoration. FC is available in the following thicknesses: from 3 to 10 mm, then 12, 15, 18 and 21 mm. It is usually produced in square sheets with a side of 1525 mm, the density of which is 640-700 kg/m3, and the humidity is up to 10%.
- FSF - here the veneer is glued together with phenolic resins, which give the material moisture resistance. In addition, it is mechanically strong and wear-resistant, so it is a common solution to the question of which plywood is best for the floor. FSF can be used not only for interior decoration, but also for exterior decoration, for example, along joists when laying a roof. This plywood has a lot of thickness options, ranging from 6 mm to 40 mm. Its sheets can be the same size as the already described squares or rectangles 1220 (1250) x 2440 (2500) mm, with a nominal humidity of the same 10% and the same density.
- BS, FB, FBS plywood options are glued with varnish or bakelite glue. This is the most durable and moisture-resistant plywood, capable of working even in extreme conditions, which is why it is used in shipbuilding and aircraft manufacturing. The thickness of these brands of plywood is in the range of 5-18 mm. Its sheets are produced very large - 1550 x 5300 (5600) mm, with a nominal humidity of 10%, but with a higher density - 1200 kg/m3.
- BV is a material impregnated with water-based bakelite glue. It has technical characteristics similar to the previous ones, but it does not have the same moisture resistance - water spilled under the laminate on a wooden floor dissolves the glue, and the plywood loses its properties.
- FOF is plywood, the surface of which is laminated with a film, and the veneer is impregnated with synthetic resin. How thick should FOF plywood be - from 3 mm to 40 mm, and the size of its sheets is approximately the same - 1220 (1250) x 2440 (2500) mm at normal density.
Choosing a plywood brand
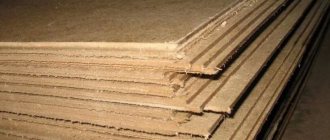
Plywood sheets
Not all plywood can be used as bases. The thickness of the sheets cannot be less than one centimeter, and even then such sheets can be used when laying a laminate floor on a concrete screed.
Bending strength of plywood (birch, coniferous and combined)
Types of plywood
If logs are used to level the floor, then the thickness should increase to 1.6 cm. In such cases, it is more advisable to lay plywood in two layers of one centimeter thick.
Floor plywood thickness
Dimensions of different types of plywood
This is not only much easier physically (thick sheets have a lot of weight), but also improves the final quality of the work. Specific base thickness values depend on the total maximum load on the floor and the distance between the joists.
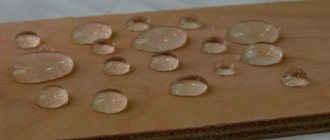
As for moisture resistance, the higher this indicator, the better. Manufacturers produce several types of moisture-resistant plywood, each of them differs in its physical characteristics.
Moisture-resistant plywood
Choosing plywood for leveling the floor before laying laminate
To create a base for a laminated board, plywood is most often used - a lightweight and durable material with a smooth surface, made from several layers of wood veneer with adhesive layers. Despite the external similarity, different brands of plywood differ in terms of moisture resistance, strength, and toxicity of the composition. These characteristics depend mainly on the type of glue used. To ensure long-term operation of a floor with laminate laid on joists, it is important to choose the right brand of plywood sheets.
Let's consider the options:
- FSF. The material has high moisture resistance and is intended for formwork, wall cladding in non-residential premises, and roof construction. However, this brand is not suitable for interior work in rooms where people often visit or live. This is due to the high toxicity of the formaldehyde-based glue used in manufacturing.
- BS is a high-quality flexible and elastic material. It has excellent strength and retains geometric parameters well. Designed for use in sea and air transport. It is usually not used in ordinary construction due to its high cost.
- BV is a durable brand, but due to the use of water-soluble glue for its production, it has low moisture resistance. This product is not suitable for leveling floors.
- FC is another type that should be used to level the floor under the laminate. The big advantage is the naturalness of the ingredients. It can be used not only in kitchens and hallways, but also in bedrooms and children's rooms.
If when choosing plywood its type matters, then the presence of flaws that do not affect the strength does not matter. The material is available in several quality categories. Let's consider which of them are best suited for our case:
- E – elite class sheets, it is irrational to spend on them in this situation.
- I – there are minor defects. These are wormholes with a diameter of no more than 6 mm, the number per square meter is no more than three, and there are knots up to 20 mm long.
- II – the number of wormholes reaches 6 per 1 m2, fused and unfused knots may be present.
- III – the number of defects is the same as in category II, the only difference is their number is less than 9 pieces per 1 m2, which completely allows the use of this material for finishing work.
- IV - the number of defects inherent in this category makes it possible to use this material for leveling the floor.
For laying under a laminated board, plywood of all categories – I-IV – can be used. But grade IV birch plywood is most often used because it allows for significant savings compared to other categories.
The thickness of the plywood intended for laying on joists with subsequent installation of the laminate is 20-30 mm. There are several options for panel sizes, the most common are 1525x1525 mm or 1220x2440 mm.
Choosing plywood for laminate
The laminate is laid on a completely flat surface. This is the only way to be completely confident in the long-term operation, reliability and aesthetic appeal of the floor covering. You can make the base level and cover any defects on it using fiberboard and OSB boards, or you can use plywood.
The best option is to lay plywood under the laminate. Smooth dense sheets are capable of:
- level the floor surface;
- increase the service life of the laminate;
- act as sound and heat insulation.
Plywood sheets are mounted on a previously laid concrete screed. They can also be installed under laminate on a wooden floor if you do not plan to dismantle the old floor.
Do you need plywood for laminate flooring?
The variety of laminate flooring solutions can be divided into two large groups, which differ from each other in the basis of the laminate itself:
- Rigid laminate - made on the basis of chipboard (chipboard) or fibreboard (fibreboard), involves laying on a pre-leveled surface or using leveling substrates. If laid on a pre-leveled surface, its curvature should not exceed 2 mm per linear meter. If the laminate is laid on special leveling substrates, they are able to compensate for unevenness to a large extent, and this depends on the thickness and material. As an example, a 5 mm thick polyurethane foam backing can compensate for unevenness of up to 3 mm per linear meter. Exceeding these values leads to excessive stress in the laminate joints.
- Flexible laminate, unlike the previous ones, i.e. hard laminates, has a vinyl backing, which allows it to be laid on a poorly prepared base that allows height differences of up to 5 mm. In appearance, a floor covering made from this material differs little from traditional solutions, but at the same time it is much stronger than them and absolutely moisture resistant.
https://www.youtube.com/watch?v=g_AIZYQ0pDg
Design decisions related to laying laminate flooring on wooden floors will depend primarily on the condition of the floors themselves.
In any case, floor preparation work is preceded by diagnostics, during which the actual state of the wooden flooring is analyzed and a decision is made on methods for preparing and compensating for unevenness. In accordance with SNiP, the following gradation is recommended:
- New wood floors. It is assumed that they are laid out as required, i.e. appropriate treatment against fungi, etc. has been carried out. Height differences are checked, fastening nails or screws are recessed, and the cracks are filled with a special solution. If the unevenness of the flooring exceeds 2 mm per linear meter, additional measures are taken.
- Old wooden floors require disassembly to assess the condition of the joists and other structural elements. During repairs, it is recommended to turn the logs upside down, check their condition, and also minimize level differences. Remove worn elements and replace them with new ones. After this, the flooring is reassembled. If necessary, old paint is removed and the floor is sanded mechanically.
- Sometimes a method is used in which a new floor is laid on top of the existing wooden floor at an angle of 90° (in a cross) - if there is confidence in the quality of the base (of course, if the height of the room allows).
The installation technology is described in detail in the relevant literature, but several fundamental points should be noted:
- On slats or directly on the floor - if the warping of the floor boards is insignificant, and the total height of the room allows it - plywood panels can be attached directly to the floor (plywood thickness - 10-18 mm). Otherwise, fastening is carried out through special slats, which are evenly placed on the base and thus level the surface.
- Thermal clearances are critical to avoid warping due to thermal expansion of the plywood backing. It is recommended to leave at least 8-10 mm between sheets, and distances from the walls - up to 15 mm.
- The plywood sheets are laid out on a wooden floor under the laminate with bandaging - a technique adopted for brick laying, which eliminates the formation of long seams, as well as corners where all four sheets meet. This solution minimizes the load on the locks of laminate structures.
- Fastening is carried out with self-tapping screws through pre-countersunk holes, allowing the heads of the screws to be recessed into the sheet.
- Final processing allows grinding the resulting surface mechanically to remove protrusions and focal irregularities.
Plywood as a subfloor under laminate can be installed in two ways:
- without intermediate supports;
- with intermediate supports.
In the first case, fastening to the boardwalk is done using glue and self-tapping screws. The second option involves the use of two types of supports. Here it is possible to install point elements, called slabs, and beams. The use of logs allows for a more reliable foundation, but the first method is preferable in terms of saving material.
Without installing intermediate support points, it is possible to lay plywood under the laminate on the floor with height differences of no more than 1 cm. It is precisely such unevenness that sheets fixed with adhesives can correct.
If it is necessary to correct unevenness of more than 1 cm, then installation is carried out using logs or blocks. It is important to remember that the gaps between the boards, cracks or areas where there are no flooring elements should not exceed 5 cm in width. In case of more serious problems, it is better to go through the rough flooring to prevent problems during operation.
READ MORE: Leveling the floor - screed for laminate, linoleum or tiles
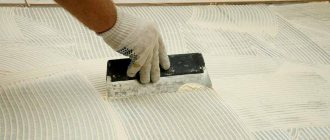
Installation with glue
Sheets can be secured using either adhesives or liquid nails. Self-tapping screws are used to provide additional fixation. Two-component, water-based adhesives are used as adhesives. You can use assembly adhesive or bustilate.
Scheme for laying plywood with glue
The work is performed in the following order:
- Checking the evenness of the base, cleaning it from dirt and dust, degreasing.
- The next step could be priming the surface. It is necessary for the adhesive solution to most effectively connect the sheets and wood flooring.
- After completing the preparatory work, they begin cutting out sheets of material. This is necessary to rationally use raw materials and ensure high accuracy of installation. The sheets are laid out so that they cover the entire room (if necessary, cut with an electric jigsaw), leaving a gap between the elements of 2-4 mm. This gap is called a damper seam, it prevents the appearance of waves on the surface when humidity and temperature increase or after the sheets expand under load. This seam is required. Also, a deformation gap is provided between the flooring and the walls. Here it should be 8-10 mm. It is this layout that will ensure the most effective alignment.
Layout options for plywood sheets
- The laid out elements must be numbered. After which they are removed from the horizontal surface. Numbering is necessary so as not to make mistakes during installation and complete it without temporary hiccups.
- After removing the sheets from the floor, holes are drilled in them for self-tapping screws. Using a drill of a larger diameter, these holes for fasteners are countersunk. The location of the fastening elements is chosen so that they are located at a distance of at least 2 cm from the edge of the sheet. In this case, the pitch of the screws is taken within 15-20 cm.
- Having completed the preparation, you can begin the main work. Installation begins with niches, ledges or podiums. First you need to apply glue to the base. The layer should not exceed 2-3 mm. The sheet is installed in the design position and pressed against the surface. Then move on to the next element.
- You can begin installing self-tapping screws only after the adhesive solution has dried. The fastening elements are installed in the prepared holes and screwed.
Laying on joists
Most often, logs are used as intermediate supports. They make it possible to simplify the installation of a frame under plywood, since the number of operations and measurements is reduced. The preparation of the base is carried out in the same way as in the previous case. The labor intensity of the work increases, but it becomes possible to eliminate serious differences without removing the wooden flooring boards.
Installation of a tape support for leveling with plywood
After cutting the sheets, they begin to install the logs. For their manufacture, boards with a section of 15 by 40 mm are used. The step is selected at the stage of developing drawings or sketches and depends on:
- sheet thickness;
- the width of the sheets (since their joint should be located on the joist).
If a material with a thickness of 14-16 mm is selected, then you will need to assign a lag pitch of 30-40 cm. When using material 18-22 mm, the intermediate supports are laid more sparsely, at a distance of 50 cm from each other. The joists are fastened to the wooden flooring using self-tapping screws; when installing subfloor sheets, you can use self-tapping screws or glue.
Plywood under laminate is a simple and affordable way to prepare a subfloor for laying laminate flooring. The technology for laying laminate flooring on a plywood base is practically no different from laying laminate flooring on a cement screed. The base can be not only wooden logs, wooden or parquet floors, but also the same cement screed.
Laying the substrate under the laminate involves using self-leveling floors or cement screed as the base. But this is not always possible. For example, installing plywood in a home with wood floors will reduce renovation time and the cost of installing new laminate floors.
The order of work depends on the condition of the floor covering. If it is an old flooring of heavily damaged boards that requires preparation, it is necessary to open the flooring and make sure that the boards and joists have not begun to rot. If the process affected the old floor, the damaged elements will have to be replaced. After this, fasten all the boards well, pressing the heads of the nails as deep into the wood as possible. Then start cutting and adjusting the sheets.
In order to minimize material consumption, lay the sheets on the floor and determine their optimal location. First, whole sheets are laid out in the center of the room, which do not require sawing. After this, the remaining pieces are cut out. When cutting plywood, it is necessary to leave a small gap between the sheets.
Why level the surface under the laminate?
The covering fabric consists of separate panels interlocked with each other by a locking system. The connection is strong enough, capable of ensuring the density and strength of contact of all elements with each other.
But on an uneven base, there is an excessively high load on individual panels, whose locking system will be subject to too difficult conditions. Gaps will appear along the joint line, which can develop into fairly wide cracks .
The appearance of the canvas in these areas will be spoiled, in addition, during wet cleaning, water will get into the gap, which will very quickly weaken the lock. The connection between the panels will be completely destroyed.
This situation is unacceptable, therefore the surface of the subfloor must be carefully prepared for laying the material, ensuring a flat plane without differences in height or curvature . If the subfloor does not meet the requirements of the material, it is leveled in various, most suitable ways.
Thickness of plywood for laminate on a wooden base
The method of installing plywood and its thickness are determined by the type of base on which it will be installed.
When the base for laying is properly leveled, a thickness of plywood sheets of 10 mm is acceptable. If it is necessary to level the surface of the base using additional spacers, then a material with a thickness of at least 15 mm is selected. A special requirement for the strength of the material is imposed in the case of laying plywood boards on logs. In this case, the sheets are subject to significantly greater load; plywood with a thickness of at least 18 mm is suitable.
What criteria are taken into account in comparison?
To determine which is better - plywood or OSB, they can be compared in terms of technical indicators. For example, let’s take two products 1 cm thick. The plywood will be made from coniferous veneer, and the OSB board will be class 3. Both of these options are relatively inexpensive, have a certain level of resistance to chemical attack and moisture, and are also environmentally friendly.
Oriented strand board OSB - 3 (OSP - 3)
Table. The relationship between the characteristics of plywood and OSB.
| Index | OSB | Plywood |
| Flexural strength along the longitudinal axis | 26 N/mm sq. | 47 N/mm sq. |
| Density | 610 kg/m3 | 550 kg/m3 |
| Chip resistance | 0.34 N/mm sq. | 1.2 N/mm sq. |
| Formaldehyde content | 7-8 mg/100g | 5-6 mg/100 g |
| Swelling in water during the day | 15% | 5% |
| Thermal conductivity | 0,13 | 0,12 |
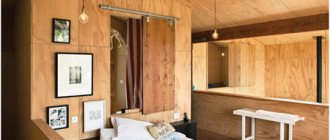
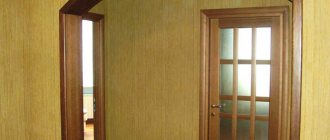
Plywood walls and floor
Main properties and characteristics
Plywood is a building material consisting of several layers of veneer glued together, with the wood fibers of adjacent layers perpendicular to each other. This gives it increased strength and dimensional stability. It also has other special properties that make it indispensable for leveling the floor surface:
- light weight;
- ease of installation;
- high level of rigidity;
- different sheet formats;
- ease of processing;
- insulation parameters - heat and noise insulation;
- environmental safety.
Plywood goes well with different types of flooring, such as traditional linoleum. When laid under the laminate, it perfectly levels the sub-base and gives the laminated panels a high level of rigidity in all directions. It is also possible to lay plywood under combined floors, for example a combination of laminate and porcelain stoneware.
How to lay laminate on plywood with your own hands
The entire floor area is covered with plywood under the laminate. Sheets, the standard parameters of which are often 1500x1500mm, are pre-cut with a jigsaw into 4 equal parts. They are laid out using the bricklaying method, i.e. the sheets of the subsequent row are positioned with a shift relative to the previous one by approximately 30 cm. As a result of this installation method, we obtain the highest level of rigidity of the plywood layer.
These squares should be screwed to the wooden floor not close to each other, but at a distance of 2-3 mm. The gap between the wall and the sheet should be larger, 15-18 mm. Those. we leave expansion gaps that allow the material to change in size under the influence of temperature and humidity. Without this necessary gap, the floor is not guaranteed to avoid squeaking or warping.
To install and fasten plywood under the laminate, self-tapping screws are used.
How to level a wooden floor under laminate with plywood
Self-leveling flooring or concrete screed under the laminate is the best option. But after pouring, the drying stage of the screed begins; its duration can be from a week to a month, depending on the size of the layer. The repair threatens to take a long time, but laying plywood under the laminate can help out, reducing the duration of the repair and money spent.
Sheet dimensions
According to GOST, the length of a plywood sheet is 244 cm and its width is 122 cm. In stores, material of this size is most often sold: it is convenient to store, transport and install.
Sometimes they produce sheets measuring 152 cm x 366 cm, this format is common. The practical dimensions of the base of the flooring are 125 x 125 cm: large sheets simplify and speed up the process of laying laminate flooring. For convenience, they are cut into 4 parts. This allows you to create the required number of damping joints that can prevent deformation of the base.
How to lay plywood under laminate
Installation of plywood is quite simple and does not require special skills. Let's look at how to properly lay plywood under laminate on a subfloor made of boards. Before starting work, you should prepare the necessary tools and materials:
- screwdriver;
- jigsaw;
- self-tapping screws;
- foamed polyethylene backing;
- plywood sheets;
- roulette;
- scotch;
- level.
Plywood sheets
Substrate
It should be noted that the subfloor must be in good condition, and this applies not only to the boardwalk, but also to the joists. If the floor is severely worn out, or certain areas are rotten, you cannot lay plywood. Firstly, it is impossible to securely fasten the flooring to rotten boards, and secondly, the wood under the plywood will continue to deteriorate until one day the floor sag under your feet.
Step 1. Prepare the base. Remove the baseboards, check the integrity of the boards, strengthen loose areas with screws, and seal large cracks. If there are noticeable irregularities in certain places, you need to remove them using a grinding machine. Finally, the floor is vacuumed or swept to remove all excess.
Cleaning before laying plywood
Step 2. Carefully take measurements and cut the sheets so as to minimize the number of joints. In this case, you need to take into account the mandatory gap around the perimeter of the room with a width of 8-10 mm and gaps of 2-3 mm between the flooring sheets.
Taking measurements
Transferring markings to sheets
Cutting plywood to specified dimensions
Advice. After cutting the plywood, it is recommended to sand the ends of the sheets to remove burrs and loose fibers.
Step 3. Lay the underlay on the floor in strips end to end. The edges of the material should extend onto the walls by approximately 5-10 cm. At the joints, the substrate should be taped to seal the heat-insulating layer. In addition, this will prevent the strips from moving when laying the plywood.
Laying the substrate
Step 4. The prepared sheets are laid one by one on the floor, leaving a gap from the wall. The joints between the sheets are shifted in each subsequent row by about a third of the sheet width. Be sure to check the horizontality of the flooring with a level to avoid differences in height (when installing laminate, maximum differences of up to 3 mm per meter are allowed).
Laying sheets of plywood on the floor
Step 5. Fix the plywood to the floor with self-tapping screws, screwing them in increments of 15-20 cm and always at the corners of each sheet. The fastener caps should be recessed by 1-2 mm.
Fixing plywood with self-tapping screws
It is more convenient to use a screwdriver than a simple screwdriver
Floor ready for installation of finishing floor covering
After this, the floor is ready for laminate installation, and laying the flooring on such a base will not be difficult. The edges of the thermal insulation substrate protruding from the walls are cut off upon completion of all work, before attaching the baseboards.
Prices for Tarkett laminate
Tarquette laminate
Video - Which plywood is better to lay on the floor under laminate
Video - Laying plywood on a wooden floor
Plywood thickness - what kind of plywood to lay under the laminate
The sheets have different sizes.
The choice of one material or another depends on the construction task assigned to the workers. Size affects the following parameters:
- The thinner the plywood sheet, the worse the job of leveling the surface will be.
- If you choose thick sheets, you will not need additional thermal insulation materials.
- The thicker the veneer, the less deflection, and the rigidity of the structure, on the contrary, is greater. Thanks to this, it is possible to increase the interval between the lags of the subfloor, and the quality of the latter will not deteriorate as a result.
According to the standard, veneer sheets have a thickness of 4, 6, 10, 12, 15, 30, and 40 mm. This indicator affects the ease of installation in joists and its wear resistance.
The standard sheet thickness is from 3 mm to 3 cm. Some types are used in highly specialized areas. Their size in height is 1-2 mm. However, sheets with this indicator are not used in construction.
The best plywood thickness is determined in accordance with the installation option, as well as the height of the floor covering. The planned load on the floor is also taken into account. For example, if parquet with a thickness of 16 mm is subsequently laid, plywood measuring 10 mm will be required. When using thicker parquet (16 - 20 mm), the minimum sheet height should be 12 mm. For large-sized parquet, sheets with a thickness of 1.5 cm or more are suitable.
For the floor, thicker plywood boards are used. So, when laying on joists, it is better to choose a material whose height is at least 18 mm.
Domestic manufacturers offer plywood boards in different sizes. But conditionally there are 2 groups: standard (152.5 cm in length) and large (up to 366 cm in length).
The height of plywood sheets for a wooden floor depends on the defectiveness of the coating and the presence of differences in height. In any case, you can use a thickness of 12-16 mm. This indicator will allow you to get a strong, flat surface.
A joist floor is a frame made of wooden beams. It is laid on the base and sheathed on top with sheet building materials. The quality of the coating and service life directly depend on the thickness of the veneer. The higher the slab, the less it will bend under the weight. Laying plywood over joists is considered the best option, although it causes many difficulties during installation.
The price of the material depends on the type and size. The following rules will help you choose the thickness of plywood that will be laid on the joists:
- Distance between wooden joists. Cells in a beam frame come in different sizes. If the gap between the beams is 500-600 mm, then you need to choose sheets with a thickness of 1.5 cm.
- The load exerted on the floor covering. The higher the indicator, the thicker the plywood should be. If we are talking about a residential premises, then it can be 10 mm, while the distance between the beams should be 40 cm. For floors in commercial premises, sheets up to 22 mm high are used.
- Type of topcoat. The choice of facing flooring material is varied. Some of them put a lot of stress on the plywood flooring. For example, laminate is light, but tiles are heavy, so there is a high risk that the veneer underneath may bend. It is necessary to carefully determine how thick the sheets should be when laying them on the joists.
The coating on concrete can be laid in several ways: on logs or along a screed. The latter method is suitable in cases where the base is flat and the finishing coating is linoleum or other plastic material.
Plywood is used with a thickness of 8 to 18 mm. Before installation, it must be cut into strips or squares. During the installation process, no seams should be formed that come together. A gap of 2-3 cm must be left between the walls and the subfloor around the perimeter of the room.
If linoleum or cork is used as the finishing floor covering, then the plywood must be secured to the base with parquet mastic. There should be no mounting gaps. If you plan to lay parquet, the subfloor must be secured with self-tapping screws. Be sure to leave mounting gaps (2-3 mm).
Leveling the floor with plywood under laminate raises a number of legitimate questions, the main one of which is what thickness should it be? The answer to this question depends on a number of factors:
- If the base of the floor is sufficiently flat and strong, then it will be enough to use plywood 8-10 mm thick as a substrate.
- If you have to use pads to level the general plane of the floor, you should purchase plywood with a thickness of at least 12 mm.
- If plywood is laid on joists, it must withstand heavy loads. The thickness of plywood when laying on joists should be at least 16-20 mm. Its cost is quite high, but you should not save on it.
Any builder is interested in how thick plywood is needed for a particular construction task.
Regardless of the manufacturer and type of plywood, its standard thickness range is between 3-30 mm. Therefore, home-grown builders often do not know what thickness of plywood for the floor they need in their particular case. But this characteristic is the most important, since during operation a large load falls on the wooden floor.
Other characteristics depend on the thickness of the plywood:
- Leveling degree. The thinnest plywood is the worst at leveling the surface, especially for flooring on boards that have a large number of defects.
- Possibility of insulation. Since wood is a poor conductor of heat and sound, plywood can partially or completely replace additional sound insulation and thermal insulation.
- The degree of rigidity also depends on how thick the plywood is laid on a wooden floor, because the greater the thickness, the more perpendicular layers of veneer, the harder the surface becomes, but at the same time elasticity is maintained.
However, the thickness of the room has virtually no effect on the height of the room, so whatever thickness of plywood you choose for the floor, it can reduce the height of the room by a maximum of 4 cm.
Plywood can be laid on wooden boards, on joists and on a concrete screed:
- Flooring on joists is the best, although labor-intensive. It allows you to prepare a perfectly flat base, which is necessary for high-quality installation of laminate flooring. What is the thickness of the plywood along the joists? This will require sheets with a thickness of 12-16 mm.
- When installing on boards, plywood is laid on solid floor boards, which should provide a flat, solid base. Here you will need thinner plywood - 10 mm or a little more. You shouldn’t buy expensive materials here; you can even buy second grade ones. The main thing is to sand the surface and fill the cracks so as not to reduce the service life of the structure.
- FC can also be used under parquet, since there are no environmental claims against it. You should not use FNF, as this plywood emits toxic phenol. If it is possible to pre-grind, then you can get by with the third or fourth grade. What thickness of plywood should I put on the floor under the parquet? The thickness calculation in this case is as follows: plywood should be 3/4 of the thickness of the parquet board.
- FK brand plywood is ideal for flooring under laminate, as it combines the necessary strength, moisture resistance, efficiency and environmental friendliness.
- FC is also perfect for linoleum. Here you can also use lower grade material with subsequent grinding. You should not lay too thick plywood under linoleum; the optimal values here are 14-18 mm.
What thickness of plywood do you use and for what purposes? Share your experience in the comments - help others with your advice.
READ MORE: Damping edge tape for floor screed made of foamed polyethylene
Selecting a substrate
The backing for plywood can be used from any material, but for a better choice you need to pay attention to the service conditions of the coating. If there is a danger of water ingress or high air humidity, then the best option would be to lay a substrate made of synthetic materials, for example, polyethylene foam.
He will be able to cut off the plywood from external moisture, maintaining its surface in a given geometric shape. The choice of a cork backing would be no less successful, but it is advisable to lay a layer of vapor-waterproofing under it to prevent the appearance of mold or rot, which is dangerous for plywood sheets.
Laying plywood under laminate on an old wooden floor
The simplest process. Before laying, you need to check the position of the old floorboards. If the variation in height is small, it is permissible to immediately lay and nail down sheets of plywood. If it is large, then the floor can be trimmed a little with an ax, removed with an electric planer, or called in a specialist for sanding.
Laying plywood on a wooden floor
Sheets of plywood on an old wooden floor
Important. When leveling old floors, keep an eye on the nails. The caps should be sunk or the nails should be pulled out. If it doesn’t work, no problem, finish them off in every possible way, minor damage to the floorboards and indentations do not play any role. All of them are perfectly covered with plywood and do not impair the performance characteristics of the laminate floor.
What is the thickness of plywood for laminate? Laying laminate on plywood
No one will deny that the most popular and most prestigious flooring made from natural materials is parquet. However, its high cost, complexity of installation and maintenance are clearly not in its favor and make it accessible to a small circle of consumers with a fairly high level of income. Therefore, the growing popularity of laminate is understandable - an artificial floor covering, which, thanks to its unique qualities, is an excellent alternative to expensive floor coverings made from natural materials.
Today, laminated floors can be found in premises for a wide variety of purposes. This is natural, since such a material is distinguished by high strength and durability. Laminate floors are characterized by beauty and aesthetics, ease of installation and maintenance, resistance to external influences and wear resistance. A huge variety of colors and patterns, allowing to imitate a wide variety of natural materials, combined with an affordable price, make laminate indispensable for decorating residential and commercial premises.
But in order for a laminate floor to bring a piece of luxury and presentability to the interior, it must be laid in compliance with all technological requirements. The main role in this process is played by a level base, which ensures the integrity and beauty of the laminate floor. To do this, you can lay the laminate on plywood. It is this method that has received the greatest recognition among masters. The main thing is to know how to choose the right plywood.
Then a completely natural question arises - which plywood for laminate will be most suitable? Most often, plywood is used under FC class laminate. Material of this class is able to provide the necessary moisture resistance and strength, and at its cost it is quite affordable. The thickness of the plywood under the laminate should be at least 6 mm and no more than 15 mm. This material is also supported by its environmental friendliness, because plywood does not emit harmful substances and is therefore completely safe for human health and the environment.
It makes no sense to use expensive high quality plywood as a base. Sanded material of class 2-4 will be sufficient. In this case, you should pay attention to the fact that the surface of the plywood does not have any flaws - dents, bulges, knots and cracks. Otherwise, the laminate floor will not last long enough.
Laying plywood under the laminate is done on a flat surface. This can be a self-leveling floor, a screed, or any other base. Plywood is fixed to the surface using self-tapping screws and glue, and for ease of installation, large sheets are cut into two or four parts.
Laying must be done in such a way that the sheets lie with a slight offset and do not meet with their corners at one point. To fix the sheets, instead of glue and screws, you can use a special primer, which will not only fix the material, but also provide additional protection from moisture.
You should not rely on plywood to solve all problems with an uneven base. Therefore, in any case, the screed should be as smooth as possible and not have large depressions or protrusions. After laying the plywood, all joints and the surface of the sheets are carefully sanded. A waterproofing film and underlay are laid on top, and only then the laminate is laid on the plywood. After 12 hours, the laminate floor will be ready for use and installation of skirting boards.
We recommend reading: Laying plywood under laminate flooring with your own hands
Sanded or unsanded?
When choosing plywood for laminate, you also have to decide which plywood is better to buy - sanded or unsanded. Opinions differ on this issue, since some experts declare the pointlessness of buying polished or even laminated products, which are more expensive. The main argument in this case is that during the grinding process the most inconspicuous irregularities are eliminated, which are not capable of affecting the quality of the final coating. Another category of experts advise buying sanded products, so that later, during the installation process, they can avoid the very procedure of sanding and bringing the plywood to an ideal state. In this light, paying a little extra and buying a polished product seems like a more optimal solution.
Instructions for laying plywood on a wooden floor
All furniture must be removed from the room where we will be renovating. Then we remove the old baseboards. If it is plastic, there will be no problems with this, but a wooden baseboard will most likely have to be dismantled with a crowbar. You also need to remove all nails protruding from the floor. Before we lay down the base, thoroughly vacuum and wash your wood floor several times. In addition, you need to prepare the material itself.
Sheets of plywood should lie in the room where repairs are planned for at least a day. This will reduce the possibility of sheet deformation after installation.
Installation of plywood sheets under laminate
A little about the technique of creating a foundation
Plywood can be laid either on an existing concrete screed or on joists. The optimal option is when such sheet material is used in a house with old floors on wooden beams. In this case, all safety recommendations are followed. The flooring is light and durable, does not create excess load, you can fill the voids between the beams with expanded clay or polystyrene granules to improve thermal and noise protection.
Plywood on the floor under the laminate must be laid according to certain rules.
- The thickness of the sheets is chosen to be at least 10 mm.
- If you decide to make a thick flooring to create a rigid base for the plywood laminate, it is better to work in two layers, for example, from 10 mm sheets.
- It is recommended to make the flooring at least 16 mm if plywood is laid on joists under the laminate.
Sheets of OSB and chipboard play the role of reliable flooring under laminate on joists or existing concrete screed. They are not water-resistant; if moisture gets in, they may swell and impair the characteristics of the floor covering. Often, expensive chipboard or OSB flooring treatments are necessary to ensure long-lasting laminate flooring.
Plywood under laminate has no problems with water. Some varieties of this material allow the presence of liquid for a long time. Others are durable enough to guarantee good quality foundations in an average apartment.
You can choose plywood of any quality grade. Whether there are knots, even dried out and rotten from old age, does not matter. The material for laminate flooring must meet only the criteria of environmental friendliness and water resistance.
Types of plywood thicknesses - choose thicker
Installation on OSB floor
Let's consider installing OSB sheets on a concrete screed.
Step 1. The surface is carefully prepared. All cracks are sealed, construction debris and dust are removed.
Preparing the base
Step 2. The surface is treated with a primer to improve the adhesion of the adhesive composition to the base. The surface is dried for about 12 hours.
Applying primer
Step 3. The adhesive composition is applied using a notched trowel onto the rough base. A layer of glue is applied so that there is a small free gap of about 1 cm to the wall.
Applying glue
Step 4. The OSB sheet is laid on the surface treated with glue. The sheet is carefully pressed down, the evenness of the laying is checked using a level.
Sheet laying
Step 5. The next sheet is laid next to the previous one with a small gap - about 5 mm.
Gap between sheets
Step 6. If necessary, OSB sheets are cut according to measurements.
Trimming material
Step 7. All OSB boards are laid in the same way. All gaps remaining between them, as well as those remaining between the wall and the slabs, are sealed with silicone sealant.
Filling gaps with silicone sealant
Video - Laying OSB
https://youtube.com/watch?v=O3598OpnPVc
Whether to choose plywood or OSB, everyone will have to decide for themselves, after soberly assessing their financial capabilities and the operating conditions of the material. After all, both plywood and OSB are good in their own way, but both types have their drawbacks. All that remains is to decide where and how the coating will be laid.
Preparing plywood boards for installation
To lay plywood, prepare the following tool:
- electric drill;
- screwdriver;
- electric jigsaw or wood saw;
- hammer;
- tape measure and other necessary measuring instruments.
After preparing the logs, the required tools and consumables, they begin to prepare the plywood.
How to properly lay plywood on joists under the laminate: stages of work
- The sheets are cut so that the joints fall in the middle of the surface of the log. So, if the width of the beam is 100 mm, then each sheet should extend onto it by approximately 50 mm. To cut a large number of slabs, it is rational to use an electric jigsaw. A hacksaw is suitable for small amounts of work.
- Before installation, it is recommended to drill holes for screws in each sheet. It is recommended to countersink the holes - using a special multi-bladed tool, remove the chamfers so that the screws are completely sunk into the plywood. If this is not done, the protruding caps will damage the materials laid on top. The interval between adjacent fastenings is 20-30 cm. There must be at least 8 fastenings per sheet.
Use screws for fastening that are 3 times longer than the thickness of the plywood.
- For fastening, screws are used, the length of which is approximately 3 times greater than the thickness of the plywood sheet.
- The second option for attaching panels to joists is nailing. It is recommended to nail the sheet at the beginning and end. A line is drawn between the first and last nails, along which the remaining nails are then hammered.
You can also attach a sheet of plywood to the joists using nails and a hammer.
- When laying plywood sheets, a gap of 2-3 mm is left between them, which is subsequently sealed with mastic. You can lay one plywood sheet with a thickness of 20 mm or more, but more often the material is laid in 2 layers. Moreover, the bottom layer is usually made thicker than the top. When laying two layers, remember that the joints of the slabs in different layers should not coincide.
- In the rows, the sheets are arranged in a checkerboard pattern.
Attention! Before installation, plywood sheets must be treated with antiseptic compounds to prevent damage by insects, rotting, and the appearance of fungus. To improve the fire resistance characteristics, the panels are treated with fire retardant compounds.
One more recommendation. During installation, the direction of the fibers on the surface of the sheets should be taken into account. If possible, it should be perpendicular to the main trajectory of people moving around the room.