Putty for stoves and fireplaces “Emelya”: pros and cons
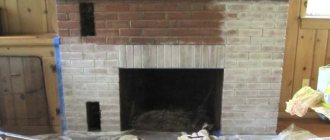
Many modern architectural buildings are equipped with an individual heating system. In cottages, dachas, and country houses you can see heating stoves or working wood-burning fireplaces.
Performing an aesthetic and heating function, these structures, like all products created by human hands, need finishing. Such plaster should not be afraid of strong increases and sudden changes in temperature. Heat-resistant putty for stoves and fireplaces "Emelya" meets all the requirements for cladding heating equipment.
How to coat the oven to prevent it from cracking: preparatory work
First of all, you need to understand that stove work, be it external or internal, must be carried out in the warm season, and long before the start of the heating season.
If the brick stove was built recently, pay special attention to drying - let it stand for several days for the masonry to completely dry solution. At least a month must pass before plastering the stove begins.
Only after this period will your new design no longer “sit down”.
Before you plaster or putty the slab correctly, so that it does not smoke in the future and flakes do not fall off and cracks do not stick out, it is necessary to carry out some preparatory measures.
Namely:
- Prepare your workspace;
- Cover the floor and furniture with protective plastic film;
- Carefully remove the old plaster (if the stove is not new), and thoroughly treat each wall with a construction wire brush;
- Clean the surface from dust and debris using a vacuum cleaner or broom;
- Treat the bricks with coarse sandpaper;
- Remove any accumulated dust again.
To finish a new stove, you need to grout the surface of the brickwork with clay, cement mortar, or a mixture of crushed asbestos, after which you need to leave it for several days until it dries completely.
About the product
Putty for stoves and fireplaces "Emelya" is the brainchild of a domestic manufacturer of paints and varnishes and building materials, which has been successfully operating since the early 2000s.
Concord OST technologists guarantee that Emelya putty, like all other company products, meets all quality standards and norms. The product is easy to use and can compete with leading Russian and foreign manufacturers of dry and ready-made mortars.
It should be noted that the composition of “Emelya” is the original development of the company’s specialists, created specifically for heating devices. It has a beautiful design and appearance.
Advantages and disadvantages
Putty for stoves and fireplaces has the following advantages:
- does not emit toxic substances when heated and is safe to use;
- has greater strength than standard putties;
- It is durable; when applied in compliance with technological requirements, the coating lasts for more than 15 years;
- easy to lay out and level on the surface of the structure, have good adhesion properties to the surface;
- characterized by high elasticity when laying, etc.
The list of disadvantages of fire-resistant puttying materials includes the following:
- higher cost compared to other building mixtures;
- impossibility of using the composition for decorative finishing;
- To complete the finishing, you will need to paint the putty with special fireproof solutions or lay out suitable tiles.
Peculiarities
The durability and safety of using stoves and fireplaces is influenced by various factors: correct installation, selection of firewood, ability to properly build and maintain a fire. Maintenance, periodic repairs and renewal of the surface are also important. Putty plays an important role in this process.
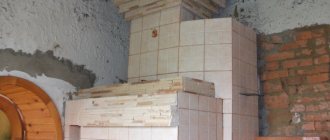
Emelya plaster is used for finishing fireplaces, stoves, chimneys and chimneys. With its help, seams and cracks are sealed, which prevents the room from smoking and increases the long-term retention of heat by the structure. It is also used as a lining material for the direct laying of stoves and their tiling.
The putty has excellent binding properties, creates strong adhesion to surfaces and reliable fixation of various structural elements. It is worth noting that the coating can withstand temperatures of +900 ºC and is not suitable for work in the firebox area.
The basis of the Emelya fireproof putty is kaolin - heat-resistant clay, the diluent is water, it also contains additives BASF, TROY, ROHM AND HAAS and a Dow Chemical thickener. The cladding is sold ready-made, the color of the mixture is beige. The shelf life is one year (if the container is not opened).
Emelya putty is fireproof - it does not contain flammable substances that can spontaneously ignite or explode when exposed to high temperatures.
Coating of heating equipment is carried out at an ambient temperature of +5C. Before use, the paste must be stirred thoroughly. At sub-zero temperatures, it is impossible to work with the composition, since the water crystallizes, and as a result, the putty will become unusable, harden, and lumps will appear in it.
Facing material "Emelya" is necessary for:
- Improving the appearance of the product. The putty is elastic, does not form cracks after drying, and creates a pleasant natural shade of clay in color. In the future, the smooth surface can be tiled, whitened or treated with heat-resistant paint.
- Ensuring the safe operation of the fireplace. Under the influence of high temperatures, cracks may appear in the masonry and in the brick itself, through which smoke begins to enter the room. This is extremely dangerous for people's lives. Emelya putty is capable of penetrating deep into the joints of masonry, filling all the cracks, ensuring the sealing of structural elements.
Black traces of soot are an unpleasant sight, but the release of carbon monoxide is much more dangerous for humans. Therefore, the operating instructions for stoves and fireplaces require periodic seasonal inspection of the structure, strengthening it with plaster or special heat-resistant coating.
Emelya cladding is used to increase the positive characteristics of stoves:
- To facilitate the maintenance of the heating structure. Stoves and fireplaces decorated with this lining material are much easier to clean from visible sides.
- Increased heat transfer. The heat in a stove that has putty on it lasts longer, therefore, it will be comfortable to stay in the room for a longer period of time.
- Increasing the service life of the structure. The facing material for stoves and fireplaces is highly resistant to elevated temperatures, so if the putty is applied correctly, the heating elements will last for decades without the need for repair.
Technology for finishing a stove with plaster
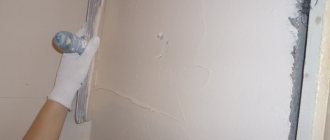
Before applying putty, it is necessary to clean the seams between the bricks and apply a primer
Standard tools are used for work. Surface preparation is required for good adhesion of the solution. The thickness of the plaster is determined before the start of the process using a level, plumb line and straight edge.
Work order:
- Old and peeling coatings, if any, are removed. Use a brush for metal work or a hammer and chisel. Cleaning is carried out before the initial laying.
- Notches are made and the seams are deepened by about 0.7 cm.
- The surface is primed with a deep penetration compound. The degree of adhesion depends on this.
- A reinforcing metal mesh is nailed down. Nails or self-tapping screws with dowels are used.
- The spraying is done as the first layer and is almost not leveled. The second layer is applied to determine the texture of the treated area.
The surface is smoothed with a trowel and a certain amount of solution is added to the holes. The mixture must dry completely and set before finishing decoration.
Advantages and disadvantages
The special heat-resistant putty mixture “Emelya” has the following positive properties:
- Environmentally friendly - safe for humans and the environment. This is an important criterion when choosing cladding, since with strong heating, many even normally harmless components of mortars can form toxins. The putty for Emelya stoves does not contain such substances.
- Long service life. According to the manufacturer, putty applied correctly to the surface of the heat source can last about 50 years.
The only disadvantage of fireproof putty is the higher price than conventional compounds and the impossibility of using it as a finishing finish.
Putty the stove or leave it as is
Puttying the formed furnace is necessary to solve the following problems:
- Giving surfaces aesthetics. The leveled stove can be coated with heat-resistant dyes or whitewashed or lined with ceramic tiles.
- Maintaining safe operation of the structure. Due to heating, cracks may form on the bricks, through which hot steam and smoke will escape.
- Saving money. Fireproof putty is a more budget-friendly finishing material than facing tiles or decorative bricks.
- Preventing structural cracking. A layer of putty helps protect the home from carbon monoxide, which can penetrate through cracks in the brickwork. The mortar used when laying bricks or stone blocks loses its strength during operation, and cracks appear between the bricks.
- Maintaining the integrity of structures, reducing the number of necessary repairs.
- Easy cleaning. Surfaces treated with putty accumulate less dust and are easy to clean with a dry cloth or sponge.
- Applying decor. On top of the heat-resistant putty mixture it is possible to paint or paint with heat-resistant compounds.
Terms of use
Working with coating will have a positive result if you follow the manufacturer’s recommendations and follow the following sequence:
- The surface of the heating device must be cleaned of dust, dirt, grease deposits, and old peeling coatings. This will improve adhesion and allow the composition to hold much more securely;
- If the already applied coating will not be removed, you need to ensure its strength;
- The putty must be applied in a continuous layer or in spots with a construction spatula; the thickness of the facing coating should not be more than 5 mm.
- You need to have time to level the surface while the solution is wet. As a rule, 10-15 minutes are allotted for this process, after which the putty hardens.
- If the solution has hardened and it was not possible to completely level it, you can moisten the surface with a spray bottle and wipe the remaining area, periodically moistening the work area.
Experts recommend heating the stove or fireplace before starting work; the surface should be slightly warm, but not hot. These manipulations are carried out so that the solution adheres better to the surface being treated and dries faster. In addition, the smoke will allow you to detect possible cracks and thereby ensure a complete repair.
Putties
Designed for leveling walls and ceilings made of concrete, gypsum and cement based plasters, plasterboard sheets, wooden bases and filling the seams of plasterboard sheets in dry rooms.
Layer thickness per application: with continuous leveling up to 3 mm; with partial leveling up to 5 mm. White color.
Packing: 20kg; 4kg
PECULIARITIES:
- Ultra-easy application, leveling and sanding
- High viability of the first application layer
- Long time to level the second layer of application
- Low product consumption
- High maximum application thickness
- Ideal for painting and wallpapering
- No unpleasant odor, high degree of whiteness.
Reviews
Consumers managed to test the Emelya putty and were convinced by personal example that it is a high-quality, reliable, highly plastic material that is easy to work with. It is applied to the surface without problems and is easily leveled. After complete hardening, it does not crumble or crack.
As customers noted, it has a faint smell, but unobtrusive, so working with the putty is quite comfortable. The solution is easily removed from the tool and hands, does not weigh down the structure, and withstands high temperatures perfectly.
According to experts, working with such a solution is very pleasant - it is elastic, like plasticine and soft, like natural clay. With its help you can create a perfectly flat surface.
To learn how to plaster a stove, see the following video.
Decorative finishing
You can apply paint or artificial stone to the putty.
The finishing coating is selected depending on the preferences of the owner and the surrounding interior. Puttying the fireplace plasterboard for painting is done with mixtures that can withstand high temperatures.
The fireplace in the room is finished:
- improved putty with painting;
- decorative plaster;
- natural stone, marble;
- artificial stone-like material;
- metal, heat-resistant glass;
- ceramic tiles, porcelain stoneware;
- decorative brick (bassoon).
For any type, materials with fire-resistant properties are used. Natural stone does not crack when heated, but the quality of the glue matters. Ceramics can withstand temperature fluctuations, but the tiles are laid with seams; the seamless method is not used. Tile crosses are used to maintain uniform spacing.
Why “whitewash” the stove?
A cracked and dark stove in the middle of the room will evoke melancholy and not create coziness. It should be whitewashed white to visually expand the room and create an additional screen to reflect light.
In addition, on the white surface of the stove it will be immediately visible where the combustion products are leaking. Whitewash solutions act as disinfectants. It is also worth whitewashing the stove so that clothes and dishes do not get dirty when they come into contact with its walls.
Types of putties for metal and their differences
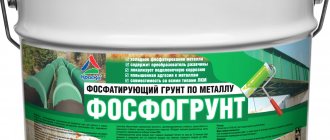
Assortment of consumables for body work in a specialized store
Putty for metal is a product with a paste-like, less often liquid, consistency. By applying the product to metal surfaces, minor defects can be eliminated before subsequent painting.
Consistency of putty, ready for use
According to the composition, putties for leveling metal surfaces are divided into the following types:
- Polyester compounds with low shrinkage and low tendency to crack;
- Epoxy compositions are the most common, since the quality of the finished result is slightly inferior to polyester analogues, while their price is lower;
- Pentaphthalic compositions are characterized by low cost and a high degree of shrinkage (on average 5%);
- Nitro putties are characterized by even greater shrinkage compared to pentaphthalic analogues, and therefore are used to level out minor relief.
Conventionally, all of the listed compositions can be divided into:
- One-component - just open the package, mix and you can apply;
- Two-component - sold in the form of a base and a hardener, which must be mixed until smooth.
What to choose - one-component or two-component formulations
Among the listed modifications, only nitro putties do not require mixing with a hardener. But this composition has more disadvantages than advantages.
For example, such a leveling mixture dries quickly upon contact with air, and therefore, after opening the package, it is better to use it immediately and not leave it for later. In addition, nitro putty, despite fast drying, is characterized by the most intense shrinkage (up to 15%).
Now a few words about two-component compositions. It is enough to add the required amount of hardener to the base, mix thoroughly and the putty is ready. That is, you can prepare exactly as much leveling agent as you need, and not worry about the remainder in the jar drying out.
The most common example of two-component compounds are epoxy putties, which, after drying, have virtually no shrinkage. The problem with epoxy resin mixtures is that they take a long time to dry. That is, if a vertical or inclined surface is leveled, the putty flows off. To prevent the formation of smudges, fillers such as crushed chalk or talc are added to the composition.
A less common two-component composition is polyester putty for metal, which is characterized by low shrinkage and, as a result, the absence of microcracks when drying. Polyester putty in combination with fiberglass allows not only to level depressions on metal surfaces, but also to seal through holes. For greater resistance to vibrations and vibrations, metal powder is added to the mixture.
Old names of putties and new designations
Modern domestic means for leveling metal and their markings:
- PE-00-85 - polyester putty for metal consists of a base (unsaturated polyester resins, fiberglass and metal powder) and a hardener;
- E-4022 and EP-0010 - epoxy putties with the possibility of adding chalk talc or kaolin to prevent the product from running off vertical surfaces;
- PF-002 is a pentaphthalic putty recommended for smoothing out minor defects in metal surfaces;
- NTs-007 and NTs-009 – nitro putty without adding a hardener.
Domestic liquid leveling compounds and method of their application
Classification according to order of application
Level the surface with a plane
The instructions for leveling metal surfaces consist of two main steps:
- filling – rough leveling when deep relief is filled;
- finishing – final leveling for painting.
In accordance with these stages, all putties can be divided into filler and finishing mixtures. How do these mixtures differ from each other, besides their immediate purpose?
As a result of grinding, holes and rubble are visible
Since the function of filler putty is to fill deep relief, the product contains components with a coarse-grained structure. A large filler fraction provides a number of advantages, including:
- Cheaper product, since the price of producing coarse grain filler is more affordable than the cost of producing fine paste;
- Ensuring better adhesion with subsequent layers, since the filler forms a rough surface when drying;
- Simplicity and short terms of leveling the relief, since large grains fill unevenness faster.
Thoroughly clean the surface with a degreaser
The composition of finishing putties includes components with fine grains. This is an elastic paste that is easy to apply and very thick to grind.
The difference between finishing putty and filler is that it is applied in a thin layer of no more than 1 mm. Finishing agents can be used both to form the top leveling layer and to independently level small defects.
The photo shows the application of a leveling layer to the prepared surface.
There is a separate variety on sale - universal putties for metal, which level the relief, but do not require the application of finishing paste. The use of such tools is optimal if the time for processing defects is limited. On the other hand, the use of such means rarely ensures high quality of the finished result.
Overview of varieties of SOLID brand putties
Table with the average cost of products of the SOLID and NOVOL brands in the Russian Federation
Why SOLID? The choice is not accidental, since most auto body shops use materials of this brand. Therefore, it will be useful to know what exactly will be used to repair the dent on the body of your car. In addition, the quality of the components of this brand in the Russian Federation is considered standard.
Filling putty containing glass fiber “Glas”
Polyester composition with added fiberglass
The composition is characterized by mechanical strength and high filling capacity. The product is applied in thick layers, which means it is possible to eliminate even deep unevenness.
Despite its high strength, this composition is not elastic enough. Therefore, it is not recommended to use this putty on large surfaces where sheet metal bends (center of door, roof, hood). Ideal areas for application are sills, arches, pillars and other strong, and therefore static, body elements.
“Glas” type putties are recommended for the following works:
- filling deep relief to level the surface;
- filling cavities to strengthen metal stretched after damage;
- filling through holes caused by corrosion;
- filling through holes in areas of metal deformation.
The presence of long fibers in the putty affects the process of mixing the base with the hardener. Mixing is carried out not by chopping, but by circular movements from the edges of the container to the center. Mixing is done manually, since the use of attachments on power tools is not recommended.
Putty containing aluminum particles “Alu”
Heat-resistant putty with the addition of aluminum
What to whiten?
In stores you can find modern compositions for whitewashing stoves; they are made by different manufacturers, but they go under one name - putty. Before use, such a purchased composition must be diluted with water in a ratio of 1 to 2.
After treating the stove with it, its walls will have a well-groomed appearance for a long time and will not fade. Among the popular manufacturers, it is worth highlighting those whose products come at an affordable price and with a high quality composition.
| Brand | Volume, kg | Description | Price, in rubles |
| Master | 1 | For this product, you need to prepare the surface of the oven so that it is dry and dust-free. They can be used to repair small cracks and whitewash walls, ceilings and stoves. | |
| Nova | 0,8 | Can be used on plastered, wooden and concrete surfaces. | 21 |
| BRAVO | 16 | The water-dispersive composition of the product is used for painting rooms and preparing walls for wallpaper. | 960 |
| Diola-006 | 4 | In its pure form it is used for sealing cracks, places after removing nails and screws, and restoring chips. After dilution with water, it is used as paint. | |
| Flamingo | 5 | Its moisture-resistant composition can be used for any premises; it is characterized by high plasticity. | 110 |
The best way to whitewash the stove in the house is up to everyone to decide for themselves; you can choose the appropriate one from the given means.
Properties and composition
The main difference between old and new types of putties is hidden in their chemical composition:
- In the past, mixtures of clay and sand were used to give the finishing material the necessary properties.
- Today the situation has changed somewhat due to the rapid development of the chemical industry - clay has been replaced by inorganic chemical compounds, which are somewhat cheaper and more common than natural clay.
The properties of fireproof putty also differ. First of all, this is due to the uniform heating of the putty over the entire area, which turns the entire surface of the furnace into a kind of radiator. Thanks to this property, the rate of heating of the room significantly increases in the cold season.
At high temperatures, the putty on the stove does not heat up in one place and does not burn out, which protects the finishing material from falling off. Practice shows that the average service life of putty is four years, which is really quite a lot under such operating conditions.
You can always update the putty without dismantling, which is really convenient. Thanks to this property, your stove will always look like new!
How to prepare whitewash yourself?
There are three common methods for preparing a solution for whitewashing a stove, each of which has been used for decades.
Mortar
Whitewashing a stove with lime has been known for a long time; if you dilute 1 liter of the mixture from it, it is enough for 2 m2. The preparation of such a composition is as follows: take 40 grams of salt and dissolve it in water, then add 1 kg of lime to it.
Salt acts as a fixative; after applying such whitewash, the oven must be heated so that a smooth transparent layer forms on its surface. It is better to dilute this product with low-fat milk instead of water.
Chalk based whitewash
The chalk should be prepared: finely crush and sift, you need to take about 1 kg of this component, then pour 2 liters of milk and 50 ml of blue into it.
Some people neglect such scrupulous preparation and end up with a solution with various inclusions; after application to the oven, under constant exposure to high temperatures it begins to change color from white to yellow.
It is the blue that prevents such a transformation of the color of the stove. The prepared milk-chalk mixture must be used immediately so that it does not harden.
Tooth powder solution
This unusual product will give the stove a pure white tint and keep it for a long time. To prepare the composition, you need to take 2 boxes of tooth powder, half a glass of milk, 2 eggs. Any dairy product can be used, boiled or unboiled.
Only the whites are taken from the eggs, which are mixed with milk and powder; after standing for 10 minutes, the mixture can be used. Its consistency should resemble paint. After staining, the oven can be used the same day, but you should note that the smell of tooth powder will disturb you during the day.
crazy hands
The putty composition for stoves is often prepared by hand.
It only requires an equal amount of fine sifted sand and moderately oily clay.
- Dry clay is mixed with sand and filled with slightly salted water.
- After soaking for 3 days, the solution is thoroughly mixed again and can be used to putty joints or plaster the entire surface of the oven.
The technology for making oven putty yourself has a couple of subtleties.
- If the clay has insufficient fat content (the wall plastered in the test area crumbles when touched), skim milk (without cream) is used instead of salted water.
- Adding a small amount of slaked lime will make the putty white. As an option, the finished surface can be whitened with an extremely durable mixture of skim milk and crushed chalk. The service life of such coating is at least 10 years.
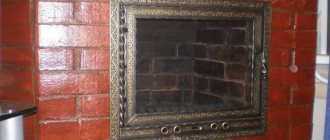
The stove in the photo is plastered and whitewashed using the method described above.
How to whitewash a stove with your own hands?
First, you need to conduct a visual inspection of the stove; if there are deep cracks and chips on it, then they must first be covered in the old fashioned way with clay or specially purchased putty. It will not be possible to beautifully whitewash the stove without preparatory work; you need to carefully eliminate all defects so that your efforts do not go in vain.
Tools for work
Before whitewashing the stove, you should clean its surface with a broom or brush; for old exhibits, you can use a metal brush, but the main thing is not to damage the plastered surface with it. Then you need to determine the method of applying whitewash, for this you can use:
- A brush is chosen by those who have painted any surface more than once and are confident that they will do everything smoothly and without streaks. Before painting, it is advisable to soak the brush in water so that no hairs remain on the surface of the stove during whitewashing.
- A sponge is an alternative method; it does not give a clearly even color; it is used only for small stoves, since it will take a lot of time to obtain the desired painting density.
- Roller - suitable for both beginners and professionals; it covers a larger area with one stroke than with a regular brush. Applying the selected composition with a roller is very simple; the main thing is to move along the surface in the direction of the window to create uniform stripes.
- Spray gun - it is used for large stoves. It is easier to handle with two people: one person will maintain the required pressure in the device, and the second will monitor the uniform application of the composition filled into it. Before using it, you need to check the spray gun, and then constantly hold the spray gun at a right angle to the oven wall, while maintaining an optimal distance of 30 cm from it.
Whitening technology
- Initially, all seams, chips and cracks are sealed using a spatula and putty; the latter can be replaced with putty, using it in its original form, before diluting with water.
- After all the surfaces of the oven are smooth and without visible defects, you can proceed to preparing whitewash for them using putty, lime, chalk or tooth powder.
- The preparation of any of these compositions is carried out according to the recipe; the components are taken strictly in the specified quantities to obtain a mixture that is resistant to heating and cracking. It should be homogeneous and without lumps; its optimal consistency is liquid sour cream.
- The walls of the oven should be slightly moistened before whitewashing, but if a composition of tooth powder is used, they need to be warmed up. Then the selected whitewash option is applied to all surfaces.
- When using a spray gun, painting is carried out as conveniently as possible, but in the case of a brush or roller, a certain technology for applying strokes must be followed: first they are made vertically, and after the first layer has dried, they are duplicated by horizontal stripes. This method of applying whitewash can achieve its most uniform distribution and avoid gaps and yellow spots. If, however, they appear somewhere, then the whitewashing should be repeated, but after the oven has completely dried.
How to putty correctly
Finishing the stove structure with plaster is carried out in stages:
- preparing surfaces for work;
- padding;
- reinforcement;
- applying plaster;
- grinding the plaster coating;
- decorative finishing of the stove.
Preparing for work
Applying putty involves preparatory measures. Measurements are taken of the surfaces that need to be cleaned and processed, and the volume of putty material is determined, taking into account the proportions specified in the instructions. Then the surfaces are cleaned. It is required to remove the plaster layer from old structures and clean the joints between brick blocks to a depth of 10-15 mm. Before plastering work begins, the oven is heated.
Reinforcement
Work on reinforcing the surfaces of the furnace is necessary to strengthen the plaster layer and increase the durability of the structure. The work is carried out using reinforcing metal mesh, self-tapping screws or burlap. A popular method of furnace reinforcement is to screw screws up to 75 mm in length into difficult areas of the furnace. The caps should protrude 10-15 mm above the stove surface.
Another reinforcement option involves covering the oven walls with burlap.
The fabric must be soaked in advance in a liquid clay solution, which will be used to coat the stove structure. Then the burlap is glued to the surface and carefully smoothed.
Burlap can be replaced with metal fine mesh. To secure the steel mesh, you will need to lay a wire with a cross-section of 3 mm at the laying stage.
Applying the composition to the stove or fireplace
Putty for fireplaces and stoves is carried out on pre-primed bases. It is optimal to use a primer with heat-resistant characteristics when preparing surfaces.
It is recommended to use a starting and then finishing heat-resistant putty. For the work you will need a 10 cm spatula, with which the starting composition is applied. The surface is leveled, cracks are cleaned. After the starting mixture has hardened, the finishing composition is laid out with a wide spatula. For large ovens, it will be necessary to install beacons to level and form smooth surfaces. After the finishing putty has dried, it is necessary to apply a fire-resistant primer. The stove is left to dry for 2 weeks, then a test fire is carried out.
Conclusion
When choosing a composition for whitewashing, you can use proven recipes or buy putty for the stove and dilute it with water in the specified proportions. The main thing is to choose the right tool for yourself and use it correctly, evenly distributing the whitewash on all surfaces of the oven.
Thank you!
We will publish information soon.
Popular posts
- Chair for dressing table Chairs for dressing tables in Moscow - 189 Products Company from Moscow, delivery 29643 a In…
- Silicone sanitary sealant Silicone sanitary sealant white in Moscow - 1491 products Company from Moscow, delivery (tomorrow) 140...
- Shelf in the hallway Currently, there are a huge number of different options for shelves in the hallway, and this is directly ...
- Insulation of the floor in a wooden Insulation of the floor in a wooden house from below: materials and installation technology SHARE ON SOCIAL NETWORKS One of the common…
Putty for metal for outdoor work
Metal products are often used outdoors; external use regularly leads to the appearance of flaws, cracks, and dents on the surface. Puttying a metal surface makes it possible to remove all existing dents. If the process is carried out correctly, then you get an updated product without any irregularities. After the material has dried, the surface is painted or varnish is applied.
What are its features
You can get an acceptable result only by using high-quality metal putty. There are a number of characteristics that such a product should have. These include:
- Quick-drying property;
- Possessing high rates of adhesion to metal material;
- High degree of elasticity, retained even after completion of the hardening process;
- It lay evenly on the surface;
- Minimum shrinkage level;
- Convenience and ease of application;
- Since metal putty is often used for painting, it is necessary that it be combined with the paint.
Why putty metal?
Before deciding how to putty metal, you need to figure out what purpose you should do it for. There may be several reasons for using putty:
- When car parts are scratched, broken, or damaged, they are treated with putty to restore their functionality and extend their service life;
- In order to protect metal surfaces from rust. The putty layer provides excellent protection against the harmful effects of water;
- To create a stronger and thicker layer of metal, putty mixtures can strengthen the surface and make it more reliable.
General rules for carrying out work
Before directly plastering the stove onto the work surface, the following work must be completed.
It is important to remove all contaminants from the working surface of the stove (dust, remnants of the previous plaster that were used when laying the stove). To improve the “grip of the mortar”, you need to clear the masonry seams to a depth of about fifty millimeters
Before application, it is important to heat the oven a little in order to achieve 20–25 degrees of heat; On warm walls, the plaster will lie more evenly, and an excellent level of quality will be achieved.
After all the preparatory procedures, you need to proceed to the main part:
Selection of mixtures for structural elements of the furnace
Fireproof fireclay mortar is necessary for laying the firebox and elements close to an open fire
To select masonry materials, you must take into account that the stove consists of several elements:
- The foundation cushion is a monolithic element built separately from the foundation of the house.
- The base of the furnace is not subject to temperature stress, therefore it is built from solid red brick. Lime or lime-cement mortar is suitable for masonry.
- Fire blind area - represented by a sheet of asbestos or mineral cardboard, on which there is an iron sheet and felt impregnated with clay.
- The furnace mass - due to the increased impact of hot flue gas on the structure, is built from ceramic bricks with clay mortar.
- The firebox gets very hot, so it looks like a monolith on a fire-resistant clay-chamotte mortar.
- The beginning of the chimney is heated to +400 degrees, which requires laying on a mixture with a clay base.
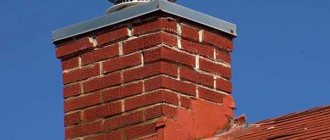
- Otter, or fluff, is an element connecting the chimney and the ceiling. Temperature and aggressive effects on it are minimal, so a lime composition is suitable for standard bricks.
- Fireproof cutting is a heat-insulating metal box that does not require a solution.
- The chimney and fluff are exposed to wind and chemicals. Installed using red solution.
Lime mixture
Lime mixture is used for laying outdoor stoves as it does not absorb water
The refractory mixture for stoves consists of sand, lime paste (1 part quicklime + 3 parts water). To prepare it yourself, you will need to sift the sand, mix it with the dough in a ratio of 1:3 and add water until the sour cream becomes thick.
The heat resistance of the product is from 450 to 500 degrees, but it is non-hygroscopic. The product is used outdoors to treat the part of the pipe protruding above the roofing. Due to toxicity and duration of contraction, lime materials are best used outdoors.
Cement mixture
Cement-based mortar is used in foundation construction
Divided into three types:
- Cement - preparation requires water, cement and sand. Greater strength and low gas density allow the compositions to be used for foundation construction.
- Cement-clay - durable mortars, with the help of which the thermal part of the fireplace and the beginning of the chimney are laid out.
- Cement-lime mixtures are strong, but have a low gas density. Suitable for the construction of fireplaces, foundations, chimneys.
To make it yourself, you will need to mix 1 portion of cement with 1-3 portions of additives and 6-15 portions of sand.
Clay mixture
The material is suitable for the construction of a furnace array. The ideal mixture does not crumble, has a homogeneous structure without lumps and the consistency of sour cream. Factory materials are made on the basis of:
- white clay - increases the fire resistance of the mass, suitable for the construction of wood-burning stoves with heating of the firebox up to 1000 degrees;
- fireclay clay is a universal product that ensures the strength of the stove structure at any temperature.
To increase strength, you can add to the solution:
- table salt or sodium chloride - 100-150 g are needed for 1 bucket;
- Portland cement - for 1 bucket you will need from 500 g to 1 kg of product.