Drywall is a fairly common material on the construction market and is in high demand. The range of applications of GVL is very wide; it is used when installing ceilings, communication boxes, and leveling walls with plasterboard. Some believe that installing a plasterboard ceiling in a bathroom is not advisable, since this material cannot withstand a humid environment. This is a misconception, and we will try to dispel it.
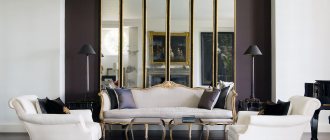
An example of a plasterboard ceiling in a bathroom
Design of plasterboard ceilings in the bathroom
Any apartment owner dreams that the renovation will be durable, high-quality, and inexpensive. A bathtub, a room in which a person relaxes, carries out relaxation procedures, so it should be convenient and comfortable. This material will help you create the design of your dreams in the bathroom without spending a lot of money on it:
- With the help of gypsum plasterboard, the ceiling will become smooth, since the material will cover all the unevenness of the ceiling slabs.
- This material looks great with finishing and painting drywall sheets.
- Thanks to plasterboard, you can install built-in lighting or mirrors on the ceiling.
To build a multi-level and expensive ceiling structure, you can invite a craftsman who can not only quickly and competently build a curved structure.
Design and decoration of a multi-level ceiling in the bathroom But we will consider the option of creating a ceiling from gypsum plasterboard in the bathroom ourselves. Firstly, there is nothing complicated in this, and secondly, it will be very pleasant to watch the result of your labors.
Important! In wet rooms, only moisture-resistant gypsum plasterboard, which has a green coating, is used.
Combined bathroom
In many standard apartments, the bathtub is combined with a toilet. Let's leave aside the question of whether this is convenient. Our task is to understand how to decorate such a room using gypsum boards.
Typically, combined bathrooms are not large in size (there are exceptions, but we will talk about them below). Therefore, we recommend giving preference to light colors.
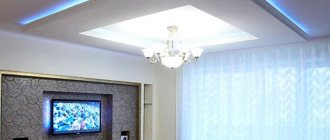
Do you have a tall but not too spacious bathroom? Try installing a white two-level ceiling with hidden lighting. On the one hand, such a solution will balance the room - sometimes with such a configuration there is a not very comfortable feeling of being in a well. On the other hand, light colors will make the room visually wider.
In addition, such lighting creates a volumetric effect and looks interesting - one of the few decorations that are suitable for such small-sized bathrooms.
By the way, it is not necessary to choose an LED strip with white light. Unusual bright edging is a common and stylish technique. True, you will have to carefully select the shade so that it harmonizes with other colored elements.
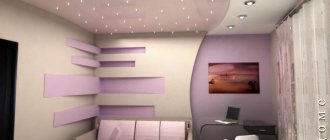
Is the bathroom spacious enough? Then experiment with the original form of a multi-level plasterboard structure with an insert of translucent stretch fabric. Volumetric elements and spotlights look extremely interesting. The main thing is a sense of proportion. When designing the layout, take into account all the dimensions so as not to overload the ceiling - otherwise you will get the opposite result from what was intended.
Nuance: Drywall will help you zone the combined bathroom. Use ceiling-floor structures for this. Of course, for tiny rooms of 2 by 3 meters this is not an option - even a very thin partition will make it difficult to move. But for more spacious ones, this is a fairly reasonable and functional solution.
Pros and cons of using plasterboard for the ceiling in the bathroom
There is no need to rush to purchase material and start installing the ceiling structure; first, let’s look at the positive aspects of the material and its disadvantages. First of all, let's look at the advantages:
- With the right choice of material, you can obtain a design with a high degree of moisture resistance and sound insulation of gypsum plasterboard partitions. At the moment, there is a material that is not subject to deformation even with a room humidity of 90%;
Original plasterboard ceiling design in the bathroom - Environmentally friendly, since the material contains only natural components that are safe for apartment residents;
- Aesthetic appearance, the plasterboard sheets are perfectly flat, and therefore the plane is even;
- Quick, simple installation; a suspended ceiling can be installed by a non-professional with a small set of drywall tools;
- Inexpensive and practical material. It is worth noting that of all the existing finishing compounds, a plasterboard ceiling made by yourself will be the cheapest.
Do not forget about the disadvantages of which drywall has two:
- If the ceiling is flooded by neighbors, it will have to be changed, since it is not designed for such a load;
- It cannot be used with a ceiling height of less than two and a half meters; the design will make the ceiling even lower.
Of course, you can contact a professional designer who can make a competent project.
These disadvantages are not significant, so you can install a similar design in the bathroom. In addition, there are now special impregnations that help eliminate this lack of moisture resistance.
Which plasterboard is best to use for the ceiling - characteristics
The concept of “ceiling plasterboard as such” does not exist among the manufacturers of this material.
Nevertheless, from its varieties you can actually choose several options, in one case or another suitable for finishing the ceiling. What is the difference between plasterboard suitable for a ceiling and the usual so-called “wall” one, what features does a fire-resistant and water-resistant sheet have, and what should be the optimal thickness of plasterboard for a ceiling structure? More on this below.
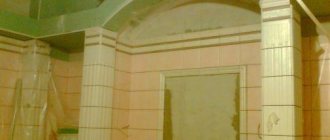
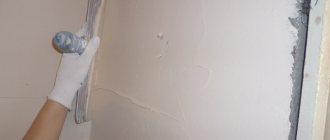
Preparing a bathroom for installation of a plasterboard ceiling
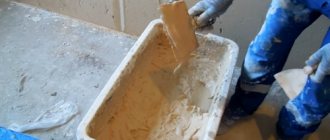
Before installing a plasterboard ceiling, the surface must be prepared and ensure sufficient air flow into the room. After this, the entire ceiling surface in the bathroom is treated with antifungal compounds. If there is wiring for lighting on the ceiling, then it must be hidden in a plastic corrugation. This can be seen in the photo. Then everything is treated with soil.
Plasterboard ceilings in the bathroom interior (photo)
When installing a structure, you need to understand how to make it so that it looks aesthetically pleasing. In this case, photos of interiors with single-level plasterboard ceilings help.
Spotlights in the suspended ceiling.
Elegant suspended ceiling.
Ceiling of different configurations.
Installation steps with step-by-step instructions
Work on preparing the ceiling surface can begin with marking and assembling the structure.
Marking the ceiling in the bathroom for installing drywall
Design and layout
Many home craftsmen ignore such a stage as drawing up a design for a bathtub with a plasterboard ceiling - this is wrong. A well-drafted project and put on paper will help to avoid many mistakes when installing the structure. Let's look at how to make a plasterboard ceiling according to your own design.
If the ceiling is simple, then it is enough to draw a rectangle with the dimensions of the bathroom on a sheet of paper and then calculate the required amount of material. With a curved and multi-level design, it must be drawn in detail.
Then the project is transferred to the surface and marking begins, the purpose of which is to make the ceiling structure perfectly flat and to facilitate the installation of a plasterboard ceiling in the bathroom.
Preparing the ceiling for attaching profiles First of all, draw the horizon using a level and a pencil, then apply markings to the surface itself, and draw the installation location of the ceiling elements and hangers for the profile.
Materials and tools
For installation you will need:
- starting profile – mounted on walls;
- ceiling profile;
- extension cords;
- fasteners;
- pendants;
Drawing with dimensions of a hanger for installing drywall - crabs;
- moisture-resistant plasterboard;
- putty;
- priming;
- serpyanka
You also need a standard set of tools:
- marker;
- iron scissors;
- drywall knife;
- impact drill or hammer drill;
- screwdriver;
- gloves;
- protective glasses.
Inspect the prepared components for installation. If at the time of work it turns out that something is missing, then the work may be delayed.
Frame installation
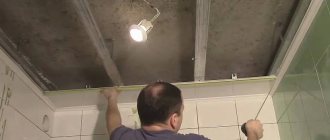
This is one of the main stages in creating a plasterboard ceiling. Horizontal stripes on the walls must be measured carefully; the quality of the ceiling will depend on this. Take a laser level or upholstery twine for marking; these devices are easy to use, even without experience. Place marks in the corners on the same horizon, pull the upholstery thread and beat off a strip; along it you need to install a PN profile (ceiling guide) 27x28 on dowels.
Marking is carried out along the entire perimeter of the walls and only after that they begin to attach the guide profile. If you build a ceiling with your own hands, you won’t be able to do it without an assistant. Try to fix the profile exactly along the line, deviation of no more than 5 millimeters is allowed.
The process of installing a ceiling frame in a bathroom Two-level plasterboard ceilings are much more difficult to install.
Installing the main profile on the ceiling
The guide profile is well fixed, you can begin installing the main elements in increments of 40 cm. There are two ways to install them:
- Screw the hangers onto two dowels to the surface at a distance of 1 meter from each other. Suspensions for each profile are attached randomly. If for attaching the first profile the initial suspension is attached at a distance of a meter from the guide element, then for the second at a distance of 50 cm. After all the suspensions are installed, we mount the profiles. Cut the element to size, place it on the hangers, install the ends in the guide profile and fasten them with small “seed” self-tapping screws on both sides.
Example of attaching a profile to hangers - First, a profile is installed between two guides, and only after that the hangers are attached. They need to be strengthened with two dowels. The suspension is installed, attached to the ceiling and immediately screwed to the profile.
Frame
It is recommended to make a frame metal base for installing plasterboard sheets from a galvanized profile. In accordance with the marked perimeter of the bathroom, a guide profile is installed, to secure which dowels are installed every half meter.
Metal profile frame
Focusing on the drawn transverse lines, with a distance of half a meter, the suspensions are attached to the ceiling base. The load-bearing ceiling profile is installed on the hangers and secured with self-tapping screws, and then the transverse elements in the guide profile fixed on the walls.
Only after the entire frame base for attaching the plasterboard ceiling has been completely assembled, is it possible to begin the process of insulation, soundproofing, and laying all communications.
Sheathing with plasterboard
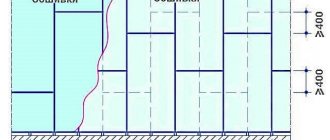
The sheets rotate in a checkerboard pattern (look at the photo), otherwise the ceiling may sag significantly over time. You can learn how to do this from the photo. It is worth understanding that the sheets of material have a flat surface, try to avoid structural distortions.
Covering the ceiling frame with plasterboard in the bathroom. Black self-tapping screws are used for fastening, the screw pitch is 15-20 cm. The seams are turned with self-tapping screws in a running start. The distance between adjacent fasteners is no more than 10 cm.
Important! To prevent the drywall from suffering from changes in humidity, when screwing the sheets near the walls, we retreat 1 cm from the surface.
Technical problems and their solutions
Now let's take a closer look at all the problems that we need to solve in order to build a plasterboard ceiling with our own hands in the bathroom.
Hood
Here are the key requirements for a bathroom exhaust fan.
- It must have a capacity of at least 25 m3/hour for a bathroom and 50 m3/hour for a combined bathroom. This requirement will not complicate your search for a hood at all: a typical fan with a diameter of 100 mm has a capacity of 90-110 m3/hour;
The performance of any hood is quite sufficient for our purposes.
- It should turn on regardless of the bathroom lighting. Connecting the hood parallel to the lamp means that the ventilation only works for those 30-60 minutes that someone is in the bathroom. Meanwhile, the water remaining on the walls and floor evaporates for at least an hour from the moment of visiting the room;
- It is desirable that the hood is silent: the bathroom is often located near the bedroom. Reducing the noise level is achieved by using bushings with plain bearings (they are much less noisy compared to ball or roller bearings) and an impeller covered with a decorative shield (the shield dampens acoustic vibrations, reflecting them towards the ventilation duct). The price of such a domestically produced fan is 500-700 rubles, foreign - up to 2500;
Silent exhaust fan with closed impeller.
It is better to connect the exhaust fan not through a switch, but through a dimmer. It allows you to manually adjust the speed of the impeller, choosing between efficiency and silence.
The hood in the bathroom is connected via a dimmer.
- The space above the suspended ceiling must be ventilated. If this requirement is not met, after the first flooding from above, the ceiling will be affected by fungus: the suspended ceiling will prevent the evaporation of moisture.
How to ensure ventilation of the space between the ceiling and the ceiling? Here are two obvious solutions:
- Installation of a duct fan in the ventilation duct, and a conventional ventilation grille (or several grilles) in the ceiling;
A ventilation grille for air intake is installed in the ceiling.
In this case, a hatch will have to be placed under the ventilation duct for maintenance and replacement of the hood.
- Installation of a surface-mounted exhaust fan directly into the ceiling plane. To do this, its connections to the walls must be airtight. To secure the fan, place a liner made of thick (at least 12 mm) plywood on the back of the plasterboard sheet, cut to fit the hood body.
In the picture, the same ventilation scheme is used for a suspended ceiling made of plastic panels.
Frame
What to assemble the ceiling lathing from?
Made of galvanized profile - ceiling (60x27 mm) and ceiling guide (28x27 mm).
PP ceiling profile.
A ceiling guide profile is needed to attach the sheathing to the walls.
The first type of profile is used for the manufacture of load-bearing sheathing, directly to which drywall is attached, the second - for attaching this sheathing to main walls. In addition to the profile, we will need direct hangers: they will allow us to secure the sheathing to the floor slabs.
Direct hangers for drywall.
Fastening is carried out:
- Guides to the walls and suspensions to the ceiling - dowel screws measuring 4x40 (for a reinforced concrete sanitary cabin or monolithic heavy concrete) - 8x80 (for cellular concrete or shell rock) mm;
- Profile to profile - with metal screws 9 mm long (preferably galvanized);
Phosphated and galvanized metal screws.
- Drywall to the sheathing - with self-tapping gypsum board screws 25 mm long.
Tools you will need:
- Hammer with drill;
- Screwdriver;
- Level (preferably laser or water);
- Metal scissors for cutting profiles;
Use tin snips to cut the profile. Abrasive cutting will cause the zinc that has evaporated in the cut area to strip the profile of its anti-corrosion coating.
- Square and pencil for marking it.
Here are step-by-step instructions for assembling a frame for a single-level ceiling:
- Mark the line for attaching the frame to the walls;
- Secure the guide profile along the markings. The step between the attachment points is no more than 0.5 meters;
- Mark the lines for attaching the sheathing. The profile should be attached perpendicular to the plasterboard sheets with a step between the axes of the profiles of exactly 60 centimeters. This is necessary so that the seams between the 120 cm wide sheets fall exactly in the middle of the sheathing elements;
- Along the marked axes, attach straight hangers to the ceiling in increments of approximately 60 cm;
Fastening hangers according to markings.
- After cutting to length, insert the ends of the ceiling profiles into the guides;
- Having aligned each of them according to the rule or long level, pull the ears of the suspensions to the side walls of the profile, then bend the free part of each ear up.
Ceiling sheathing ready for plasterboard filing.
Wiring
Wiring for power supply of lamps and ventilation is carried out immediately after assembling the frame. The wiring is laid in a corrugated PVC tube, which will prevent damage to the insulation by the sharp edges of the profiles.
The corrugated tube will protect the wiring insulation from damage by the sharp edges of the frame.
Binder
Which drywall should you choose?
- Moisture resistant. It differs from the usual one in the green color of the front side;
- For the walls, wall material with a thickness of 12.5 mm is used, for the ceiling - a thinner (9.5 - 10 mm) ceiling material.
An exception is a bathroom or bathroom in the attic. The lower part of the sloping ceiling is at the height of a person, so in order to avoid accidental damage to the gypsum board, it is better to use a more durable wall sheet.
The sloping attic ceiling needs strength.
Holes for built-in lighting and ventilation are drilled with a drill with a diameter of 10 - 12 mm and cut in a circle with a jigsaw, but cutting drywall along straight lines is done differently:
- The sheet is cut along a steel ruler or profile with a sharp knife to about a third of the thickness;
- Then it is laid on the edge of any elevation and broken off along the cut line;
- Lastly, the kraft paper is cut through the back of the sheet.
Notched drywall breaks easily in straight lines.
Why is this method more convenient than cutting with a jigsaw? Greater speed and much less dust that you will have to breathe, and which you will then need to remove from all horizontal surfaces in the house.
How to attach the sheet? It is attached to the frame with self-tapping screws in increments of 15-20 cm. When fastening it, it is very convenient to use a span as a measure of length - the distance between the thumb and forefinger stretched in different directions.
This length measure will significantly simplify the marking of fasteners.
When attaching gypsum boards, follow a few simple rules:
- The seam between adjacent sheets should be exactly in the middle of the profile;
- The head of the self-tapping screw should plunge approximately 1 mm below the plane of the sheet. In the future, the fasteners will be puttied;
- The self-tapping screw should not be screwed in closer than a couple of centimeters from the edge, otherwise it may crumble.
Proper fastening of drywall.
Puttying
How to putty a plasterboard ceiling in a bathroom?
Gypsum finishing or universal putty. I was very favorably impressed by ABS Saten and Eurogips Saten. They practically do not clump when kneading and live after mixing for at least 40 minutes.
There are also several subtleties in preparing putty:
- It is mixed in small (no more than 1.5-2 liters) portions . Otherwise, you risk not having time to develop the putty before it begins to set;
Mix the putty in small portions.
- It must be mixed in a perfectly clean container . The spatulas are also washed after using the next batch of putty. If you work with a dirty tool, lumps of setting plaster that fall under it will spoil the surface you are finishing with grooves;
Pay attention to the grooves in the putty that remain behind the spatula. They are left behind by lumps of dry plaster.
- When mixing the mixture, water is first poured into the container and only then dry putty is added . After swelling for 5 minutes, it is mixed with a mixer. If you pour water into the mixture, insoluble solid lumps will form at the bottom of the container.
What tool will you need for puttying?
I use a pair of spatulas - wide (30 cm) and narrow (8 -12 cm). The narrow one is used to fill seams, the wide one is used to cover their reinforcement.
Set of tools for puttying gypsum board joints.
What is reinforcement and why is it needed?
The fact is that gypsum boards slightly change their linear dimensions with fluctuations in humidity and temperature. After a year or two, constant slight changes in dimensions can lead to the appearance of cracks at the seams between the sheets. Reinforcing material (fiberglass mesh or, less commonly, fiberglass) will prevent cracks from reaching the surface.
Cracks along the seams between sheets of drywall.
Reinforcement (serpyanka - self-adhesive rolled fiberglass mesh) is glued along the seam, after which it is filled with putty by moving a narrow spatula crosswise directly through its cell. The more densely the seam is filled, the less likely it is for cracks to appear.
Serpyanka is a fiberglass mesh with an adhesive layer applied to the back surface.
After puttying the first pass.
Drying the putty takes from 6 to 24 hours depending on temperature, humidity and layer thickness. The second layer, hiding the reinforcement, is applied with sliding movements of a wide spatula along the seam; The putty is first applied to it with a narrow spatula.
The second layer of putty should completely hide the texture of the reinforcing material.
The heads of the self-tapping screws are puttied with a couple of crosswise movements of a narrow tool. First, you fill the recess with putty, then remove the excess.
After the second layer has dried, the surface is sanded and primed for painting or other type of finishing. For sanding I use a vibrating sander with sanding grids, for priming I use any penetrating primer for acrylic-based mineral substrates.
The sander will greatly speed up the sanding of ceilings and walls.
Finishing
I left the most interesting part for dessert. So, how can you protect drywall from contact with water when using the bathroom for its intended purpose?
When building a bathroom in the attic, I used two types of finishes:
- The shelves in the niches and the apron above the bathtub were tiled . To install it, I did not use tile adhesive, but silicone sealant. It was applied pointwise to the back side of the tile, and it was later used to fill the seams in the apron;
Close-up of silicone-filled joints between tiles.
- To paint the rest of the walls and the entire ceiling, I purchased rubber water-dispersion paint on an acrylic-latex base.
It’s worth telling her a little more.
- After drying, the coating is no different from any other semi-gloss water-based emulsion.
This is what semi-gloss paint looks like in a bathroom interior.
At the same time, it is absolutely impermeable to water. Suffice it to say that I used the same paint to waterproof the plywood steps of a street staircase;
I used Rezel+ paint produced in Sevastopol.
- Drying one layer takes no more than an hour. The paint is completely odorless (which is typical for water-based dyes) and non-toxic;
- The consumption when painting in four layers (with fewer layers the base was visible through) was about 350 g/m2;
- The coating tolerates contact well with detergents based on alkali and acid solutions. To wash the walls, I used “Belizna” - an aqueous solution of sodium hypochlorite. Contamination is easily washed off with its help, but the paint retains its original appearance;
White is an effective and safe cleaning agent for painted walls.
- Wear resistance is also quite good. The painted wall successfully withstood my cat’s attempts to bury food from visiting the tray in the corner. The example with the stairs also confirms the highest durability of the coating.
Finishing
The final stage of installation of figured plasterboard ceilings will be the final finishing of the assembled structure:
- unstitch all seams;
- mix the gypsum-based plaster mixture;
- plaster the seams;
- glue the seams with sickle tape until the first layer dries;
- for subsequent work, the plaster mixture must dry well, then sand them;
- the entire surface of the drywall is covered with primer;
- the soil dries in about 4 hours, and you can start puttingtying the ceiling;
- prepare the putty mixture;
- Using a small spatula, apply the mixture onto a larger spatula and spread it evenly over the surface in a small layer.
Important! The installation of curved plasterboard ceilings will turn out to be of high quality if it is puttied in 2 layers with a starting putty mixture and once with a finishing, polymer putty. All stages can be studied on video. The video shows the process of installing a plasterboard ceiling in a bathroom.
Advantages and disadvantages of plasterboard structures in the bathroom
Like any other coating, plasterboard has its strengths and weaknesses. They must be taken into account when planning the installation of a ceiling in a room with high levels of humidity and constant temperature changes.
The advantages of plasterboard structures include:
- increased fire safety;
- high level of sound insulation;
- moisture resistance;
- environmental friendliness;
- neat appearance;
- the ability to disguise flaws in the rough ceiling, communications and lighting equipment;
- affordable price;
- simple installation;
- durability.
Among the disadvantages, it is necessary to highlight the lack of ability to hold back water during flooding in emergency situations, as is the case with tension fabrics. In addition, the disadvantage of plasterboard construction is that it reduces the height of the bathroom. However, the problem can be easily solved if you plan the structure correctly and, using decorative elements and lighting, achieve the effect of visually increasing the height of the ceilings.
Hood installation
Often a stationary hood in a bathroom is located right under the ceiling, and when installing a plasterboard ceiling structure frame, it goes under it. But you can’t have a bathroom without a hood, so you need to install a ventilation grille on the ceiling. This is not difficult to do, just cut a hole in the drywall to the size of the grill and glue it to silicone. Extraction can be of two types: forced or natural.
If for the second type of ventilation no devices are needed, it is enough to simply install a ventilation grille, then for the first option you need to provide an electrical connection with a switch.
The exhaust fan is selected based on the needs of the owner and the area of the room. The electrical wire is laid under the suspended structure.
Installing a hood in a bathroom with a plasterboard ceiling Forced ventilation is installed on a ready-made ceiling structure using special fasteners, having previously connected it to the electrical network.
Installation technology
The construction of the suspended structure is carried out in stages, which eliminates the occurrence of problems. The necessary materials and tools are purchased in advance.
Preparation and marking of the base
It is recommended to carry out the work before installing the plumbing.
Step-by-step instruction:
- The coating is freed from all unnecessary things. It is advisable to check for the presence of mold and mildew: damaged areas are cleaned and treated with special compounds. Antiseptic impregnation of the entire base is also carried out.
- Cracks and crevices are sealed.
After thorough cleaning and sealing of cracks with cement or polymer mortar, the base is covered with an antiseptic at least 2 - 3 times, otherwise the colonization of fungus is guaranteed within a year - The dimensions of the ceiling are taken and a diagram is drawn up. It must take into account the location of the levels of the future structure and communication systems.
- Marking is being carried out. For rooms with high humidity, a lathing made of a metal profile is preferable, so a line is cut out on the walls for guides, and on the base for areas for ceiling parts and suspensions.
The easiest way to mark the horizon under the PN profile is with a laser level, but this equipment is expensive; for one-time use, a hydraulic level is enough
You should know! The height of each tier of a multi-level structure is calculated based on the greatest surface deviation, lighting and forced ventilation.
Creating a frame and covering gypsum boards
Further actions:
- The pre-drilled guides are fixed first. It is recommended to use anchors for fastening. All parts must be aligned with each other.
- Suspensions are placed along the lines on the base, after which the ceiling profiles are mounted.
- Wiring is distributed at the locations of lighting devices and ventilation is arranged.
- Drywall is being hemmed. If the structure is multi-level, then the lower tiers are partially finished.
- Using a similar scheme, the frame for the second step or figures is set up.
- The sheathing is completely covered with slabs.
The algorithm for installing a plasterboard box in a bathroom is no different from installing similar structures in other rooms, the only difference is that only a metal profile is used to create the sheathing; timber is not installed here
. If the preliminary calculations are made correctly and the data is correctly transferred to the base, then no difficulties will arise .
Photo examples of plasterboard ceiling design in the bathroom
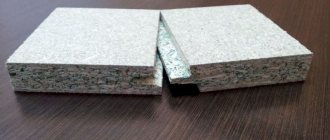
Ceiling plasterboard: types and installation features
To make it easier for the reader to choose the type of plasterboard for the ceiling that is most suitable for his case, we will highlight the different types of material, and also emphasize the features of each of them as applied directly to the ceiling. This type of plasterboard is made from special moisture-resistant cardboard and with special additives in gypsum, which practically eliminate moisture absorption material and the possibility of mold formation. Sheathing with plasterboard is one of the most popular methods of installing ceilings during repairs, since it allows you to achieve close to ideal evenness of the ceiling surface when installing a single-level ceiling and create interesting and varied structures from a design point of view when arranging a multi-level ceiling system. In typical apartments, gypsum boards are used to decorate the ceilings of kitchens and bathrooms, and sometimes, if there is free money, they are chosen for living rooms as a means that will somewhat reduce the damage caused to repairs in the event of a flood from neighbors above.
Moisture-resistant, fire-resistant and gypsum plasterboard ceiling sheets, as in the case of conventional gypsum boards, must be chosen thinner - within 8-9.5 mm.