From time to time it is necessary to carry out repair work in any room. And the ceiling becomes the face of the room, because the overall impression of the room will depend on its appearance. Most modern paints are marked that it does not need to be pre-treated before applying to the ceiling. Before you begin repair work, you need to understand why you need a primer for the ceiling.
Purpose and application
Priming the ceiling before painting is an important part of the painting job. The fact is that the main purpose of the material is to reduce moisture absorption of the surface. The layer prevents the ceiling from absorbing moisture from the paint, and it will dry in an even layer. When applying paintwork to an untreated surface, the paint will dry out and may become cracked. Uneven drying is also possible.
The material is mainly used to improve the adhesion of paint to the ceiling surface. When applying the primer material to a plane, it forms a rough film, which improves adhesion to the paint and also prevents moisture from being absorbed from the paint material. In addition, pre-treatment before painting can hide small defects on the ceiling, such as cracks and small differences in height.
The primer performs many functions:
- Strengthening the surface, in particular preventing the ceiling from falling off;
- Strengthening the base for painting;
- Improves the water-repellent properties of the ceiling;
- Improves the adhesion of the ceiling to paint and other finishing materials;
- Makes subsequent putty (plaster) easier and smoother;
- Protects the surface from mold formation;
- Helps reduce paint costs for subsequent finishing;
- Promotes rapid hardening of the putty;
- Increases the service life of subsequent finishing (paint, wallpaper, tiles, etc.).
The universal option can be used on almost any plane. In particular, its use on various materials makes it universal.
Why do you need a primer?
Primer is applied for painting for a number of reasons:
- paint consumption is reduced;
- stains and other problems that may appear under the paint are masked;
- the service life of the decorative coating is extended;
- the level of moisture resistance increases (and this is true even if the surface is treated with a special water-based paint);
- the paint goes on more evenly.
This is not a complete list of reasons, but it is the most significant.
In order to more fully and accurately imagine how exactly priming the ceiling will help, it is worth understanding what paint (enamel) is. Any type of paint has the form of an emulsion of polymers (small particles), the composition and combination of which depends on the type of paint and varnish material. For water-based paint, these are, for example, acrylic and latex. At the moment of drying, the water evaporates from the paint, and the particles are soldered together, creating a single coating.
If the base for such a coating is even and smooth, the resulting layer will be almost perfect. However, the structural composition of concrete, brick, putty, plaster and plasterboard surfaces is porous. Accordingly, without a primer, the created surface layer of paint will not be solid, spots will appear, differences in the dullness of the coating, color or level differences will appear.
In addition, paint can attract foreign substances and particles. If we talk about painting the ceiling, then it can be not only lime deposits or the same putty, but also rust, fat deposits (especially important for the kitchen), fungus, and so on.
Ceiling primer also has the form of an emulsion, most often acrylic, but with a smaller molecular size and a higher density. This allows the substance to impregnate the top layer of the ceiling, compensate for all unevenness and roughness, create a waterproof film and an additional adhesive layer.
In some cases, a special blocking insulating primer may be required - for example, if there are stains from grease, nicotine, soot, rust, and fungus. It is combined with means for treating problem areas (usually they are differentiated by the type of problem).
Composition and technical characteristics
The composition of ceiling primers includes the following components:
- Surface film forming agents;
- Plasticizer;
- Additives to improve film formation;
- Antiseptics;
- Components to improve absorption and hardening.
In addition, color pigments may be present in the primer composition. The shade of the coating will depend on their addition.
Important! The composition of the primer may vary depending on the intended surface to be coated, as well as the type of room.
A universal ceiling primer for painting dries on average in 1-1.5 hours. Can be stored for up to 6 months at temperatures from 5 to 50 degrees. Retains its properties at temperatures of 5-30 degrees.
Consumption per 1 m2
Basically, when applying 1 layer, 10 liters of primer material is enough for 65 sq.m. The average consumption is 0.15-0.17 kg/sq.m.
This indicator can increase upward depending on the type of surface, porosity and smoothness. Also, consumption increases with the number of layers applied.
Tips and recommendations for use
To make high-quality painting of the ceiling, you must follow the instructions for use. Basically, the work of preparing the surface and applying the primer is divided into stages:
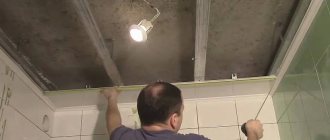
- First of all, it is necessary to vacate the premises in which repair work will be carried out. Remove all lighting fixtures from the ceiling, if any. It is recommended to lay a film on the floor.
- It is imperative to remove the old coating from the plane and clean the ceiling. Whitewash is easily removed with a wet roller and scraper. Paint can be removed with sandpaper and solvent.
Important! Before starting work, the room must be de-energized!
- After cleaning, you need to check the ceiling for cracks and irregularities. All of them are covered with putty.
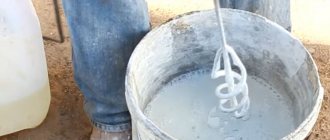
- After which you can start working with the primer composition. It is important to follow the instructions when diluting the primer with water. Otherwise, insufficient or excessive amounts of liquid will negatively affect the quality of the coating.
- The substance can be applied using a roller and brush. You should not give preference to only one of their options. With a brush you can reach hard-to-reach places, and with a roller you can level the surface. So it’s worth purchasing both tools in advance.
- The primer must be applied in two layers. It is important to wait for the first coat to dry before applying the second. It is also recommended that the direction of layering be perpendicular.
- After which it is recommended to apply two layers of putty. It is also worth treating each layer with a primer. This will make the ceiling much smoother and stronger.
Advice! To prevent streaks from the layers from being visible after painting, it is recommended to finish with a roller. You can also replace it with a spray gun when applying the second layer. In this case, the layer will lie very evenly, without stripes or bald spots.
After all this work, you can safely apply paint. Preliminary priming and putty will reduce paint consumption.
Primer - what functions does it perform?
A completely reasonable question that may arise in any person’s head is why do you need a primer at all? The purpose of this procedure is to prepare the ceiling or any other surface for further finishing work. Such work can be: puttying, painting, applying liquid wallpaper and much more.
This repair operation performs a very important function – protective:
- The surface gains additional strength, its layers are impregnated and glued together;
- Moreover, the surface becomes more moisture resistant after applying the primer. At the same time, she does not lose her ability to “breathe”;
- The consumption of paint or other decorative and finishing materials is significantly reduced if work is carried out on a surface that has been primed. That is, to the question: “Does the ceiling need to be primed?” the answer will be unequivocal - of course, it is necessary.
Ceiling primer performs many important tasks
Liquid paint instead of primer - is this acceptable?
In certain situations, when performing construction work, paint, rather than primer, is used.
In such a situation, the paint is pre-diluted so that the composition is as liquid as possible. Many people ask the question: is it even possible to do this, if this makes any sense?
Liquid paint is not an alternative to a full-fledged primer composition
First of all, when the paint is liquid, it not only penetrates well, but also compacts the surface remarkably well - no worse than primers created specifically for this purpose. But this is only that small part of the iceberg that you see with the naked eye. But what if we look at the process in more detail?
Liquid paint, in fact, contains many large particles of fillers and solvents - they are part of the material. It is because of this that the paint will only interact with the top layer of your surface. At the same time, it will definitely seal all micropores and will not penetrate inside under any conditions. That is, it is better not to prime the surface with paint - not a single specialist will recommend this.
What exactly is a better primer?
It is not entirely correct to compare a primer and any paint. The primer is a very fine suspension of polymer resins and that says it all.
What else can you say about the primer:
- Deep penetration compounds penetrate into the very thickness of the material being processed. Next, polymerization occurs - and the layers of the treated material are glued together;
- Microparticles of the substance are approximately 10 times smaller than paint particles. They have very high permeability - this figure is even higher than that of high-quality drinking water.
Thus, we have figured it out - liquid paint is not at all suitable for the role of primer. Moreover, in order to prime the surface of the ceiling. The paint can seal the top layer - but this will not add strength, it will simply form a thin film, which will definitely not provide reliable support for all subsequent layers (including decorative ones).
Applying a high-quality primer is a guarantee of excellent results
Is ceiling primer necessary at all?
There are people who do not prime the surface. In reality, this is not always the right decision. Let's consider the factors that speak in favor of the primer:
- Regardless of what the ceiling is finished with, your finish will definitely be subject to downward pressure. She also carries a serious burden on herself. Because of this, over time, the base of the ceiling, which has not been primed, will crumble and shedding will occur - even if your ceiling is covered with ceiling tiles using high-quality glue;
- The durability and strength of the ceiling coating depends directly on the adhesion ability of the ceiling surface and paint or some other coating. The primer gives your surface this property ideally.
Dust and loose microparticles
Repair or construction work is quite a dirty process. During such actions, a lot of dust always arises. Even when you move into a new apartment, the renovation of which has already been completed, you have to do cleaning - more than once or twice. Only after this does the construction dust disappear.
During finishing work, it is impossible to remove all the dust - even if a powerful vacuum cleaner is used for this. The ceiling surface is no exception; dust particles are also sure to settle here.
Do I need to prime the ceiling before painting? Undoubtedly
When they find themselves between the ceiling surface and the paint, the level of adhesion decreases - which does not have the best effect on the quality of the coating. Putty, paint, and glue can hardly cope with such dust.
As a result of this phenomenon, the ceiling finish may begin to peel off quickly - and this is due to small particles that are not secured. Should I prime the ceiling before painting in this case? Of course, it is better to do such work in order to protect yourself from possible problems in the future.
Advantages and disadvantages
Ceiling primer for painting has its clear advantages:
- Levels the plane;
- Improves adhesion to paint;
- The application process is very simple;
- Protects from moisture;
- A large palette of colors makes the painting process easier;
- Protects the ceiling from mold and mildew, and prevents corrosion when processing metal parts.
But despite many advantages, the material also has its disadvantages:
- Layer transparency;
- Possibility that the film is formed unevenly.
But almost all shortcomings can be easily solved by correctly applying the material to the ceiling.
Types of primers for ceilings
There are several types of primer, and in order to make high-quality repairs, it is necessary to select the material for priming strictly for the type of subsequent finishing. Also, the material must be selected in accordance with the type of surface on which it will be applied.
Thus, the primer is divided into the following types:
- Acrylic.
It contains acrylic polymers. Can be applied to wood, brick, concrete, fiberglass, cement and plaster surfaces. This primer is water-based and recommended for use before painting with water-based materials.
Important! In residential areas, acrylic, mineral or alkyd based primers can be used.
- Alkyd.
This primer is different from other high strength primers. Mainly used on surfaces made of tiles, glass and steel. This primer is not suitable for use on plaster or drywall.
- Mineral.
This type is the most popular and widespread. It can be used on brick, concrete, plaster, aerated concrete and foam concrete surfaces. The composition is based on cement, gypsum and lime.
- Colorful.
To produce this type, drying oil or resin is used. Used for subsequent painting of wooden or metal ceilings. There are also options with additional anti-corrosion and moisture-resistant properties.
- Deep penetration primer.
This type of primer penetrates the surface to a distance of 0.3-2 cm. This thereby strengthens the ceiling. There are also options with antiseptic properties that prevent the occurrence of rot, mold and mildew.
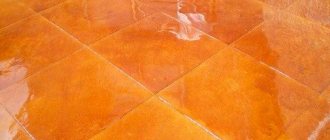
- Quartz.
This primer contains sand. After the material dries, the ceiling plane becomes very rough. Used for application to ceilings and other surfaces for painting and other finishing materials.
There are options that are full coverage. They are usually applied in several layers.
How to properly prime a ceiling for painting: work order
- Before painting the ceiling, it should be degreased, cleaned of foreign contaminants, determine whether it needs to be plastered or immediately primed and then painted.
- The primer composition is applied only to a very dry, clean surface that does not have poorly adhering or crumbling parts.
- The primer is applied with a roller or brush, wetting the ceiling tile well, but not so much that puddles appear.
Since the question of choosing the required type of primer from the enormous number of options offered by the market often arises, you should buy the primer composition and paint from the same brand. This way you can get an excellent repair result.
The secret to good quality surface finish when using compounds from one manufacturer is simple. Each manufacturer produces its own paints, primers, putties and other materials for repair on one basis, so there is no dissonance between them, they all perfectly combine and complement each other. Primer for ceilings and walls is usually sold in the form of a dry mixture, so before starting work, you need to prepare a suitable container convenient for mixing the mixture with water. You also need a roller with short pile (it is especially convenient to work with a roller with a telescopic handle), and a brush for treating hard-to-reach places.
If you have practical experience in such work, it is permissible to apply the primer using a spray gun, but you should take into account the danger of drips, and this is poor-quality work. To work at heights, you cannot do without a stepladder, light and stable.
How many times should I prime the ceiling before painting?
Typically, priming the ceiling before painting is done in two layers. The first layer must be completely dry, only then can it be primed a second time. Drying time usually takes three to four hours. The primed surface should be smooth and slightly sticky to the touch.
If plaster is first applied to the ceiling to smooth out roughness and seal chips and cracks, then after it has dried, the surface must be primed again.
If the plastering step is skipped, then after priming the ceiling, it is puttied, after which the primer is again applied to the dried putty, and then painted. PS And for dessert, I suggest you watch the video: Primer of the ceiling
Review of popular manufacturers
Among the popular manufacturers of primer material are:
- Prospectors.
The primer from this manufacturer fills any cracks and pores in the surface. Quartz sand in the composition significantly improves the adhesive properties of the surface. Primer consumption is 0.1 l/sq.m. The layer dries in 1 hour.
- Ceresite.
The composition of this material is based on synthetic resin. The primer is well absorbed and is also protected from uneven drying.
- Optimist.
The primer from this manufacturer is used for surface treatment indoors and outdoors. The composition contains quartz sand and antiseptics. Suitable for application on surfaces that are subject to constant humidity.
- Bolars.
The primer is transparent or matte, usually white. Used to strengthen concrete plasterboard. Helps reduce the amount of paint up to 1.5 times.
- Text.
A universal primer that penetrates 6 mm into surface pores. Used to prepare surfaces indoors and outdoors. Can be used in damp environments.
Results
You should not skimp on primer, nor should you refuse this type of work. In terms of finances, this still won’t justify itself; there will also be costs to correct various problems with the ceiling surface.
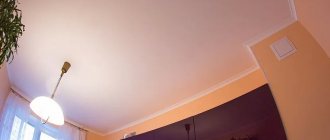
A beautiful ceiling in a room is quite possible if the surface is primed correctly
The secret is to choose a specialized primer for your ceiling or one that has a mineral base. Universal primers are often used for ceilings. It is important to study the instructions carefully and buy the product that will match the surface. They usually decide on the spot whether to prime the ceiling plinth. It’s better to just remove it – if it comes off easily.