Optimal types of paints for kitchens
Since the kitchen area is characterized by a high percentage of humidity and is also characterized by temperature fluctuations, the coloring composition must be maximally adapted to such conditions. In this section we present good options for high-quality ceiling painting.
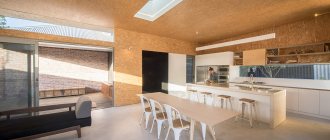
Pastel-colored water-based paint on the kitchen ceiling Source trastroom.ru
Water-based
The water-based paint composition has good technical characteristics and has a reasonable price. This product has its own worthy qualities. The composition is harmless, even when dried, it does not emit toxic substances.
The product can set in rooms without heating. Using a water-based composition, plastic, wood, brick and plasterboard surfaces can be easily painted. The paint is easily diluted with water and washed off; it is possible to mix different shades with each other.
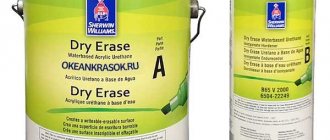
Acrylic paint
A universal product based on an acrylic emulsion solution. Before using this composition, perfect leveling of the ceiling surface is not required. The paint dries quickly enough and is safe.
With prolonged use of acrylic coating, a property such as abrasion resistance is noticed. Also, the acrylic composition is able to withstand high temperatures and temperature changes. This composition is easily diluted with water and quickly applied to the surface. Mixing shades is allowed, which are offered in a wide range.
It is recommended to wipe acrylic paint with a damp sponge, since excessive washing and soaping can damage the pigment layer, resulting in a whitish spot appearing on the ceiling surface.
Kitchen ceiling painted with white acrylic paint Source mykaleidoscope.ru
Alkyd
The declared composition is based on alkyd varnish. Dissolves with kerosene or white spirit. After drying, the product becomes abrasion-resistant, so there is no need to be afraid to wash it when cleaning. Only non-abrasive cleaning products are suitable for washing.
This paint is divided into two types according to its coating: glossy and matte. The first one can be quickly cleaned, but the second one will have to tinker with wiping. The composition is applied to the ceiling perfectly evenly, suitable for wooden and metal bases. During operation, the paint can withstand high humidity and temperature fluctuations.
Water-based paint
This type of paint is not too expensive; the cost is slightly higher than chalk or lime compositions. Has good covering ability. The painted surface can be wiped with a damp cloth, just remember that you cannot thoroughly wash or scrub such a ceiling.
During repair work and after it, no unpleasant odors are released. All components of the coloring composition are water-based, so this ceiling is completely safe in the kitchen.
An easy application method will allow you to update the floors at any time. This composition can be made in any color, the main thing is to choose the color you like.
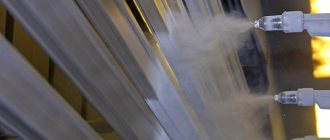
Useful information: “Painting the ceiling with a hand spray gun“
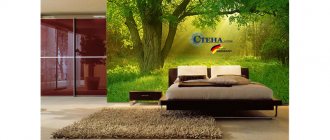
Color options for the ceiling in the kitchen
Choosing the type of paint is not the final decision. It is also important to decide what color to paint the ceiling in the kitchen, because the surface should not only be properly tiled, but also beautiful. Since shades affect mood, it is necessary to choose gentle tones that will not cause discomfort and disgust. But the coloring can be even the most unexpected. So, the following colors that psychologically affect the body can be given preference:
- red. This shade is considered powerful, but quite aggressive. It is called energetic because it can give strength and improve appetite. This shade should be used with caution, as it is suitable only for balanced people who are not prone to mood swings. The red shade does not suit all interiors. Ideally for modern, modern, English;
- orange. This color has a positive effect on mood, causes joy and stability, inspires and stimulates appetite. This shade is very much appreciated in the kitchens of depressed individuals. Suitable for marine interior, modern, hi-tech, modern;
- green and its shades. Quite attractive colors that will emphasize the style of the room and its purpose. Such shades are symbols of stability and have a positive effect on the functioning of the body. Green ceilings are suitable for kitchens in eco-style, classic, English, rustic, Provence;
- pastel shades. Suitable for people who value harmony, comfort and tranquility. These solutions look perfect with neutral base tones in a kitchen that becomes light and airy. Pastel looks perfect in Provence, rustic, eco, hi-tech, modern style.
Also, when choosing shades for the ceiling in the kitchen, we recommend following these tips:
Pastel shade of the ceiling surface in the kitchen Source remontnik.ru
- if the kitchen has a small area, then light colors with a glossy finish would be ideal. They visualize the height of the ceilings and expand the perception of space;
- the ceiling surface after applying all the layers should look several tones lighter than the interior as a whole. In particular, the emphasis is on the colors of the walls, and the ceiling is their continuation;
- if the kitchen is too large and spacious, dark matte shades of paint will help to visually lower the height of the ceilings and make the room squat. The main condition is the presence of diluting tones in the kitchen;
- In order to zone the kitchen into a dining and work space, you can paint the ceiling in two shades with clear boundaries. But even in this case, strong contrast is not allowed.
In general, proper coloring requires a competent approach and knowledge of special technology, which you will become familiar with in the next section.
Painting the ceiling in the kitchen with light-colored paint Source remontnik.ru
Features of the room
The kitchen can be called not only a work space, but also a place where the whole family gathers at the dinner table in the evening. That is why, when deciding which paint is best to paint the ceiling in the kitchen, you should choose not only practical compositions with good performance characteristics, but also a coating that will create a certain aesthetic effect.
When choosing paint, consider the following features of kitchen processes and coating requirements:
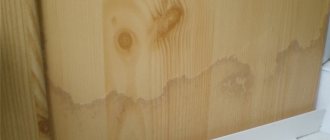
- The paint for the ceiling in the kitchen should be resistant to various stains and easy to clean. Particles of fat, soot and evaporation quickly settle on all surfaces and are difficult to wash off. In addition, some coatings (for example, chalk or lime whitewash) easily absorb odors, so whitewashing the ceiling in the kitchen is not the best solution.
- When deciding how to paint the ceiling in the kitchen, keep in mind that this room often experiences high humidity, since steam is actively released during cooking. Moisture most often condenses on the walls and ceiling, so a painted ceiling must have a moisture-resistant coating.
- To understand how to paint the ceiling in the kitchen, it is worth considering that there are sharp temperature changes here, so the coating should easily withstand them and have a wide range of operating temperatures.
- Also, when choosing a mixture, take into account the peculiarities of local repairs, because the ceiling surface is usually damaged unevenly (above the slab more than in the rest of the room). Choose the right paint with which you can quickly repaint part of the ceiling with your own hands without visible areas of layers and color changes.
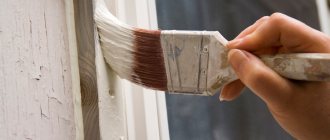
Painting the ceiling: how to do it without hiring a painter
Having made a conclusion for yourself what paint to paint the ceiling in the kitchen, you can get to work. But immediately before the procedure, you need to perform a number of additional steps.
Preparation of material
The following list of materials and equipment will be useful for painting the ceiling surface:
- spatulas of different lengths;
- sponge, rags, brush;
- roller with a long handle (can be replaced with a spray gun);
- small brush;
- container for diluting paint;
- putty;
- grout mesh;
- paint, primer and container for it;
- personal protective equipment, stepladder.
After assembling the tools necessary for the job, proceed to the next stage.
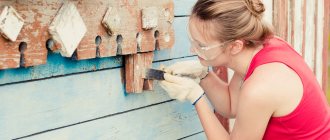
Surface preparation
Most paint compositions require preliminary preparation of the ceiling surface. It involves preliminary removal of the old coating, puttying and sealing of defects.
Carrying out the preparatory stage before painting the ceiling surface in the kitchen Source remontnik.ru
For example, if the old coating on the ceiling is whitewash or water-based paint, then they can be washed off with warm water or a soap solution; the softened layer of the old coating is removed using spatulas.
If a waterproof paint composition was used for the ceiling, then you can use a special remover, which is easily found on sale in hardware stores. All irregularities and holes are sealed with plaster, and for an ideal result and strength, everything is sanded using a trowel mesh. Then wait until the coating dries completely. And they perform priming to improve adhesion.
How to prepare the ceiling
Any surface must be cleaned of dirt, dust and old coating. In the case of concrete, the following additional measures are required:
- puttying uneven surfaces;
- sanding the entire surface of the ceiling;
- removing dust with a vacuum cleaner or mop, broom;
- priming (it is advisable that the manufacturer of primer and paint be the same).
Attention: After puttying, you need to wait until the putty is completely dry: this information can be found on the can. As a rule, the interval is from 12 to 24 hours.
Ceiling priming begins by passing the corners and perimeter, carefully treating all areas inaccessible to the roller. Then they prime with a roller, rolling the ceiling in stripes. After all the necessary preparatory work has been completed and the primer layer has dried, you can begin painting.
Video description
How to easily paint a ceiling.
Putty ceiling before painting Source remontnik.ru
Painting: technology
Painting the ceiling in the kitchen is carried out sequentially, and in order not to forget anything, you need to act strictly according to the algorithm:
- First of all, glue all surfaces that may be accidentally stained with paint using masking tape. At this stage, be sure to cover all the seams between the ceilings and baguettes, if the latter are installed.
- The floor is covered with film so that drops of paint do not become embedded in the coating, the paint composition is diluted in a special container, and then either the roller is blotted or the composition is poured into the spray gun.
- Then take a brush, dip it in paint and paint the surface of the ceiling in hard-to-reach places (in corners, near baguettes).
- Next, the first layer of paint is applied, it is applied strictly perpendicular to the window in the kitchen.
- Next, re-paint some places with a brush where there are gaps, wait until it dries completely.
- After the paint has firmly adhered to the ceiling surface, begin to reapply it. In this case, the direction is changed to the opposite, that is, now the painting occurs along the window opening.
- At the end, they evaluate the condition after drying and determine on their own whether the ceiling needs to be painted with a third layer.
In most cases, it is enough to apply paint in one or two layers. It all depends on its transparency and the shade of the ceiling base.
Applying masking tape before painting a kitchen ceiling to protect against stains Source decks.fungamemedia.com
Painting the ceiling - work progress
If you want to not just apply a layer of paint, but get a really excellent result, then you will need instructions for performing the work:
- Preparatory work. First, you should clean the ceiling from old layers of paint or plaster down to the concrete base. You can clean the surface using a spatula or a hammer drill.
Stripping old coating
- To protect your respiratory system, you must use a respirator and remember to close the door to the kitchen tightly.
- Protection against mold may well be found under a layer of plaster, so after cleaning the surface must be treated with a special primer, for example, Ceresit CT 99, which has an antimicrobial effect.
- Such a primer can not only destroy existing mold, but also prevent its occurrence in the future. To save money, you can use any product containing chlorine instead of a primer, for example, the well-known “Whiteness”.
Antimicrobial primer Supraton Lux
- The application of primer is carried out with the aim of better and more uniform adhesion of the paint to the surface in the future. For this, for example, Ceresit ST 17 is suitable, or, as in the photo, Supraton Lux. These are primers that have the ability to penetrate the surface deeply and strengthen weak areas.
- Leveling the surface, defects on the ceiling with a depth of 1 cm must be plastered, and small irregularities up to 0.5 cm are best treated with finishing putty. After the plaster and/or the first layer of putty has dried, it is necessary to apply a second thin layer, which will finally mask all problem areas.
We do it ourselves by sealing the joints between the floor slabs
- You can smooth the surface after puttingty no earlier than 6 hours later. To do this, you will need a grouting mesh on a holder, first large, and then smaller. It is necessary to grind until it is perfectly smooth - you can make sure there are no unevenness on the matte ceiling using a straight strip or a steel meter.
- Prime the surface again. Another additional layer of penetrating primer or a 10% aqueous solution of paint that is supposed to be used to paint the ceiling is applied.
- Painting the surface is the final stage. The paint is applied in two layers - the second layer must be applied no earlier than the first has completely dried.
Primer for old paintwork
If your ceiling is in order and does not require strengthening or leveling the base, but simply repainting it, the preparation process will boil down to applying a primer over the old paint.
Useful tips
We bring to your attention a few tips on the topic: how to paint the ceiling in the kitchen, which will help you do this job quickly and efficiently:
- Following the recommendations of experienced builders, you need to start painting the ceiling from the window. This will create the visual effect of more uniform coloring.
- It is better to apply each layer of paint without interruption; if you take a break from working for at least an hour, a noticeable strip will remain on the border between the dried area and the newly applied area.
The direction and trajectory of the roller movement is schematic
- For the ceiling, it is better to use matte paint, as it masks minor defects, while glossy paint makes them more noticeable. The glossy coating looks ideal only on stretch ceilings, as their advantage is precisely their smooth surface without the slightest irregularities.
It is better to use matte paint
- When working, it is better to use materials produced by the same manufacturer (for example, primer and paint) - this guarantees their compatibility.
- Always strictly follow the instructions on the package and measure the amount of water not by eye, but in a container with the required volume.
- Never drain or throw away construction materials or their waste down the drain, otherwise you may clog the drain or permanently damage your plumbing.
How to properly paint a ceiling with water-based paint
Beautiful ceilings for the kitchen are a worthy interior decoration. If the painting is done carelessly and there are flaws in the work, such ceilings can ruin even the brightest and most unusual design solution.
- At the same time, careful work will only emphasize the advantages of the interior of your kitchen, and a variety of shades and textures will add individuality to it.
- Despite fashionable trends in ceiling finishing, for example, leveling with plasterboard sheets, painting with water-based paint remains quite popular. This can be explained by various reasons.
- If the apartment already has low ceilings, then a suspended plasterboard structure will make it even lower and the kitchen will lose precious volume. In addition, painting the base ceiling is much easier than installing plasterboard structures.
- However, in private houses, where, as a rule, there are no problems with ceiling heights, preference is given to plasterboard for two reasons: an insulating layer can be integrated inside the structure, and it is possible to integrate lighting fixtures and lighting, which increases the chances of creating a design.
Below are some examples:
Useful tips from experts
Taking into account the tips given in this section, you will be able to do the coloring job correctly and efficiently. You need to know the following points:
- Painting the ceiling in one layer is carried out strictly at a time without interruptions. Otherwise, spots and shading will be visible when drying;
- for a matte type of paint, it does not matter whether there were minor defects on the ceiling, since they are not noticeable under such a coloring composition. In the case of glossy, it’s the other way around;
- if a primer is used, it must be from the same company as the coloring composition;
- When painting the ceiling in the kitchen, you should screw an economical light bulb with maximum brightness into the lamp.
Additional recommendations
When painting the ceiling, it is recommended to hang an energy-saving light bulb of maximum brightness in the room. The light it emits will help you see all, even small, defects and correct them in a timely manner.
The results of labor should be viewed from different angles, determining the quality and density of coloring.
The main thing in this matter is to do everything systematically, without long breaks (apart from waiting for the materials to dry), but also without unnecessary haste - and you will achieve the desired result.
Ceresit - the best silicate paint for ceilings
Photo: www.kupyura.ru
Approximate price for Ceresit CT 54 (15 liters): 3300 rubles.
Ceresit silicate paints are primarily intended for facade work, but it is quite acceptable to use them inside a building, including for ceilings. Builders and consumers like them for their final result, good hiding power, environmental friendliness, antifungal properties, easy maintenance and durability.
Ceresit paints are quite demanding on the base and work best on mineral plasters.
Rating: 9 points out of 10
The paint is “capricious”: if you don’t pay attention to the base, the result will be unpredictable.
Reviews: “Ceresite is applied quickly and very easily. I used a regular brush for painting and the ceiling looks just great. But I had to struggle with the plaster.”
Whitewashing the kitchen ceiling
One of the oldest methods, which is still used by many today. The reasons are significant.
Lime is known for its ability to retain air pollution in its layer. In rooms that have recently been whitewashed with lime, it is especially easy to breathe.
The cost of lime is low, the tools are a roller and a brush.
But we also have to deal with the limitations of whitewashed ceilings. So, whitewash can only be white - lime and dyes are not “friendly”. The ceiling cannot be washed or wiped throughout its operation; if it becomes dirty, it will have to be whitened again.
If the ceiling has been whitewashed many times, problems may arise with removing the coating (for example, if this time you decide to paint it). The issue can only be resolved by plastering the ceiling.
Caparol - the best paint for the ceiling in the country
Photo: www.kavkaz-torg.ru
Approximate price for Caparol CapaSilan (10 liters): 3950 rubles.
This is one of the few manufacturers specializing in silicone paints for ceilings.
Silicone compounds, when drying, easily eliminate or hide small irregularities, roughness and cracks on the ceiling. The adhesive properties of Caparol silicone paint can “hide” cracks up to 2 mm thick.
The material is also characterized by high hiding power and, even in one layer, perfectly paints the surface, is easy to clean and almost does not become dirty, as it has a powerful dust- and water-repellent effect.
Our rating: 10 points out of 10
Reviews: “In my opinion, the best paint for ceilings in unheated rooms. I used it for ceilings in the country, and although the house was not heated in winter, in the spring all the ceilings looked like they were freshly painted.”
Rating of high-quality and popular ceiling paints
10.MARSHALL ceiling, for ceilings
Acrylic paint of Russian-Turkish production is intended for specialized construction work. The water-emulsion structure is easily applied to concrete, plastered, dry plasterboard mineral surfaces without splashing or drips. To ensure even distribution over porous and weak surfaces, use a base primer. Suitable for repairing dry rooms, and can be used at temperatures from +5°C to +30°, with air humidity 40-80%.
Before use, the mixture should be mixed thoroughly; additional dilution is not required. The paint is applied with a brush, roller or spray gun. To obtain a long-lasting snow-white matte color, the manufacturer recommends applying two layers.
MARSHALL ceiling, for ceilings
Advantages:
- price;
- shelf life 2 years.
Flaws:
- additional priming is required;
- high consumption.
9. Five masters acrylic paint for ceilings in dry rooms
Specialized ceiling covering made in Russia for ordinary premises. Can be applied to chipboard, fiberboard surfaces, concrete, plasterboard, and putty bases. The emulsion applies evenly with a matte snow-white coating and does not peel off.
Before application, the outer part should be degreased and cleaned of dirt and dust, old painted layers should be sanded, and the whitewash should be washed off. Irregularities are ground and cleaned of abrasive particles. To reduce fluid consumption, additionally prime the base.
Work with acrylic coating is carried out at a temperature not lower than +5°C, with a humidity of at least 65%. Please note that as humidity increases, drying time increases. The liquid is easily applied with a roller, brush or spray gun. To avoid the appearance of joints in the layer, you need to paint the surface in one go, and with only one product.
The second layer can be applied no earlier than after 8 hours, and full stability of the film occurs after 14-15 days. Care must be taken when working. Ensure that the area is well ventilated and if liquid gets into your eyes, rinse with plenty of water.
Five masters acrylic paint for ceilings in dry rooms
Advantages:
- large packaging;
- low price;
- quick-drying.
Flaws:
- high consumption.
8.Tikkurila Euro White for children's matte
Finnish branded product with unique microspheres that provide a deeply matte color without glare. The highly covering property of the film hides minor surface defects even when applied in one layer. The film of the material absorbs light and gives the ceiling long-lasting brightness and increased whiteness.
The odor of the liquid is neutral, it complies with the European environmental standard for organic volatile substances. Therefore, it is recommended for use in children's rooms of preschool and medical institutions.
It is used only in dry rooms, on pre-cleaned surfaces: concrete, brick, particle board, wood fiber, plasterboard, putty. The finishing material adheres well when painted with a brush, roller, or spray gun in one layer. Dries quickly; to apply the second coat you need to wait about two hours.
When frozen, it loses its properties, so the paint is stored for 36 months at temperatures above +5°C, in low humidity and in the absence of sunlight.
Tikkurila Euro White for children's matte
Advantages:
- without smell;
- uniform distribution;
- long shelf life;
- environmental friendliness.
Flaws:
- high price.
7.DULUX BINDO 7 for walls and ceilings matte
The matte white coating has almost no odor and is applied evenly and easily to concrete, putty, brick surfaces, plaster and wallpaper. Suitable for dry rooms: bedroom, living room, pantry. To reduce consumption, additional surface priming is required.
Pigment Prof technology (the structure of the mixture includes more titanium dioxide) increases coverage and ensures quick drying of the layer. The liquid has economical consumption, so it is suitable for treating large surfaces with a brush, roller, or spray. Once completely dry, the surface can be cleaned using mild detergents.
The product is suitable only for interior decoration, at temperatures in the range of +5°C +30°C, and relative humidity 40-80%. Environmental safety is confirmed by certificates and the paint can be used in children's, medical and preventive organizations.
DULUX BINDO 7 for walls and ceilings matte
Advantages:
- efficiency;
- environmental friendliness;
- not resistant to ultraviolet light.
Flaws:
- high price.
6.Tikkurila Euro Power 7 matte washable paint
A latex composition based on acrylic copolymer paints a variety of surfaces and has different liquid consumption: concrete and plaster - 5-7 m²/l, putty, wallpaper, chipboard, fiberboard - 8-10 m²/l, painted or primed surface - 10-12 m² /l.
Apply the mixture with a roller, brush or spray onto a dry, clean surface. Mixed with optical brightener, which gives the coating a dazzling white color. Can only be used indoors, and the heat resistance of the film is 85°C.
Drying time for one layer is about two hours. After fixing the structure, the surface is cleaned with a brush and a mild detergent. The finishing material is stored for three years from the date of manufacture in a warm, dry, dark place.
Tikkurila Euro Power 7 matte washable paint
Advantages:
- durability of operation;
- abrasion resistance;
- economical consumption.
Flaws:
- high price;
- susceptibility to burnout.
| CHARACTERISTICS | CARAPOL CAPASILAN | DULUX DIAMOND EXTRA MATT | NEOLAB | TURY SW-7 COLOR | Tex Pro |
| COMPOUND | silicone | alkyd | acrylic copolymer | acrylic | latex |
| CONSUMPTION (PER M²/L) | 7 | 7 — 9 | 6 — 7 | 90-120 g | 9 — 12 |
| DRYING TIME (H) | 4 — 6 | 6 | 8 | 1.5 | 1.5 |
| QUANTITY | 14.7 kg | 2.5 l | 3 kg | 2.4 kg | 4.5l |
| AVERAGE PRICE (RUB) | 5950 | 2147 | 149 | 344 | 700 |
5.CARAPOL CAPASILAN paint for walls and ceilings
The finishing material of the German brand made of silicone resins, according to buyers, provides high hiding power, long-term operation, strength and low water permeability. Designed for interior finishing of dry surfaces: concrete, brick, plasterboard, stone, chipboard, fiberboard, fiberboard, wallpaper, sandstone and plaster.
The liquid spreads evenly on the ceiling and walls even when applying one layer; it takes 3 days to dry completely. The matte interior texture visually expands the space of the room, while it is vapor permeable.
Does not cause allergic reactions, does not emit toxic substances when applied. The safety and environmental friendliness of the finish has been confirmed by independent research, so it can be used to paint surfaces in children's and medical institutions.
CARAPOL CAPASILAN paint for walls and ceilings
Advantages:
- environmentally friendly and safe;
- high layer strength;
- can be washed.
Flaws:
- high price.
4.DULUX DIAMOND EXTRA MATT paint for walls and ceilings, water-dispersion
Suitable only for interior work in dry rooms with moderate humidity. The emulsion lays flat on any walls and ceiling: concrete, plasterboard, plaster, wood, brick, suitable for wallpaper. It is applied without drips or spattering and has almost no odor.
Diamond technology gives the paint increased wear resistance and allows it to be used in high-traffic areas: corridors, halls, staircases. The service life is 25 years. The finishing is environmentally friendly, which is confirmed by certificates, and is suitable for medical and children's organizations.
The deep matte texture has an anti-reflective effect and perfectly masks small cracks and unevenness of the base. The painted surface can be cleaned with detergents and abrasives.
DULUX DIAMOND EXTRA MATT paint for walls and ceilings, water-dispersion
Advantages:
- service life - 25 years;
- high abrasion resistance;
- environmentally friendly.
Flaws:
- high price.
3.NEOLAB super white acrylic paint for ceilings and walls.
Acrylic dispersion in an aqueous solution lies smoothly on the horizontal and vertical bases of dry interior spaces. Can be applied to concrete, particleboard, plasterboard and fiberboard.
The white matte color hides minor imperfections well and visually expands the space of the room, but you should wait 8 hours to apply the finishing layer. The liquid is stored for 12 months at a temperature of +5°C; freezing is not allowed, otherwise the composition will lose its properties.
NEOLAB super white acrylic paint for ceilings and walls
Advantages:
- low price.
Flaws:
- takes a long time to dry.
2.TURY SW-7 COLOR washable for walls and ceilings
The water-dispersion composition of the Russian company applies evenly and forms a durable, washable film that can be cleaned with household products no earlier than 10 days after application. This paint is used for renovations in the kitchen or bathroom.
The acrylic layer has good vapor permeability and gives the walls and ceiling a light beige shade with a deeply matte texture. Excellent hiding power allows the composition to be applied to concrete, brick, wood board, chipboard, and primed metal surfaces.
TURY SW-7 COLOR washable for walls and ceilings
Advantages:
- applied to all bases;
- high moisture resistance;
- low price.
Flaws:
- No.
How to choose the best ceiling paint?
High-quality repairs always begin with careful selection of materials. Therefore, the following tips will not be superfluous:
- Try to buy paints from foreign manufacturers produced in their homeland.
- Beware of fakes, that is, choose only trusted stores and companies.
- When focusing on characteristics, always take into account errors.
- For coverage and adhesion, listen to the recommendations of specialists.
Ceiling paints are a capricious material. If you don’t want to observe spotting of the coating, yellowness, heterogeneity or peeling, then choose the paint very carefully, and then the result of the repair will not disappoint!
Choosing a paint roller
The choice of roller for painting the kitchen ceiling is also important.
The best roller for painting is a polyamide roller with 10 mm pile. It applies paint evenly and does not bleed or leave threads on the surface. It is easy to identify; it has double or triple spiral stripes on its coat, preferably green. Rollers with a red stripe have slightly more pile.
In addition to the roller and paint, you will need a ditch. This is a tray for dipping and squeezing the roller. The cuvette must match the dimensions of the roller.
How to paint a ceiling
- We start by preparing the ceiling. We clean off the old coating using a spatula or drill with a sanding attachment.
- Remove dust by wiping with a cloth or vacuuming.
- If there is damage to the base, we putty, and after drying we sand these places.
- We apply a primer so that the paint lays down more evenly and sticks better. If we use a deep penetration primer, it will also strengthen the base.
- We paint the surface for the first time - with a roller or brush. It is advisable to do this parallel to the wall on which the window is located.
- Apply the second coat of paint when the first has dried. Apply strokes perpendicular to the strokes that were applied when painting for the first time.
- If we work with a roller, we paint the corners with a brush.
Matte paint on the ceiling is more convenient - inexperienced painters will appreciate it. On a dry glossy finish, brush strokes are visible more clearly, but on a matte surface they are lost. If you want a glossy look on your kitchen ceiling, you should think about stretch ceilings.
Tags:
roller primer tension