When carrying out repairs indoors, the ceiling surface should be as level as possible. High-quality materials for this purpose are chipboard products. In the article, we will consider in detail the installation features and laying technology of oriented strand boards, compare the options for fixing the panels on the ceiling and give examples of various methods of finishing with these materials.
Negative sides
- A negative point when choosing OSB boards is that they may contain synthetic substances that are harmful to health. For indoor use, you should choose products labeled Eco or Green and toxicity class E0 (the level of formaldehyde does not exceed natural wood) - E1 (permissible limit for the furniture industry).
- It is not recommended to fasten OSB boards to the ceiling with nails due to the fact that they cannot withstand impact loads. For the same reason, their slabs cannot be cut with a milling cutter to create grooves and tenons.
Obvious advantages
Particle boards are a fairly practical material. And, of course, it has many more advantages than disadvantages among analogues in the same price category. Its structure consists of several layers of large chips glued together with a mixture of resins and synthetic wax. This results in a fairly strong and flexible layer. Let's figure out what other advantages of OSB as a building material for creating a ceiling:
- Durability. Such cladding can last more than 10 years, and its replacement is carried out in the shortest possible time.
- Simplicity of installation allows you to assemble a ceiling from OSB boards alone. And its finishing is also not difficult, since no additional leveling of the surface is required.
- Thanks to resins and wax, this building material has a high moisture resistance. Special impregnation will enhance the effect.
- Unlike many wood materials, OSB is not susceptible to destruction by insects.
- Thermal insulation properties.
Positive traits
- Strength. Can withstand the weight of built-in massive lamps and hanging fixtures.
- Ability to carry out finishing work on the material. It plasters and levels well.
- High density.
- Resistant to temperature changes. Widely used for rooms without heating.
- Good thermal insulation and sound insulation properties.
- Simplicity and ease of processing. The panels are easy to saw with electric tools and manually.
- Unlimited service life.
- Antiseptic. Mold and mildew are not scary.
Choosing OSB for ceiling lining
For residential premises, you should choose the product marking OSB-2 or OSB-3. These options are ideal for work due to their good density and quality.
OSB-4 is used in damp rooms, where there is a high probability of condensation or steam forming on the ceiling, or in the production of SIP panels.
The cheapest OSB for ceilings is grade 1. They have low strength and low resistance to moisture. They can only be used as a rough ceiling.
OSB thickness and dimensions
The most common slab dimensions are 1250*2500 mm and 1220*2440 mm.
Based on the size and load of the floor, several standard sizes are used:
- OSB-3. Thickness 9 mm . It is used for filing ceilings in residential premises, as well as on the veranda or terrace.
- OSB-2, OSB-3. Thickness 6 mm . Ceiling cladding in dry service areas, balconies and loggias.
- OSB-3. Thickness 12 mm. When covering a ceiling with a high load on the slab (weight of insulation, wide spacing of the slab, suspended structures are planned, for example a heavy chandelier).
- OSB-3. Thickness 15 mm or more, grooved. The most expensive option. Thanks to the tongue-and-groove technology, it can be installed without gaps between the plates, which simplifies the application of the finishing coating.
Panels of any marking themselves are voluminous, so using thicker sheets is impractical.
Installation technology
General preparatory work
Lining the ceiling with OSB board requires certain preparation. Before installation, the surface should be treated with a fire-fighting and antiseptic composition, and the location of future communications should be determined. When moving the structure into the attic, you should also consider an insulation plan and carry out waterproofing and vapor barrier.
The surface should be thoroughly wiped from dust and dirt, and covered with several layers of primer.
Covering the ceiling with OSB slabs requires compliance with a number of recommendations:
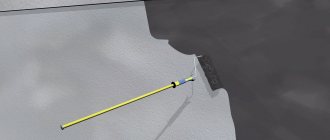
- Compensation gaps are formed along the perimeter of the walls, and space is left between adjacent panels.
- To work, you will need self-tapping screws that are 2.5 - 3 times the thickness of the material used. To prevent bulging, the self-tapping screw should be slightly recessed flush.
- The parameters of the room are calculated in advance so as not to purchase excess material. Sheathing is carried out from the corner or from the center of the room.
Options for fixing panels to the ceiling
There are two fixation options:
- Directly onto the surface of the rough ceiling. This method is suitable if the original ceiling is absolutely flat. For fastening, self-tapping screws or dowel-nails are used if the ceiling is concrete.
- Fixation on the sheathing or on the beam.
Fixation on beam - The simplest installation option is to work with OSB boards on wooden beams. In this case, there is no need to make a supporting frame. The panels can be attached directly to the beams using only wood screws. The disadvantages of such fastening is the danger of the slab sagging when the slab thickness is less than 12 mm.
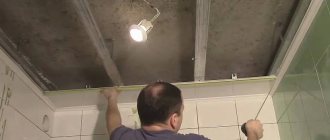
Sheathing on wood sheathing
Fastening to a supporting frame made of beams, boards or galvanized metal profiles. The frame mounting option has a big advantage in design. A space is formed between the panels and the base ceiling, which can additionally be insulated with thermal insulation material. With this fixation option, warm air will not escape through the ceiling surface. Load-bearing lathing also provides a number of positive aspects. There is always the opportunity to lay utility lines behind the panels, as well as decorate the ceiling surface with built-in lamps. False ceilings do not have such advantages. The maximum that can be done is to lay power supply cables behind such panels.
Sheathing device
- When using wooden beams, it is pre-impregnated with antifungal and anti-mold drugs. The parts dry well.
- The surface is marked. At a width of 2 - 3 cm from the wall you need to start placing the first elements. The overall pitch is determined depending on the type of base and the presence of insulation in the structure. The most successful option is 50 – 60 cm.
- The first post of the frame is located against one wall and is clearly leveled. To position the second part, a cord is pulled along the edges. The resulting plane should be completely filled with fragments of the sheathing. The structure is fastened with a certain margin of safety.
- Communications are laid and the location of lighting elements is marked.
How is the preparation going?
The quality of the installation of a ceiling made of OSB boards and its finishing directly depends on the correct implementation of preparatory measures.
They include the following operations:
- Application of antiseptic and fire-fighting agents to the base.
- Development of a communications laying scheme.
- If there is an attic above the room being finished, it is important to take this fact into account before laying insulation, vapor and waterproofing.
- Installation of frame racks and cutting of slabs is carried out according to a previously drawn up diagram.
- Remove dirt and dust from the surface of the base using a broom or rag. If necessary, degreasing is carried out.
- 2-3 layers of concrete contact primer are applied on top of the slabs, with a pause for each layer to dry.
- Prepare a fastening tool (screwdriver), equipped with bits of the required sizes.
- Considering the fact that the work will take place at height, it is necessary to make comfortable construction trestles of sufficient width and height.
Rough ceiling made of OSB boards
The work is carried out using frameless plate fastening technology. Using self-tapping screws, the panels are screwed to wooden beams. You can get a smooth and even ceiling at the same level if you hem the beams from below with panels.
You can also attach the slabs much higher than the bottom edge of the beam. In this option, the beam structure will not be covered with panels.
It can be interestingly played out in the interior in the future.
.
Wallpaper
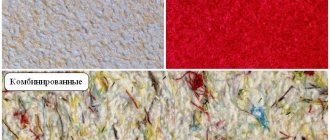
Everything here is not as simple as it might seem at first. If you are decorating osb boards inside rooms using wallpaper, you need to make sure that the wood does not show through them. To do this, you need to choose a version that will completely hide the pattern on the outside of the panel formed by glued shavings.
Gluing can be done with ordinary glue intended for ceiling coverings of this type. If you choose wallpaper for painting with a three-dimensional pattern or a pronounced relief, then after gluing and painting it it will be impossible to determine what material the ceiling is made of - such a ceiling will look no different from standard structures.
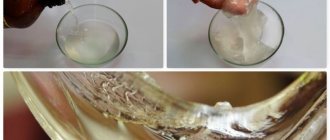
Another option for decorating such a surface is to use “liquid wallpaper”. In terms of their consistency, such compositions resemble putty mixtures and are applied in the same way. However, finishing with such materials on an osb board should be done only after priming has been done.
Comparison of different methods of finishing OSB ceiling surfaces
Cladding can be done in several ways
- Varnishing. This method allows you to obtain a pronounced coating, which makes the wood pattern brighter and more striking. The varnish is applied to a dry surface in several alternating layers.
Also, before applying varnish, tinting is used, for example with stain, then putty is applied. A layer of alkyd polyurethane varnish is applied on top. - Painting. When painting, any colored paint and varnish composition is applied to the surface. Before this procedure, be sure to degrease the surface in advance and impregnate it with a layer of primer.
- OSB puttying. If you want to remove the grain of the wood and get a perfectly flat surface, you will need puttying. Putties that can be used on the surface of these slabs are divided according to their composition into oil-adhesive, adhesive and nitro putties.
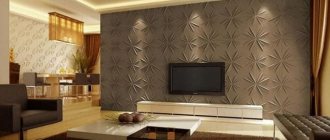
- Wallpapering. An expensive and slightly complicated finishing method. For pasting you need to select special fiberglass wallpaper. They do not need to be pre-treated to improve adhesion. If traditional roll wallpaper is used, then it must first be puttied.
- Decorative plastering. For work, use a flat trowel, which is used to apply a thick layer of plaster (but not more than 5 mm). You can do two or three layers of plaster. The dried surface is primed.
When working with acrylic mixtures, apply layers in one stroke to ensure a uniform color after drying. The frozen surface is treated with a textured roller. After drying, minor blemishes are sanded down. For the final coating, pearlescent varnish is used. When using flock plaster, a certain sequence of actions must be followed. First, the surface is treated with glue using a spatula, then the first layer is distributed with a spray gun so as to obtain the desired texture. After covering the entire ceiling, there is no need to level the surface. Finally, coat it with pearlescent varnish and prime it.
The ceiling must be sheathed with high-quality materials, such as OSB boards. If the installation technology is followed, the work can be done quickly and easily.
Using paint
In country houses, colored paint is usually used to decorate a rough OSB ceiling.
To prevent dark spots from forming on the finished surface during operation, you need to proceed as follows:
- Be sure to degrease the pre-cleaned surface. For these purposes, white spirit and similar liquids are used.
- The degreased surface is primed in 2–3 layers.
- The base is puttyed using a special wood compound. The optimal finishing thickness is 2-3 mm. If the ceiling area is large enough, it is recommended to pre-glue the reinforcing mesh. This will ensure a reliable finish and no cracking at the joints.
- Grinding. After drying, the putty layer is sanded with painting sandpaper No. 100-120.
- Next is whitewashing or painting. It is most convenient to whiten with a spray gun, and to paint with a wide fiber roller. Particularly popular are acrylic compositions, the use of which is not accompanied by an unpleasant odor.
In some cases, wood or polyurethane baguettes are used to finish the ceiling made of OSB boards. This makes the room more decorated and beautiful. To glue baguettes, it is recommended to use wood glue or special mastic.