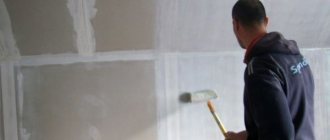
Facade putties are construction mixtures specially designed for creating optimally smooth surfaces and subsequent application of the final decorative finishing layer. The terms putty and putty combine one concept and are of German origin, so both designations may appear in different sources. The task of high-quality putty is not only to level the surface, but also to maximize the protection of external walls from the negative effects of external factors.
DIY façade putty
Classification by purpose
Fine-dispersed facade finishing materials, depending on their purpose, can be represented by compositions of different size fractions and consistencies:
- starting putty, better known as a base or leveling mixture;
- the finishing version of a fine-grained putty with a relatively liquid consistency;
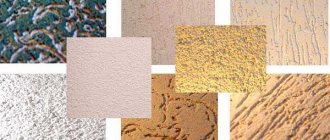
- a decorative version of putty that allows you to create textured decorative elements;
- wood putty used to level and protect wooden surfaces.
Depending on the intensity of exposure to external factors, not only the compositions, but also the technical characteristics of facade putty mixtures can vary. A high-quality putty must be vapor-permeable, moisture-resistant, frost-resistant and sufficiently elastic, which will allow the work to be completed by applying paint, decorative tiles, enamels, mosaics or other finishing materials.
Putties differ in composition and characteristics
The base and finishing mixture can be waterproof, frost-resistant and heat-resistant:
- mixtures with water-repellent qualities minimize the risk of condensation appearing on the surface, which can occur under the influence of rain and evaporation. This putty is distinguished by its simple and quick application, uniform distribution, and compatibility with other types of finishing materials;
- frost-resistant mixtures are used when sealing cracks or chips, and increase the resistance of the surface to low-temperature conditions;
- heat-resistant compounds combine excellent adhesive properties and have proven themselves when treating surfaces exposed to high temperatures.
Putties not only hide unevenness, but also perform protective functions for the facade
Using putty - photo
Application of putties
Before using any material, it is necessary to carry out preparatory work. In this case we need:
- A container for mixing dry mixture or a small container for ready-made mixture.
- Kneading tool.
- Protection tools: respirator and mask.
- Primer and tools for its application.
- Tools for application and putty (spatulas, grater, diamond mesh).
- Starting and finishing putty.
The above materials have been prepared, let’s move on to the stages of work.
- Primer of walls. This is a mandatory procedure for each layer of putty. It not only increases the strength of the coating, but also prevents the appearance of fungus and mold. Apply with a roller or brush and require complete drying.
- While the primer is drying you can mix the starting solution. For mixing, refer to the manufacturer's instructions. This is very important: improper kneading means poor quality and crumbling. You can mix the putty manually, or you can use a mixer and drill. When mixing, keep in mind that the unused volume will harden within an hour.
- The solution is ready, and you can apply it to the prepared base using spatulas of different sizes. At this stage it is necessary to make a flat surface and repair all irregularities. For corners you can use aluminum corners. Do not forget about the minimum layer of starting putty. If necessary, putty is applied in several layers. Irregularities can be smoothed out using sandpaper, graters or a diamond mesh. After hardening, we prime and proceed to preparing the topcoat.
- The finishing putty is applied in the same way as the starting putty with two spatulas, but with a difference in layer thickness. If you've done a good job with the starting finish, the finishing touch won't cost you much. After the finishing putty has dried, it is primed and proceeded to decorative design. Important: each layer of putty must dry completely.
Classification by composition
Each putty mixture is characterized by a composition strictly established by production technology, the main component of which allows us to distinguish several varieties that have certain advantages and disadvantages.
| View | Application | Advantages | Flaws |
Cement | Concrete surfaces with deep cracks. Starting, universal and finishing versions are available, differing in additives. | Resistance to temperature changes, affordable price, ease of work. | Shrinkage occurs and cracking of the layer may occur. |
| Acrylic | The liquid version levels and decorates the surface. Apply with a thickness of 0.1-0.3 cm onto a previously properly prepared and primed surface. | Good moisture-resistant material with a high level of strength and elasticity. | Not suitable for quickly repairing deep cracks; grinding requires the use of a respirator. |
Latex | The paste-like composition has improved moisture resistance and good frost resistance. | Ease of use, high level of plasticity and good protective qualities, durability. | Not very affordable price. |
| Silicate | A mineral version of a façade mixture based on liquid glass, produced in a ready-to-use form. Suitable for working on surfaces consisting of shell rock and cellular concrete. | High vapor permeability, serves as protection against moisture and dust, and has neutral electrostatic characteristics. | A minimal violation of the application technology can cause cracks to appear. |
Oil-adhesive | A high level of density of the composition may affect the uniformity of the applied layer, so certain skills in finishing work are required. | A budget option with high protective properties. | Significant mass and high density, inconvenient application on vertical surfaces. |
| Plaster | The presence of polystyrene in the composition indicates frost resistance, and latex additives improve water-repellent properties. The mixture can be presented in powder and liquid versions. | Durable and plastic material with an affordable price and excellent technical characteristics. | There are practically no downsides when using high-quality material from official manufacturers. |
| Silicone | Elastic material with high vapor transmission and strength. Apply in a thin and uniform layer. | Plastic and vapor-permeable composition in a variety of colors. | The cost is too high. |
Ceresit CT 225. Finishing putty for external and internal work
The best formulations from reliable manufacturers
The following is a brief description of the products offered by the major putty manufacturers.
Putty "Prospectors"
This brand (manufactured by the domestic enterprise of the same name) is a budget brand, and in terms of its consumer characteristics it is certainly worthy. White cement acts as a binding element. The domestic product is easy to use; you can knead and apply it to the wall quickly and effortlessly. Also, the “Starateli” brand product adheres well to the surface. To finish one meter of wall surface, on average, one kilogram of this product will be required, provided that the resulting layer is one millimeter thick.
The material is available in craft bags weighing five and twenty kilograms. This is a very inexpensive product, its cost in stores ranges from 400 to 450 rubles per kilo.
Putty "Knauf"
The price of this product is significantly higher than that of the “Starateli” brand putty. At the same time, it also significantly surpasses the previous product in strength. Another plus of Knauf is its very significant plasticity. This product is applied effortlessly to the surface.
After the putty layer dries, a dense layer forms on the wall, and this coating does not shrink in the future. Also, this brand does not crumble or crack. In addition, Knauf is excellent for grinding.
The range of this manufacturer includes cement and polymer putty. The cost of 25 kilos is approximately five thousand rubles.
Ceresit
The basis for the brand's products is gypsum. It is believed that their application to the wall surface should be done when it is dry and warm. Ceresit putty dries in a very short period of time. This is a significant advantage, but there is a downside. As a result, it is recommended to dilute the product little by little and cover the walls faster. Among other advantages of Ceresit, it should be mentioned that the layer on the wall is strong, the coating does not suffer in frosty weather
Scanmix
The manufacturer produces cement-based finishing products. The putty tolerates moisture well, and nothing unpleasant will happen to it in low temperature conditions. Most often, products belonging to this brand are used for starting wall coverings.
"Vetonit"
The brand is comparable in cost to “Prospectors”; it is a very budget option. Among its advantages is the ability to get rid of potholes in the walls, even if their depth is quite significant. Of course, “Vetonit” will fit equally well on any surface. This material dries relatively quickly, moisture does not cause much damage to it.
Scanmix
Scanmix is another brand; this putty is available in both starting and finishing versions. It has excellent moisture resistance, and frosty weather will not cause damage to it. This composition hardens in just 24 hours, and can be used to repair very significant damage to the wall surface.
Volma Standard
This façade putty is produced at the Volgograd Gypsum Plant, hence its name. There are two brands of this and Sokol on the market. These brands are also designed for budget-conscious users, and these inexpensive compounds harden in a short period of time and subsequently do not shrink. The price for a 25 kilo package is 400 rubles.
Weber vetonit LR+
This starting material can be applied in a very thick layer of up to five millimeters. Moreover, after preparation, the product retains its quality for two days. But accordingly, it does not dry too quickly on the wall; this process will take a whole day. In addition, Weber vetonit LR+ has a large grain size and must be prepared correctly to reap all its benefits.
Weber vetonit JS
This material is intended for finishing walls. It can be used with equal success on both walls and ceilings. The finished composition is suitable for use for a long time. The surface is perfectly smooth and even, the product does not crack over time. At the same time, it is worth keeping in mind that this composition is afraid of high humidity. Due to the lack of water resistance, it makes sense to use it in a room with a dry microclimate, preferably one that is well heated.
PROFORM
This is a relatively expensive putty; it is purchased ready-made; it is in liquid form in a plastic bucket. This material is easy to apply to the surface to be treated, as it adheres well to it. After drying, the coating becomes very durable and will remain unchanged for a long time. The cost of one bucket of composition, which weighs 28 kilos, is approximately 1,400 rubles.
Making your own putty
If there is a need to save money on purchasing factory mixtures, it makes sense to prepare the putty yourself:
- To level concrete, relatively flat surfaces, it is recommended to prepare a gypsum-chalk mixture by mixing three parts chalk and part gypsum. With uniform mixing, the bulk ingredients should be gradually poured into a 5% solution based on wood glue. A homemade solution, mixed until smooth, hardens quickly and should be used immediately after preparation;
Gypsum-chalk putty, mixing
- To level a wooden facade, it is advisable to use an oil mixture, in the production of which a couple of kilograms of drying oil and four kilograms of chalk are mixed, with the addition of a quarter kilogram of drier. The mixture brought to a boil must be cooled to room temperature.
What are driers
Drying oil
Construction chalk, calcium carbonate
It should be remembered that the consumption of self-prepared putty will be higher than when applying ready-made factory-produced mixtures.
Composition and technical characteristics
Polymer putty is made on the basis of polymers and plasticizers. Its components are film-forming substances, backfillers, chalk and talc. Good adhesion of the mixture is ensured by specific additives, and the product owes its color palette to various coloring pigments.
Consumption per 1 m2
In order to calculate the consumption of polymer putty, it is necessary to measure the perimeter of the room and the height of the walls.
The calculation of the product per 1 m2 is made according to the formula:
- the rate of putty consumption per 1 square meter is multiplied by the thickness of the defects of the plane;
- add up the length of all the walls in the room;
- the length of the wall above the doorway is multiplied by the height in the same area, and the sum of the height of the walls is added to this indicator;
- the result of the first calculation is added to the sum of the lengths of all walls, this result is multiplied by the resulting number of the third action.
Preparation of working tools
To carry out puttying work, you will need to purchase some tools to make application easier and get the most even, smooth surface:
- a fairly wide brush with soft bristles or a roller, with which the façade surface is primed;
Maklovitz brush
Rollers for priming walls
- a construction mixer or electric drill with an attachment for high-quality mixing of the putty mixture;
Construction mixer
- Several spatulas of different sizes allow you to process large areas of the facade, as well as corners or hard-to-reach areas.
Spatulas
Construction mixer price
Construction mixer
If paint is to be used as the final finishing of the facade, then the surface must be absolutely flat and smooth, so a well-dried layer of putty will need to be rubbed with a special fine-grained mesh.
Mesh for grouting putty
Procedure for applying polymer putty
- As with any other finishing material of a similar format, application is only possible on a previously prepared surface. Dirt, grease, mildew and everything else must be removed;
- The surface is treated with a primer. Mineral will do;
- We dilute the putty according to the instructions on the package. Ready-to-use options are often sold, distributed in sealed containers;
- Apply a layer of three millimeters using a spatula. Learn how to properly work with this tool below;
- In the case of the finishing layer, a few hours after application, we treat the surface with sanding paper or a construction float to give a smooth surface with high visual qualities. The movements should be circular.
Starting layer application technology
Starting mixtures are coarser and coarser. They are used for rough finishing of facades and have good adhesion to concrete, lime, brick and other substrates. Allows you to fill seams, deep cracks and other large defects.
Starting putty - what is it for and what is it good for
Depending on the initial state of the facade, the working solution can be applied in a layer of several millimeters or centimeters. It is recommended to apply the starting solution thinly, but in several tiers. In this case, it is possible to obtain a higher quality finish.
Step 1. Cement and gypsum putty compositions are diluted with clean water in the proportion recommended by the manufacturer. Polymer compositions are ready for use and only need to be mixed before application.
Putty solution
Step 2. We take a small amount of working solution onto a construction spatula, and then apply it to the surface with a sweeping and fairly wide movement. During the application process, the spatula must be pressed fairly tightly to the surface at a stable angle of inclination.
Large and small spatula
The photo shows how to correctly put putty on a spatula
Applying putty
Wall putty process
Step 3. Immediately smear all sagging and uneven areas using an empty spatula, and carefully remove excess mixture.
Wall putty
Step 4. After the solution has hardened, we perform thorough grinding, which allows us to get rid of minor defects and makes the surface even and as smooth as possible.
Grinding
Facades with strong unevenness need to be leveled in several steps.
Quickly hardening self-made compositions or solutions diluted from dry ready-made mixtures cannot be stored. They are used as quickly as possible.
Finishing work
It is recommended to begin finishing work on the facade of the building after the foundation has settled. On average, this process lasts about a year. Wall finishing requires effort and diligence; you should be prepared for the fact that for satisfactory quality you will need at least 2 layers of base mortar.
Even the most experienced and qualified craftsman will not be able to get by with just 1 layer. The optimal air temperature for performing external finishing work is 5-20°C, the maximum permissible relative air humidity is 80%.
Operations are performed in the following sequence:
- The wall surface is cleaned of dust, dirt, remnants of old finishing and oil stains. If there are areas with cracked plaster coating, this must also be removed.
- A deep penetration primer is applied to the cleaned wall; it must be completely dry before the next operation begins.
- On the surface to be treated, individual defects are repaired with starting putty: depressions, cracks, dents. After this, the material is allowed to dry.
- A portion of putty is applied to a section of the wall and then leveled. The best tools to use are a construction float and 2 metal spatulas. It is important to note that facade putty must be used in its pure form; it cannot be mixed with paint, glue or other dry mixtures.
- After drying, the first layer of putty is primed in order to improve the adhesion of subsequent layers to it.
- The starting putty is applied in layers until the surface of the facade is completely leveled. The maximum thickness of individual layers is 4 mm. Each subsequent layer is applied only after the previous one has dried. The average consumption of starting putty per 1 m2 is 11-15 liters.
- At the final stage, a finishing layer is laid on top of the base putty and leveled, which should be sanded after drying. The approximate consumption of finishing putty per 1 m2 is 4 liters.
Putty should not be applied to heated surfaces. During finishing work, it should not be exposed to direct sunlight, rain or splashes.
In order to protect the freshly applied solution from atmospheric moisture, the finished façade surface is covered with plastic film until completely dry.
Features of finishing putty
Main features of applying putty to the wall
The composition of the finishing putty mixtures is represented by fine-grained fractions, due to which the processed structure acquires a smooth and durable structure. Coarse-grained putties based on quartz sand or marble chips can also be used, designed to create a relief and highly decorative texture of the facade.
In recent years, the most popular way to decorate the façade of buildings is to use putty, which is subsequently pigmented with high-quality coloring compounds. Quite often this method is combined with facing work using natural or artificial materials.
Leveling the finishing putty
Finishing putty will improve the quality of subsequent decorative finishing.
Facade putty can be applied not only manually, but also mechanically, using special equipment. The disadvantage of mechanical application is the lack of the most even application.
Features of working with facade putty
When using facade putty mortar, you need to take into account the following features of working with it:
- For external work, it is necessary to use a mixture prepared in accordance with all manufacturer’s recommendations. If you do not follow the proportions when preparing the working solution, you will end up with a low-quality putty that will quickly lose its properties.
- Before applying the solution, you must carefully inspect the surface of the walls for defects. There should be no peeling plaster or sprinkled brick on them, on which the mortar will not last long.
- Putty should be applied to the façade on sunny days. In this case, the air temperature should be at the level of 10-20 degrees Celsius. Under such conditions, it is possible to achieve more reliable adhesion of the solution to the wall surface. In cold weather, it is not recommended to putty the facade.
Main manufacturers
Putties on the domestic construction market can be presented by both foreign and Russian manufacturers. Of particular interest to consumers are mid-price products with high product characteristics.
| Putty | Type | Applied layer | Drying time | Seasonality of work |
| Dry mixture “Plitonit-KF” | Cement | 5 mm | 72 hours | At +5-30°С |
Dry mix “Knauf Multi-Finish” | Cement | 1-5 mm | 24-72 hours | At +10-20°С |
"Ceresit CT-225" | Cement | 1-3 mm | 24 hours | At +5-30°С |
Dry mix “Glims Finish-R” | Cement-polymer | 1-10 mm | 24 hours | At +5°C and above |
Dry mix “Bolars Finish-Super” | Polymer | 0.2-2.0 mm | 2 hours | At +5-30°С |
Pasta "Bolars Empire-facade" | Polymer | 1-5 mm | 24 hours | At +5-35°C |
Pasta “Profi” | Latex | 1-5 mm | 4 hours | At +5°C and above |
Paste “Holzer Festspachtel Elastisch” | Latex | 0.2-3.0 mm | 10 hours | At +10-30°С |
German cement-based Knauf exterior putties are characterized by high levels of frost resistance and moisture resistance, so they will be the best option for finishing the exterior walls of newly constructed buildings and restoring old façade surfaces.
Knauf putties
Finnish acrylic-based putty compositions “Vetonit” are ideal for working with any concrete or wooden bases subject to high humidity levels.
Photo of Vetonit LR putty
Domestic mixtures “Ceresit”, “Starateli” and “Bolars” are distinguished not only by their affordable price, but also by their good quality, and also allow you to obtain a durable coating.
Photo of finishing plaster Prospectors
Prices for popular types of putty
Putties
Types of putty based on the base
Since all types of facade putties are assigned the functions of a protective barrier, they must have a fairly reliable base. For this purpose, cement or polymer components are used. Let's take a closer look at both options:
Cement-based putties
Facade cement putty is characterized by high resistance to moisture and low temperatures.
In addition, it has good strength, so it almost never cracks when dried. For the production of cement-based starting putty mixtures, quartz sand, crushed to 0.5-0.6 mm, is used. The composition of the finishing facade putty may include the following components:
- limestone flour with granule sizes up to 0.2 mm;
- ground quartz sand (marshallite);
- marble dust (microcalcite).
To improve the technical characteristics of this finishing material, its composition is enriched with chemical additives. Cement putty for facade surfaces can have a beige, yellowish or gray tint.
White cement putty is currently not produced because expensive bleaches must be used for its production.
Before purchasing cement-based putty, craftsmen recommend paying attention to the following aspects:
- brand of cement;
- compressive strength;
- level of adhesion with the material that will be finished.
Polymer-based putties
Polymer binders serve as the basis for a whole range of façade putties. All of them can be conditionally divided into two large groups:
- Acrylic putties. All brands of acrylic putties are made on the basis of acrylate-siloxane mixtures. They are excellent for both basic and finishing finishing of external surfaces of buildings and structures. Acrylic-based mixtures do not need to be diluted with water; they are easy to apply and easy to process. After laying, the material is leveled to a thin layer approximately 2 mm thick.
- Latex putties. This type of polymer putty is not used for finishing facades.
All putties for exterior use that have a polymer base have a number of advantages:
- strength;
- durability;
- plastic;
- fast setting;
- no shrinkage;
- no smell.
The disadvantage of such putties can be considered incompatibility with some types of building materials. Most often, polymer putties are used for finishing surfaces made of cement, concrete, gypsum or plaster mortar.
There are also special mixtures used, for example, for finishing polyurethane.
