One of the mandatory stages of bathroom renovation is leveling the surfaces. This stage of work must be completed before painting the ceilings and walls, since all the roughness and unevenness will be very noticeable on the decorative layer, worsening the design of the room.
For this work, it is necessary to choose a material that is not afraid of moisture. Using a special putty, you can get the most even surface possible, while improving its water-repellent qualities and preventing the appearance of fungus. Thanks to the special composition, the moisture-resistant putty for the bathroom only becomes stronger when exposed to moisture.
What is wall putty in the bathroom?
Do-it-yourself bathroom putty
We begin bathroom renovations with a careful inspection, assessing the scope of work. We pay special attention to treatment with antifungal agents. In order for the walls and ceiling in the bathroom to be smooth, it is necessary to complete several main stages of work:
- Leveling difficult areas (we lay the material in the area of depressions, irregularities, cracks, and then level it with a spatula)
- Priming and drying the surface (after treating the surface with a primer, you need to dry everything). Moreover, the best option for drying: naturally, without the use of heating devices.
- Applying the finishing layer (apply a layer of putty, leveling the walls and ceilings)
- Smooth the surface until it is as smooth as possible and dry again.
After the putty on the walls in the bathroom has dried, you can apply a decorative layer: lay tiles, paint, etc.
Puttying walls in the bathroom (video)
How to apply the mixture to the walls and ceiling?
Tool
To work you will need to have the following tools:
- Containers for mixing the solution and for washing the mixer. You can take a separate bucket of clean water to wipe away any mistakes or dust that forms during sanding.
- Mixer, drill for stirring the composition . It is difficult to do this manually, since only by mechanized means can it be mixed evenly.
- Spatulas of different sizes. One is small, for directly applying the solution to the working tool. The second is large, for distributing the putty over the surface.
- Level or rule. They level the plane and apply the solution evenly.
It is necessary to protect the surface of existing objects in the bathroom from dust. To do this, cover the sink and other items with plastic film.
- Gloves are worn to protect hands.
- Protective glasses are put on the eyes.
- A respirator is used for the respiratory tract.
Preparation of the solution
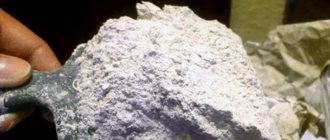
Components of a simple putty mixture:
- sifted gypsum;
- chalk;
- laundry soap;
- varnish;
- drying oil;
- glue (animal or wood glue).
- First, thoroughly mix the plaster with chalk.
- The resulting powder is poured into a container with an adhesive solution and kneaded again until a homogeneous base with good plasticity is obtained.
- All other ingredients are added in dissolved or crushed form.
If you buy a ready-made dry mixture in a store, then it:
- Pour into a clean container, add the amount of water at room temperature indicated in the instructions.
- Shake the mixture well with a mixer. The amount of diluted solution should be such that it is used up in approximately 40 minutes of work.
- The resulting mass is left to infuse for 10 minutes and mixed thoroughly again. The consistency should be similar to thick sour cream.
Advice
Any putty mixture hardens quickly if you prepare a lot of it. It is recommended to knead a small amount to avoid hardening.
The unused ready-made polymer-based solution can be filled with water for use next time, carefully draining the water and without stirring.
Layers and Application
When applying to the wall, you need to have two spatulas of different sizes on hand:
- Narrow. It seals cracks and fills existing sinks and cracks. A handy little tool for working with joints between walls.
- Big. A wide spatula is suitable for applying putty around the perimeter of the working surface. They are used to level and form the finishing base.
- First, a leveling layer is applied, which is carefully smoothed with a wide spatula. At this time, they constantly check the evenness of the walls using a rule, plumb line or building level. After the initial treatment, the bathtub is left for a day until completely dry.
- The next stage is to identify defects in the dried space: smudges, roughness, unevenness. Defects are corrected with putty. It is convenient to do this with a medium-sized spatula. Then the wall is rubbed down, waiting a couple of hours for the material to set.
- After drying, sanding is carried out with sandpaper. It is convenient to secure the tool on a flat block. At this stage, roughness is finally removed and irregularities are eliminated.
Types of putties
For the bathroom they should be:
- waterproof;
- protect walls from dampness and fungus;
- with the lowest porosity values;
- resistant to sudden temperature changes;
- It wets the surface well, which makes it possible to apply a very thin layer of material.
Manufacturers offer two groups of putty:
- cement based
- polymer compositions (acrylic, latex)
There is also putty for enamel bathtubs and sinks, but its use has slightly different purposes, namely the restoration of the coatings of washing containers. With careful preparation and execution, this allows you to reliably protect products from further destruction. We use epoxy bathroom putty here. The subtleties of carrying out such work will be discussed by us in a separate article.
Types of polymer compositions
Modern industry has presented a whole range of polymer-based mixtures. Among them are:
- A very plastic, acrylic-based composition that gives perfect smoothness. Hypoallergenic, odorless;
- Creates a mirror layer, universal, high-quality composition based on latex.
We recommend: Tips for choosing an iron
Modern mixtures have a number of advantages. Not afraid of mold, mildew, moisture. This substance is not afraid of high temperatures, changes, or steam. Lay on the surface in a perfectly even layer. The paint can be applied in any shade. They are environmentally friendly, created on the basis of natural ingredients using the most modern technologies. Of course, the cost of the substance will be higher than other options. Considering the minimal cost of carrying out the work, it is not worth saving on the purchase. In addition, in the absence of proper experience, working with such a substance will be much easier.
Requirements for putty
How to putty a bathroom yourself
The main requirements that putty for a bathroom must meet:
- Increased water resistance. The mixture must maintain its characteristics over a long period of time, regardless of exposure to moisture. This requirement remains unchanged even if the wall leveled with putty is covered with a facing material (tiles, lining, moisture-resistant wallpaper, etc.).
- Resistant to deformation over a wide temperature range. Otherwise, if the bathroom is tiled with ceramic tiles laid on putty that “floats” with temperature changes, then the tiles will simply begin to fall off after several showers.
- In addition to being water-resistant, bathroom putty should have a long service life. And if all stages of finishing work are carried out correctly, then there should be no complaints for about two decades.
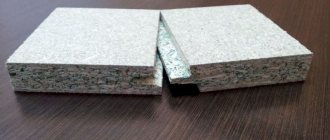
Why putty gypsum boards?
Drywall does not form a monolithic surface - mobility is maintained at the joints of sheets, at external and internal corners. Products with factory edges have chamfers that create indentations. If the wallpaper is stretched over the joint, it may tear, creases and folds may form on it as a result of thermal deformations of the base.
What primers are needed? Depends on the stage and the type of finishing material:
Calculation of the required amount of materials
Each stage of work on puttying bathroom walls is performed with a different type of finishing material. Starting, or in other words, “rough” putty is used at the very beginning. Finishing, or “finishing” is the final one and is intended to create a perfectly flat surface on which you can glue wallpaper or tiles. How to correctly calculate the amount of putty for the ceiling and walls in the bathroom for painting or other type of finishing?
Leveling the putty
Unfortunately, it will not be possible to calculate material consumption with an accuracy of 1 kg. This is due to the fact that each type of surface has its own characteristics, and the curvature of the walls is always individual. For standard flat walls, normal putty consumption is 0.8-0.9 kg/m2. And unevenness, cracks and surface defects can easily “raise” these figures to 8-9 kg/m2. Feel the difference!
When making calculations, the main focus is always on the information provided by the manufacturer on the packaging of the material. But in order to avoid getting into a situation where literally half a kilogram of the mixture is not enough, it is best to use this method. We multiply the consumption data given on the packaging by the area of the surface to be treated and add another 10% to the result obtained. Please note that the consumption figures on the packaging are shown when applying a layer 1 mm thick. If during the work the putty layer becomes thicker, proportionally more material will be lost.
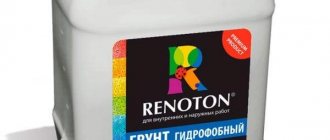
Choosing a manufacturer
Be sure to pay attention to the manufacturer when purchasing. It is better to opt for well-known brands. The most popular are Rotband and Vetonit. Such compositions are offered for sale in special packages, bags, and buckets. The container is designed for a certain area, which is indicated on the packages. Manufacturers clearly prescribe storage rules and preparation proportions. The material for the final layer has small volumes - up to 1.5 kg. A smaller quantity is required, which is why manufacturers offer such a container weight.
Popular compositions and their features:
- Vetonit VH: it is suitable for bathrooms, the mixture is cement. The layer thickness is up to 2mm. The shelf life of the prepared mass is 3 hours. The surface dries in 1-2 days;
- Vetonit KR+: polymer composition. The layer thickness reaches 5 mm. You can work throughout the day. It also dries in 24 hours;
- Vetonit KR: adhesive (organic material). The layer thickness is 1-3 mm. It is recommended to use the prepared mixture 24 hours in advance; the surface dries within 24 hours.
Leveling the walls with putty with your own hands
After the starting and finishing layers have been applied, dry the surface thoroughly. Drying requirements:
- Stable temperature conditions.
- No drafts.
Plastered walls should be sanded no later than after 3-4 days. Otherwise, the surface will harden so much that you won’t be able to handle it with any grinding machine. The process of leveling the walls itself, although labor-intensive, is not difficult.
During surface treatment, a large amount of dust is generated. Be sure to use a protective cap on your hair, a respirator and special construction glasses when working.
In conclusion, we note that moisture-resistant putty is used in the same way as other similar materials. A distinctive feature is the components that allow it to be used under aggressive influences of humidity.
What tools are needed?
Before starting work, it is better to prepare all the necessary tools and materials. Then the process will go on without stopping. You can work without being distracted by shopping and searching for missing items. The following materials will be required:
- putty: basic, finishing, final;
- spatula: narrow (width – 80-100 mm), wide (width – 30-40 cm), angled;
- sandpaper (you can buy a special sanding mesh);
- wall mesh fastening;
- primer mixture (universal);
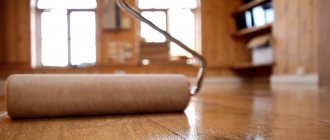
- roller (for working with primer).
Tools for putty work
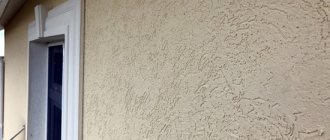
Photo gallery of finished works
?????????????????????????????????????????????