One of the popular finishing materials for exterior work is façade moisture-resistant plaster. This is an excellent and practical way to decorate, insulate a facade with a seamless coating, and decorate it with a pattern you like. Expert advice on selection and installation will help you complete the task quickly and efficiently.
Types of bathroom plasters and their characteristics
Modern manufacturers offer a variety of building mixtures that differ in composition, properties, and application. Most of them need to be diluted with water, although some, more expensive, are sold ready-made. Depending on the “relationship” with moisture, all types of plaster can be grouped as follows:
- Moisture-resistant plasters. They tolerate high humidity and short-term direct contact with water very well.
- Hydrophobic plasters. A durable film with a water-repellent effect is formed on the surface.
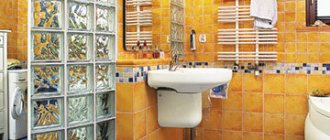
Cement plaster for bathroom
Cement plasters for bathrooms are traditional. Simple mortars are made on a cement base, the filler of which is sand. As a rule, this is a leveling mixture. The finishing touches for her have always been oil paints and tiles.
Ready-made SS (dry mixes) are produced by many companies. It is also possible to compose and prepare solutions yourself.
Less commonly, cement-lime and cement-polymer mixtures are used for the base.
Disadvantages of cement plaster
Applying cement plaster
With all the advantages of using cement plaster specifically for the bathroom, it also has a number of disadvantages:
- Long drying time. Cement-based plaster dries and becomes strong enough for further work only four weeks after its application. Ready-made dry mixtures reduce the period to one week, but here everything depends on the thickness of the layer and composition. As a rule, the instructions on the packaging indicate approximate deadlines.
- Cracks are the main drawback of cement mixtures for plaster. When drying, cement often shrinks, especially if there are large fluctuations in temperature and humidity in the room, which can cause cracks. Also, a layer of plaster can crack due to uneven drying of different areas or attempts to speed up the process using heating devices.
Important! Manufacturers of ready-made dry mixes successfully avoid this problem with the help of plasticizers, but when working with such plaster, you should remember that it must dry in a natural environment. Forced heating of the surface to speed up drying is unacceptable.
Can I use gypsum plaster in the bathroom?
When planning a renovation or intending to start decorating a new home, beginners ask themselves: is it possible to plaster the walls and ceiling in the bathroom with a gypsum mixture? Gypsum compositions are very easy to apply, durable, easy to install and tenacious. The catch is that gypsum is a substance that actively absorbs water from the environment.
Saw blade: what you need to know
Once saturated with water, gypsum loses strength. Therefore, while gypsum-based compositions were widely used for interior decoration, they were not used for bathrooms. In the Technical Recommendations for Moscow, only cements are indicated as plaster binders for bathrooms.
This situation has changed with the development of building materials, and gypsum plaster in the bathroom is now more common.
Therefore, to the question “can I use gypsum plaster?” – the answer is ambiguous. For leveling (followed by a hydrophobic coating), gypsum with modifying additives is suitable. For heavy tiled cladding – no.
If you decide to use a gypsum composition, then it is better to purchase gypsum plaster for the bathroom from leading brands, for example, Rotband from Knauf or Unis Teplon.
Silicone plasters
Such mixtures are made on the basis of silicone resins, which literally repel water and are not afraid of fungus and mold. Silicone mixtures are applied without much difficulty, even a beginner can handle them. They do not accumulate dirt, do not deteriorate due to temperature changes or exposure to ultraviolet radiation, are extremely durable and can last for several decades.
Ready-made silicone mixtures can be tinted, so they often play the role of decorative plasters. The only disadvantage is the high price of the compounds and their inability to level large defects and deep cracks. Typically, silicone plasters are used as a finishing coating.
Facade plasters
In rooms with high humidity, facade (street) plasters can be used to level the walls. Such mixtures have many advantages: they do not deteriorate from temperature changes or contact with moisture, since they can withstand even precipitation and sunlight. Most facade mixtures are strong and durable.
The only downside is the roughness of such materials, which, for the most part, are represented by coarsely ground components. They are not suitable as finishing finishing because they do not fit well into the apartment interior. It is also important to clarify the composition of the plaster: some façade mixtures contain additives that are not 100% environmentally safe.
Silicate decorative plaster
Silicate plaster for the bathroom
The basis of this type of wall decoration is potassium glass, also called liquid glass. Walls covered with silicate plaster perfectly repel water and are resistant to the spread of fungus and mold. Moreover, this finish has high vapor permeability.
The choice of colors is unlimited: moisture-resistant decorative plaster for the bathroom based on silicate has more than 250 different shades. Among the disadvantages of this plaster, one can note the rather high price.
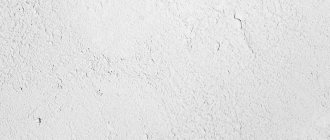
Mineral
Mineral plaster consists of cement and lime. It also sometimes contains marble particles to obtain texture. The depth of the relief depends on the size of the marble pieces. Thanks to its water-resistant components, this plaster is suitable for cladding walls in the bathroom.
Loft-style bathroom: practical advice on choosing basic style elements and selecting design elements, choosing colors and furniture.
In addition, mineral plaster has the quality of vapor permeability. This property of the material creates additional comfort. Finally, this material is durable and resistant to impacts and other mechanical influences.
Mineral plaster is the least elastic; it also does not withstand constant vibrations.
Acrylic
Acrylic plaster is a mixture whose main component is acrylic resin. Ash elements, ground granite, glass or marble are used as filler.
This plaster resists the passage of moisture, but it is worth considering that it is also vapor-tight, which is why acrylic plaster is more suitable for rooms with good ventilation. Its service life is up to 50 years.
What is the difference between moisture-resistant plastering?
In conditions of high humidity in interior spaces, bathrooms, kitchens, special mixtures with additional additives are used to protect against the appearance of fungus and dampness on external walls. A distinctive feature of moisture-resistant plaster for exterior use is that it protects the surface from the penetration of excessive amounts of water while simultaneously allowing vapor permeability, which allows the walls to “breathe.” This property is achieved through the use of hydrophobic components. The polymer mixture prevents the appearance and development of microorganisms on any treated surface.
The main characteristics of the material include:
- strength;
- durability;
- additional heat and waterproofing;
- aesthetics;
- large selection of composition and colors.
There are leveling and decorative mixtures, in dry form and ready-to-apply solution. The advantage of the material is that it is easily applied to any surface: brick, aerated concrete, wood.
Recommendations for choosing formulations
Moisture-resistant plaster for the bathroom should be chosen taking into account what the finishing coating will be. Quite often, in rooms with high humidity, walls are lined with ceramic tiles. In this case, the first priority is the requirement for the strength of the material under constant exposure to moisture and ideal alignment of the walls. The color of the plaster and the appearance of minor cracks do not play a significant role, since it is masked by the tiles. Therefore, the use of cement-polymer and cement mixtures is justified.
A different approach is required when preparing walls for painting. With the help of paint it will not be possible to hide even the smallest defects; rather, they will appear more pronounced. Even the slightest cracking is unacceptable. Gypsum plaster fully meets these requirements.
In recent years, preference has increasingly been given to moisture-resistant plaster for the bathroom, which does not require additional coating. This issue can be solved with the help of decorative plaster, which is also produced in a waterproof version. The decorative effect can be achieved in different ways: volumetric texture, different colors, imitation of natural materials.
In bathrooms, it is not recommended to apply a layer with deep grooves (for example, the so-called bark beetle plaster), since microorganisms can multiply in them. Of the ready-made compositions, moisture-resistant plaster for the Knauf bathroom has proven itself to be excellent (their price ranges from 350 to 730 rubles per 25 kg).
The combination of areas with decorative plaster and tiled cladding looks very original. When creating an unusual interior, Venetian plaster is often used today. To increase the reliability of such coatings, it is recommended to cover them with a protective layer. The most common are wax compositions, for example, “Optimist”.
Experts recommend that in rooms with high humidity, you should play it safe and use additional protection against the effects of moisture. This is achieved by applying a very thin primer layer of Aquastop.
It is necessary to carefully select moisture-resistant decorative plaster for the bathroom. Price is sometimes decisive, but you should not save on these compounds, since inexpensive mixtures from unknown manufacturers do not always guarantee high quality.
Bathroom tile design: the best combinations and application features for a stylish interior. Design of bathroom tiles.
Which plaster is better to choose
Many mixtures are popular on the market for finishing and leveling walls in damp rooms and applying an additional layer.
Positive reviews, for example, have the following composition:
- Ceresit CR 65. Good resistance to salt and alkaline ingress from wall materials. It has vapor permeability and moisture resistance.
- Dufa Kratzputz aussen. This is an original decorative plaster with an “Orange Peel” texture. Consists of polymers. It is durable and vapor permeable. It is convenient to work with the composition.
- Magma GidroPlaster. Suitable for any substrate, has special plasticity and water resistance. The composition includes modifying components.
Moisture-resistant plaster is recommended for bathrooms and rooms exposed to high humidity. If you ignore applying the composition to the walls, repairs will be more expensive.
When do walls need to be plastered?
Master finishers know for sure that the base for the tiles should be level, without significant differences. Whereas to non-specialists any surface without noticeable defects may seem like this. You must understand that even if the walls are plastered or made of outwardly smooth concrete slabs, this does not mean that they are ready for cladding.
Mass construction with machine plastering does not involve leveling the surface. Beacons are not used here, which means that height differences can reach several tens of millimeters. This is a lot and will be very noticeable, for example, in corners where the cladding simply “does not fit” or at the junction of the edge of the bathtub and the wall.
Concrete slabs are rarely aligned strictly vertically. Often they are “filled up” by at least 10-20 mm. According to building regulations, this is a completely acceptable error, but for finishers it is too much. Thus, it turns out that alignment is necessary. To verify this, it is enough to take measurements by attaching a long rule to the base. If the differences are more than 2-3 mm per linear meter, you will have to level the surface before gluing tiles onto it.
Instagram shtukaturkarostov ru Machine plastering does not require perfect leveling, so the wall needs to be prepared for the tiles
Sometimes you can hear that unevenness in the base can be leveled out using tile adhesive. Indeed, by adjusting the thickness of the solution layer, you can level the base. But this should only be done for very minor differences. Firstly, leveling with glue increases its consumption, and this is not cheap. Secondly, the cladding laid on a thick layer of tile mixture will “float” and will not hold firmly enough. There is a high probability that it will fall off quickly.
Why do you need to plaster?
There are two main reasons for this - protection and surface leveling. A layer of plaster protects the base material from minor mechanical damage and dampness. Alignment is necessary for the following reasons:
- Preparation for decorative finishing (tiles, painting) – the finishing is easier to attach, more securely fixed, and looks better on the prepared wall;
- Convenience of preparation for other work - on a flat wall it is easier to make markings for laying pipes and wiring;
- Some materials (foam block, aerated concrete) absorb water from adhesives and paints. It is impossible to fix the finish on them (the composition must be specially selected).
The plaster under the tiles must be perfectly smooth, otherwise all mistakes will be clearly visible, moisture will get into the seams, and the tile itself may come off.
Important! An alternative could be plastic panels. They look no worse, handle moisture, are easy to clean and cost much less than tiles. Disadvantages include flammability and instability to mechanical stress.
Is it possible to lay tiles on plaster?
To properly level the surface, it is best to plaster it using a suitable composition. But there is no need to apply putty, since the minor differences that it removes are leveled out by the tile adhesive. In some cases, the walls have already been leveled and, despite the fact that the plaster is old, the result is preserved. Doubts may arise whether such a base is worth covering.
First of all, you should carefully inspect the coating and assess its condition. It is best to take a hammer and methodically tap the wall. A ringing sound will indicate the normal state of the base, a dull sound indicates the presence of voids. In such areas, the plaster is removed. They also remove it where it crumbles and cracks. All defects are carefully sealed with a suitable solution.
Criteria for choosing tiles
It is somewhat more difficult if the plastered wall is painted. You should not lay the tiles on the paint, the adhesion will be very poor. It is optimal to remove the paint layer, but this is a very labor-intensive process. You can do the following: apply notches, which will significantly improve adhesion. They are made at a short distance from one another. They do the same with an unpainted smooth base if they want the cladding to last for a long time.
Instagram andrei.kodesnikov An insufficiently level wall must be prepared for tiles. All defects are carefully sealed with a suitable solution
Control inspection before applying tiles
Before starting finishing work, you need to once again check the geometric dimensions of the room and make sure that the walls are really vertical and rectangular. This is necessary so that the tiles fit correctly in the corners of the walls, as well as to avoid gaps between the bathtub and the walls.
Checking the geometric dimensions of the room
It is convenient to check the quality of plaster using a rule. A perfectly smooth surface is not needed here; the deviation from the plane should not exceed 0.5 mm. Remove any existing solution build-up. If depressions larger than 0.5 mm are found, it is better to level them, otherwise count on increased overuse of tile adhesive.
Defects in future tiles due to uneven walls
Advantages of gypsum wall finishing
Gypsum bath plaster makes it easy to give walls a smooth surface. They dry five to six times faster than cement ones; do not require additional sanding after leveling the plaster mortar - immediately after drying they can be painted or glued to tiles.
How to apply gypsum mixtures to walls:
- prepare the walls - clean them of old paint and pieces of plaster. Remove grease stains, dirt and dust. Lightly scratch grooves on the walls or sandblast them - this will improve the adhesion of the plaster to the base;
Installation of beacons
- Apply the first layer of bath plaster to the wall, pouring a liquid solution. The applied layer does not need to be leveled, however, its thickness should not exceed 0.5 cm;
- Let the walls dry and apply a coat of primer. With even coverage, you can limit yourself to one layer; if the walls are not coated evenly enough, apply the primer again;
Stages of applying gypsum plaster
- Now it’s time to apply moisture-resistant plaster for the bathtub to the walls. Lightly wet the primed wall with a brush or spray bottle first. To work, take a wide spatula and scoop up the solution. Press the spatula against the wall at an angle of 20 degrees and carefully distribute the solution over the surface. Polish the still damp plaster with a float until smooth.
After the moisture-resistant plaster for the bathroom has dried, decorative finishing can be applied to the walls.
Priming walls before plastering
Before applying the plaster solution, it is necessary to prime the walls. It is better to use a primer from the same manufacturer as the plasters. The type of primer depends on the base:
- For concrete and cellular concrete, a deep penetration primer is mainly used, for example Ceresit CT17, Optimist G103. In the case of using gypsum plasters, soil compositions of the “concrete contact” type are used.
- For brick walls, the choice of priming method depends on the type of plaster used. If the future plaster is cement-based, then a special primer is not required; instead, the wall is generously moistened with water immediately before applying the plaster so that moisture from the mortar does not escape into the brick. If gypsum plaster is used, then use acrylic primers, for example Rotband Grund.
How to line the walls in the bathroom
Cement plaster
The best option for leveling bathroom walls is cement-based plaster mixtures. They create a durable, waterproof coating. But their disadvantage is that they take longer to dry than gypsum.
To save time, avoid adding excess dirt and avoid confusing the composition, novice craftsmen are advised to purchase ready-made dry mixtures.
But if you decide to prepare the solution yourself, then for this you need: Portland cement grade M400 or M500, washed fine-grained sand and a plasticizer.
The materials are mixed in the following proportions:
- M400: sand - in a ratio of 1:4;
- M500: sand - in a ratio of 1:5.
A plasticizer is added to increase the elasticity of the mixture, facilitate plastering, increase the adhesion of the solution and reduce cracking. Its amount depends on the concentration; you must see the instructions from the manufacturer. The plasticizer can be replaced with a liquid detergent by adding it to the water before mixing the plaster solution in an amount of 0.5-1% by weight of the resulting cement.
Plaster: can it be used, how to protect it from moisture?
Gypsum-based plaster mixtures are not recommended for leveling surfaces in bathrooms, toilets and other rooms with high humidity. But sometimes finishers still choose this option - the setting time is faster than that of cement-sand, and it is easier to apply.
Gypsum plaster is protected from moisture by applying 2-3 layers of deep penetration primer. It creates a water-repellent film on the surface.
This waterproofing provides additional benefits:
- increasing the adhesion strength of materials and coatings;
- reduction of porosity;
- preventing the development of fungus or mold.
Subsequent finishing is important to protect gypsum plaster from moisture. The best option is tiles, but it is also possible to paint with latex-based water-based compounds, for example, Tex, Dulux, Dali, etc.
Drywall
Another way to make the walls in the bathroom smoother is to finish it with moisture-resistant plasterboard (green sheets). It is attached to a frame made of metal profiles or glued with special gypsum glue. The disadvantage of the feather method is that it reduces the size of the room from each wall by 10 cm, but if the curvature is significant, then this is the only possible method.
The frame is mounted from two types of profiles - rack-mount and guide. It is attached to the wall with dowels, and hangers are additionally installed to increase strength. The gypsum boards are screwed to the profile with self-tapping screws, and the joints are taped with sickle tape. The fastener caps and mounting tape are puttied.
The walls are pre-primed for the glue. Glue is applied pointwise to the sheet and applied to the prepared surface. Check the position with a bubble level and level if necessary.
Leveling with plasterboard is easier than plastering walls, but it needs good waterproofing. This method is suitable for tiling.
Calculation of the amount of mixture
To make calculations, you need to know the area of the surface to be plastered and the mixture consumption rates indicated by the manufacturer. But these values are not enough - you should also take into account the curvature of the walls in the room, because a layer of plaster in the bathroom for tiling or painting, as provided for in design standards, is not always enough. Its final thickness is determined by the deviations of the wall from the vertical or horizontal plane. If the curvature exceeds 3 cm, installation of beacons and additional measurements will be required.
Types of waterproofing
A waterproofing layer created in different ways becomes a barrier to moisture. Depending on the method and materials used, waterproofing can be:
- painting (applying layers of bitumen, resins, rubber);
- impregnation (application of compounds that penetrate deep into the pores of structural materials);
- coating (coating with hot bitumen compounds);
- mastic (applying an adhesive mass with fillers - mastic);
- injection (pumping special impregnating compounds into holes and cracks);
- pasting (sticker of rolled bitumen or resinous materials);
- plastering (plaster compositions allow you to additionally insulate the structure);
- backfill, for example, backfill with bentonite clay;
- film (use of anti-condensation films);
- cast (hot or cold pouring of mixtures in several layers);
- mounted (installation of hydromembranes).
Types of waterproofing
Also, depending on the location, a distinction is made between internal and external waterproofing.
Preparation and application.
Waterproof plaster for the bathroom begins with proper preparation of the wall; the further appearance and quality of the work depends on this. It is imperative to remove any remnants of the previous paint and plaster compositions. As for new buildings, the presence of grease stains and dirt is inevitable, so new houses require especially thorough cleaning:
- The easiest way to remove remnants of old paint is by burning it with a blowtorch, however, this must be done while wearing a protective mask in order to avoid poisoning and possible minor burns of the mucous membrane. You can remove paint using folk ingenuity. Take 8 parts of lime mixture and mix with 2 parts of caustic soda - ready.
- It is advisable to treat walls with a too smooth surface by notching or slicing. Thanks to this action, the solution holds much stronger.
Important: along with the listed processing methods, sandblasting can also be used. Thanks to him, the work will go much faster.
Owners of brick walls with filled joints must make a notch in advance, scratching depressions about 1.5 cm deep. Any dust that appears must be eliminated. Those whose walls have unfilled seams can safely start applying, because the roughness will already be enough.
Door arch made of plasterboard
Spray.
Spraying is necessary to ensure the greatest adhesion of the mixture to the wall surface, by filling all sorts of cracks and other irregularities. The first thing that is important to do is, of course, spraying. For it, they use a liquid solution whose consistency resembles sour cream:
- First, the base must be thoroughly moistened with water.
- Then, using the usual “throwing” method, they cover the wall with the mixture. The thickness should be within 5 mm.
- The layer obtained by spraying should be left as it was.
Interesting: The wooden base requires more attention and the thickness can be increased to 9 mm.
Rough layer.
They cover the spray. For those who choose a lime-gypsum solution, it is enough to achieve a thickness of 7 mm; the cement mixture can be coated with a layer of 5 mm.- There are cases when the first application is not sufficient. This case requires applying the second, thickest one, immediately after the first has hardened.
- They work with the rough layer using a special trowel, with a length of 70cm to 1m. Any direction of movement is welcome, it does not have a huge role.
Finishing layer.
The finishing part can be divided into 2 types: treating the walls with a mixture for further finishing (occurs when plaster is needed for a bathroom under tiles), or using it as a decorative material. The key difference between these options is: careful selection of the substance and the thickness of the solution. Decorative plaster for the bathroom is applied with a thickness of 4-7 mm, when the usual one is less than 2 mm:
- First, it is important to wet the rough layer of plaster
- Then the professionals take a wide spatula, use the edge of which to scoop up the finished mixture and spread it on the wall in an even layer. Holding the spatula at an angle of 15-20 degrees will achieve the best effect.
- The layer that has not yet had time to set is rubbed using a grater. In a circular motion.
Important: When rubbing the protrusions, it is important to press the grater more firmly, while rubbing the grooves, squeeze out lightly.
- Those planning to use textured plaster in the bathroom should remember that the texture is applied to the rough layer with a narrow spatula (from 8 to 12 cm). With its help it is much easier to work, creating unique patterns and ornaments. It is necessary to move the spatula, however, the direction in this case plays a small role, so you can do it however you like.
Mandatory: Anyone who wants to turn their bathtub into a work of art undoubtedly needs to remember about their own health, otherwise there will be no one to admire it. Therefore, it is important to use gloves and a gauze bandage, especially if gypsum plaster is chosen in the bathroom.
Among other things, be sure to monitor the level of humidity and temperature, because it is obvious that at a higher temperature, waterproof bathroom plaster will dry much faster. Upon completion of all technological processes, the tools must be washed, and the remaining material must be put away in a convenient place, closed.
How to choose and hang wallpaper for the bedroom photo
Features of working with the material
When working with moisture-resistant plaster, it does not differ from the accepted application methods. Installation features should be taken into account:
- Surface preparation. It is necessary to clean the wall from the old crumbling layer of plaster.
- The joints of the brickwork are deepened by 5-10 mm. For alignment, small notches are made on the wall for better adhesion of materials.
- Remove dust and dirt. Treat the surface with primer twice, allowing the first layer to dry thoroughly.
- Mix the solution according to the instructions on the package.
- Apply the plaster in three layers: spray, base, coating. The thickness of the first layer varies between 5-10 mm and is intended for the initial leveling of walls. The cape must be completely dry. The thickest second layer, up to 3 cm, is applied the next day. The work is carried out with a wide spatula, using a long rule to remove excess mortar. The finishing layer of 1.5-2 mm is applied after the previous layer has completely dried, after wetting the surface with a small amount of water. The movements are wave-like. On wet plaster, grout with a wooden float counterclockwise. Repeat with felt for smoother alignment.
- The surface is ready for decoration.
Important: for ease of work, beacons are pre-set, which serve as a guide to the thickness of the plaster for a given surface.
Among the wide variety of finishes for the facade of a building, moisture-resistant plaster is distinguished by increased performance characteristics, accessibility, and the ability to aesthetically decorate the walls at your own discretion.
Features of applying decorative plaster
In the process of applying decorative plaster, it is worth considering some nuances. If, for example, Venetian plaster is planned, then the base for its application should be perfectly smooth, and if this is a structural type of application, then small unevenness will not become a problem.
Before applying decorative plaster, it is necessary to prime the wall in the bathroom. It is best to use an acrylic-based primer with high adhesion.
Decorative plaster is applied with a wide spatula and then distributed over the entire surface. Further actions depend on the application technique: “bark beetle”, “fur coat”, Venetian or textured.
Characteristics and properties of waterproofing plaster
Among the advantages that plaster waterproofing has:
- resistance to various types of mechanical stress;
- high reliability of the coating, which manifests itself even during prolonged flooding;
- good adhesion;
- high frost resistance (≥ 200 cycles);
- environmental friendliness;
- durability;
- suitability for finishing;
- low cost.
The technical characteristics of different mixtures vary. The main characteristics are: strength, adhesion, water-holding capacity and water resistance.
Nuances.
A solid foundation is an important part of any job and makes plastering your bathroom walls a pleasure. Having a wall cleaned of grease and wallpaper residues can add strength and stability to the beauty of the work.
You should always pay special attention to the initial work; in this case, it is extremely important to get rid of weak points in advance. Cracks in the walls, hated by many, play such an important role only in the case of waterproof plaster for the bathroom that you can gradually fall in love with them. In general, it is advisable to even deepen and expand them.
Those with unsightly efflorescence on the walls should be completely unceremoniously dealt with with a steel brush, and special efflorescences that have captured large areas can commit genocide with an angle grinder and a brush so that the wall of the house is left alone. 24 hours before plastering the walls in the bathroom, be sure to spray the wall; the activity is as useful as it is fun.
By the way, you should remember about the reinforcing mesh, because without it, some types of wall plaster in the bathroom will hold up very weakly, among which gypsum plaster can be distinguished. For those who are wondering which plaster is best for a bathroom, it’s easy to immediately answer that you can use any, but they try to avoid gypsum.
Door arch made of plasterboard
In general, tiles are rarely installed on gypsum plaster in the bathroom, because there is a danger of water getting between the seams and then you will have to redo it again. The liquid will simply “eat through” the entire gypsum layer.
When mixing the dry mixture, use clean, preferably drinking water. The permissible degree Celsius is between 15 and 20. Slowly pouring the mixture in portions and stirring at the same time will achieve the ideal consistency.
Based on the required layer thickness, the thickness of the mixture is adjusted. Adjustment is very simple, you just need to add water. By the way, it is advisable to prepare the finished solution within 20 minutes, since long inactivity will lead to a deterioration in quality and porosity.
Regarding brickwork, there is such a subtlety: first, the seams are hammered in, and then, immediately, they are covered with the main layer of plaster. The solution is applied in different ways; you can do it manually, or using special devices, in one or more passes.
It is imperative to ensure that the plaster dries; this process must be completed no earlier than 24 hours.
What is moisture-resistant plaster
The material is an individually prepared solution, which is applied to bases in rooms where dampness exceeds the norm. Using this method, you can finish the walls in the bathroom easily, quickly and efficiently.
Mixture composition
Plaster has a composition that is distinctive from other types of similar mixtures. It contains additional additives that give the solution water protection properties.
Therefore, the mixture can withstand different temperature changes, high humidity, and has good strength to hold heavy finishes. Additionally, the material provides protection against fungal growths, including mold formations.
Characteristics of moisture-resistant material
Waterproof plaster for the bathroom has special characteristics. It represents non-standard solutions based on sand and cement, which take a long time to dry and can lose their service life from splashes or streams of water. This is a polymer that has many advantages.
Advantages and disadvantages
Positive traits:
- High adhesion strength to concrete, brick, block and other types of bases.
- Minimal shrinkage during drying eliminates the chance of cracks on the finished plastered surface.
- The material has a high level of plasticity, which will ensure minimal labor costs and save time.
- Moisture-resistant plasters are made from environmentally friendly components.
The disadvantage is the increased cost. But experts believe that it is better not to save money, since repairs are more expensive.
Recommendations and advice from experts
When choosing a plaster mixture for the bathroom, it is important to pay attention to the advice of experts who will tell you how to finish the walls with high quality.
- The mixture is diluted with clean water at room temperature.
- When mixing the plaster, the dry mixture is poured into water and mixed thoroughly.
- Each layer requires its own thickness of material.
- The composition is prepared half an hour before application, otherwise it will harden.
As you know, plaster mixtures can be different, so everyone independently chooses what type of finish to use. Regardless of the choice, it is important to treat the walls of the bathtub under the tiles with moisture-resistant plaster. This procedure will eliminate the need for regular cosmetic repairs.
Types of plaster mixtures and their properties
Nowadays, plaster mixtures are durable, easy to use, and dry quickly. Many different modifications are available on a cement or gypsum basis. When leveling walls before final finishing, they are used as a primer, can be laid under tiles or form a topcoat. The first step is to decide what the final finish will be.
The quality of work directly depends on how correctly the material is chosen.
Mixtures of various purposes are available for sale.
Sanitizing
Sanitizing plaster, which creates a porous layer, is used in damp rooms. In addition to leveling the walls, it protects them from exposure to water. One of its varieties is used for the first layer as a primer, the other, forming a protective film, protects the walls from dampness: it removes internal moisture.
- This plaster is not suitable for tiles and cannot be applied over a gypsum base.
- It is easy to work with and dries within 7 days.
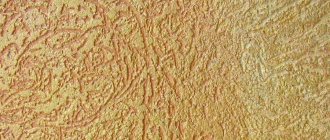
Decorative
Decorative plaster is becoming more and more common. The design possibilities of such finishing are endless.
Using it allows you to make your bathroom individual thanks to a huge number of variations of textures and colors. This is a modern type of finishing with which you can imitate any material.
There are several varieties of such plaster. These are mineral (service life - 30 years), silicate (service life - 60 years), acrylic (service life - 50 years).
This surface is easy to clean, and small errors that occur during operation are very easy to repair.
Decorative plasters on any base are resistant to all harmful influences. They are easy to clean and reduce static electricity on surfaces. All the steam released during washing is absorbed by the walls, but they themselves are not damaged.
One of the popular decorative types of plaster is Venetian. Glossy, bright, it creates a brilliant three-dimensional effect and reliably protects the walls. With its help, you can imitate smooth natural stones - granite or marble, and often drawings are applied to it. Carrying out such finishing is a rather labor-intensive process.
Textured plaster for the bathroom creates a relief surface of the walls. It is quite easy to work with. Additional inclusions add picturesqueness, for which pebbles, wood shavings, mineral chips and even cotton fiber are used.
At the same time, the primer for such plaster is simple, because there is no need to carefully level the walls. It is durable and can be painted any color you want.
The only thing is that, due to the pronounced relief, water is retained in the depressions, which shortens the service life of the coating.
Decorating walls with plaster can be completed in a week. When working independently, you should strictly follow the instructions, otherwise the material may fall off.
Textured
With the help of textured mixtures, you can achieve several goals at once: it is very practical for the bathroom, and has an original composition, which, after being applied to the walls, gives them a unique look. The composition of textured mixtures, in addition to the binder base, includes additional fillers. These can be cotton or wood fibers, tiny particles of mineral chips or small pebbles. After treatment with such a plaster mixture, the walls acquire an original pattern reminiscent of embossed silk, natural wood or stone.
Textured plaster
A textured bath mixture does not require careful leveling; it better hides all minor surface defects. It has high adhesive characteristics and retains its strength for a long time. In addition, such plaster for the bathroom is good because it can be painted, changing the boring color.
The ready-made mixture is available for sale, packaged in plastic containers of 15 or 20 kilograms. There are two types of textured plaster - for a roller and for a trowel. You should keep this in mind when choosing material.
Venetian
A very popular textured mixture with water-repellent properties, which is called Venetian plaster, or simply Venetian. Its waterproof qualities are so high that Venetian is successfully used even for finishing a swimming pool. Of course, those surfaces that are directly exposed to water should be covered with ceramics or glass panels - they will form a single ensemble with the Venetian.
Surfaces finished with Venetian have a texture reminiscent of cut natural stone, marble or granite. This gives the room a special sophistication and luxurious look.
Venetian plaster
It is better to apply Venetian plaster in thin layers in several stages. Each layer should be very thin - until transparent. This technology creates the impression of depth of the material and richness of the design. Processing with Venetian requires care: only by achieving ideal smoothness, almost a mirror-like shine, can the desired effect be achieved.
Bathroom walls covered with Venetian should be treated with a special sealant.
We introduced you to several types of plaster mixtures that can be used to decorate bathrooms using tiles or decorative plaster. The choice of how to plaster the walls in the bathroom is yours. It depends, first of all, on your capabilities and finances. However, no matter what type of finishing you choose for your bathroom, it is necessary that the walls be treated with special moisture-resistant plaster - including under tiles. Only in this way can you save yourself from the need to regularly carry out cosmetic repairs and make your bathroom truly beautiful and cozy.
Technology of leveling with plaster under tiles
Preparatory stage
First of all, you should determine whether the old coating needs to be removed. Plaster cannot be applied to whitewash and paint, as the mortar may peel off after cladding. For the same reason, you cannot plaster loose, crumbling surfaces, areas with traces of bitumen, oil stains or covered with mold. All this must be cleaned down to the concrete base, and for convenience and speeding up the process, it is best to use a grinder with an appropriate attachment.
Removing paint using a grinder with a mechanical brush
After this, the surface is cleaned of dust, oil stains are treated with a solvent, and mold stains are treated with antifungal agents.
Wall treatment
If the walls are covered with cement plaster and it adheres tightly, there is no need to remove it. To ensure the quality of the coating, you need to tap the walls with a hammer - the sound should be equally clear over the entire area. Where the knocking is dull, you need to knock down the plaster - voids will probably form underneath it.
If you hear a dull sound, it means the plaster is holding weakly.
Detected cracks must be expanded and removed from dust, and through holes around communications must be thoroughly cleaned.
Sealing cracks and crevices in walls
To seal gaps and cracks, cement mortar (part cement to 3 parts sand) or epoxy resin is used, which is injected into the cracks using plastic nozzles. When sealing large cracks, fiberglass reinforcing tape is additionally used.
Repairing cracks in the wall
Advice. New concrete walls are too smooth for plastering, so it is advisable to apply small notches to them with a chisel to a depth of 2-3 mm. The more notches, the better; on average, there should be about 250-300 notches per m2 of wall. In new brickwork, it is enough to deepen the seams a little by scratching them with something sharp. Finally, sweep off the dust with a brush and treat the surface with a primer, for example, Betokontakt Knauf or Ceresit.
Notches on the wall
Knauf Betokontakt
Material calculation
To calculate the amount of plaster, you need to find out the thickness of the application layer. To do this, measure the differences in the heights of vertical planes at several points by applying a rule or a flat rod to the wall.
Determining the evenness of walls
The more such points, the more correct the calculation will be. Next, the obtained values are summed up and divided by the number of points at which measurements were taken.
For example, measurements were taken at 5 points and the deviations were 1, 2, 2.5, 2.7 and 3 cm. In total we get 11.2 cm. Divide by 5 and we get 2.24 cm - this is the average thickness of the plaster layer .
Permissible thickness of plaster layer
The packaging of the mixture always indicates the consumption of plaster per m2 at a certain layer thickness, most often 10 mm. For example, the consumption of Profit Hydrophobe is 15 kg/m2. We multiply by the thickness of the layer we get: 15 x 2.24 = 33.6 kg. That is, per meter of area we will need 33.6 kg of plaster. To find out the total quantity, all that remains is to calculate the area of the walls and multiply the values.
For example, the total area is 20 m2, then 33.6 x 20 = 672 kg. The mixture is usually packaged in bags of 25 or 30 kg, and to calculate the number of bags, we divide the total consumption by the volume of one package: 672/30 = 22.4.
Water-repellent plaster Profit Hydrophobe
Round up to the nearest whole number and get 23 bags. It is impossible to calculate exactly down to the gram the consumption of the mixture, so you always need to round up so that there is some reserve just in case.
Leveling the surface
If the unevenness of the walls exceeds 10 mm, and the area for the tiles is large enough, the surface is leveled using beacons. Plaster beacons are inexpensive and are sold in all construction stores, so there will be no problems purchasing them. They are T-shaped lightweight profiles, perforated along the length, with a height of 10 and 6 mm.
Step 1. Mix a little gypsum mortar to attach the profiles.
Gypsum mortar
Marking
For ease of installation of beacons, it is necessary to install dowel nails and pull the guide thread level
taut thread
The vertical is determined by the level at a distance of 10-10 cm from the corner and the solution is applied pointwise.
Throwing mortar for beacons
Apply the plaster profile, level it strictly vertically, pressing it into the solution.
The lighthouse must be sunk into the solution and leveled
Having retreated 100-120 cm, attach the next beacon, and so on around the entire perimeter of the room. Between the profiles in the inner corners there should be 30-50 cm, no more. All beacons must be located in the same plane and exactly horizontally, without deviations.
Advice. Before applying plaster to the walls, you need to protect the communication terminals from getting the solution on the threads and inside the pipes. The easiest way is to wrap them with masking tape or film.
Step 2. Pour the dry plaster composition into a container with clean water at room temperature and mix with a mixer at low speed until smooth. The ratio of water and dry mixture is indicated in the instructions on the packaging, and for high-quality leveling these proportions must be strictly adhered to. The solution is left to mature for 5 minutes, then mixed well again.
Step 3. The finished solution is spread with a trowel onto the wall between two beacons in a thick layer. Application is carried out from the bottom up, as densely as possible so that there are no voids left inside. Smooth and adjust the mortar with a trowel, filling the recesses along the beacons.
The mortar is applied to the wall with a trowel
Leveling the solution using the rule
Step 4. Take the rule, apply it to the bottom of the wall across the profiles and, firmly pressing it against the beacons, lift it up in a zigzag motion. This allows you to level the plaster, remove air pockets and remove excess mortar. Smoothing is usually carried out until the plaster layer becomes absolutely even.
Step 5 . As soon as the solution begins to set (after 20-30 minutes), they take the rule again and once again apply force along the wall, “trimming” possible irregularities and sagging. After half an hour, the treated area is lightly moistened with clean water and rubbed with a dense sponge or felt grater. Movements should be circular and uniform, no need to rub too hard.
Step 6. Finally, smooth the plaster with a wide metal spatula or a smooth metal trowel. If 2 layers of plaster are required, do not apply wet grout, but leave the wall until completely dry. After this, a second layer is applied and rubbed as described above.
Checking the evenness of the wall
The technology for applying cement and gypsum composition is practically no different, except perhaps in the setting time of the solution. After drying, the walls need to be primed and you can begin tiling. Perfect alignment is not required, since a layer of tile adhesive will easily cover minor unevenness. To install a bathtub with your own hands, read on the website.