What is OSB?
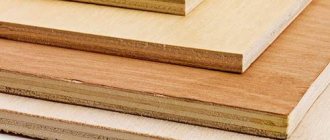
The abbreviation OSB stands for “oriented strand board”. The raw materials for its production are wood chips and shavings. During production, layers of such material are compressed under conditions of high temperature and pressure, and they are placed mutually perpendicular. This unique design makes the panels more resistant to external mechanical damage.
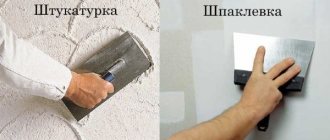
From the outside, the slabs look quite attractive, while the base itself is not at all practical. For this reason, putty of OSB panels is additionally needed. As a result of this, the surface is leveled; if desired, you can then glue wallpaper or apply paints and varnishes to it. Another advantage of puttying is extending the life of walls and ceilings.
Oriented strand board is an excellent alternative to expensive wood Source kronas.com.ua
Similar to other wood products, the board can intensively absorb moisture. It is precisely this property that gives rise to doubts among many craftsmen regarding the advisability of puttying OSB panels. After all, wallpaper glue and paint after application can cause destructive swelling and deformation of the base. But this problem can be easily resolved if you refuse to use water-containing products. In the absence of water, the likelihood of surface damage completely disappears.
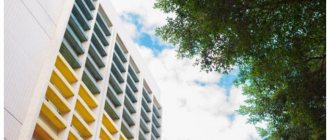
Modern OSB panels have a huge number of advantages, which is why they are beneficial for using in interior decoration. Source remoo.ru
Attention! The level of moisture resistance of an oriented strand panel largely depends on its type. Products labeled OSB-3 are considered the most resistant to moisture. They are originally designed for use in high humidity conditions.
If necessary, the surface of OSB boards can be left unchanged or covered with a protective layer of varnish. But such a design is not particularly attractive; it is suitable only for a country house or utility room.
OSB boards look harmonious when decorating the rooms of a country house in an eco-friendly style Source stroy-podskazka.ru
Advice from the experts
Professional craftsmen with extensive experience are well aware of the many nuances of finishing work and can share a number of useful recommendations:
- When leveling the putty over the surface, it is better to hold the spatula at a slight gentle angle so that the mixture is distributed evenly.
- It is better to take the primer and primer (if necessary) from the same manufacturer, otherwise their compatibility cannot be guaranteed.
- It is better to avoid purchasing facade finishing putties for interior work, since some varieties emit harmful substances after drying.
- The ceiling should only be primed with a brush, as the roller leaves gaps. There are no such problems with walls, and therefore both brushes and rollers are suitable for vertical surfaces.
- When attaching the reinforcing material, make sure that its joining does not go along the seams of the OSB boards - the fabric should overlap them.
- The maximum thickness of the putty applied (all layers) should not exceed 10 mm.
- It is worth considering that when adding glue to the solution to give it greater plasticity, the drying time of the putty increases.
- It is more convenient to work “armed” with two spatulas - the smaller one scoops up the mixture onto the larger one, with which it is leveled on the OSB sheets.
- For the very first layer of putty, it is advisable to prepare a liquid consistency, which allows you to better fill all the unevenness.
By following these tips, any novice finisher will acquire useful skills and abilities. Then the work will be done effectively and will not take too much time and effort.
Puttying OSB walls is an important step in achieving goals
Puttying OSB panels not only helps create a protective layer that protects the material from harmful external influences. This is also an effective way to give surfaces a decorative appearance, which allows you to create a special zone of comfort and coziness in the room.
Was this information useful to you? Share in the comments!
Priming Features
Before putting putty on OSB panels, they must be treated with a suitable primer. Moreover, the slabs should already be carefully polished before that period. In this form they can be purchased on the modern construction market. Otherwise, you will have to spend a lot of additional time preparing the material.
As a primer, it is important to use only the composition that was originally created for finishing wooden bases. Usually this product does not contain water at all. It is often made from drying oil.
Important! The end parts of building materials suffer the most from moisture. They should be thoroughly treated with primer before installing the panels, since this will then be impossible to do.
Priming of OSB boards is carried out only with those products that do not contain water at all. Source obustroeno.club
Features of puttying OSB before certain types of cladding
Different types of designer coatings require their own approach to the preparation of OSB sheets.
Gluing wallpaper. The final layer of putty does not need to be sanded - the wallpaper will hide the smallest irregularities on it. For better adhesion and maintaining a smooth surface, it is better to use an acrylic primer or PVA glue (to save money) as the final primer layer. Detailed instructions for gluing wallpaper on OSB, as well as the features of various technologies, are in a separate article: gluing wallpaper on an OSB surface.
Tile. Often, tiles are used in damp rooms; in this case, before the puttying process, a film-forming epoxy primer must be applied directly to the OSB sheets.
It is better to apply acrylic water-repellent putty with mandatory reinforcement using fiberglass mesh. The last finishing layer must not be sanded; it is better to make notches on it using the sharp edge of a trowel.
More details about gluing tiles and ceramics to OSB can be found in a separate article: how to properly glue tiles and ceramic tiles to OSB.
Plastering, liquid wallpaper. All the work described above is carried out, and the last step is to apply the optimal primer for fixing the future coating - concrete contact. More information about these types of finishing can be found in the articles: plastering OSB indoors; applying liquid wallpaper to OSB.
Gluing PVC, fastening MDF, laminate. For such design solutions, complete puttying is not required at all - the main thing is to seal the joints between the OSB sheets, sand the unevenness and cover the panels with a tintable primer, matching the color of the chosen design solution.
Coloring. For this option, the putty coating should be sanded with special care so that there are no even the smallest flaws. This is especially true for the ceiling. More information about painting OSB can be found in the articles: painting OSB indoors, painting OSB outside.
Important properties of putty for OSB boards
Regardless of the main component, all putty compositions must meet the following requirements:
- Excellent adhesion. The panels are coated with resins or wax, which is why not all mixtures stick to them well.
- Slight shrinkage. This characteristic prevents cracking.
- Solid consistency. Such materials are easy to sand.
- Uniformity of the solution. It guarantees the absence of excessively large particles, which greatly facilitates the process of applying the mixture to the base.
Advice! To prevent the appearance of cracks in OSB boards, their surface must be reinforced with a special elastic material. Most often, painting non-woven fabric is used as it.
Varieties of mixtures for walls and ceilings
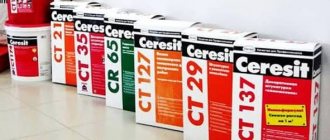
Putty for OSB must meet certain requirements and be made on an oil, adhesive or synthetic basis. It is necessary to select compounds that are suitable for working with wood. These are polymer and oil-adhesive putties.
Polymer
Polymer putty for OSB (acrylic) is made on the basis of latex and acrylic. Thanks to modifying additives, it is suitable for rooms with high humidity and facade work. Easy to apply, dries quickly, sands well.
- high price;
- quick drying.
Dispensed dry and ready-made. Neutralizes phenol vapors and is compatible with water-soluble paints. Consumption - up to 1.3 kg/m2 with a layer thickness of 1 mm.
Oil-adhesive
The binder in oil-adhesive putty is drying oil. Fillers - glue, lime, water, adhesive plasticizers. Add more driers to increase the speed of drying of oils. Can only be used for interior work. Layer thickness - up to 2 mm.
- low price;
- high adhesion;
- quick drying;
- environmental friendliness;
- plastic;
- easy to apply;
- easy to sand.
- unstable to mechanical stress;
- does not tolerate moisture well;
- cannot withstand temperature changes;
- incompatible with most finishing materials.
There are 2 stages - priming the surface and sealing the cracks. This is necessary to increase adhesion, stability and sealing of joints.
How to make your own putty for OSB panels
Store-bought putty compounds are quite affordable. But if the area to be treated is too large, then the costs will be significant. Sometimes experienced craftsmen prefer to make such a mixture with their own hands. To do this you will need the available ingredients:
- linseed oil – 280 g, turpentine oil – 60 g;
- pumice powder – 30 g;
- gelatin, casein – 20 g each;
- water – 300 ml;
- borax – 12 g;
- ammonia (18%) – 17 g.
Cooking method:
- Grind the pumice as much as possible.
- First add linseed oil, and after thoroughly stirring, add turpentine oil.
- Mix everything thoroughly until a homogeneous mass is formed.
- Leave for 10 minutes.
- Mix the remaining ingredients.
- Place the mixture in a water bath and heat to 90°C.
- As soon as the mass reaches a paste-like form, immediately remove it from the heat and cool.
Attention! A self-prepared putty composition retains its characteristics only for an hour. Therefore, it must be used for the specified period of time.
Preparation is the Key to Success
The next step after the primer has dried is to seal the cracks and technological gaps. You need putty for OSB. It hides all gaps and joints up to 10 mm in size. The ideal putty option for gaps is Knauf Rotband paste.
The staples are driven in in increments of 100–150 mm.
The last stage of preparation of particle boards is the installation of mounting angles. They protect corners from damage, extending the service life of the finish. The corner is also fixed with a stapler into the perforated areas.
Preparation for puttying OSB boards
As previously mentioned, on the eve of filling, OSB panels must be coated with a special primer. This procedure is considered mandatory, since the untreated base practically does not adhere to the putty applied to it. In addition, the primer eliminates the release of various wood components onto the surface: resin, essential oil.
As a rule, the wood base needs to be primed twice. The first step is to apply a primer that does not contain water at all. Only then the surface is painted with paint and varnish.
Attention! If the OSB panels were varnished during the manufacturing process, they can immediately be coated with an insulating, usually whitish, layer.
After priming is completed, it is important to take a technological break so that the panels have time to dry. Depending on the soil used, the waiting period can last from several hours to a day.
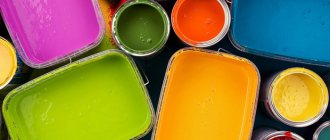
Primer-paint for oriented strand boards not only strengthens the base, but also brightens it, creating an ideal base for wallpaper or painting Source fasad-exp.ru
Decorative putty OSB
It differs from other types of finishing in that it does not require leveling the surface. OSB is quite flat in itself and all work comes down to strengthening the walls and ceiling, as well as increasing their adhesion.
First of all, the OSB is sanded with sandpaper and primed in two layers with concrete contact. Then designer putty is applied.
Plastic compounds such as silicone or acrylic putty are suitable as a textured mixture. On sale they are called textured plasters.
Applying the plaster is very easy, the main thing is to do it quickly - the hardening time on the wall is 30 minutes. In the process of work, you can give it any texture you like. This is done with figured rollers, toothed trowels or other prepared forms.
After hardening, the surface can be varnished or tinted in any shade. More details about decorative plastering can be found in the article: plastering OSB indoors
If you follow the above technologies, then repairing or finishing surfaces made of OSB sheets will allow you to bring the appearance and performance characteristics of the work performed to the best result.
How to putty OSB boards
Putty on OSB is applied only in conditions of above-zero temperatures, low or moderate humidity (up to 60%). The material must be placed in a container so that it is convenient to take the mixture from it with a spatula and carefully apply it to the base. Periodically, after processing each new area, it is necessary to carefully trim the already created coating.
After completing the filling of the entire surface, it is necessary to take a short break, which will allow the material to dry. Then you need to sand the dried base. During the grinding process, minor defects are eliminated and an ideal surface smoothness is achieved.
The final stage of the work described above is reinforcement of the base. It is carried out by gluing non-woven fabric with an overlap. To remove excess thickening, you need to make double cuts along the strips, then remove the scraps of the fabric. Adjacent strips are secured end to end.
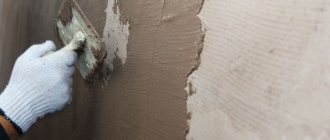
The finished putty for OSB boards is applied to the surface using a wide spatula, then leveled with smooth arc-shaped movements Source gidpokraske.ru
Puttying OSB on walls
After installing OSB sheets on the walls, you can begin preparing them for further finishing.
1. Remove the protective paraffin layer from the OSB boards, which prevents adhesion. Then, the surface is cleared of dust. This can be done simultaneously using a Giraffe sander. Or step by step, for example, remove the protective layer with a grinding machine and R-180 sandpaper; remove dust with a damp cloth.
The giraffe sander sands the surface and immediately collects dust.
2. Apply a primer coat in two layers. It is better to use a concrete contact primer - this will significantly improve the adhesion of the applied solutions. The soil should be distributed with a brush or roller. More details about priming and choosing a composition can be found in a separate article: primer for OSB (selection, application).
3. Putty all joints and crevices between the sheets and walls with a thick acrylic mixture. The mixture is applied with a gun or spatula and then smoothed out. After partial drying (3-4 hours), the protruding layer residues are smoothed off with a grinding machine.
4. Fiberglass mesh is secured over the entire surface of the walls using a construction stapler. It improves the adhesion of subsequent layers of putty to OSB. The main thing is to prevent the formation of waves and make a tight fixation.
5. In the outer corners, staple the corner slats. They give the corners sharpness and allow you to quickly and evenly apply the solution.
6. If you are using ready-made acrylic putty, then add two tablespoons of PVA glue to a two-kilogram jar. When the mixture is dry, two kilograms of powder are mixed - it will not be possible to produce more, and it will dry out. The solution is prepared according to the instructions, but you also need to add two tablespoons of PVA glue to it.
7. Using a 30-40 centimeter spatula, apply the first layer of putty. Use semicircular movements to stretch the solution as much as possible until a thin, uniform layer is obtained.
8. The most critical places need to be reinforced with sickle mesh. It can be smeared into the uncured first layer of coating.
9. For a high-quality process and preparation of a strong and smooth surface, three layers of putty are required. Allow the required drying time between each coat (8-12 hours).
10. Sand the final dried surface using a flat plastic float and replaceable mesh. After leveling, the surface is dusted with a damp cloth.
11. Finally, the walls should be primed once, but well. To do this, you should use the primer mixture that is most suitable for the future final coating.
Below are two videos that demonstrate in detail the entire puttying process:
How to hang wallpaper correctly
If the preparatory work has been completed and the wall is completely dry, you can begin gluing the wallpaper.
Sequencing:
- Following the manufacturer's instructions, dilute the glue in the container.
- Cut the panel into pieces of the desired size, taking into account the placement of the pattern.
- Using a roller or brush, cover the wall and wallpaper with adhesive.
- Wait until the material is saturated.
- Place the trellis on the previously prepared base. In this case, it is advisable to prevent the appearance of bends and penetration of glue onto the front side of the wallpaper.
- Gently smooth the canvas, simultaneously removing bubbles and any unevenness.
- At the joints, the surface must be well rolled with a rubber roller. Excess adhesive mixture is removed with a dry cloth.
Puttying oriented strand panels is an optional procedure. But when in the future you plan to paint them or glue wallpaper, you will still have to apply putty to the OSB boards.
Wallpapering surfaces made of oriented strand boards is carried out in the same way as when working with walls made of other materials Source dompodrobno.ru
Preparing materials and tools
To work you will need the following set:
- sandpaper of different fractions;
- serpyanka, which is used to reinforce the joining areas;
- roller or brush;
- spatula with a working surface made of rubber material;
- container for preparing putty mixture;
- electric drill with mixing attachment;
- fiberglass mesh;
- roulette;
- primer mixture Concrete-contact.
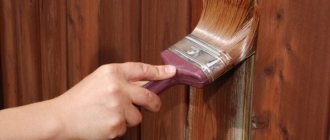
Coloring
The surfaces of OSB panels can be coated with oil and water-based compositions. As a rule, they are applied with a brush, spray, or roller.
If you use a water-based coloring agent when finishing such a material, then the shape of the panel will subsequently increase slightly (swelling is possible). Therefore, in such cases, it is highly desirable to use special moisture-resistant OSB 3. Moreover, one-sided painting often leads to slight bending of the material. For this reason, it is recommended to treat oriented strand boards with water-based paints only when their appearance is not of great importance. Otherwise, it is better to use oil formulations.
Blend selection
Before you putty OSB, it is recommended to choose the right putty. Let us remind you that the finishing material should not contain water.
So, how to putty an OSB board indoors? As a rule, finishing is carried out with mixtures prepared on the basis of varnish or drying oil. It is better if the material you choose is intended specifically for wood surfaces. It may be nitro putty or an oil-adhesive composition.
It is allowed to use a synthetic mixture or a product intended directly for such material for OSB boards.
As you know, walls made of concrete and brick are covered with cement- or gypsum-based putties. Is it possible to putty an OSB board with gypsum putty or a mixture based on cement material?
Please note that cement compositions are never used for finishing such slabs. The reason is that the specified putty solution is prepared on a water basis. In addition, the applied covering layer on the surface of the slabs does not last long.
Gypsum putty for OSB boards is considered a good option, especially if polymer components are added to its composition.
Some developers are wondering what putty to use on slabs for exterior work. Everything is simple here - street surfaces made of slabs are not subjected to this type of finishing, the facades are simply plastered with solutions based on mineral or silicate substances, or a finishing layer is made of curtain panels.
Features of the process of plastering panels indoors and outdoors
In practice, plastering of OSB panels is carried out on the outside and inside of buildings. But the working conditions when performing such work are completely different. The natural environment has a more pronounced effect on the surface being treated.
Before you start plastering the oriented strand facade wall, you need to wait for warm and calm weather. The optimal temperature for performing such work is from 5-35 °C. The surface must be protected from possible precipitation, as well as direct sunlight.
Indoor conditions for plastering walls are more comfortable. But special attention should be paid to humidity: it should not exceed 65%. Additionally, you need to check that there are no drafts.
After completing all plastering work, the surface should dry naturally. The drying process cannot be accelerated by fans or other heating devices. If this rule is violated, then multiple cracks will most likely form on the coating over time.
Important! According to safety requirements, the day before plastering begins, you need to turn off the power to the electrical wiring in the house.
When performing work outside a building, it is important to choose days with calm, dry and warm weather. Source gidpokraske.ru
Preliminary work
We found out what is the best way to putty an OSB board for painting or wallpapering. It remains to understand the specifics of the work.
First of all, it is necessary to prepare the surface of the walls, for which the slabs are processed with coarse sandpaper in the most difficult areas - corners, around window and door blocks.
After this, the base is primed in two to three layers at intervals of thirty minutes. Having finished applying the primer, time is given for the slabs to dry completely, this takes from three to four hours.
We cut the mesh for plastering work into strips, the length of which corresponds to the height of the ceiling, and apply them in one layer to the surface. An overlap between the strips of two to ten centimeters should be observed. The mesh is fixed with glue, staples or screws. Laying begins from one of the corner sections of the room.
Why are gaps left when installing OSB?
All wood materials react strongly to increases in humidity and temperature. Oriented strand board is no exception in this regard. During the heating process, the sheets expand greatly and without the provided compensation gaps, two adjacent panels are capable of deforming each other.
Therefore, compensating gaps of 3 mm are created between the sheathing elements and 15 mm around the perimeter of the coating. They continue to work throughout their entire service life and must be preserved, but at the same time, do not in any way affect the appearance of the designer finish.
The fulfillment of two mutually exclusive conditions is possible if the joints are covered with elastic materials that can hide the joints well and preserve their purpose.
Alternative ways to protect OSB seams and gaps
There are fans who believe that the strand board itself looks beautiful and is not worth covering. However, the finishing coating performs another important function besides the decorative one - it protects the sheets from the destructive effects of the external environment. When the panels are left open, harmful effects on them must be minimized.
Firstly, you cannot remove the factory paraffin layer - it at least slightly protects the wood from moisture and the resin from the destructive effects of ultraviolet radiation.
Secondly, it is better to use a variety of oil impregnations to increase the service life of the casing.
Thirdly, the most vulnerable places on OSB sheets are the joints. From the ends, these wooden products remain uncovered and, from there, the process of decay and rotting most often begins. Therefore, it is advisable to close the gaps, even if the panels remain bare.
To make the sealed cracks look beautiful, they are decorated and highlighted as much as possible. For these purposes, they are covered with wooden slats, filled with sealant and painted over. You can also fill prepared joints with plastic or translucent polycarbonate profiles.
This contrasting combination looks very attractive, and when the entire surface is covered with stain, the slabs can serve without deteriorating for a very long time.