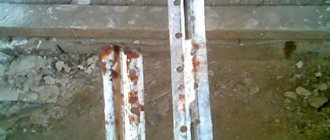
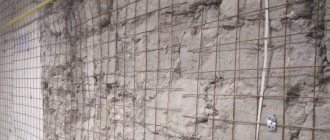
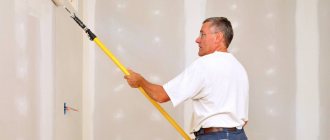
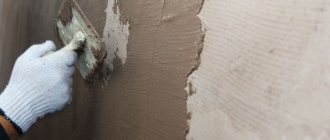
A fairly convenient and useful product used during puttying is a painting mesh, which serves as a reinforcing base. The canvas copes with the task perfectly, contributing to more effective alignment of the walls. There is a wide range of products on sale with different roll heights, fiber thicknesses and cell formats.
What is a painting mesh and its features
The reliability and service life of the entire structure depend on the material used.
Without a reinforcing component, it is difficult to ensure high quality of repair work, since this ensures strong fixation of the plaster and joints. Puttying is the final stage before applying paints and varnishes. The final result depends on how well the work was performed: the smoothness of the walls, the durability and strength of the foundations.
Also, the quality of the work determines the aesthetic overall appearance.
Fiberglass putty. Features of the material
Mesh for wall putty
Fiberglass putty involves the use of a special woven material that is similar to a mesh. It is sold both in large rolls for covering large areas, and in tape form for working on small damaged areas.
This material is widely used not only for restoring damaged surfaces, but also in the manufacture of window slopes and when working with plasterboard sheets. This “matter” allows you to create strong corners, as well as seal seams and joints.
Representatives and properties of painting meshes
It is difficult to find the best product to ensure a smooth surface.
Why do you need a painting mesh?
When using reinforcing mesh for putty in construction, it becomes much easier to process walls. All kinds of building mixtures can be applied to the product: cement-sand mortar, putty, decorative compounds of any viscosity. The product is also required when laying tiles to reinforce the adhesive and compact the mixture. The product is used to seal cracks, it is used to cover the space around doors and windows, to process joints, and it is laid on the floor during the process of pouring a concrete screed.
Mesh in rolls
They produce several options for painting mesh for wall putty, including fiberglass products with large cells. This option is resistant to alkalis. Even after a fairly long period of use, there is no rust on it.
Other benefits include:
- light weight of the material;
- resistance to high loads;
- preventing wall deformation;
- increase in service life;
- improving adhesion of plaster;
- prevention of crack formation.
It is necessary to distinguish between the facade version of the mesh, which has a higher fiberglass density and larger cell size, from products for work inside buildings. Such materials are characterized by small cells and low density.
Fiberglass for walls and ceilings
When choosing products, it is necessary to take into account the type of surface. Fiberglass is a fabric that is produced from special fibers by heat treatment and pressing.
This product has the following quality characteristics:
- fire safety;
- high reinforcing properties;
- excellent tensile strength;
- antistatic;
- hypoallergenic.
Thanks to the use of safe components in production, fiberglass does not have a negative impact on human health. Considering its resistance to biological damage, this material can be considered an excellent addition to protecting ceilings and walls from mold and fungal infections.
Application area
Abrasive painting mesh is purchased for sanding wall and ceiling bases made of wood, plasterboard and other materials. It is used for finishing putty on the base for wallpaper and painting. Based on the abrasive, the material is used for various plasters: putty, soft gypsum plasters. The surface to be treated can be cement, sand-lime, or gypsum.
The mesh is purchased for cleaning metal, plastic, concrete, and brick surfaces. It prepares the plastered surface for finishing. It not only polishes, but also removes rust, old paint, and whitewash from the metal body. It can be used to sand almost all types of plaster material.
Using putty nets
The execution process is almost the same with any type of reinforcing mesh.
Working with paint mesh
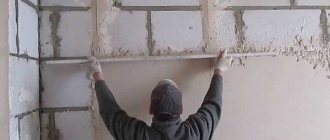
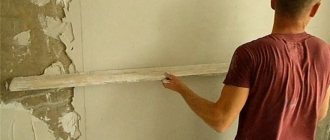
Before starting work, it is recommended to divide the canvas into separate fragments. Then the wall should be primed, after complete drying, apply the initial layer of putty, lay the reinforced mesh and press it into the wet material with a spatula. It is worth considering that the putty mesh is overlapped.
After this, a thinner layer of putty is applied on top and leveled, using the widest spatula. The finally dried wall is sanded with a mesh or sandpaper. It is necessary to remove all construction dust and apply a final leveling primer layer, which is subsequently cleaned with fine-grained sandpaper.
Using serpyanka
This product is a mesh with cells in the form of small squares and is necessary for connecting joints. Serpyanka is best suited for drywall, fiber sheets, concrete and cement, for more thoroughly strengthening slopes on windows and doors, for masking cracks and reinforcing joint corners in rooms.
It is important to remember the procedure:
- joints should be thoroughly cleaned and primed;
- carry out actions only after the walls have completely dried;
- Place the serpyanka on the desired area and apply putty using pressing movements so that every cell is filled.
A new layer is applied after the previous one has dried, then the surface is cleaned. There is another option, in which the serpyanka is attached to a surface previously lubricated with glue. To fix the mesh, it should be pressed tightly against the wall. Then another adhesive layer is applied on top, after which it dries, they begin to putty.
The described method is less popular among builders, since the quality of finishing may decrease.
Application of web mesh
This product is made from the same raw materials, the only difference is that the fiberglass is pressed. The use of a web mesh completely eliminates the formation of cracks on the walls. The product is glued to the primed areas.
The operating procedure is as follows:
- the wall is glued with a special compound;
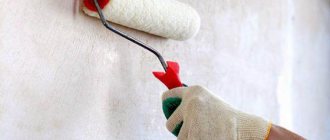
- using a roller, press down the evenly distributed product;
- After drying, the wall is puttied.
The next steps are sanding and additional priming. We must not forget that the web mesh is overlapped with a margin of up to 6 cm.
How to use
The reinforcing capabilities of painting grids are maximized when they are placed inside the processing layer intended for leveling. The probability of crack formation decreases in proportion to the approach of the mesh to the outer layer of the surface. Technological process for reinforcing the putty layer:
- Prime the plastered wall.
- After the primer has hardened, apply the putty base.
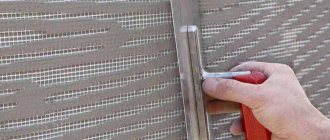
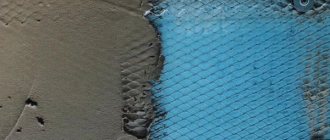
- While the putty is wet, place a fiberglass mesh on the wall and press it into the solution with a tool (trowel).
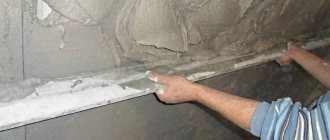
- Cover the network with an additional layer of putty, leveling it with a wide spatula.
When the reinforced layer has hardened, it is time to process it with a sanding mesh or sandpaper. In order to achieve an ideal aesthetic effect, a finishing compound is applied to the second layer of putty, which, after hardening, is sanded with fine-grain emery cloth. A completely flat plastered wall is coated with a finishing primer, after which it has hardened, painting can begin.
The technology for using mesh with an adhesive layer on drywall is somewhat different:
- The joining boundaries are expanded, cleaned and primed.
- Serpyanka is glued to the frozen joint.
- Putty strokes are applied with force so that the mass squeezes through the mesh and fills the space between the sheets of drywall.
- Without interruption, apply the second layer of putty, gradually leveling it with a spatula.
After sanding the surface and making sure that the primer has completely polymerized, you can begin painting and wallpapering.
The web is also initially glued to the primed surface: the glue is spread with a roller, the strips of fiberglass are leveled and pressed with the same adhesive roller. The putty mixture is applied after the glue has completely hardened. The following steps are identical to previous finishing technologies: sanding and priming.
Note! The next mesh for puttying fiberglass walls should overlap the previous one by at least 5 cm.
In order to reinforce the putty layer at the outer corners of the openings, you can use a specially designed corner with attached fiberglass. The corner forms an auxiliary barrier against careless chipping as a result of severe mechanical damage by a person carelessly leaning on these areas. Internal corners are often reinforced with a standard grille or fiberglass.
Working with polyester mass
The subsequent processing of walls with mesh directly depends on the quality of the putty on the walls. For this, builders often use a polyester mixture, which can be purchased in specialized stores. It includes substances that have a positive effect on the durability of the coating. At the same time, the total cost of construction work increases slightly.
Professionals use polyester mass for the following purposes:
- sealing cracks and leveling the surface:
- final finishing;
- giving smoothness.
Using the paste in some cases allows you to do without sanding and grouting. The mixture is firmly connected to the surface of the walls and, if necessary, can be easily sanded.
There are several types of finishes that require a polyester blend:
- with aluminum powder;
- with universal coating;
- pneumatic spray;
- based on fiberglass, etc.
Fastening technology
The technologies for carrying out work with each option have an identical algorithm: preparing the base, fixing the canvas, covering the surface with a solution. However, each case has its own nuances.
Preparatory stage
Before leveling the base, preparatory work must be carried out. The surface must be clean, “healthy” (free from mold, mildew and rust), and durable. The putty is applied in a thin layer, so it is also important to fill large differences, pores, cracks, and gaps in the seams with plaster mortar in advance. Only a couple of types of paints stick to oil stains, which forces you to use a degreaser. Finally, the walls and ceilings are impregnated with adhesive primer. For wet rooms, options with antiseptic additives and water repellents are considered.
Grinding
The final stages of reinforcement are finishing putty and sanding the walls. The final putty is carried out in the same way as the main one. It is only important to wait until the surface with the reinforcement mesh is completely hardened. If this condition is ignored, the integrity of the coating may be compromised. The last putty layer should be no thicker than 2 mm. Sanding work begins only after the walls have completely dried. The process is carried out with the aim of straightening the walls and ensuring their smoothness, which affects the overall aesthetics of the room.
More attention should be paid to sanding walls, since wallpaper or painting applied to poorly treated areas only enhances existing defects. If the surface is not smooth enough, the wallpaper will peel off and wrinkles will form on it. To obtain the desired result, grinding should be carried out in good room lighting so that no imperfections are left on the surface.
It is best to start the sanding process one day after the final putty. Use a special sponge or sandpaper for this purpose. The device should be moved along the surface to remove roughness and protrusions from it. If depressions are found, they should be filled with putty. At the first stage of sanding, you will need coarse-grained sandpaper, after which fine-grained sandpaper is used to give the walls an aesthetically smooth appearance.
The technology of the process consists of circular movements going from top to bottom, thanks to which all irregularities are gradually removed. In difficult to reach places, it is recommended to use a sanding sponge. Some builders work with an abrasive mesh that has good wear resistance. However, this material is higher in price. The process is accelerated several times when using a grinding machine on which emery is attached. In addition, the quality of work improves several times.
Do I need to putty drywall?
Nobody wants to do extra work. In addition, putty is a long, difficult process that takes a lot of time. A reasonable question arises: why putty on the flat surface of plasterboard sheets. Maybe you can do without it during finishing? With some types of finishing it is possible, but not with all.
You should always seal sheet joints, corners and screw heads. For any type of finish. Be sure to putty the gypsum board before painting. The surface of the drywall is far from ideal, and new irregularities are added during transportation and installation. If you paint the surface without first leveling, they will all be clearly visible, especially if there is at least a slight degree of gloss.
Preparing drywall for wallpapering - you can only putty the seams, then prime the surface
The Knauf company, one of the leaders in the production of drywall, allows the entire surface of the sheets not to be puttied under tiles and wallpaper. Only joints, corners and screws. No one uses putty for laying tiles, but yes, for wallpaper. And all because wallpaper pasted without pre-treatment sometimes comes off along with the cardboard and sometimes even down to the plaster. So the second time, putty is simply inevitable.
You can avoid puttingty the entire surface of the sheet by using a primer. In this case, the primer is water-dispersed acrylic paint diluted with water. It creates a film on the surface with which the glue interacts well, but this film also prevents the cardboard from being damaged when the wallpaper is torn off.
Before painting, it is necessary to putty the drywall completely, and until it is in perfect condition.
So, it is absolutely necessary to putty the drywall before painting, preferably before wallpapering (at least in one layer) and only seal the screws and seams under the tiles.
