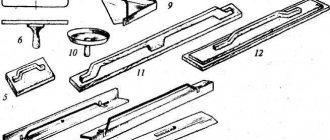
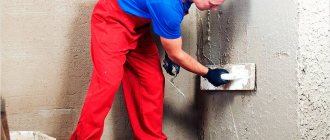
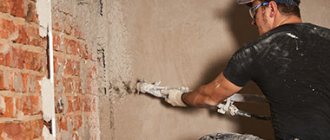
When starting a renovation, the owners want to get a beautiful, stylish, comfortable apartment or house. Achieving the goal is impossible without durable finishing: plaster and putty. A strong plaster layer can be obtained using a technological operation such as reinforcement. Beginners in the construction business and some experienced home craftsmen do not always understand the nuances of reinforcement.
The editors of the StroyGuru website decided to talk in detail about the types of reinforcement, the materials for its implementation, and the features of the technical process. Particular attention will be paid to the reinforcing mesh for plastering walls.
What is this - reinforcement
Reinforcement is a method of increasing the strength of a product by introducing high-strength materials into the composition (structure). A striking example of reinforcement is reinforced concrete. Thus, a concrete slab 4-5 cm thick is easy to destroy - it has weak bending strength. Reinforced concrete is so thick, it takes a lot of effort. And that’s not a fact.
For plaster, 2 reinforcement methods are used:
- using a mesh for plaster;
- dispersive - short fiber fiber made of metal, propylene, glass or basalt is mixed with the CPR.
Reinforcing the plaster layer with fiber successfully copes with the task when there is good adhesion of the mortar to the wall. If there is no adhesion at all or it is weak, a plaster mesh helps. What it is and how it works can be found here.
Why is it necessary?
Plaster reinforcement allows you to:
- ensure reliable adhesion of the mortar to the wall material - when working with brick and wooden walls, it will not be possible to obtain a monolithic slab. It will definitely peel off. The same problem applies to a thick layer of mortar - without a reinforced mesh for plaster it will quickly “swell”;
- increase the strength of the leveling layer:
- when the building shrinks;
- vibrations;
- mechanical influence.
- achieve higher load-bearing capacity;
- reduce the influence of temperature and humidity, with their sudden changes, on the strength characteristics of the finish;
- strengthen areas with a high risk of collapse: openings, slopes, joints - reinforcement prevents destructive processes;
- increase the durability of the plaster layer;
- Preserve the surface of the applied mortar from cracking as it gains strength;
- protect the insulation from mechanical stress when facing the facade with decorative plaster using the “wet” method;
- reduce shrinkage of the solution.
When to use it
Experts recommend continuous reinforcement of plaster with mesh in the following situations:
- the solution is applied to porous building materials: aerated blocks or foam concrete;
- mixed masonry of two or more wall materials was used;
- External walls are insulated using the “wet facade” method - polystyrene foam (Penoplex) or basalt wool is plastered with decorative compounds;
- plastering is carried out before painting;
- plaster layer 3 cm thick or more;
- decorative plaster is applied with a grain size of less than 2 mm.
According to regulatory documents (SNiP and SP), when carrying out interior finishing work, it is allowed to refuse reinforcement when using gypsum compounds. For cement, cement-lime and cement-gypsum mixtures, a mesh under the plaster is required in places where cracks are most likely to appear. This:
- semicircular surfaces;
- elastic bases;
- ceiling rustics;
- floor slab joints;
- connecting seams of drywall - often under putty or grout;
- connecting seams of dissimilar wall materials. An example would be a wall, one part of which is lined with bricks, the other with gas blocks.
It is also recommended to lay “kerchiefs” - strips of fiberglass reinforcing mesh - at the corners of door slopes.
How to attach metal mesh
The main task at the reinforcement stage is not only to securely fix, but also to straighten the mesh fabric. Metal products are usually heavy and elastic. Therefore, in order to reliably fix the panel on a wall or ceiling, you need a sufficient number of fastening points, and the fastening elements themselves must withstand the weight of the network (taking into account the weight of a thick layer of mortar that tends to slide down along the surface).
The design of the fixing part is selected taking into account the cell size. The cells of metal sheets are larger than those of plastic ones.
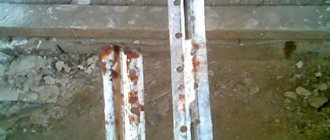
If the mesh is covered with lubricant, it must be cleaned of it before attaching the mesh to the wall. Otherwise, a satisfactory connection between the wire and the solution will not work.
Probably the easiest option for wooden and brick walls is to nail the canvas. In this case, the nails are driven in only partially (hardware 60-70 mm long are driven in 50 mm), and the upper part of the nail is bent, pressing the mesh fabric to the base. In a brick base, nails are driven into the masonry seam. There are no specific recommendations on the spacing of attachment points or their placement on the plane. However, it is recommended to fasten the upper edge of the canvas in increments of up to 50 cm (optimally 25 cm) parallel to the corner line.
fixing the mesh with nails
An alternative to nails is self-tapping screws. You can use them on any surface except metal. However, to install self-tapping screws in concrete, you will need dowels. The diameter of the screw head is not enough to securely press the net. That's why washers are used.
fastening the metal mesh with dowels and spacers
You can make the clamping parts yourself. A mounting tape perforated in length is suitable for our purpose. We also attach the mesh under the plaster using metal hangers that are made for attaching drywall sheets. Using metal scissors, we cut the tape into pieces with two holes to create mounting strips that simultaneously press two mesh wires.
You can also tie a network to the caps of the self-tapping screws using a binding wire. First, screw in the self-tapping screw (without screwing it all the way), then, after attaching the wire, deepen it until it stops. From time immemorial, stove makers laid the ends of the binding wire into the masonry, and fixed the net with the leads. You can do this even now if you lay brick walls with your own hands.
Holes are drilled under the dowels. During the drilling process, dust is generated, which is carefully removed at the preparation stage. This is a minus, since you will have to get rid of dust again.
Types of reinforcing mesh
The material reinforcing the plaster must have a cellular structure and not react with the acidic (gypsum) or alkaline (cement) solution environment. In addition, it has high tensile strength, good elasticity and a service life exceeding the durability of the reinforced structure.
The following grids fully meet these requirements:
- made of metal;
- plastic (polypropylene, polyurethane, polyethylene, lavsan);
- fiberglass;
- basalt.
In addition, shingles are widely used to reinforce wood.
Metal
Metal mesh for plastering walls is made from galvanized and non-galvanized wire, a single sheet of stainless steel and reinforcing rod.
Advantages and disadvantages
Metal is a strong and durable material with many advantages :
- has high strength, which allows you to: strengthen walls; keep a thick layer of plaster from delamination; withstand mechanical loads on the finish; resist vibration and shrinkage of the building;
- rigidity - a minimum amount of fasteners can be used to attach to the wall;
- fastening hardware does not increase the thickness of the solution;
- forms a monolithic layer of plaster with the wall when the mortar has poor adhesion to the wall material, such as brick;
- the only material that allows you to plaster metal surfaces is simply welded to the base;
- versatility - there are no restrictions on the types of walls (you can always find a suitable option) and areas of application;
- Easy to cut with metal scissors.
There are also disadvantages . Some of them are holding back sales growth:
- high price compared to alternative options;
- large specific gravity, creating additional loads on the wall and foundation. It is impossible to say that the wall will fall apart or the foundation will burst. But their service life will decrease. This is especially true for wooden and plasterboard walls, weak foundations;
- complex fastening - installation is difficult without experience. The problem is the hardware, which you need to be able to mount correctly on the wall;
- susceptibility to corrosion in aggressive solution environments. So, coating the metal with zinc helps little inside the gypsum solution.
Kinds
Based on the manufacturing method, the following types of mesh are distinguished:
- all-metal expanded metal network (CPVS);
- chain link;
- welded;
- woven.
TsPVS. All-metal expanded metal mesh is produced by cutting holes in a sheet of cold-rolled or galvanized steel and then stretching it on special machines. As a result of stretching, the cells take on the shape of a diamond or scale. The thickness of the finished mesh can vary from 0.4 to 2 mm, the slot length starts from 3 mm.
This manufacturing technology allows us to obtain the most durable metal reinforcing material. It does not deform under heavy loads and temperature changes. Retains all technical characteristics when one or more threads break. Has a long service life. Even non-galvanized metal can withstand the alkaline environment of CPR for decades.
The downside is the heavy weight - it creates a significant load on the walls and foundation.
Chainlink. This type of mesh is the most popular in the building materials market. But the main purpose is to construct barriers. It is rarely used for plastering, only on concrete and brickwork.
It is obtained by weaving carbon, high-alloy, stainless or galvanized wire with a diameter of 1-3 mm using a special technology invented in 1878 by Karl Rabitz - after the name of the inventor, the mesh became known as “Rabitz”.
Weaving with bending of threads allows you to obtain a flexible, yet durable material. It is durable and withstands the aggressive environment of solutions well. This type of reinforcing network is indispensable when finishing walls made of adobe and clay - it is easier to plaster using “Rabitz”. It allows you to easily obtain a layer of plaster of almost any thickness - it holds a large volume of plaster mortar due to its thickness.
The main disadvantage is the complicated installation. Several helpers are needed to first stretch, then unravel, and then support while attaching to the wall.
Welded. Already from the name itself it is clear that the reinforcing mesh is obtained by welding. To do this, low-carbon steel rods are laid perpendicular to each other and tacked with a welding machine at the intersection points.
The wire diameter and mesh size can be very diverse. Moreover, the thicker the rod and the smaller the cell, the stronger the reinforcement. The most popular product is a mesh with a cell of 5x5 mm and a rod thickness of 3 mm. This is enough for external and internal work, under cement mortar.
For information: you can find out the thickness of the wire by number. For example, welded mesh No. 3 means that the rod diameter is 3 mm.
Welded mesh canvas is most often used to strengthen masonry. But plasterers are no less willing to work with it. Especially on wooden walls, where filling traditional shingles is time-consuming and labor-intensive. But here we need a different cell size: 40x40 mm.
The advantage is low price and easy installation - no need to unravel and support during fastening. Fastening can be different: using hardware or glue. It goes on sale in the form of rolls 10-30 m long and 1 to 2 m high.
The main parameters of the welded mesh can be found in the markings. It has the following form: X C p D b x L, where X indicates the type of network, C indicates the type of connection - welded, p - rolled reinforcement, D - shows the diameter of the wire (if the rod is of different diameters, the designation takes the following form: d1/ d2), after the diameter the steel grade is sometimes indicated, b is the width, L is the length of the roll or sheet.
Woven. The adjective “woven” in the name of metal reinforcement appeared due to the characteristic weave of fabric made of stainless, galvanized or carbon steel wire of the same diameter. Woven fabrics made from non-ferrous metals are also available on sale. Cells are square or rectangular. The size 1x1 mm is obtained by plain weave, 1x2 and 2x2 mm - by twill weave.
The thickness of the wire used may vary. Based on this criterion, light, medium and heavy networks are distinguished. Each type of metal reinforcing materials discussed above has individual disadvantages that should be paid attention to.
Thus, welded galvanized mesh is deformed during long-term storage, resulting in their separation at the intersection of the rods. It doesn't seem to affect the overall strength of the mesh. But the problem lies elsewhere: welding damages the protective layer of the metal and it begins to actively deteriorate. The deformation of the cells in the expanded network is not restored. Chain-link requires a lot of installation effort.
Mesh for plaster: selection and application
Encyclopedia map
Plaster remains one of the most popular materials for finishing walls and ceilings. In order for the plaster layer to last as long as possible, it must be properly reinforced using a special plaster mesh. The mesh for plaster can be metal or polyurethane and is attached to the surface using glue, self-tapping screws, screws or other devices for the same purpose. As a rule, it is sold in rolls and can have different sizes.
Each type of mesh has its own characteristics and its own scope of application.
Masonry mesh (painting), made of plastic (polymer), with cells of five by five millimeters; it is used when finishing brick walls inside and outside buildings; it is suitable for plastering with gypsum mortar, where there is no cement; The colloquial name for such material is painting mesh.
Universal small – made of polyurethane; the side of its cell is six by six millimeters; This 20 mm woven mesh for plastering is used in combination with mixtures for finishing and plastering; this material is suitable for interior decoration.
The universal mesh is medium - its cells are rectangular, 14 by 15 millimeters; it is commonly used to create building interiors.
Universal large with cells, the side of which is 22 and 35 millimeters; it is convenient to use when finishing spacious premises, for example, warehouses or production workshops; This is a suitable mesh for plastering façade walls; it tolerates loads and temperature changes well.
Fiberglass mesh, which is made of fiberglass pre-treated by a special method; its cell size is five by five millimeters; it tolerates low and high temperatures well, exposure to precipitation, and is also not affected by chemicals, which makes it the best option when using cement mixtures; It has very high strength characteristics and can “work” anywhere.
Plurima, which is a biaxially oriented structure; its material is polypropylene; the sides of the cells are five by six millimeters; does not react to the action of chemical compounds; very light; used for indoor and outdoor work.
Armaflex made of polypropylene, with reinforced connections with cells of 12 by 15 millimeters; its advantage is its ultra-high strength, which allows the use of such a product when creating a thick layer of mortar; it is suitable for forming a reinforcing layer of façade plaster.
Syntoflex mesh, polypropylene, with two types of cells: 12 by 14 and 22 by 35 millimeters; it is distinguished by its lightness and inert properties with respect to the chemical effects of various substances; used both inside and outside buildings for various purposes; This is an ideal mesh for plastering exterior walls.
A steel mesh is made up of rods connected by soldering at the intersection points; There are many cell options; suitable for heavy loads when it is necessary to form a layer of large thickness.
Galvanized mesh, which is made from galvanized metal rods; cell sizes vary; very durable and used for facades and interiors; one of the most popular types of reinforcing mesh on the Russian market.
Depending on how the plaster is applied (coating or spraying), metal or plastic mesh for plaster can be secured in different ways. The bottom plaster layer is reinforced with the selected mesh over the applied mortar of the required thickness, slightly pressing it.
The ideal option for applying the final – decorative or covering layer – would be to first attach the reinforcement to a dry surface using special devices. If the surface to be treated is small, the plaster mortar itself can serve as fasteners. In these cases, it should be applied pointwise, only to secure the mesh. After this, the required thickness of the plaster layer is spread evenly over the entire surface.
Experts advise paying attention to several points when deciding whether to use reinforcing mesh.
First, understand how thick the mortar layer is supposed to be on a specific wall or ceiling surface. This is important because the thickness of the construction mesh depends on this factor. To do this, take measurements: find the most protruding point on the wall or ceiling. One of the levels is used - laser or construction. Then they look for the “lowest” place. Determine how thick the plaster layer needs to be applied.
When the layer of mortar is no more than twenty millimeters, and there are no rusts or significant protrusions on the ceiling or wall, reinforcement does not need to be used - the mixture can stand on its own.
With a layer thickness of twenty to thirty millimeters, reinforcement will be needed. Without it, the coating may peel off over time and cracks may appear. A polymer mesh or fiberglass mesh is suitable. It will prevent cracks from forming on the finished surface of the dried mixture.
A layer of more than thirty millimeters requires the use of metal material. This will help prevent the plaster from peeling off under its own weight.
If measurements show that to level the surface it is necessary to apply a layer of solution of fifty millimeters or more, it is better to abandon plaster altogether. In this case, it is easier to use a suspended or suspended ceiling.
Installation of fiberglass plaster mesh.
When choosing a mesh, remember that its cells must exceed 5x5 mm, density - from 110 to 160 g/m2. The material must be alkali-resistant. The minimum thickness of the plaster layer when using fiberglass mesh is 3 mm, the maximum is 30 mm.
Before starting work, the mesh is cut to size into sheets. The size of the canvases will depend on how the mesh is positioned - across or lengthwise. If there are rustications on the ceiling, the mesh should be placed in one piece along each of the seams. If there are no rustications, then there is no particular difference in the location of the mesh; you just need to make sure that the entire surface is covered with the mesh. It is better to cut with a margin of 10-15 cm to strengthen the seams between the walls and ceiling.
The surface to be plastered is degreased and coated with a special primer. This is necessary to ensure good adhesion of the mortar to the wall or ceiling.
First, the first layer of putty or plaster is applied to the entire surface. A plaster mesh is placed on top of it and then recessed, after which a second layer can be applied. It is permissible to perform this operation in one pass or wait for the first layer to dry in between. The fiberglass mesh should be placed in the middle of the plaster layer.
Builders most often use screws and brackets to attach the fiberglass mesh to the base, and then plaster directly over it. This method will be justified for a thin layer of plaster (putty). In this case, the mesh will be located in the middle of the plaster mortar. However, if the thickness of the plaster mortar is 10 mm or more, the mesh will definitely end up on the edge, reinforcing not the plaster itself, but the surface.
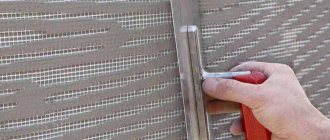
It is better to apply the mixture throughout the entire space, but it is worth distributing it, starting from the middle - in different directions. At the same time, the edges of the canvas are pressed at the corners with a wide spatula. The second spatula is used for smoothing.
When plastering the ceiling, it is suggested to first make holes, then insert fasteners into them. After this, glue the plaster fittings to the ceiling with mounting tape. This option is suitable if lightweight material is used. Then metal plaster beacons are installed. The mixture is applied. It is important to ensure that it fills the cells and adheres to the surface of the ceiling.
Metal mesh for plastering walls
used when you need to make a layer of solution of thirty millimeters or more. It is better to choose galvanized steel with cells of ten by ten or twelve by twelve millimeters. An expanded metal mesh with a cell size of 10 by 25 millimeters is also suitable.
Before starting to work with metal reinforcement, experts recommend degreasing it.
After this, the mesh is cut using scissors into individual canvases, taking into account how they are planned to be placed on the surface of the wall or ceiling.
Then, using a hammer drill, holes are made for the fasteners. The distance between them is proposed to be chosen from 25 to 30 centimeters. Thus, you should get about sixteen holes per “square”.
The next step is to secure the metal mesh to reinforce the plaster with screws or dowels, or self-tapping screws (in the case of finishing a plasterboard surface). Additionally, the material is secured using mounting tape. The individual pieces should overlap each other by about ten millimeters. If necessary, drill additional holes for fastening - the reinforcement should not move away from the ceiling.
Then construction beacons are placed. Apply the first layer of mortar using a trowel. It is important to thoroughly push the solution through the cells. Then distribute it evenly over the entire surface. Wait until the layer dries before moving on to the next one.
Professionals recommend choosing a metal mesh for plaster in cases where surface differences are more than four centimeters. Durable metal will help hold the thick layer of mortar that will have to be applied in this situation.
Steel materials are the only option if the mixture contains cement, which contains alkali. Metal is less susceptible to alkali than plastic.
A solution with clay also requires the use of metal reinforcement. Material with cells of 50 by 50 millimeters is suitable.
Fiberglass
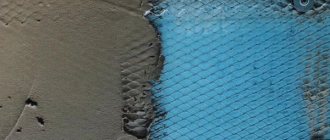
Fiberglass mesh for plaster is a composite material. They have a reinforcing strand, consisting of fibers not twisted together, covered with an anti-corrosion layer of polymers. The structure is clearly shown in the photo.
For reference: basalt threads have the same structure, where basalt fiber is used instead of glass roving.
Advantages and disadvantages
According to professional plasterers, this is the best option for most types of plastering work. Consumers like it for the following advantages:
- high tensile strength during deformation - the figure is approximately 2 times higher than that of metal;
- resistance to mechanical loads during vibration;
- reliability and stability (does not change linear dimensions) in different operating conditions - perfectly withstands high and low (frost) temperatures;
- plasticity and flexibility, allowing to reinforce curved surfaces;
- elasticity - inferior to polypropylene, but superior to all types of metal mesh;
- resistance to deforming loads - integrity and shape are maintained during bending and twisting;
- good adhesion to all types of solutions;
- absence of destructive processes: rotting, corrosion, decomposition in alkaline or acidic solutions;
Fiberglass mesh.
- durability - manufacturers indicate a service life of up to 100 years;
- simple installation: easy to cut; simply attaches to the wall; installation can be done immediately after unpacking - there is no “shape memory”, i.e. you don’t have to wait for the material to straighten;
- light weight - about 6 times lighter than metal, 1.4-1.8 times lighter than plastic;
- fire resistance;
- affordable price;
- versatility - can be used for interior and exterior work.
There are also weaknesses:
- is destroyed at a temperature of +200oC and above;
- An assistant is needed for tensioning when attaching to the mortar.
Kinds
Alkali-resistant fiberglass mesh is produced not according to GOST, but according to TU. In them, the main characteristic of the material is density. Depending on its size, the following types of fiberglass for plasterers are distinguished:
- painting for interior work. Its characteristics: density - 50-60 g/cm3; cell size - 2x2; 2.5x2.5; 3x3 mm. Used for leveling walls and ceilings, strengthening internal and external corners, as well as door and window slopes, strengthening joints and cracks;
- interior Density - 60-70 g/cm3, cells - 5x5 mm. It is used for leveling load-bearing surfaces, strengthening slopes in window and door openings, for putty;
- universal mesh. The main purpose is external and internal work when applying several thin layers of plaster. Density - 120-130 g/cm3, cell size - 5x5 mm;
- putty. The density is much higher - 145-160 g/cm3. Cells from 5x5 to 10x10 mm. It is used for insulating facades with basalt wool or polyethylene, restoring a building, waterproofing the foundation and plinth;
- armored Used to increase the strength of plaster when finishing with tiles or porcelain stoneware. Cell size - 5x5 mm, density - 270-340 g/cm3.
In addition to the usual mesh, manufacturers offer:
- self-adhesive fiberglass material - used for plastering polystyrene foam, expanded polystyrene, smooth concrete;
- serpyanka mesh - a narrow strip of fiberglass. Used for sealing seams and joints, cracks.
Marking
The markings on the insert will help you select a mesh. Letters and numbers are used. The numbers indicate density and tensile strength, the letters indicate the purpose and quality characteristics:
- “C” - plaster mesh;
- “SS” – fiberglass mesh;
- “N” - used for outdoor work;
- “B” - internal;
- “Ш” - putty;
- “A” - anti-vandal (basement);
- "U" - reinforced.
For example, the inscription “SSSH 160-3700” means that the mesh is fiberglass, putty, with a density of 160 g/cm3 and a tensile strength of 3700 N.
Application area
Most often, fiberglass mesh is used to create a durable top layer of plaster. It prevents it from cracking, peeling, or peeling. In this case, the mesh is attached not to the spray, but to the ground, slightly submerging it in the main layer of plaster.
Fiberglass is also widely used to improve the adhesion of the solution to smooth surfaces from which it slides. Here you already need a self-adhesive version of the reinforcing mesh. There is practically no alternative material when reinforcing seams and joints in sheet materials, panels and blocks, cracks - serpyanka comes to the rescue.
Reinforcing fabric goes on sale in the form of sheets rolled into rolls (usually 1 m wide, up to 100 m long), strips (45 and 100 mm wide, 20 to 150 m long) and corners (30 mm shelf width, 2 mm thick). mm, length - 2.5 m).
Types of grids
There are several types of products used for reinforcement, the main ones being the following materials:
- fiberglass;
- metal.
Types of reinforcing mesh: a - metal;
b - fiberglass When applying a thin layer of solution on a flat surface, fiberglass cloth is usually used. For finishing curved walls, when the thickness of the plaster is more than 2 centimeters, only a metal product is suitable.
In turn, metal mesh also comes in several types:
- woven - durable and flexible material, which is made from wire of small cross-section. This product is used for both external and internal work. When choosing a woven fabric for reinforcement, it should be taken into account that the optimal cell size in this case is 1x1 cm;
- wicker - also known as chain-link mesh. Best suited for finishing large surfaces. The most common cell size is 2x2 cm;
- welded - made from wire using spot welding. The rods located perpendicular to each other form square cells, the optimal size of which for reinforcement is 2-3 cm. Welded products are most often used for finishing buildings subject to severe shrinkage;
- expanded metal – made from sheet metal by forming diamond-shaped cells on a special machine. Such material is usually installed in cases where a small solution consumption is expected per 1 m2.
Basalt reinforcement
Basalt reinforced mesh for plaster is produced using two technologies:
- from roving (untwisted fiber of a tow or thread) - the structure repeats the fibers of fiberglass;
- twisted basalt threads.
Weaving of nets is carried out on knitting and stitching machines. From roving it is immediately supplied to the commercial network, from twisted threads it is first impregnated with protective compounds that prevent destruction of gypsum or cement in an aggressive environment, and only then goes on sale.
Such fittings are popular among plasterers. Its advantages:
- high strength: tensile strength - 50 kN/m, tensile strength - 53.6 kN/m. Such indicators make it possible to perfectly withstand deformations, bends, and increased loads that appear during the operation of the building;
- resistance to high and low temperatures - 25 freezing cycles resulted in a loss of tensile strength of only 5%;
- resistance to aggressive environments of various solutions;
- does not rot, does not corrode;
- has good adhesion to gypsum and cement mortars;
- has a long service life - 50 years or more;
- bends well - you can reinforce surfaces with complex geometries;
- easy to use - easy to cut with ordinary scissors and install;
- does not create radio interference;
- light weight - one square meter weighs 320-360 grams;
- low price;
- moisture resistance.
There are no shortcomings, which is very rare for building materials.
Dimensions
Unlike fiberglass, the number of sizes is limited. The thickness of the thread varies from 2 to 4 mm, the cell size is 25x25 and 50x50 mm. Rarely, but there are cells of 5x5 mm and 150x150 mm. Sold in the form of a canvas with a width of 50 to 500 cm, rolled into rolls.
Application area
It is used to strengthen plaster on facades, plinths and on walls inside the building.
Shingles
Shreds are knocked out of a row of plaster mesh. It's not a mesh at all. But without it it is impossible to plaster wooden walls, be they logs, beams or boards. Sometimes they try to use welded metal mesh, but only on interior partitions.
On load-bearing walls, especially in new buildings, there is a high risk of metal deformation due to the “breathing” of wood - linear dimensions change greatly under the influence of humidity. Deformed reinforcement will tear the plaster. But in old wooden houses, where the wood has dried well, everything can be reinforced with welded mesh. The drani does not have this problem - it breathes synchronously with the wall.
Shingles are narrow planks from 1 to 2 m long, 15-20 mm wide and 3 to 5 mm thick. Sold in packs of 50 or 100 pcs. in each. They are quite expensive.
Advantages and disadvantages
Among the strengths of drani:
- environmental friendliness - natural wood cannot be an allergen or emit harmful substances;
- is not afraid of changes in temperature and humidity - can be used in unheated rooms, on balconies and loggias;
- improves the heat and sound insulation properties of the wall;
- light weight;
- simple installation technology - the whole process can be done with your own hands.
Flaws:
- burns well - requires treatment with fire retardants. In practice, such a procedure is not carried out, the explanation is simple - in case of a fire it still won’t help, and money is never superfluous;
- susceptible to rotting - protective impregnation is needed, but without oil elements (it is not friendly with solutions). Experienced plasterers prefer good drying instead of treating with special compounds;
- high price, as already mentioned above.
In addition to the plaster mesh, there is also a painting mesh, which has several varieties:
- putty mesh. Made from fiberglass. Looks like textiles. Cells 2x2 mm. Thickness - 0.8-1.2 mm. Density up to 60 g/cm3. Used to increase the strength of putty when painting walls. Not applicable for other types of finishing;
- fiberglass - glass fibers pressed into a thin sheet. Sometimes called a spider web. The purpose is the same as that of the putty net;
- serpyanka - putty mesh cut into strips. For ease of use, many manufacturers apply glue on one side. The main purpose is to reinforce cracks, joints, and seams between sheet materials.
Which grid and in what case to choose
When choosing a reinforcing mesh for plastering walls, you must consider:
- type of plaster mortar;
- wall material;
- application area. It is important here on which side of the wall the finishing is carried out: outside or inside the room, as well as the type of object;
- thickness of the plaster layer.
Type of plaster mortar
The compatibility of the solution with the type of reinforcing material depends on its resistance to chemical reactions with the components of the plaster mixture. All main compatibility options are given in Table 1.
Table 1. Compatibility of different types of reinforcing materials with different plaster solutions.
| Type of reinforcement / Type of mortar | Metal | Polymer | Fiberglass | Basalt | |
| galvanized | regular | ||||
| Cement | + | — | +/- | + | + |
| Plaster | — | — | + | + | + |
| Acrylic | — | + | — | + | + |
| Polymeric | + | + | — | + | + |
The table shows that gypsum solutions are not recommended to be applied to metal mesh. They have an acidic environment, against which wire protection helps little. And for CPR, the metal needs to be galvanized.
We need clarification on polymer films. Some of them do not react to the alkaline environment of cement plaster, some dissolve. When purchasing, you need to check with the seller or look at the certificate.
Wall material
The material of the walls does not always directly influence the choice of plaster mesh. For example, for all types of foam concrete blocks, when finishing facades, you can use metal reinforcement - here CPR is used, but not inside, because SNiP and SP recommend using gypsum for interior decoration, with which metal is not compatible. Recommended types of plaster for wall materials are given in Table 2.
Table 2. Recommended types of plaster mesh for different types of wall materials.
| Wall materials | Types of reinforcing material | ||||
| Metal | Polymers | Fiberglass | Basalt | Shingles | |
| Concrete | + | — | + | + | — |
| Tree | + | — | — | — | + |
| Brick | + | + | + | + | — |
| Lightweight concrete | +/- | + | + | + | — |
| Drywall | — | + | + | + | — |
| Insulation (wet facade) | + | +/- | +/- | +/- | — |
When strengthening the plaster layer over insulation (“wet facade”), not all types of lightweight mesh (polymers, fiberglass, basalt) are suitable for reinforcement. It is necessary to look at their purpose.
Application area
Externally, the fittings are used in extreme conditions. Therefore, fiberglass and basalt meshes are best suited. However, they cannot withstand a layer of plaster of more than 3 cm. In this case, there are two solutions: use metal reinforcement or two layers of glass and basalt mesh. One is placed at the bottom of the plaster layer, the second at the top. In terms of operational parameters, there is no big difference between the technologies. But the labor intensity and financial expenses need to be considered and the most optimal option must be chosen.
In addition, there is one more nuance: not all meshes are designed for facade work. You can find out the scope of application by marking. For interior work, light types of reinforcement are used: woven metal, polymer, fiberglass and basalt. When leveling a wall with a thick layer of plaster, use “Chain-link”, TsPVS or welded with a cell of 2x2 or 5x5 mm and a thickness of at least 2 mm.
For the ceiling, lightweight materials are needed for thin-layer gypsum plaster. In this case, the entire ceiling surface must be covered with overlapping fabric. The overlap is at least 10 cm. The joints between the ceiling and the wall are also reinforced with an overlap.
The furnace is reinforced with a metal mesh with a cell of 25x25 - 50x50 mm and a steel section of 1.2-2 mm, or basalt. Fiberglass and polymer materials cannot withstand heat.
With a plaster layer thickness of up to 3 cm, all types of reinforcing materials are suitable. Thicker ones require metal. Sometimes they use this method: two meshes made of fiberglass or basalt are sunk onto the bottom and top layers of plaster.
What is the function of the grid
The plaster mortar hardens and becomes artificial stone. Compositions with a mineral binder, while working well in compression, can hardly resist bending or tensile loads. Therefore, the plaster coating easily bursts at the slightest deformation of the wall or when the thickness of the layer peels off from it. In concrete structures, metal rods - reinforcement - are used to absorb tensile forces, and in plaster, the function of reinforcement is performed by a reinforcing mesh. Connecting with the network into a single whole, the plaster becomes a composite material capable of resisting bending, compression and stretching, no matter from which side external force is applied. Thus, the strength of the plaster layer increases many times over.
The second task that the reinforced mesh solves is the reliable fixation of the plaster to the base. To achieve this, several methods have been developed for attaching the network to the ceiling or walls. The methods and elements of fastening the mesh are different and depend on the materials of the base and the mesh fabric.
Another task of the mesh is to help the plaster mortar applied to the junction of structures made of different materials (for example, wood and concrete), hardening differently, and not form cracks.
The classic material for reinforcing plaster coatings is metal. Modern means such as plastics and basalt fiber have become such materials. You can learn more about reinforcing meshes in a separate article.
A simple rule will help you choose the type of reinforced mesh: if the layer thickness is 5 cm, use a metal mesh; if the layer is 2-3 cm, a plastic product will cope with the task. When plastering fireplaces or stoves, use a metal mesh.
In order for the attached mesh to fully cope with the task, it must:
- cover the entire surface to be plastered;
- be inside the plaster layer.
The mesh fabric is unwound and attached to the wall, placing the strip vertically. The fixed panels are overlapped (for metal - by the size of the cell, for plastic - 5-10 cm). They begin to mount the canvas on the wall from the ceiling. Attach it before installing the beacons. Only in this case is complete reinforcement ensured.
Metal and plastic have different properties. Metal is more difficult to cut and bend (depending on the diameter of the wire and the type of metal). Therefore, the methods of attaching metal and plastic panels are different.
Instructions for use
For each type of mesh there are several technologies for attaching to the wall. Let's look at the most common ones.
Metal fittings
Metal reinforcement can be secured using:
- self-tapping screws;
- dowel-nails;
- staples
All operations are performed in the following sequence:
- the roll is unrolled and leveled;
- cut into pieces of the required size;
- cleaned of oil - this is recommended by building regulations. In practice, I have never seen anyone wipe it;
- markings are carried out for fastening hardware - the ideal option is 30 cm from each other (optimally 16 hardware per 1 m2). For “Chain-link” you can use 50 cm;
- holes for dowels are drilled;
- fasteners are hammered or screwed into the wall, but not completely;
- a mesh is stretched over the fasteners, with an overlap of 10-15 cm;
- the fasteners are driven tightly into the wall, but so that there is a gap of 2-3 mm between the mesh and the wall;
- beacons are mounted on the solution;
- plastering work is being carried out. First, the spray is applied, then the primer, and the coating finishes.
Lightweight reinforcing materials
Fiberglass and basalt mesh can be fixed in one way - submerged in a layer of mortar and covered with the same compound on top. Wall mounting with staples and hardware is also common. But why this is done is unclear. After all, only up to 8 mm of solution can be applied on top. And for such a thickness of gypsum plaster, reinforcement is useless.
The algorithm of actions for this technology is simple:
- the wall is stitched (what it is and how it’s done can be seen here);
- markings are applied for beacons;
- the locations of the dowels are marked;
- holes for fasteners are drilled;
- dowels are driven into the resulting holes;
- Screws are screwed in under the guides - all heads must be in the same plane;
- the mesh is cut to size with a margin of 10-15 cm for overlapping installation;
- a cement-sand mortar is prepared;
- the first layer of plaster is applied - sprayed - to the area under the first sheet;
- After leveling the spray, the mesh is attached to the solution. The hardware heads are carefully passed through the reinforcement cells;
- the mesh is covered with a thin layer of new solution or rubbed over with the already applied one;
- the spray is applied to a new area, after which the mesh is again attached to the solution with an overlap;
- after attaching the reinforcement, beacons are installed along the entire wall;
- primer is applied;
- reinforcement is carried out again;
- after the soil has dried, the plaster layer is covered with a cover;
- the wall is plastered.
Important: the reinforcing mesh sunk onto the spray can be fixed not with mortar, but with construction staples.
Polymer reinforcement
Plastic mesh is attached to the solution, but using a slightly different technology:
- the mesh is cut to size;
- a base (primer) layer of plaster is applied;
- the mesh is attached and pressed into the solution;
- using a spatula, the reinforcement is leveled, from the middle to the edges;
- the reinforcement is covered with a layer of putty.
Shingles
The rubbish is applied to the wall in 2 layers. For the first, lifestyle, thin, 3 mm thick and 25-30 mm wide slats are taken, for the second, weekend, thicker and wider slats are needed. They are packed crosswise at an angle of 45o relative to the floor. The technology is described in more detail here.
