Decorative plaster called “bark beetle” is now perhaps the most popular type of facade finishing. You can see it on private houses and public buildings, and in a wide variety of designs. In general, applying decorative bark beetle plaster has a simple technology, but there are certain nuances without which it will not be possible to obtain the desired texture. What these nuances are, and how to learn this finishing yourself, we will consider in detail in our article.
Decorative plaster "bark beetle"
Characteristics of bark beetle plaster
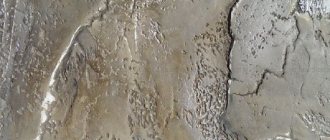
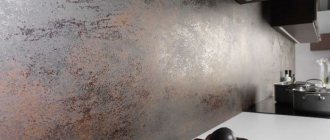
The material received this name because of the pattern that is obtained during the processing of the coating: the texture resembles wood worn away by bark beetles. When applied correctly, this coating looks very attractive and aesthetically pleasing, but if you make a mistake, all the decorative effect is lost.
Example of bark beetle plaster
The creation of a characteristic pattern is ensured by small hard granules contained in the plaster mixture. Their size varies from 1 to 3.5 millimeters, and the larger the grain, the more expressive the texture of the coating. Bark beetle plaster is made on a gypsum, cement and acrylic basis, and marble or mineral chips act as a filler. Acrylic compositions go on sale ready for use, gypsum - in the form of a dry mixture. As a rule, they are all white, but can be tinted during the mixing process, and can also be painted after being applied to the surface with façade paints.
Structural pattern of bark beetle plaster
Main characteristics of the material:
- after drying, the coating acquires high strength, due to which it can withstand light impacts, friction and other mechanical influences;
- plaster does not absorb moisture, tolerates atmospheric influences and temperature changes well;
- the content of polymer components and mineral fillers makes the finished composition much lighter than conventional plaster, and this reduces the load on the façade structural elements;
- This plaster contains no substances harmful to human health, so it is considered an environmentally friendly material;
- when applied correctly under standard operating conditions, the coating lasts for years without deterioration in external qualities, and can be easily restored if necessary;
- Bark beetle plaster can be washed with water and soap solutions; it is affected by mold and does not burn.
You can purchase the material at any hardware store, and for a very reasonable price. As for the disadvantages: the application process requires great care and cannot be rushed. It is very easy to smear the pattern with unnecessary movement of the tool, as a result of which, instead of nice grooves, you get ordinary rough scratches on the surface of the plaster.
Example of façade finishing with bark beetle
Characteristics
There are two types of bark beetle plaster - acrylic and gypsum based. The acrylic type is sold immediately ready for use, but the gypsum type is sold dry and will need to be diluted first.
The solution, depending on the manufacturer, has a different composition. But in almost every bark beetle plaster you can find mineral chips and marble particles. The grain size is different and depends on the size of the added crumbs.
Now let's look at the advantages of this wall decoration.
How to choose plaster
Bark beetle plaster is produced by a huge number of manufacturers, but you need to focus not on brands, but on the type of composition, its grain size, and the pot life of the solution. Grain size is the most important parameter, since it determines the texture of the material and affects its consumption. The thickness of the plaster layer should be equal to the size of the filler granules, that is, the larger the grain size, the thicker the layer, and therefore the higher the consumption.
The next criterion is the type of composition. Ready-made plasters save time, are more flexible and easy to apply due to the content of special additives, but they are more expensive than dry mixes and cannot be stored. If you do not have time to use the entire volume of plaster, the remainder will have to be thrown away - the hardened solution is unsuitable for use.
Decorative acrylic plaster with bark beetle texture, ready-made
Dry mixtures are cheaper, they can be prepared in the volume needed, and the remainder of the dry powder is perfectly stored in a closed package. The only difficulty here may be preparing the solution, but if you follow the instructions exactly, the kneading process will not cause any difficulties.
The best manufacturers of facade plasters
Comparative table of bark beetle plaster compositions from various manufacturers.
| Brand name | Characteristics | Price |
Ceresit ST 35 | Dry mixture based on cement with mineral filler. Available in 2 fractions – 2.5 mm and 3.5 mm. The color palette includes, in addition to white, 7 pastel shades. The consumption rate is 2.5-4 kg/m2. Drying time is 1 day, setting time of the solution is 60 minutes. Packaged in 25 kg bags | From 670 RUR/bag |
Ceresit ST 175 | Ready-made composition based on silicone resin. The color palette includes 200 different shades. The grain size of the filler is 2 mm. The consumption rate is 2.7 kg/m2. Packaged in 25 kg buckets | From RUB 2,590/bucket |
Knauf-Diamant | Dry cement mixture with mineral granules of two fractions - 1.5 mm and 2.5 mm, white. The consumption rate is 1.5-3.5 kg/m2. The mixture is available in white and beige colors. The viability of the solution is 3 hours. Packaged in 25 kg bags | From 300 rub./bag |
Caparol Fassadenputz | Ready-made composition based on acrylic binder. The filler grain size is 2 and 3 mm. The mixture consumption rate is 2.3-3.8 kg/m2. The main color is white, suitable for tinting. Packing – 25 kg buckets | From 2850 RUR/bucket |
Prospectors | The base is white cement, the filler is dolomite chips. Available in two fractions - 1.5 mm and 2 mm. The viability of the solution is 2 hours, the consumption rate is 2-2.5 kg/m2. Packaged in 25 kg bags | From 465 RUR/bag |
UNIS Bark beetle-Decor | The composition is based on white cement, filler – marble flour. Available in 2 fractions – 1.5 mm and 3 mm. Consumption rate from 5 to 6.5 kg/m2. Drying time is from 2 to 3 days, the pot life of the solution is 1 hour. Main color white, packaging – 25 kg bags | From 450 RUR/bag |
Founds | Dry cement mixture with mineral granules is available in 5 fractions - 1, 1.5, 2, 2.5, 3 mm. Colors: paintable white, super white and grey. The consumption rate is 1.5-3.3 kg/m2. It takes 2 days to dry, the pot life of the solution is 1 hour. Packaged in 25 kg bags | From RUB 395/bag |
Baumit Silicone Top | Ready-made composition based on silicone resins with mineral filler. Available in two fractions - 2 mm and 3 mm. The mixture consumption rate is from 2.8 to 3.9 kg/m2. Packaging – 25 kg bucket | From RUB 4,630/bucket |
Bolars | Type of plaster – dry mix, filler – marble chips. Available in 3 fractions: 3.5 mm, 2.5 mm, 1.5 mm. The main color is white, suitable for tinting. Drying time is 24 hours, setting time of the solution is 3 hours. Consumption per m2 – from 2 to 4 kg. The service life of the coating is 10 years. Packaged in 25 kg bags | From 580 RUR/bag |
Prices for various types of decorative bark beetle plaster
Decorative plaster bark beetle
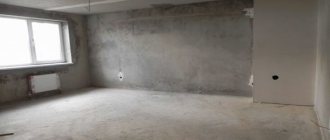
Preparing for work
Before plastering the walls, they are prepared for work. If there is an old coating, it is better to remove it to a solid base. There should be no crumbling areas, dust, or oil stains. All irregularities and defects of the walls are eliminated by rough plastering.
Then the base needs to be primed for better adhesion to the decorative plaster.
primer is used for the bark beetle :
- Universal primer with deep penetration. It is used for porous substrates with good adhesion: plaster, putty, aerated concrete, brick.
- Adhesive primer with quartz sand (concrete contact). It is used to cover smooth surfaces: concrete, plasterboard, OSB boards, etc.
The necessary materials and tools for the work are given below:
- Decorative plaster with a “bark beetle” effect (mineral or polymer).
- Container for mixing cement-based compositions. A plastic bucket or rectangular basin with a capacity of 20 liters or more will do.
- Mixer or electric drill with attachment.
- Large rectangular trowel made of steel for applying plaster to the wall and leveling it.
- Steel spatula for applying mortar to a trowel from a bucket.
- Plastic grater (trowel) for forming a pattern on the surface.
To prepare the decorative mixture, you need to pour clean water at room temperature into a bucket. The amount of water for mixing is taken at the rate of 5.5 - 6 liters per bag of dry material (25 kg). The plaster is poured into a container, mixed with a mixer and left for 5 minutes. Then mix again.
For one square meter of wall you will need 2.5 - 3.5 kg of the finished mixture, depending on the grain size.
Tinting of acrylic or silicone “bark beetle” is carried out with water-dispersion colors and pastes. To do this, add up to 2 - 3% dye to the mixture and mix.
Expert opinion
Alexander Guryanov
Plasterer and decorator
We recommend doing a trial painting of decorative items in a small volume. Write down the proportions of the color. After tinting, apply the composition to a white surface, for example, a sheet of paper. This will be a sample for future work.
Plaster application technology
The process of applying the decorative coating “bark beetle” consists of two main stages: distributing the mixture over the surface and forming a pattern using a tool. But before this, it is necessary to carefully prepare the base, because the adhesion strength of the plaster to the base and, as a result, the durability of the finish depends on this.
Preparatory stage
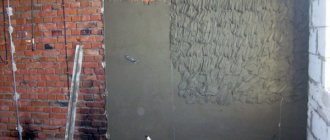
Decorative plaster should be applied only to dense and smooth surfaces that are not subject to shrinkage. Walls made of brick, concrete, or cinder block are best suited for this, but for wooden houses it is preferable to choose other finishing methods. The basis for decorative plaster is usually leveling cement plaster, which is applied to the walls themselves or to the insulation layer. In some cases, bark beetle can be applied over façade paint.
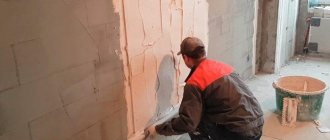
Preparing the façade for finishing
So, first, dust and dirt are cleaned, oil stains are removed with a solvent, and fungus-affected areas are cleaned and treated with an antiseptic. All recesses, cracks and chips are sealed with cement mortar. Next, take a rule at least 2 m long and apply it to the wall in different places to check if there are deviations from the plane. If deviations are more than 2 mm, additional leveling with plaster or putty mixture will be required.
Sealing cracks
Alignment of facade walls is carried out if necessary
A facade painted with oil paint can be thoroughly sanded over the entire area with coarse sandpaper, provided that the paint adheres firmly and has no defects.
After the base is cleaned and leveled, it is primed. Some master plasterers claim that it is not necessary to prime external concrete and cement-sand bases, and simply moisten the surface with water before applying the plaster. This approach is incorrect and leads to a reduction in the service life of the coating, because it is the primer that strengthens the upper layers of the base and ensures high-quality adhesion of materials. It is advisable to use primers of the same brand as the plaster itself. As a rule, manufacturers indicate on the bark beetle packaging which primer is preferable to use.
Ceresit CT 16. Primer for decorative plasters
Advice. To prime the surface, it is recommended to use strengthening compounds with quartz sand. They penetrate deep into the pores of the base, impart water-repellent properties, and maximize adhesion. If you plan to use tinted plaster, then the primer should also be tinted to match the finish so that after the patterns are formed, the base does not show through.
The primer is applied with a roller or brush, evenly working the walls from top to bottom. This should be done in dry, warm weather, on a dry surface. For a solid base, one layer is sufficient, for a dust-forming base - 2 layers. After this, the walls should be completely dry; on average, drying takes from 4 to 6 hours.
Facade priming
Treated surface
Now you can apply the plaster.
When choosing a dry mixture, you need to pay special attention to preparing the solution. If you do not yet have experience in plastering, do the mixing in small portions, since the plaster dries quickly and cannot be diluted with water. Read the instructions on the package, be sure to remember the proportions of water and dry powder, because the quality of the solution depends on this.
Step 1. Take a mixing container (a regular 10-liter bucket will do), pour in the specified amount of water, the temperature of which should be between 15-20 °C, and gradually add the dry mixture. On average, 1 kg of mixture requires 200-250 ml of water.
Gradually add the dry mixture into a container of water
Step 2. Mixing is done with a drill with an attachment, since it is difficult to achieve a uniform consistency manually. You need to mix at low speed, completely immersing the mixer in the solution so that no air bubbles form.
Mix the mixture with a drill and attachment
Step 3. After 2-3 minutes, when the solution becomes paste-like and homogeneous, turn off the mixer and let the plaster sit for 5 minutes. Then mix again and begin application.
Ready-to-use solution
If you need to give the plaster a certain color, you should purchase the desired shade in advance and add it when mixing the solution. In this case, mix especially carefully so that all the pigment is dissolved and no streaks or individual inclusions remain. Manufacturers recommend tinting only ready-made compositions based on acrylic and silicone, and painting plasters made from dry mixtures with facade paints after drying.
Tinting decorative plaster
Prices for primer for decorative plasters
Primer for decorative plasters
Video - Tinting decorative plaster "Bark beetle"
Applying plaster
To apply the solution you will need a metal trowel 30 cm long and a narrow metal spatula 10 cm wide.
Apply the solution to the grater
The solution is applied with a narrow spatula on a trowel, after which the tool is placed against the wall at an angle of 30 degrees and the plaster is distributed in an even thin layer to the thickness of the filler grain. Try to perform a minimum of movements in one area, and maintain the same pressure all the time. It is most convenient to apply the mixture in narrow vertical stripes.
The next strip is applied so as to overlap the edge of the previous one by 5-7 mm. The solution needs to be stirred periodically, as the filler tends to settle to the bottom. During the work, individual areas should not be allowed to dry out, as this will reveal the transitions. If the area is large, it is better to work together with an assistant: one person will apply the plaster, the second will mix new portions of the solution.
Applying plaster
Since the pattern is formed on wet plaster, each wall is processed separately from corner to corner. If you decide to first apply the solution to the entire facade and then start grouting, you will not succeed, since the first sections will already be dry.
Formation of texture
The creation of the pattern begins 10-20 minutes after application (depending on the composition of the mixture). The readiness of the plaster for grouting can be determined by the lack of shine on the surface or by touching the hand to the wall - if the mixture does not stick to the palm, it’s time to start grouting.
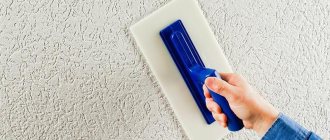
Take a plastic grater, apply it to the surface, press it a little and perform uniform movements in one direction. As with application, the walls are treated in sections no more than 1.5 meters wide. Movements must be careful, there is no need to rush, and you cannot drive in one place several times. The joints of two strips must be moistened with water.
Pattern Formation
If you do not have time to complete one plane, take masking tape and stick it along the line where the plaster layer ends. Then apply a little solution onto the tape, form a pattern, and immediately remove the tape along with the remaining plaster. When you can continue working, the first step is to apply masking tape along the edge of the now dry plaster, and then begin to apply the solution. This technique will avoid overlapping layers, as a result of which the transition will be almost invisible.
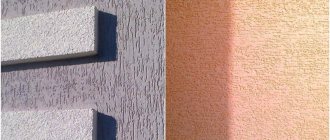
There are many options for forming texture, the most popular of which are:
- “rain” - movements are performed from top to bottom strictly vertically;
- “diagonal rain” - the grater is moved from the upper left corner to the lower right;
- “carpet” - when rubbing the coating, vertical movements alternate with horizontal ones, resulting in the formation of a cross-shaped texture;
- “lamb” - rubbing is performed with short circular strokes, and the resulting furrows resemble sheep’s wool;
- “cork” - rubbing is performed with a foam grater, making short circular movements in one direction and pressing the tool with force to the surface.
Texture formation options
Finishing coating
It usually takes about 2 days for the plaster layer to dry (look for exact information on the packaging of the mixture), and before this no work can be done on the surface. After the specified time has elapsed, it is advisable to sand the coating with the finest sandpaper to remove adhering crumbs of the solution and level the surface. If acrylic tinted plaster was used, the finishing work is completed.
Sanding walls after puttying
When using a cement mixture, painting is done to increase decorativeness. Water-soluble paints based on silicone and acrylic are best suited here. So, after sanding, the walls are cleaned of dust and treated with a deep penetration primer in one layer. After the surface has dried, begin painting. If you prefer to paint with a roller or brush, choose tools with long bristles - this will allow you to properly paint all the grooves and grooves. Apply the paint in two layers - the first with vertical strokes, the second with horizontal strokes.
Painting bark beetle plaster
Dyeing process
Recommendations for finishing with plaster
Finishing the facade with plaster should be carried out at temperatures from +5°C to +30°C and air humidity not exceeding 60%. Only under such conditions will the quality of the coating meet the specified characteristics. That is why you need to start finishing in dry, warm weather and preferably calm. Strong wind, as well as direct sunlight, negatively affects the plaster and contributes to its cracking. If the façade is exposed to direct sunlight during the day, apply the plaster in the late afternoon so that the coating can harden and dry sufficiently overnight.
For beginners, it’s better to start with the most inconspicuous part of the wall, since not everyone can accurately apply a design right away, and it’s no longer possible to correct flaws on dry plaster. It is advisable to choose paint, primer and decorative putty from one manufacturer - this guarantees maximum compatibility of materials and quality of coating.
Finishing the facade of the house with plaster in two shades
Finishing the facade with decorative plaster
Video - Applying decorative bark beetle plaster
How to apply decorative plaster with your own hands master class
Professional craftsmen have their secrets. Let us look at the most effective methods of applying plaster.
How to apply decorative plaster on walls video
The simplest option that even a beginner can use is the spray method. With it you can achieve surface relief. This can be done this way: after the first layer has dried, a second one is applied to it, and with the help of available tools we create a texture.
Even an ordinary broom is suitable for this purpose. It needs to be dipped into the mixture and hit against a stick so that the splashes fly onto the wall. The surface can be painted in any color and then splashes of plaster will create the effect of falling snow.
The Italian method of finishing walls with plaster is in many ways similar in technology to the first. After painting the first layer, without allowing it to dry, a second layer is immediately applied, but of a different color. The second layer should overlap the first layer by more than half. While the material remains soft, it needs to be leveled.
The desired texture can be set using one or two tools. After applying the covering layer, you need to take a trowel with a small amount of plaster mortar. Next, using gentle pressure along the entire wall, we create patterns.
How to apply and make decorative plaster with your own hands in the “wet silk” style. Video lessons master class.
Hatching method. Here we set the relief on fresh, still soft plaster. The surface is treated with a metal brush, then left to dry for exactly one day. After which the remaining mixture is removed with a spatula.
Let's learn to plaster ourselves. Master Class
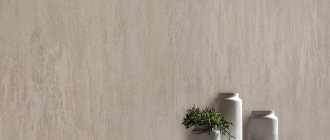
Textured plaster
In another way, this type of wall decoration can be called relief. There is not much difference between structural and textured plaster; both are designed to create unique textures.
The complexity of the ornament depends on the composition used and the tools for its application. Among textured plaster, imitation wood, compressed paper, and ashlar are popular. This finish does not lose its relevance, it looks unusual and expensive.
The main component of the textured mixture is limestone flour. Marble or granite chips and fibers can also be added to the mixture. Its properties depend on the composition of the plaster. Manufacturers often add polymer substances to the plaster, which make the relief coating more dense and prevent it from cracking.
The more complex and intricate you want to create the texture, the more layers there should be. Moreover, these layers should be thin. The terrain will also depend on the tools used.
Structural plaster
The main characteristic of such decorative plaster is its heterogeneity. Taking into account the size of the added granules, it can be coarse-grained or fine-grained. The latter does not have a pronounced texture and can be used if you want to make the surface smooth. The first, on the contrary, gives the surface peculiar reliefs.
The tool you use (roller, spatula or sprayer) also matters. The elasticity of this plaster allows it to be applied to any surface, from wood to metal.
It is recommended to be used for finishing bathrooms, walls in the living room, and ceilings. Water-based plaster is best suited for indoor use.
The color of the mixture is initially white, but by adding pigment to your taste, you can make decorative plaster of any shade yourself. The main thing is not to overdo it with the coloring ingredient.
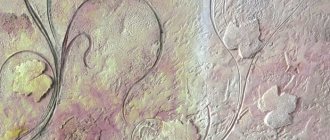
Venetian plaster
This type of coating is a transparent mixture based on marble dust, slaked lime and water emulsion. It is sold in liquid form in containers weighing from 7 to 25 kilos. It looks like a viscous composition. It is recommended to apply it to perfectly smooth walls.
The composition of Venetian plaster allows you to add any color to it. With its help you will get a surface with the effect of noble marble. It is completely fire safe, waterproof and resistant to mechanical stress. “Venetian” is a quick-drying mixture, so repairs with it will not be lengthy.
Application methods
The grain size of the solution and the quality of the base directly affect the thickness of the layer of decorative plaster.
Among the many application techniques, it is better for beginners to focus on simple methods, which video lessons will help you master. A detailed description of the process outlined in the master class will allow you to independently decorate the wall with decorative plaster. The key principle of each method is that an even base layer is initially formed, then they move on to structuring the wall using auxiliary tools and devices.
Selection of plaster
Before starting work, you will first need to select and purchase material. There are a huge number of manufacturers and each of them has their own recipe for making bark beetle plaster. When purchasing, first of all pay attention to the grain size and type of mixture. The result you get at the end of the work will depend on this, namely texture and depth.
Also, do not forget about the type of solution - dry or immediately ready for application. The ready-made option is much more convenient, but its price will be higher. However, if you prepare dry bark beetle plaster correctly, it will be no different from the finished one.
The nuances of choice depend only on your personal preferences and financial situation.
This mixture should only be applied to walls with good adhesion. The ideal option would be concrete, brick, drywall.
This plaster is a final finish, so its use for sealing wall defects is not recommended. This solution would also be a good choice for treating the ceiling. The technology for applying plaster with your own hands is quite simple and even a beginner in the construction craft can handle it.
What does bark beetle plaster look like and how easy is it to use?
The appearance of the finishing coating directly depends on the method of rubbing done manually after applying the bark beetle paste to the wall. The pattern may vary depending on how the tool is moved:
- Up down;
- Longitudinal;
- Chaotic;
- Diagonal;
- In a circular motion.
There is nothing complicated in forming a pattern; you just need to choose one thing for the entire facade or room. The pattern is made with a plastic trowel or a wooden grater when the mass has set a little (after about 20 minutes).
Working with decorative plaster is a pleasure; it is a creative process combined with the final finishing of surfaces. The original texture is used in the repair of facades of large buildings and small apartments:
- Walls, niches;
- Vaulted ceilings;
- Arches, pilasters and columns;
- Curved surfaces;
- Adjacent coatings on different bases that need to be combined with a common coating (foundation and superstructure).
When applying bark beetle indoors on a prepared surface with your own hands, you can save money. A layer of 2-3 mm is sufficient, provided that it is evenly distributed and the same pattern is formed. On the outer covering the layer should be twice as large. Often a primer is not needed if it is a smooth concrete surface that has been wetted with water.
The original texture is used in the repair of facades of large buildings and small apartments.
What can be replaced - non-woven wallpaper with the “bark beetle” effect
Adherents of spectacular finishing can avoid the labor-intensive process of decorating walls with decorative plaster. Instead, it is proposed to take an imitation - non-woven, ordinary paper or washable “Bark Beetle” wallpaper for walls.
When wallpapering, you cannot avoid seams! Roll materials are suitable for interior spaces, but even in a room, any wallpaper is not durable and resistant to negative factors.
Washable or moisture-resistant wallpaper is suitable for decorating a hallway, dining room, insulated loggia and studio apartment. The advantages of replacing plaster with wallpaper with the “bark beetle” effect:
- The decoration of the room can be completed within 1 day;
- The least expensive type of cladding;
- Environmental friendliness - the paper base “breathes”;
- You can do everything yourself without painting tools.
Washable or moisture-resistant wallpaper is suitable for decorating a hallway, dining room, insulated loggia and studio apartment.
You can find a compromise option - decorate some of the premises with plaster, and cover the living rooms with wallpaper. Advantages of decorative plaster compared to other cladding methods:
- High aesthetics, completely seamless coating;
- Environmentally friendly base - water, sand, gypsum, lime and high-quality cement;
- The coating is resistant to temperature changes and adverse external factors, the pigment does not fade in direct sunlight;
- Does not contain a breeding ground for fungi, mold, insects and pathogens;
- Unlike wallpaper, plaster can be safely applied to walls that are adjacent to the fireplace;
- The surface is easy to clean from dry dust (with a vacuum cleaner); stains are removed with a soap solution.
Washable wallpaper and bark beetle plaster can be purchased at construction supermarkets, and can also be ordered from an online catalog with delivery.
Unlike wallpaper, plaster can be safely applied to walls that are adjacent to the fireplace.
Types of decorative plaster
Its conditional classification will help you understand the variety of decorative plaster. Finishing materials can be divided into the following groups:
- Structural plaster ensures the formation of a pattern thanks to the inclusions in the composition. The surface texture in this case depends on the size of the solid particles. For the Traventino texture, decorative mixtures with 1.5 mm granules are suitable. The choice of the size of fractions of decorative plaster “Bark beetle” depends on the location of the surfaces: it is better to perform external finishing with a solution with 3 mm granules; for internal decoration of walls, inclusions of 2 mm are suitable. Watching a video lesson with a master class on applying the Bark Beetle mixture will help you make sure that the process is not complicated. https://www.youtube.com/watch?v=xSUFCmtCE0s
- Textured plaster for decorative finishing can be used in two directions. In the first case, a thin layer of mortar is applied to the smooth surface of the walls, after which it is given the desired relief using auxiliary tools. The second option - the design of the walls consists of smooth transitions of color of the decorative mixture without adding volume to the surface.
- Venetian plaster is considered the most difficult to apply independently. The presence of artistic talents allows you to give the surface a unique design. The proposed video with a master class describes in detail the process of applying Venetian plaster.
When choosing a finishing material, study the composition of the mixture, focusing on modeling components and fillers. Depending on the location of application, preference is given to solutions with organic or mineral binding components.