During the renovation process, we have to deal with many obstacles, and one of the most difficult is correcting the defects of the base wall surface. Plastering walls is still a pleasure, but for beginners it seems like wandering through the seven circles of hell: it is so difficult sometimes to achieve the desired result, especially if you have a tendency towards perfectionism in your blood and any shortcoming seems to you a real disaster. However, if you know all the intricacies of scrupulously leveling walls and consistently use your knowledge in practice, then there will be no trace of conventional complexity. Plastering walls with your own hands is a repair operation that is accessible to everyone, and after reading this material you will easily be convinced of this.
- What is plaster used for? Surface requirements;
- Are there any negative points? The main mistakes of beginners;
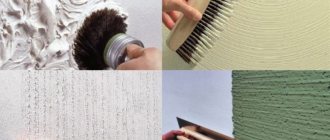
- 4 types of plaster. How to choose the right mixture;
- Recommended mixtures and their approximate consumption. Market prices;
- Necessary tools and materials;
- Surface preparation;
- Why are beacons installed?
- Preparation of the solution;
- Basic process. 3 main stages;
- Useful materials: 3 videos with tips from experts;
- Conclusion.
What is plaster used for? Surface Requirements
Surfaces are different, but the requirements for them are quite specific, taking into account the standards prescribed in official documents. According to them, the permissible deviations vertically and horizontally should be:
- for non-residential premises
- no more than 3 millimeters per 1 meter; - for facades
- no more than 2 millimeters per 1 meter; - for residential premises
- no more than 1 millimeter per 1 meter.
Plaster just helps to adjust the walls to existing standards. Of course, achieving an ideal surface is difficult, but this mission is not impossible: if you know all the intricacies of the operation, it is quite possible to achieve a good result, even if you do everything yourself for the first time. Of course, the duration of leveling directly depends on the degree of unevenness of the wall, as well as on the presence of various defects on it. For example, cracks, mold, scraps of old material.
In addition to its direct purpose, this operation also allows you to get several other advantages:
- increasing the ability of the wall to pass excess vapor through itself, thereby regulating the level of humidity in the room;
- improving the insulation characteristics of the structure;
- protection of wooden bases from fire;
- enhancing the water-repellent qualities of the surface.
It is not possible to skip the grueling stage of plastering the walls even if you use a plasterboard structure (read about how to attach plasterboard to a wall). In this case, it is worth talking about a quick, so-called starting
leveling followed by priming the wall.
Are there any negative points? The main mistakes of newbies
In any business, negative aspects are inevitable, and plaster of this kind is no exception. However, they do not appear out of nowhere and are only the result of some common mistakes, most often characteristic of beginners. Let's focus on this.
Possible cracks
Among the main reasons for their appearance are:
- violation of the recommended temperature regime during the operation;
- failure to comply with drying times.
If you are plastering walls for the first time, then the main commandment for you is not to rush
. This applies not only to your manipulations with the spatula, but also to other, seemingly secondary aspects of the work. So, when processing the facade, you should keep in mind that the temperature should always be above zero. In the same way, you need to strictly monitor the hardening time of the solution. Usually this information is contained on the packaging, but ultimately the exact time depends on the thickness of the applied layer, the base material and the humidity level in the room.
Violation of building regulations
This doesn't happen as often as cracks popping out on the surface, but it does happen. This is usually caused by an excessive layer of plaster. Of course, it is not applied out of a “good life” - to correct very serious defects in the wall, but in pursuit of a satisfactory result, sometimes you have to turn a blind eye to existing standards. It's good if there are no consequences. But what if it’s the other way around?
Rapid surface contamination
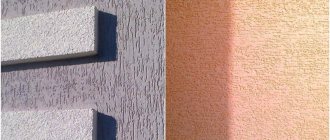
Some types of finishing structural plaster have an “amazing” ability to literally attract dirt and dust. Everything would be fine, but sometimes even diligent cleaning does not help to cope with it. What to do? It is best to varnish or wax such a wall. Of course, this needs to be done in advance - which beginners don’t even realize.
High mixture consumption
In order to achieve perfectly smooth walls, sometimes you have to spend not only a lot of time, but also a lot of material. Unreasonably high material consumption is a consequence of incorrect leveling technique. Smearing the plaster vigorously with a spatula on the wall is not the key to success; the chosen direction and even the position of the spatula are no less important, but we will talk about this later in the section on direct technique.
Selecting a working mixture
The first question that arises in a builder’s mind is what is the best way to plaster brick walls inside a house? Today, there are many different compositions and mixtures used for interior finishing work, but the most optimal choice is still considered to be a mixture based on cement. If you are still wondering how to plaster a brick wall, then pay attention to cement - it is a universal material; it is also often used for the primary finishing of the external facades of a building.
The main advantages of cement-sand plaster include the following factors:
- long service life. On average, cement plaster lasts about 30 years;
- cheapness. The components of the mixture have a low market value and are therefore available to a wide range of consumers;
- high ductility due to long drying time. Correction or correction of unevenness in the applied layer is possible even several hours after completion of work;
- the material has good resistance to high humidity, so it is optimally used when finishing showers or bathrooms;
- The work does not require special skills or expensive equipment.
Of course, there are also disadvantages that must be taken into account when carrying out finishing work:
- plastering brick requires some skill and some physical effort, so it is worth first mastering some skills associated with this type of work;
- As mentioned earlier, the solution takes quite a long time to dry.
Reinforcing mesh for plaster
When carrying out work, you should also know that due to the physical parameters of the solution, the primary layer should not be too thick (up to 3 cm). Therefore, if you need to increase the thickness of the plaster layer, you will have to use a reinforcing mesh. If you are using the mortar for exterior finishing, then to increase the strength of the mortar you need to add “boiler” (calcium oxide, quicklime).
Important! There is a little trick on how to improve the thermal insulation of a room. To do this, you need to add a certain amount of porous substance (pumice sawdust, etc.) to the solution. This will significantly improve the quality characteristics of the solution and subsequently save you heating costs.
Recommended mixtures and their approximate consumption. Market prices
The table below shows the most suitable mixture options with the recommended nature of use, approximate consumption and current prices on the market. When making a choice in favor of one option or another, take into account the alignment aspects that we discussed in the previous section. The plaster consumption calculator will also help you.
| Name | Basis and purpose | Consumption | Price |
| KNAUF Rotband | gypsum-based leveling | 8.5 kg per 1 sq. m with a layer of up to 10 mm | 410 rubles for 30 kg |
| Veber Vetonit Profi Gypsum | gypsum-based leveling | 8.5-10 kg per 1 sq. m with a layer up to 15 mm | 390 rubles for 30 kg |
| Forman 61 | basic cement-based, for interior and exterior work | 14 kg per 1 sq. m with a layer up to 30 mm | 230 rubles for 25 kg |
| Veber Vetonit TT40 | cement-based leveling for interior and exterior work | 1.7 kg per 1 sq. m with a layer of up to 10 mm | 290 rubles for 25 kg |
| M100 Besto | leveling on a cement-lime basis | 18 kg per 1 sq.m with a layer up to 10 mm | 120 rubles for 25 kg |
Plastering the facade
External walls can be plastered either by machine or by hand. If the brick facade has a large area, the first technology is better suited. When a consumer asks a question about how to plaster walls on the street, he should know that in addition to machine-applied plaster, about 2% hardener should be added.
Attention! Brick and plaster look great together, so you can combine a cheap cement-sand mixture with a decorative brick finish.
Attention! Plastering one wall must be carried out in one step. This is due to the fact that the plaster may harden unevenly, which will lead to the formation of cracks on the facade.
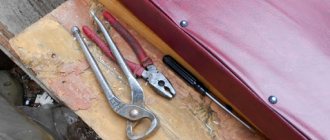
Required tools and materials
One of the advantages of plastering walls is the absence of any surprises in the list of necessary tools and materials.
- selected plaster mixture;
- drill with mixer attachment (perforator with drill);
- hammer;
- dowels;
- self-tapping screws;
- level;
- square;
- container for mixing the mixture and primer;
- primer;
- brush;
- putty knife;
- gloves;
- protective glasses;
- protective mask;
- work clothes.
How and with what to plaster external brick walls with your own hands: video
Facade plaster for brick walls is used quite often. After all, it is quite a comfortable and durable material. Plastering of external insulated walls can also be done; for example, it is successfully used for finishing foam plastic on the outside of a room.
Today we will look at how to properly plaster external walls. Also in the video in this article you can see all the details.
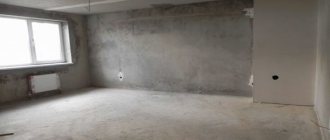
Surface preparation
A stage of work that many people look down on - and completely in vain. In many ways, the final result depends on it. Although all failures can always be blamed on a poor-quality solution - it’s always easier that way. However, the nature of the surface preparation in each individual case may differ - you need to take into account the material from which it consists.
Brick
- removing old material by moistening and then methodically tapping with a hammer on a spatula;
- the cleaned surface is treated with a grinding machine or a regular brush with iron bristles;
- deepening the seams between the bricks for better absorption of the plaster and optimal adhesion;
- completely clean the surface with a wet sponge;
- Apply 2 layers of primer with an antiseptic effect, apply the second one no earlier than the first one has dried.
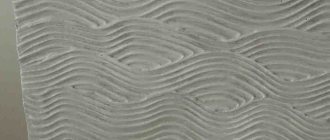
Concrete
- using an iron brush, clean the moistened surface from a layer of old material or cover it with an adhesive compound and vigorously scrape it off with a spatula;
- make small notches on the already cleaned wall, which will significantly improve the adhesion of the plaster to the permanent base;
- treat with a deep penetration primer - it is best if it is a concrete contact.
Tree
- cover the floor with protective film;
- tap the entire wall surface with a hammer - some fragments of the old plaster will fall to the floor themselves;
- Carefully pry off the remaining parts with a spatula and remove them yourself;
- remove the old shingles - sheathing for better adhesion of the mixture to the surface;
- treat the entire wall with a deep penetration primer;
- hammer new shingles diagonally onto the wall - it will serve as beacons while eliminating unevenness;
- treat the entire wall along with the shingles with a wood antiseptic;
- Proceed to the next stage only when the wall is completely dry.
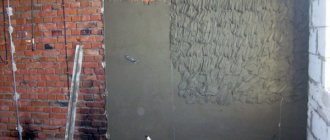
Primary treatment of brick walls
At the first stage of surface preparation, a visual inspection of the brickwork is carried out, and the presence of loose bricks or uneven layers is not allowed. This problem is especially typical for Soviet buildings of the 60-70s, in particular near door or window openings. Serious defects can be eliminated by strengthening the masonry with a cement mixture (if this material is not available, it can be replaced with polyurethane foam).
All small cracks, chips and irregularities must be eliminated by covering them with cement mortar or another similar composition. It is also possible to eliminate unevenness without prior “restoration” of the masonry - as a result, plaster is applied to an unprepared surface in two or three layers. The durability and durability of the composition depends on the quality of the preparatory work, and preliminary correction of the masonry will increase the mechanical stability of the surface.
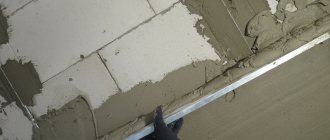
Why are beacons displayed?
Beacons
are metal profiles that act as guides during plastering of the surface. The purpose of their use is very clear - to achieve ideal evenness of the wall. Here's how to work with beacons to get the most out of them:
- take the metal guide profiles and fix them on the wall with a gypsum mixture, having previously checked the building level - the choice of gypsum is important, since this material dries very quickly and allows you to safely fix the profile at the level at which it is required;
- guide profiles are set at intervals of 1-1.5 meters;
- Using a plumb line you can check the vertical alignment of the profiles.
If the surface has no obvious defects, there are no noticeable depressions or bumps, then it is quite possible to do without placing beacons. However, in the opposite situation, their use will help you save time and nerves and achieve a good planned result.
Learn more about how to correctly set the beacons in the video below.
Preparation of the solution
- water is poured into the prepared container;
- add a small amount of purchased dry mixture - 6-7 trowels - and stir;
- the rest of the dry mixture is poured in successively and stirred with a construction mixer;
- let the solution sit for five minutes and do a final stir with a mixer to achieve the desired consistency.
Keep this information in mind so you don't waste your plaster!
All the nuances of preparing the solution are discussed in the next video.
Basic process. 3 main stages
Plastering walls is a complex process in terms of its multi-stage implementation. However, if you break the main operation into several points, you immediately discover that behind the apparent complexity there are generally simple manipulations.
Stage 1. Splash
Used:
plaster spatula (trowel), usually.
Recommended layer thickness:
from 4 to 10 mm, depending on the type of base.
Purpose:
filling voids, eliminating noticeable defects, leveling the scattered layer
Technology
- using a plaster spatula, scoop up the solution from the container and throw it onto the wall, trying to get into the existing voids;
- you should start from the bottom of the wall and gradually move to the left or right, rising higher and higher;
- the solution should be thrown carefully, without unnecessary fanaticism, to a height of no more than 1.2 meters;
- a rule is set on the guide profiles (beacons) and slowly rises up with slight pressure on the wall;
- the plaster is distributed with smooth and confident movements to the left and right.
Stage 2. Priming
Used:
wide and narrow spatula.
Recommended layer thickness:
until the guide beacons are completely hidden.
Purpose:
applying a primer layer.
Technology
- the second stage should begin after the starting fill and already leveled layer has completely dried;
- using a narrow spatula, the solution is taken from the container and transferred to a wide one;
- the mixture is applied to the wall with careful alignment of all strips remaining after contact with the tool.
Stage 3. Finishing layer (covering)
Used:
narrow and wide spatula, smoother.
Recommended layer thickness:
no more than 1.5-2 mm.
Purpose:
final leveling of the wall surface, grinding.
Technology
- the finishing layer is applied to the still wet previous one - if it has already dried, it can be moistened with a roller soaked in water;
- in order not to miss flaws on the surface, the wall is illuminated with a light bulb and each crumpled strip is carefully leveled with a spatula;
- after drying, use a wooden (plastic) trowel to rub the entire surface in a counterclockwise circular motion;
- to achieve the desired result, you need to press it as tightly as possible;
- at the very end, you can attach the felt material to the trowel and carry out the final rubbing.