ADVANTAGES OF MACHINE PLASTER
BETTER QUALITY
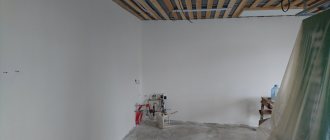
A perfect surface that does not require putty. The surface is suitable for wallpapering, decorative plaster or textured painting.
FASTER
A team of four people will complete 100-150 m2 per day. The team manually completes this volume within a week.
CHEAPER
Automation of rough finishing, less material consumption, and no need for further surface treatment.
Equipment setup process
After the preparatory work, you need to set up the equipment for applying the plaster composition. To begin with, the device must be installed in a specific place. As mentioned above, the design of any device of this type contains a reservoir for dry plaster composition, as well as a mixing tank, which receives both the composition and water.
The settings are set at the factory, so you should not try to change them. The settings regulate the proportions of water and composition, which allow you to create a substance of a certain consistency. In the mixing container, the process of loosening the material and saturating it with air also occurs.
After this, under the influence of pressure, the finished mixture passes through the hose and is applied evenly to the surface to be treated. The flow is regulated by a gun attached to the end of the hose. The machine method of applying plaster sometimes requires a special attachment on the device, which provides a higher speed of applying the plaster composition to the wall. After application, it is necessary to level the surface using a wide spatula.
Setting up equipment for machine plastering
After installing the device, you can start launching it. This must be done according to the instructions that come with each device. First of all, the device must be connected to the power supply and water mains, then pour a certain amount of dry composition into the receiving tank. If it is not possible to connect the equipment to the water main, then you can use the pump that is also included with the device. It must be lowered into a container with liquid and connected to the device.
Return to content
from 0R/M2
Stages of work on mechanized plastering
1. Delivery of materials to the site 2. Protection of windows and doors 3. Primer of surfaces 4. Reinforcement of walls (if necessary) 5. Installation of beacons 6. Installation of plaster corners
8. Applying the mixture by machine 9. Alignment with beacons 10. Removal of beacons 11 Sealing the grooves with mortar 13. Trimming the plaster 13. Glossing.
Mechanical gypsum plaster of walls with gloss is suitable for wallpaper (does not require additional putty). You immediately glue the wallpaper, the result is excellent.
Equipment
To carry out this type of work, a special installation will be required. The modern market offers a huge number of different models, so choosing a device that suits you in size, functionality and cost will not be difficult.
RFT Ritmo M. This model is a small device that is perfect for working with putties and paints.
Plastering station RFT Ritmo M
Knauf . Such devices are small in size but have wide functionality.
Plastering station knauf
Kaleta 5 . This equipment is used for processing wall structures with various types of plaster. Can also be used for arranging self-leveling floors.
Plastering station Kaleta 5
Afalina ShM-30 . This model differs from the previous ones in its larger dimensions. However, it can be used to perform a huge number of operations.
Plaster station Afalina ShM-30
The design of this type of equipment includes a tank for dry composition, a mixing tank, a compressor, a hose and a gun.
It is necessary to pour the dry composition into the receiving tank, which then goes into a special tank, where it is mixed with water in strict proportions. For mixing, the design includes a special spiral, which is driven by an electric motor. After this, pressure is applied using a compressor, under the influence of which the mixture passes through the hose.
The feeding distance can reach 50 meters. As you yourself understand, the cost of any device, even the smallest and simplest, is quite high, so if you plan to process a small area, then it is better to rent this device.
Return to content
Mechanized wall plastering is the optimal method for high-quality leveling
Mechanized (also called machine, mechanical, automatic or automated) plaster allows you to level rough walls built from any material. The application process consists of a machine method of spraying the finished gypsum or sand-cement mixture onto the surface to be leveled. This layer of plaster varies from 1 to 5 centimeters and helps protect against moisture penetration. The applied gypsum mixture is an environmentally friendly product with heat-saving properties.
Choosing a mixture and making it yourself
For mechanized application, gypsum or cement based plasters are used.
For spraying through a hopper bucket, for example, any composition with a fraction size of no more than 10 mm is suitable. These can be either self-mixed solutions or factory-made dry mixtures. For plastering machines (stations), a composition with a grain size of up to 8.5 mm is selected.
As a rule, they buy plasters whose composition is designed for machine application:
- Gypsum : KNAUF MP-75 and MN-Start, Volma Gips-Active, Prospectors MN, Dauer Gipsart-M, Gypsum polymer Rotgips MSh100, Osnovit PG26 M, etc.
- Cement-sand : KNAUF Unterputz (Unterputz), Dauer Fasad-M, Quick-mix MK3 (lime-cement) and MZ1, Osnovit PC21 M, Volma Aquaslayer MN, Weber Vetonit TT40, Ceresit CT 29, etc.
When preparing cement-sand mortar yourself, you will need:
- Portland cement grade not lower than M400 (preferably M500) or VBC (waterproof non-shrink cement.
- Purified quartz sand with a humidity of 5-10%. Autumn dry sand does not mix well with water, resulting in a heterogeneous solution.
- Additives and plasticizers. They are diluted in water before mixing or added to dry CPS.
The table below shows examples of special components for mechanized plaster.
| Substance class | Brand |
| Hydration regulator. The setting time increases or decreases. | "Asilin", "Proston - D18" |
| Moisture detachment blockers. During the plastering process, no liquid is released, which allows the mixture to be applied in a thick layer without slipping. | "Conwisol SM-11", "SikaLatex" |
| Air-entraining. They reduce the density of the composition, which reduces its thermal conductivity. | Mapeplast LA |
| Plasticizers. They increase the elasticity and mobility of the solution, the bending and tensile strength of the coating. | "Hardplast", "SikaPlast-520" |
| Waterproofing penetrates. Increases the water resistance of machine-made plaster. They can reduce adhesion, so they are added strictly limited. | "Kalmatron-D", "Sika-1" |
| Structure modifiers. They reduce the shrinkage of the mixture, provide tension and water resistance. | "Parade", RSAM, Cement NC |
Answers to frequently asked questions about machine plastering
Preparatory process
Plastering is the most important stage in interior finishing. The walls should be dry and the room temperature should be positive. Before applying plaster, it is necessary to clean the wall from dust, dirt, and metal inclusions (later they will rust and protrude on the surface). To eliminate differences, unevenness and blockages, vertical beacons are installed using a laser level. After priming, plastering of the walls begins using a mechanized method. As soon as the mixture dries, the beacons are removed and the grooves are sealed. The plastering process should not be interrupted in broken areas so that drying is uniform.
Machine plastering technology
Machine plastering is often compared to the manual application method. Obviously, completion times increase many times over due to the use of an automated method. An important feature of gypsum plaster is that it dries quickly, so it is prohibited to carry out work in sub-zero temperatures and drafts. The thickness of one plaster layer should not exceed 4 centimeters. For curved walls, it is possible to use several layers, which are applied in stages with a special bonding mesh for better adhesion.
Pros and cons of machine application
Mechanized plaster is a method of leveling walls and ceilings, in which the solution is applied not manually, but using an automatic or semi-automatic plastering machine.
This modern method of plastering walls significantly reduces the time and effort spent on work.
Many builders who professionally carry out finishing work and use manual and mechanized methods highlight both the positive and negative aspects of the mechanization of plastering walls.
Among the advantages are the following:
The plastering machine significantly speeds up the leveling of walls
- Productivity . The mortar supply rate from the plastering station is from 1.2 m3/hour, which is 20-40 m2 of walls plastered per hour. Mechanization of work saves time up to 4 times.
- Economical . The use of special mechanisms for plastering eliminates waste of material. Also, when finishing manually, two layers are often applied, but with a mechanized method, one will be enough.
- Work force . For mechanical plastering using stations, two workers are enough: one applies the solution to the wall, the second levels it.
- High-quality adhesion to the base . By applying the solution under pressure, good adhesion to the wall is ensured.
Features of mechanized plastering that limit its use for one-time home repairs:
Mono-mix FU plaster applying machine (220V) costs from $8,000
- Dirt. When applying plaster with a gunite station, part of the solution bounces off the wall under pressure, and splashes fall on the floor.
- Cost of equipment . Plastering stations have a high cost, therefore, it is advisable to purchase equipment for professional work. For one-time and independent repairs, it is more profitable to work manually or rent such equipment.
- Equipping the work site with reliable electrical wiring and centralized water supply.
- High noise level . Pneumatic equipment is powered by a powerful compressor, which is quite loud. This also applies to machines for mechanical plastering.
- Timely care of equipment : washing upon completion of work, checking the oil in the compressor, etc. Also, the solution should not remain without movement for more than 15 minutes, since during this time it will have time to set.
Surface preparation
Before starting mechanized plastering, it is important to carefully prepare all working surfaces:
- remove old finishes that are poorly attached to the wall, clean off paint and plaster deposits, and wash off lime;
- clean the walls from dirt and dust, which is especially important for street surfaces;
- Depressions and crumbling areas should be cleaned as much as possible, reinforced with fiberglass mesh, and sealed with cement plaster;
- treat metal elements with an anti-corrosion compound;
- expand the cracks and also seal them with plaster;
- remove dust from the base by treating with deep penetration soil in 1-3 layers (depending on the degree of porosity);
- if necessary, distribute special plaster profiles in the corners.
Preparation for plastering walls
It happens that external surfaces strongly absorb moisture. In this case, priming with “concrete contact” will help, as well as pre-wetting the wall, applying a thin layer of mortar, drying it and further standard plastering.
Technological process and step-by-step instructions
The technology includes surface preparation, preparation of equipment, application of the mixture, leveling, cleaning and drying of the coating.
Surface preparation
Mechanized plaster does not eliminate the need for preparatory surface treatment.
Preparation includes an action algorithm consisting of sequential steps:
- Surface cleaning . Removing traces of wallpaper, dirt, paint, glue, grease, concrete deposits.
- Working with weak points. Cleaning the crumbling areas with rough sandpaper, strengthening the depressions with a metal mesh with a plaster mixture. Seal small holes. Cutting and cleaning of protruding metal elements, followed by treatment with an anti-corrosion compound.
If we are talking about the facade surface, reinforcing mesh is necessary for the entire area of the walls. This can be done not only at the preparation stage, but also immediately after applying the mixture, by drowning the mesh in the solution.
- Removing dust from the surface.
- Moisturizing or priming. Primer is preferable.
Expert opinionKukushkin Anatoly Sergeevich
Repair specialist
For the best adhesion of the plaster to the surface, it is better to prime it twice, waiting time for the layers to dry.
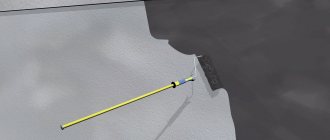
- Measurements . Take measurements for a flat surface and base using an arrow, levels, or a laser marker.
- Installation of corner profiles.
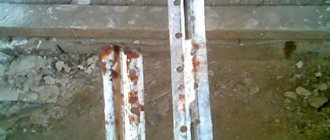
- Marking with beacons. Beacons can be installed from metal or mortar, focusing on the points of greatest protrusion of the surface. Beacons are attached pointwise to the prepared solution.
Equipment preparation
In the case of a hopper bucket or an air gun, no special adjustment is required. But you will have to prepare the solution yourself. It is also important to set the optimal pressure on the compressor, based on the parameters of the finished mixture. And for a pneumatic gun, you still need to choose a suitable nozzle nozzle.
Builders recommend choosing the size of the nozzle according to the parameters of the mixture and the required thickness of the future coating layer. If the plaster mixture is thinner and the layer is supposed to be quite thin, a narrower nozzle is needed. If the solution is thick and a thicker layer is needed, it is better to take a nozzle with a wider hole.
If we are talking about machine plastering, then the unit must be prepared for work.
The preparation is not difficult:
- Installation and assembly of the machine. Installation of the mixing tank and supply pipe. Selecting and installing the desired nozzle attachment.
- Connection. Connect to the water supply, then connect to the network.
- Safety check.
- Supply of mixture. Pouring dry plaster mixture.
- Settings. You can set the desired parameters for diluting the mixture using the remote control or control panel on the machine body. All that remains is to wait time for kneading and aerating the mixture, after which the machine is ready for use.
The head of a finishing team with many years of experience is R.V. Filatov. advises that when setting up, take into account the recommendations on the packaging of the dry mixture, as well as the material of the surface being treated and the technology chosen by the workers (fast, step-by-step, multi-layer, etc.).
Application of the solution
Despite the fact that different professionals prefer to work with slightly different techniques, there are still general recommendations for applying plaster by machine:
- Nozzle placement. The nozzle of the hose or gun is placed perpendicular to the surface, at a distance of 20-30 cm from it.
- Supply of solution. To do this, press the trigger lever or open the air valve.
- Start of application. First, corners and joints are filled with plaster, moving the nozzle evenly from top to bottom, adjusting the thickness of the layer with the speed of movement.
- Plastering flat areas. It starts from top to bottom, the nozzle is guided along the wall at a distance between the beacons, then the nozzle is directed in the opposite direction between the same beacons. The mixture is overlapped slightly. The step width is 3-4 cm. The movements are not interrupted until the very bottom of the wall. After that, a transition is made to the neighboring section, and the operations are repeated.
Expert opinion
Kukushkin Anatoly Sergeevich
Repair specialist
The slower you move the nozzle, the more solution hits the surface. This means the layer will be thicker. For cement mixtures, it is recommended to apply a layer no thicker than 5 mm at a time, and for gypsum mixtures, an application thickness of 1 cm is acceptable. If a thicker cement coating is needed, the work is carried out in several stages.
Alignment
Typically, gypsum mixtures are leveled immediately, and cement-sand mixtures are leveled after about an hour. Exact recommendations are given by the manufacturer on the packaging. The main thing is to start leveling until the mixture sets.
- Alignment order. Alignment begins from bottom to top.
- Tools. The plaster rule is used.
- Correction of defects. Excess mixture can usually be removed and applied to those places where there is not enough solution. After which the alignment is repeated. If texture is needed, then they go over the surface with smoothers, trowels and plaster floats.
Cleaning and drying
It goes in several stages:
- Pruning. Performed approximately 20 minutes after leveling. To do this, drips, sagging and other flaws are cut off using a trapezoidal rule. The rule is held at an angle like a knife.
- Mashing. This is done about half an hour after pruning. Grouts, grouting machines and trowels are used.
If time is lost, then you can rub the surface after a couple of hours, having previously moistened it.
- Removing beacon markings. Perform after the layer has set to the surface. The passages are filled with plaster and leveled with a large spatula.
- Drying. Drying time depends on the parameters of the mixture and surface. The packaging of the mixtures usually provides information about the time and conditions for complete drying of the coating.
Applying plaster mortar
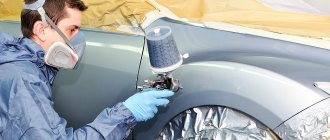
Mechanized plastering work occurs as follows. You need to take the gun in your hand and bring it to the surface to be treated at a distance of no more than 0.3 meters; the device should be positioned so that the jet and the wall structure form a right angle. The gun must be held with both hands and the air valve must be opened. The first step is to process corners, joints and other hard-to-reach places, and then begin processing the main part of the surface.
During application, it is necessary to move your hands back and forth, and thus cover the entire surface of the wall structure with a layer of plaster material. During work, it is very important to ensure that the next layer of material overlaps the previous one by half.
Automated plaster application
You adjust the thickness of the layer yourself - the faster the hand with the gun moves, the smaller the layer.
Return to content
Advantages and disadvantages of the mechanized method
The method of applying plaster using special equipment has its pros and cons. Here are its main advantages:
- High speed. Plastering any surfaces occurs an order of magnitude faster than manual application of the building mixture. Depending on the type of plaster, the acceleration occurs 4-7 times, and there is no heavy physical work.
- Enhanced adhesion. The release of the solution under pressure, which is the same throughout the entire working process, helps improve the quality of adhesion to the base. To achieve a similar effect when applied manually, you need a lot of time and physical effort.
- Excellent quality. Mixing of the solution in plastering installations is carried out continuously. This helps make the mixture homogeneous, with a smooth texture, so the dried layer dries evenly and does not crack or warp. The finished plaster is monolithic, without seams or unsightly joints.
- Significant area. Using the mechanized method, you can immediately process an entire room without interruption, which also reduces the risk of cracks and speeds up the overall repair time.
- Saving material. Some equipment allows you to reduce the consumption of plaster mixture compared to manual application. This is achieved by optimizing the viscosity of the solution and preventing it from deteriorating, going into waste, or being knocked off the wall.
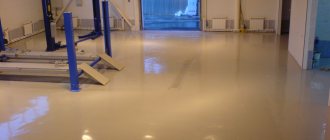
- Versatility of equipment. Many types of plastering stations make it possible not only to apply plaster, but also to pour cement-sand screeds onto the floor.
Mechanized plastering also has disadvantages. Thus, equipment for work is quite expensive, so purchasing high-tech stations and robots on your own is not advisable. However, simple devices such as hopper buckets are much cheaper, and every craftsman can afford to purchase them. To work with machine installations, two people are often needed, so you will have to invite an assistant.
Electrical installations are energy-dependent, and at remote sites, in new houses where there is no electricity yet, a diesel generator will have to be connected. In addition, to use complex equipment, you need to gain experience in its operation, cleaning, and maintenance. Applying plaster in the evening or at night will not work if there are neighbors nearby: plastering machines usually make quite a lot of noise.
Which plastering is better - manual or mechanized?
Each technique has its own advantages and disadvantages, and the choice of a specific method should be made individually depending on needs and capabilities. To make the right decision, you should familiarize yourself with the following conclusions:
- In terms of price, some station plasters and pneumatic shovels are cheaper than similar compositions for manual application. But in this case we are talking about gypsum solutions, which contain additional improvers and modifiers. If you prepare the composition for application with a spatula yourself, mixing cement, sand, water, then the costs will be much lower than when purchasing dry mixture in packages.
- With mechanized wall finishing, 2-3 kg less mortar is spent per square meter of area than with manual plastering. This advantage is lost only by replacing a more expensive mixture with a cement mixture made by yourself.
- With strict adherence to technology and sufficient professionalism, it is possible to achieve no less high quality manual finishing than with mechanized plastering. To prevent the finished layer from cracking, you can use fiberglass, and the problem will be solved.
With mechanized application, the solution consumption is less
Which method is cheaper
The cost of plastering work performed by mechanization ranges from 220 rubles/sq. m and above. Hand plastering usually has a higher price - 250-300 rubles per 1 sq. m. m of the first layer and from 550 rubles for 3 layers. But in practice, the price of finishing walls using special equipment may turn out to be more than indicated.
For example, with a total area of less than 2000 sq. m it increases, because it is more convenient for craftsmen to work with large volumes. Time for installing beacons and preparing surfaces will also be paid additionally. Slopes can only be plastered by hand, and you will have to pay the craftsmen separately for this. Also often included in the price are:
- moving time, equipment delivery costs;
- time to prepare the device and wash it after work;
- costs for installing plaster corners.
The use of the machine method is effective for large volumes of work
The owner should also consider energy costs, which turn out to be quite significant when using powerful plastering machines. As a result, the price of conventional and mechanized plaster may be approximately the same.
Stages of plastering work
The use of beacons will make it easier to apply plaster and will allow you to level the walls faster and better. To install the guides, carefully measure the base and find its most convex section, which will be the top point for applying the solution. After fixing the beacons, they begin plastering and rubbing the walls. If work is carried out indoors, drafts should be completely eliminated.
Applying plaster
First, the plastering installation is connected to the network, plaster powder is poured into it or the finished composition is poured into it. Then they begin to process the corners and joints of the structures, and only then fill the main area. The nozzle of the device is held at a distance of 15-30 cm (depending on the type of device), making sure that the plaster is sprayed strictly perpendicularly. Each new strip of solution should slightly overlap the previous one, but not higher than that marked by the beacons. The higher the speed of movement of the nozzle, the thinner the plaster layer.
Leveling the surface
The applied layer of plaster is leveled according to the rule, unless, of course, the work is carried out using a robotic plasterer. Also for this purpose, smoothers and large spatulas are used. Beacons are removed or left inside (according to the chosen technology). If it turns out that in some areas the layer of plaster is too thin, “increase” it manually and level it again. It is important to carry out this stage of work immediately after applying the plaster, while it retains its fluidity.
Alignment using beacon rules
Trimming the solution
20 minutes after leveling, the mortar is trimmed using a cutter (trapezoidal rule), which will help to finally form the finish. First, apply the tool to the surface and drag it a little, as if cutting off a thin outer layer. Make sure that the main layer does not drag behind it. Otherwise, wait a little more time and repeat the manipulations. On a flat plane, it is permissible to leave fluctuations of no more than 2 mm for every 2 linear meters.
Leveling the surface
After another 20-30 minutes, they begin to grind the base (you can start this stage after 2-3 hours, but only after first spraying the wall with water). For this purpose, graters, trowels, and trowels are used. If the surface is being prepared for painting, 6 hours after rubbing, polishing is done - repeated ironing with a wet tool.